A powerful way for creating fully custom render passes in Maya by considering the contribution of different light rays.
Believe it or not, a renderer never ceases to amaze us in terms of functionalities! Nowadays, we might encounter situations where we need more control over the compositing of 3D rendered material.
Many renderers already have features to produce custom render passes, but they also offer advanced solutions for customizing the export.
First of all, why is a custom render pass important for compositing? In short, instead of outputting one single render image, you can rely on different ones. Each of them captures a specific part of the scene in terms of lighting. Subsequently, you’ll have more control over that part without affecting the rest of the scene.
For instance, your final work can include custom render passes for:
- direct specular reflections
- indirect specular reflections
- direct diffuse reflections
- indirect diffuse reflections
- sub surface scattering contribution
- light groups
and so on.
In the end, you can edit each output separately and blend them together to obtain the final image.
That is the normal workflow in production and Arnold for Maya manages custom render passes through the AOVs tab.
To have examples of what you can export from a 3D program into a compositing software, refer to the following article. Here you can comprehend an actual usage of render passes inside of After Effects.
That’s great! But what if we want to deal with custom render passes without picking just the existing ones?
Here is where Light Path Expressions come in handy!
A Short Explanation as a Premise to Light Path Expressions
At first glance, the argument might sound a bit intimidating. Fortunately Arnold allows us to write simple expressions by providing us with a well-documented guide.
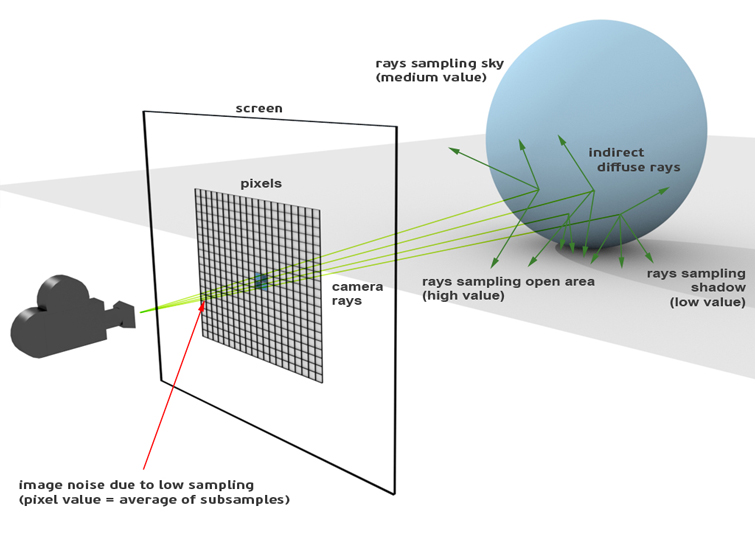
Before getting into light path expressions, let’s comprehend how to calculate lighting, starting from the camera’s point of view.
To simplify, a ray-tracing algorithm sends rays from the camera towards the scene; those rays bounce many times until they reach a pre-determined number of iterations. If we consider many bounces, the surfaces which see the lights are shaded and the calculation recursively combined, sent back to the camera and showed on the screen (image plane).
Here, for instance, the ray hitting B and terminating in C combines light information and sends the result back to A. In a basic ray-tracing system, we only have specular, refracted, and shadow rays, but in a path tracer, like Arnold, the principle is the same for other phenomena such as diffuse inter-reflections.
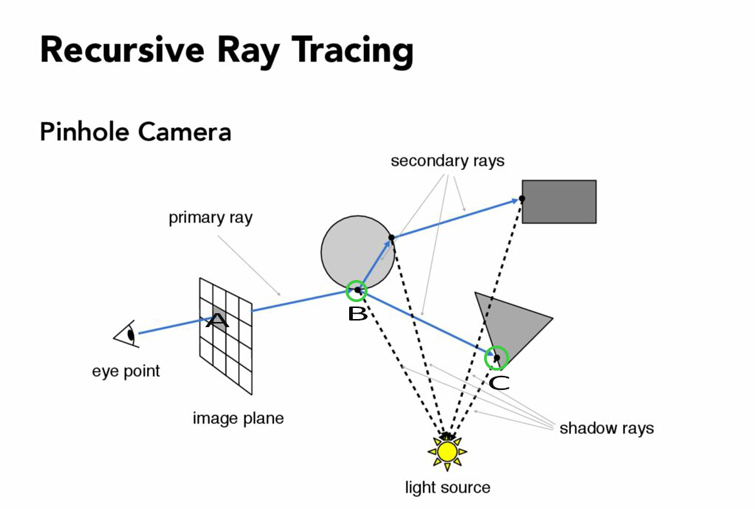
However, in this example we stop at the direct light instead of producing more bounces.
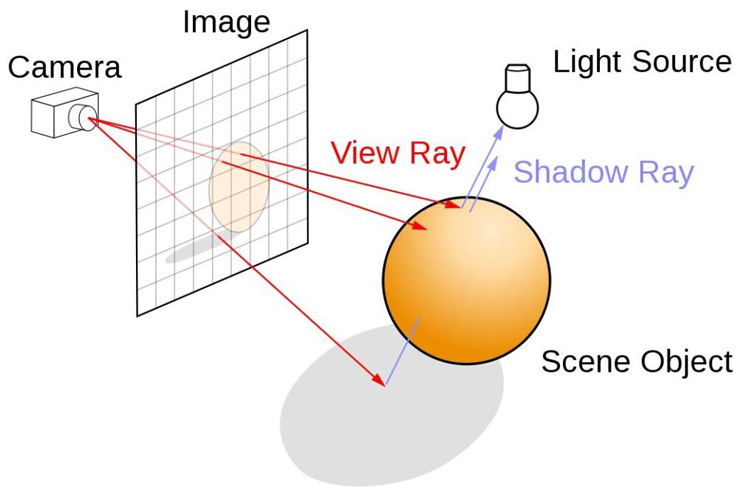
Finally, in this next image, the green camera rays hitting the sphere are supposed not to see the direct light, but they gather lighting information from the nearby surfaces—via Indirect Diffuse Rays.
Those rays gather samples from the surrounding environment to calculate the indirect illumination for the camera rays.
In a nutshell, a Light Path Expression allows you to render particular lighting aspects by selecting proper light paths via regular expressions. Remember that a path always starts from the camera, according to the path-tracing algorithm.
Understanding Light Path Expressions, Events and Operators
That said, this is a small portion of the list of commands to use. The left column indicates the name of the current render pass; the right one, instead, the related expression.
Don’t worry if the expressions look cryptic. We’ll try to demystify them in a while.

All expressions in the previous list begin with a “C” letter.
The “C” letter stands for Camera Event and the meaning is quite obvious. The rays are being considered from the camera’s point of view. That’s the first event.
Furthermore, there are also other Scattering Events that make the list even richer. Among them, some are interesting:
- RD—diffuse reflection—which selects just the contribution of diffuse rays
- RS—specular reflection—that triggers specular rays
- TS—specular refraction—which consider transmitted/refracted rays
Finally, we can also have Operators working as elements to compose your expressions in a custom way. For instance, there’s a subtle difference between [AB] and AB, where A and B are events.
The former, indicated by the square brackets, means A or B. Conversely, the latter has a different meaning. The event B must follow A in the expression.
Again, the “.” (dot) operator indicates any event and the “*” operator says that the event might happen either 0 or more times.
To have a summary of the Events and Operators, let’s report the following list from the Arnold guide.

Now that we have all the elements, let’s start with some practical examples.
Light Path Expressions in Action
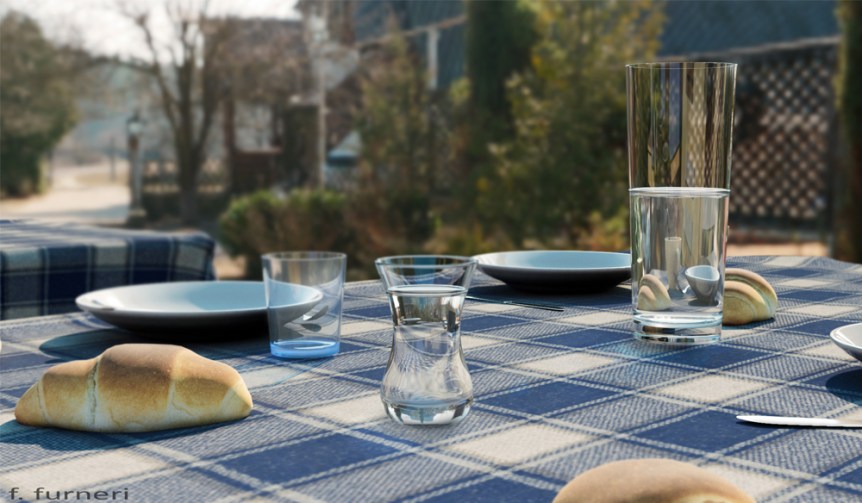
Let’s take the following scene

The scene includes an HDR map and one directional light creating hard shadows on the table cloth.
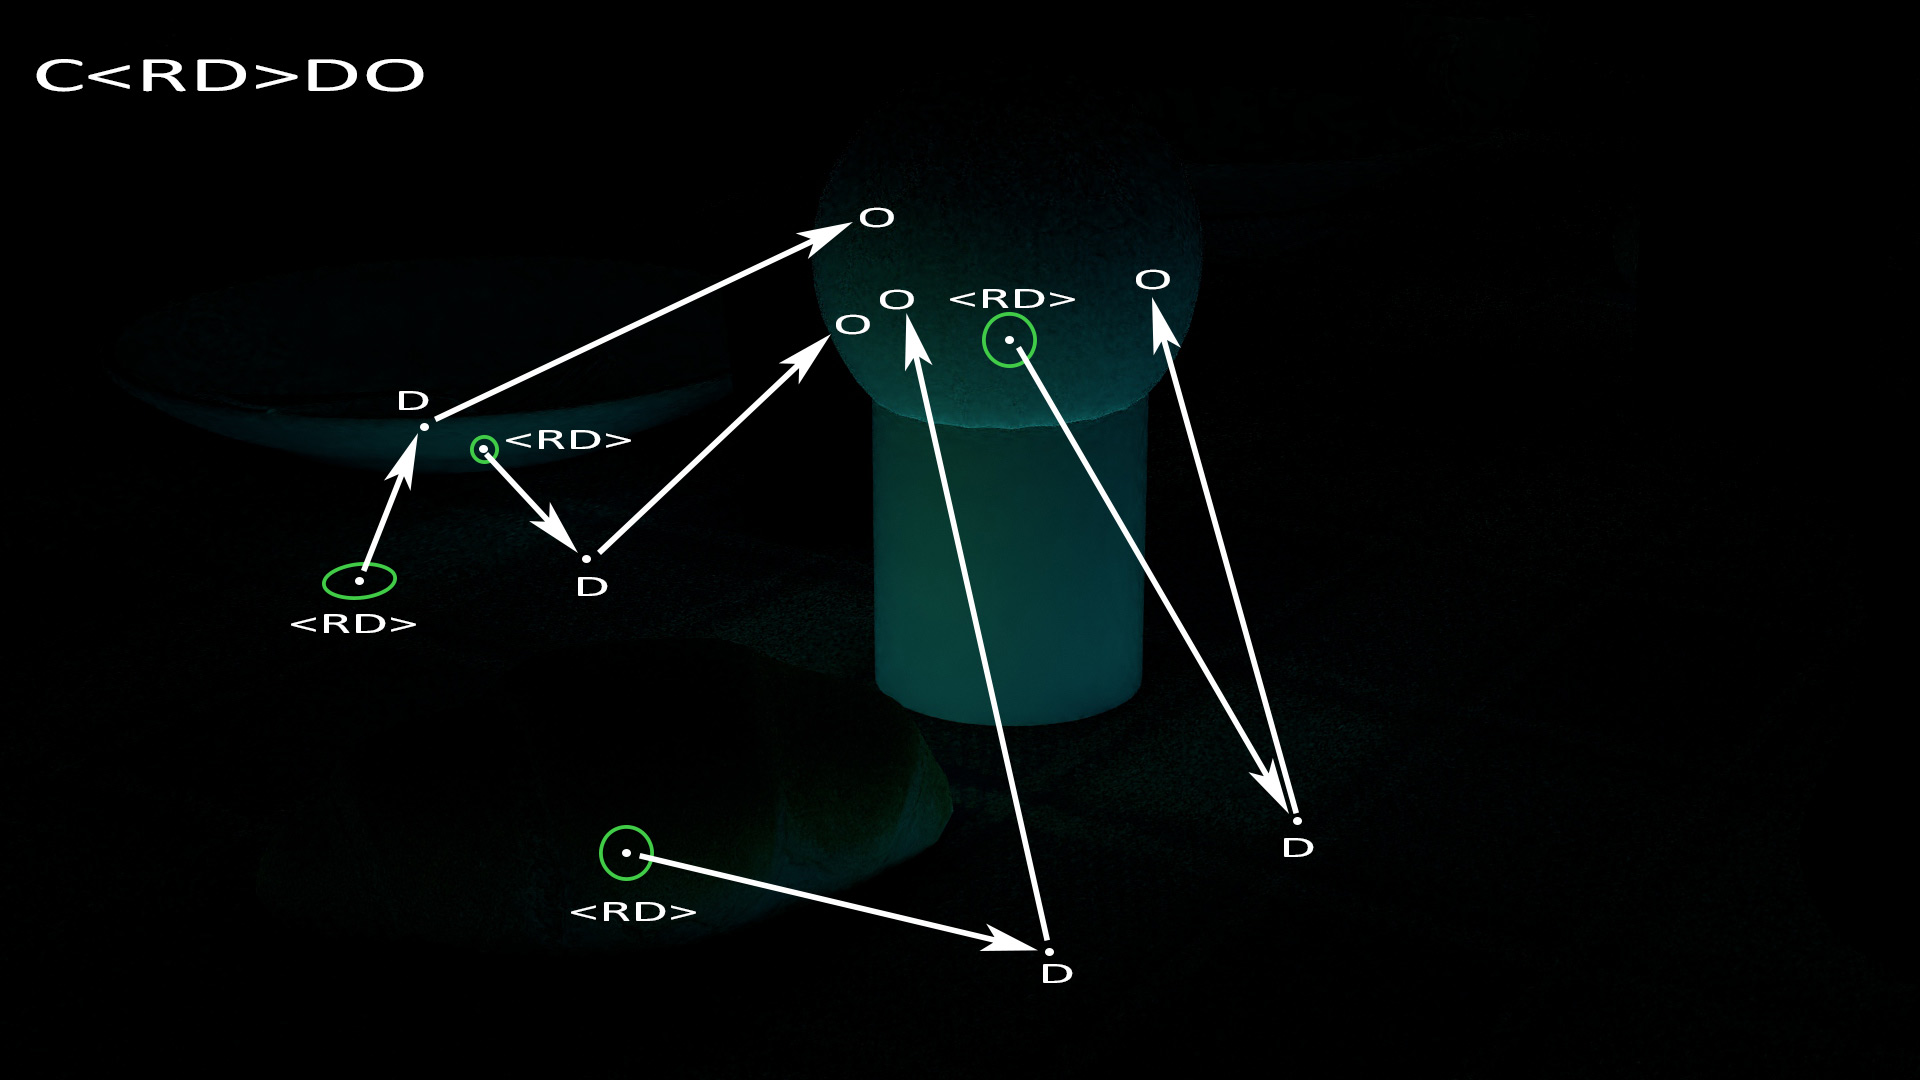
Let’s consider the expression C<RD>[DSVOB].* for the built-in render pass which calculates the indirect diffuse reflection. That means we only want to follow diffuse indirect light bounces.
In relation to the previous render, I changed the camera position, rearranged some props and made the shadows a bit brighter for the purpose of this demonstration.
- When a camera ray hits an object (green circle), the event says to follow and trigger just the diffuse rays from that point to gather lighting information.
- By following one of those rays from the previous step, we check the next point against a scattering event [DSVOB].
- The point can trigger new rays based on the event. The event includes objects emitting light, volume scattering, background emission, indirect specular / transmitted rays generating caustics and so on. In the image, D allows tracing new rays for diffuse lighting. Here we don’t have neither volume scattering, emissive backgrounds / objects nor similar materials.
- Finally the “.*” means more events of any type to follow. It can be the presence of direct light, secondary / tertiary bounces with recursion.
Let’s draw the rays over the image to explain it even better.
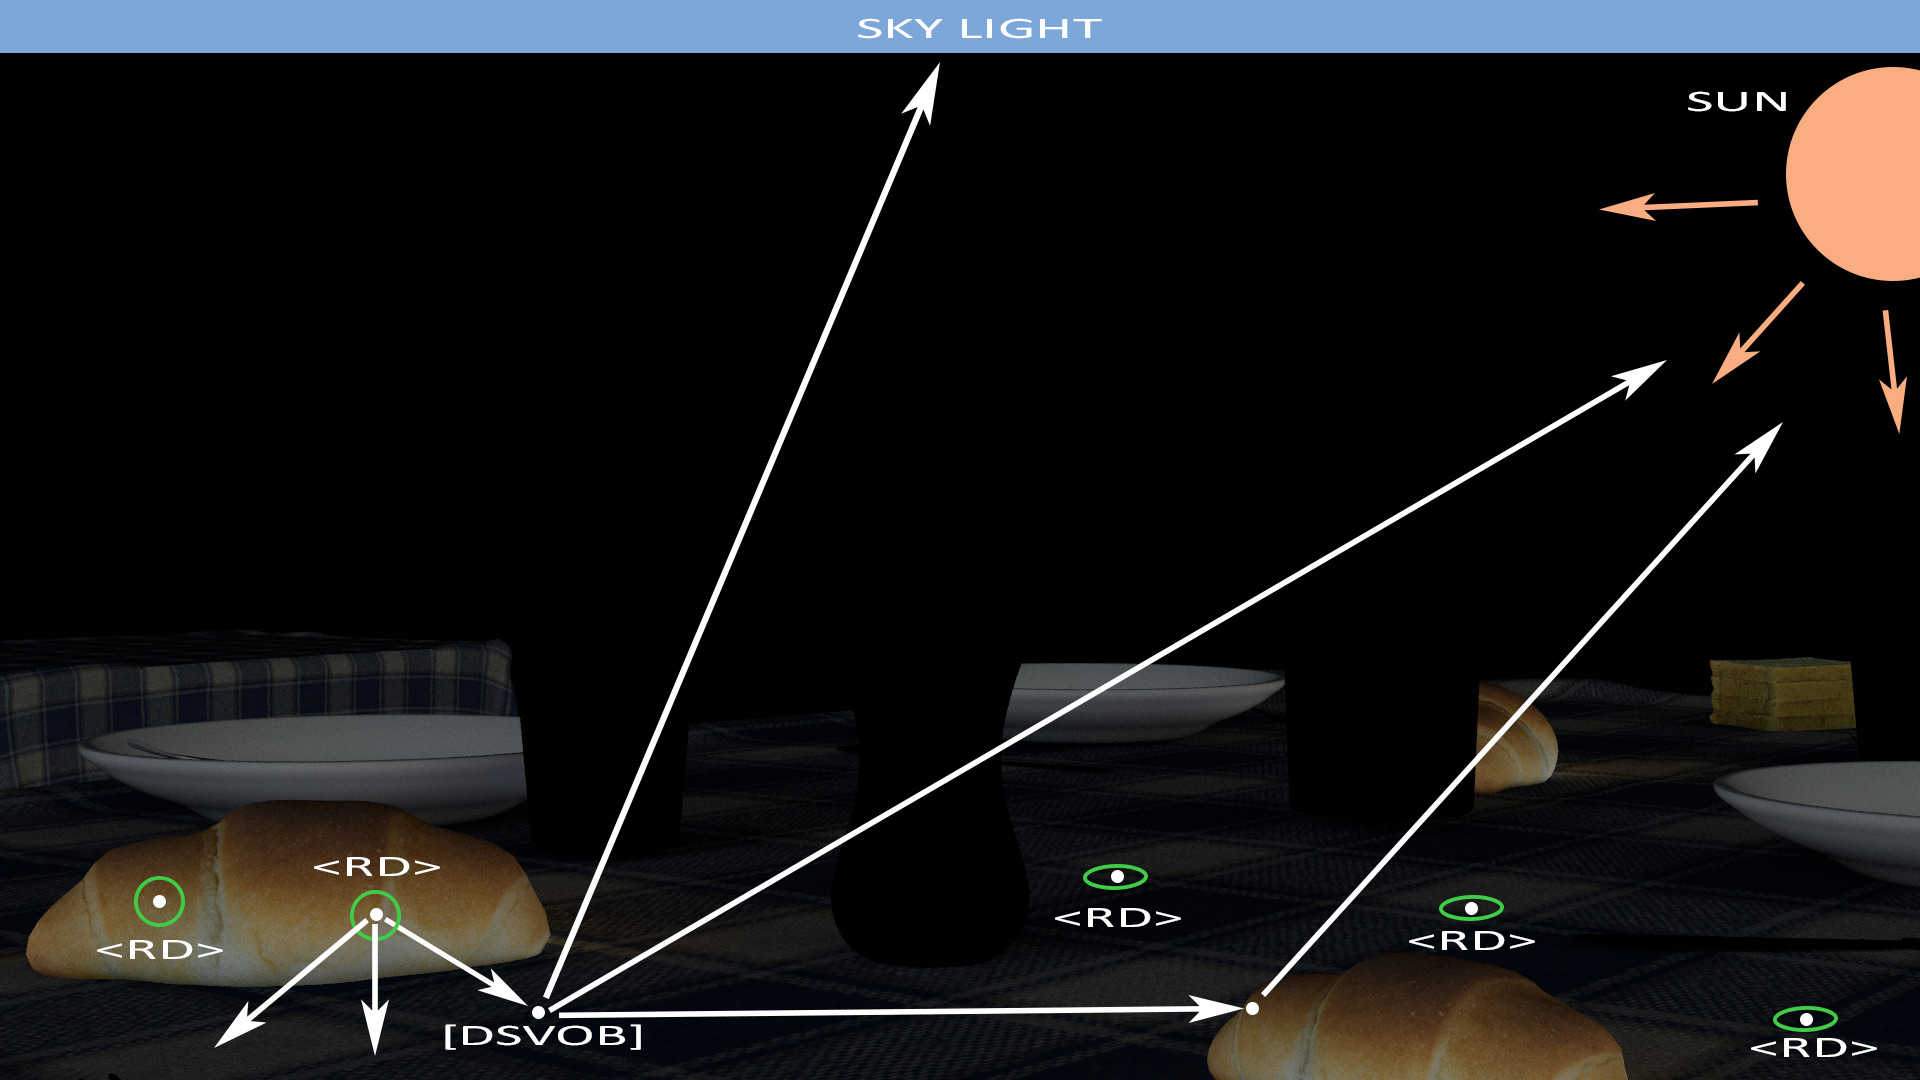
All green circles are calculated starting from the camera rays. Their value depends on the lighting information gathered by subsequent rays, which are triggered according to specific events.
Analogous result could have been achieved with C<RD>D.* excluding the presence of volume scattering, emitting objects and so on.
A Few Observations
In a regular expression, the rays that output a result must always follow the chain of scattering events.
For instance, direct diffuse rays are excluded from the previous expression because the “L” event (light) doesn’t appear after the <RD> one. Conversely, the L event is implicitly considered in “.*” but at the end of the expression.
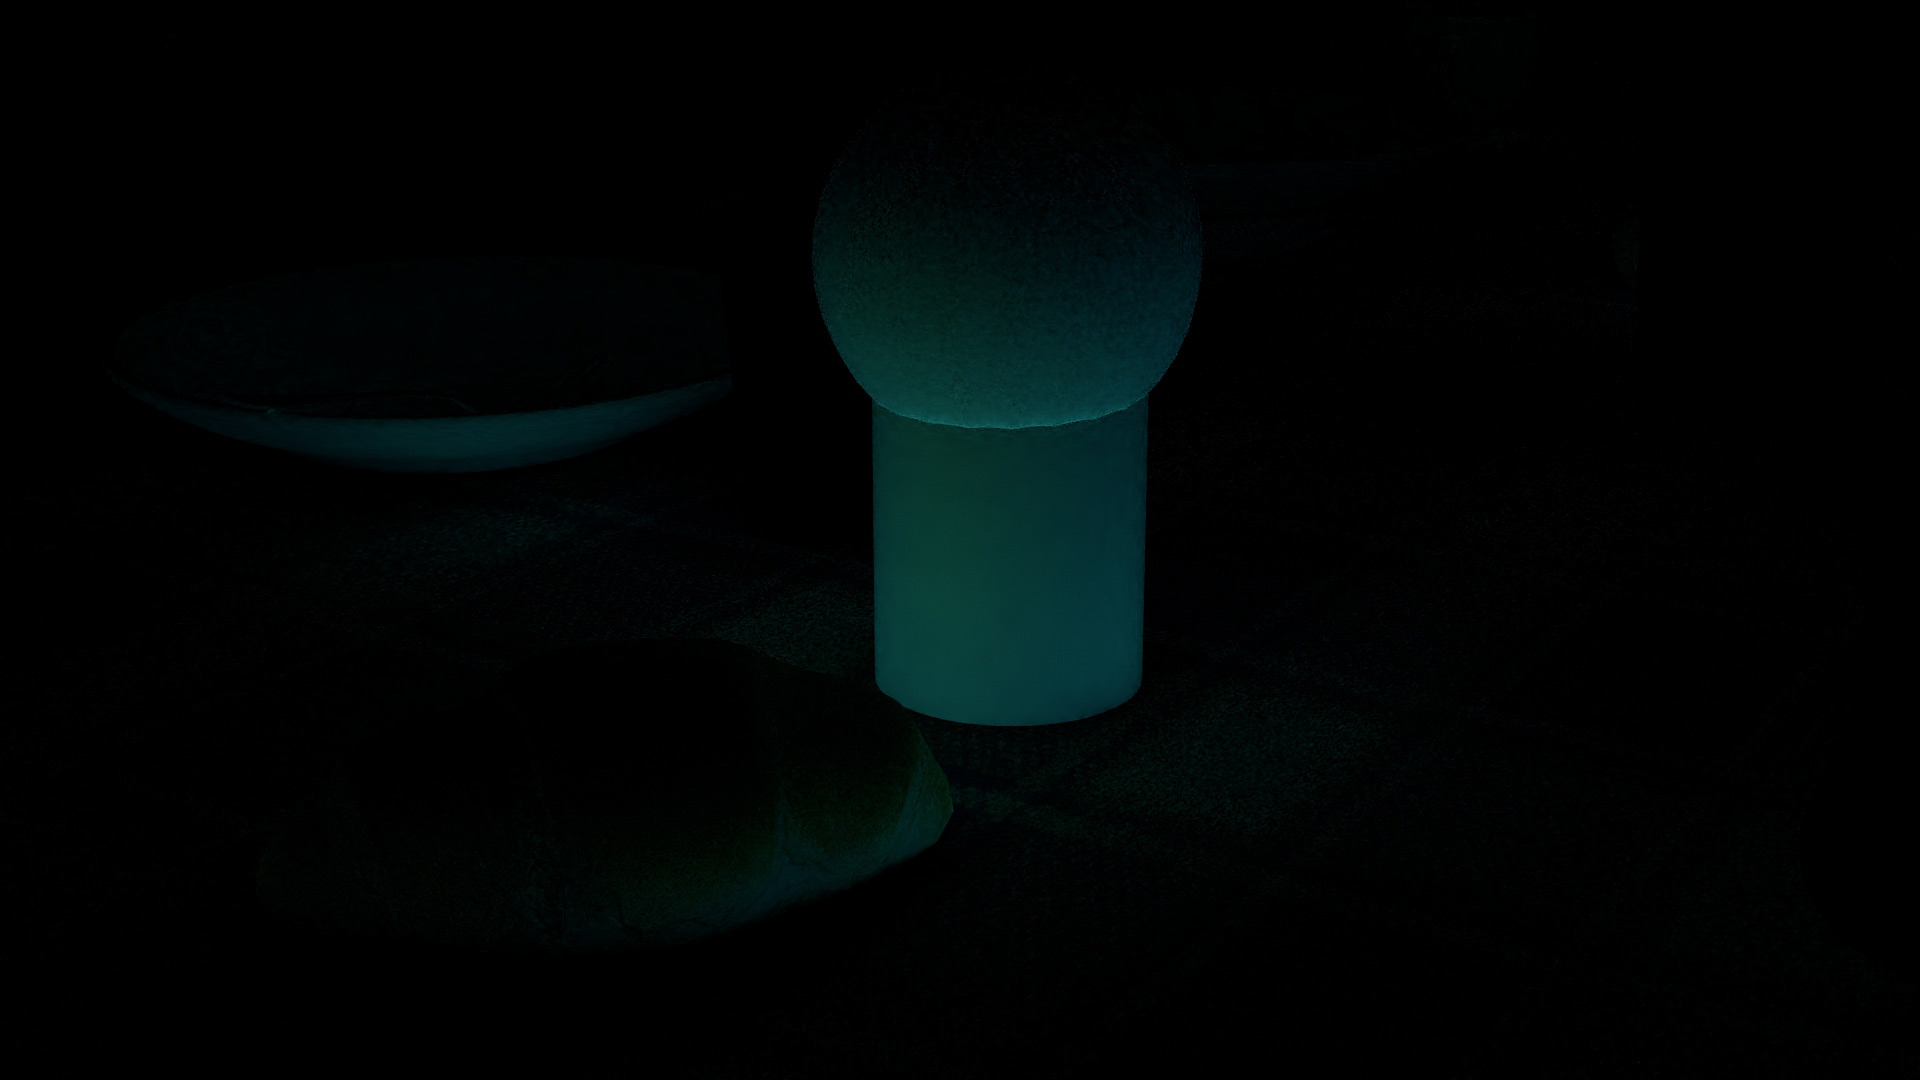
The table cloth looks dark because C<RD>[DSVOB].* output the indirect diffuse bounces, excluding any rays that directly see the light.
The visible output for an expression involves the camera rays—green circles—and not the subsequent rays, which only contribute to the calculation.
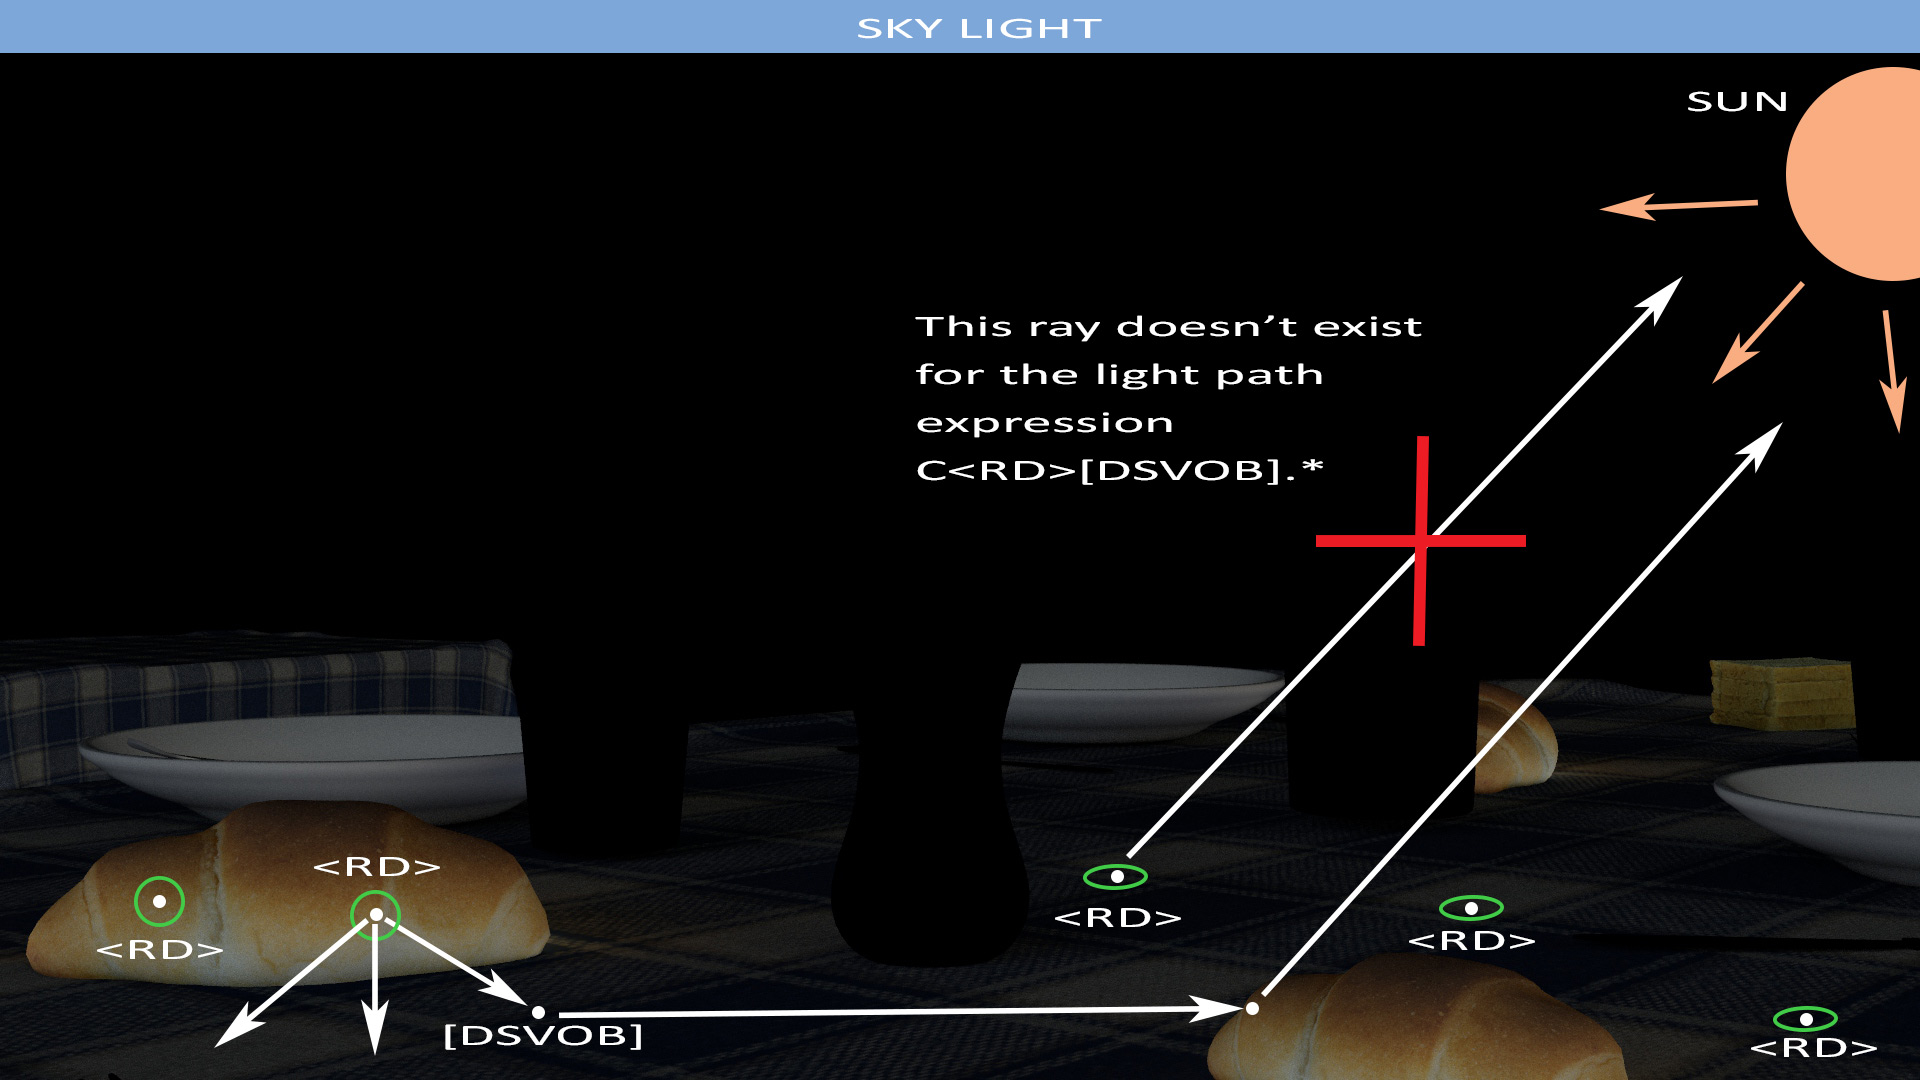
If we want to get the direct diffuse reflection only, C<RD>L is what we need.
In the same ways, rays passing through the glasses don’t appear as the expression excludes from the very beginning.
Customizing Light Path Expressions
Regular expressions are also cool because they are perfectly customizable!
So far, we’ve seen general expressions for built-in render passes (AOVs).
Let’s take it a step further.
In the current scene, there is a 3D mesh emitting light and we’d like to extract some custom lighting information.

There is already an AOV that outputs the emissions from the mesh, but how to capture the direct and indirect diffuse reflections coming from the emissive mesh only?
These are the expressions to use:
- C<RD>O for the direct light emitted from the mesh. The expression simply calculates a diffuse value for the pixels which see the emissive mesh directly. Any point in the shadow doesn’t follow the regular expression.
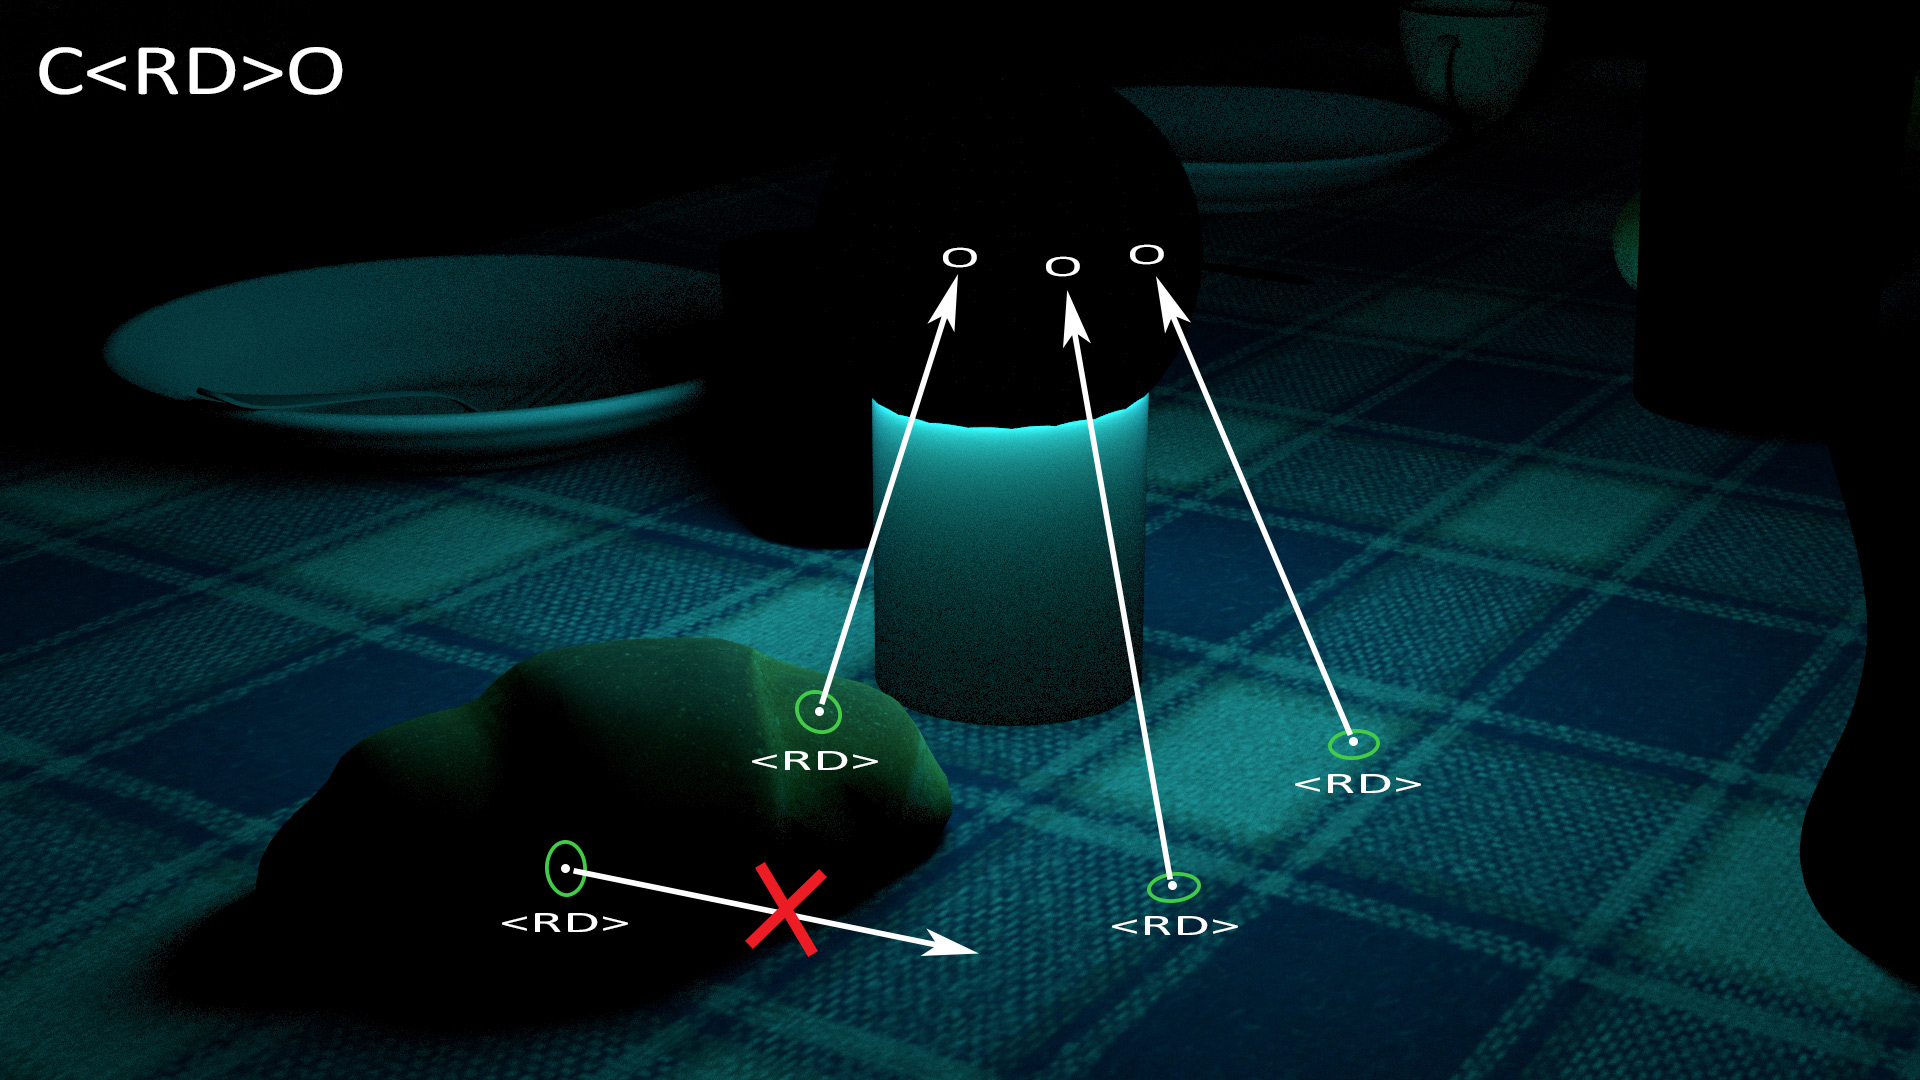
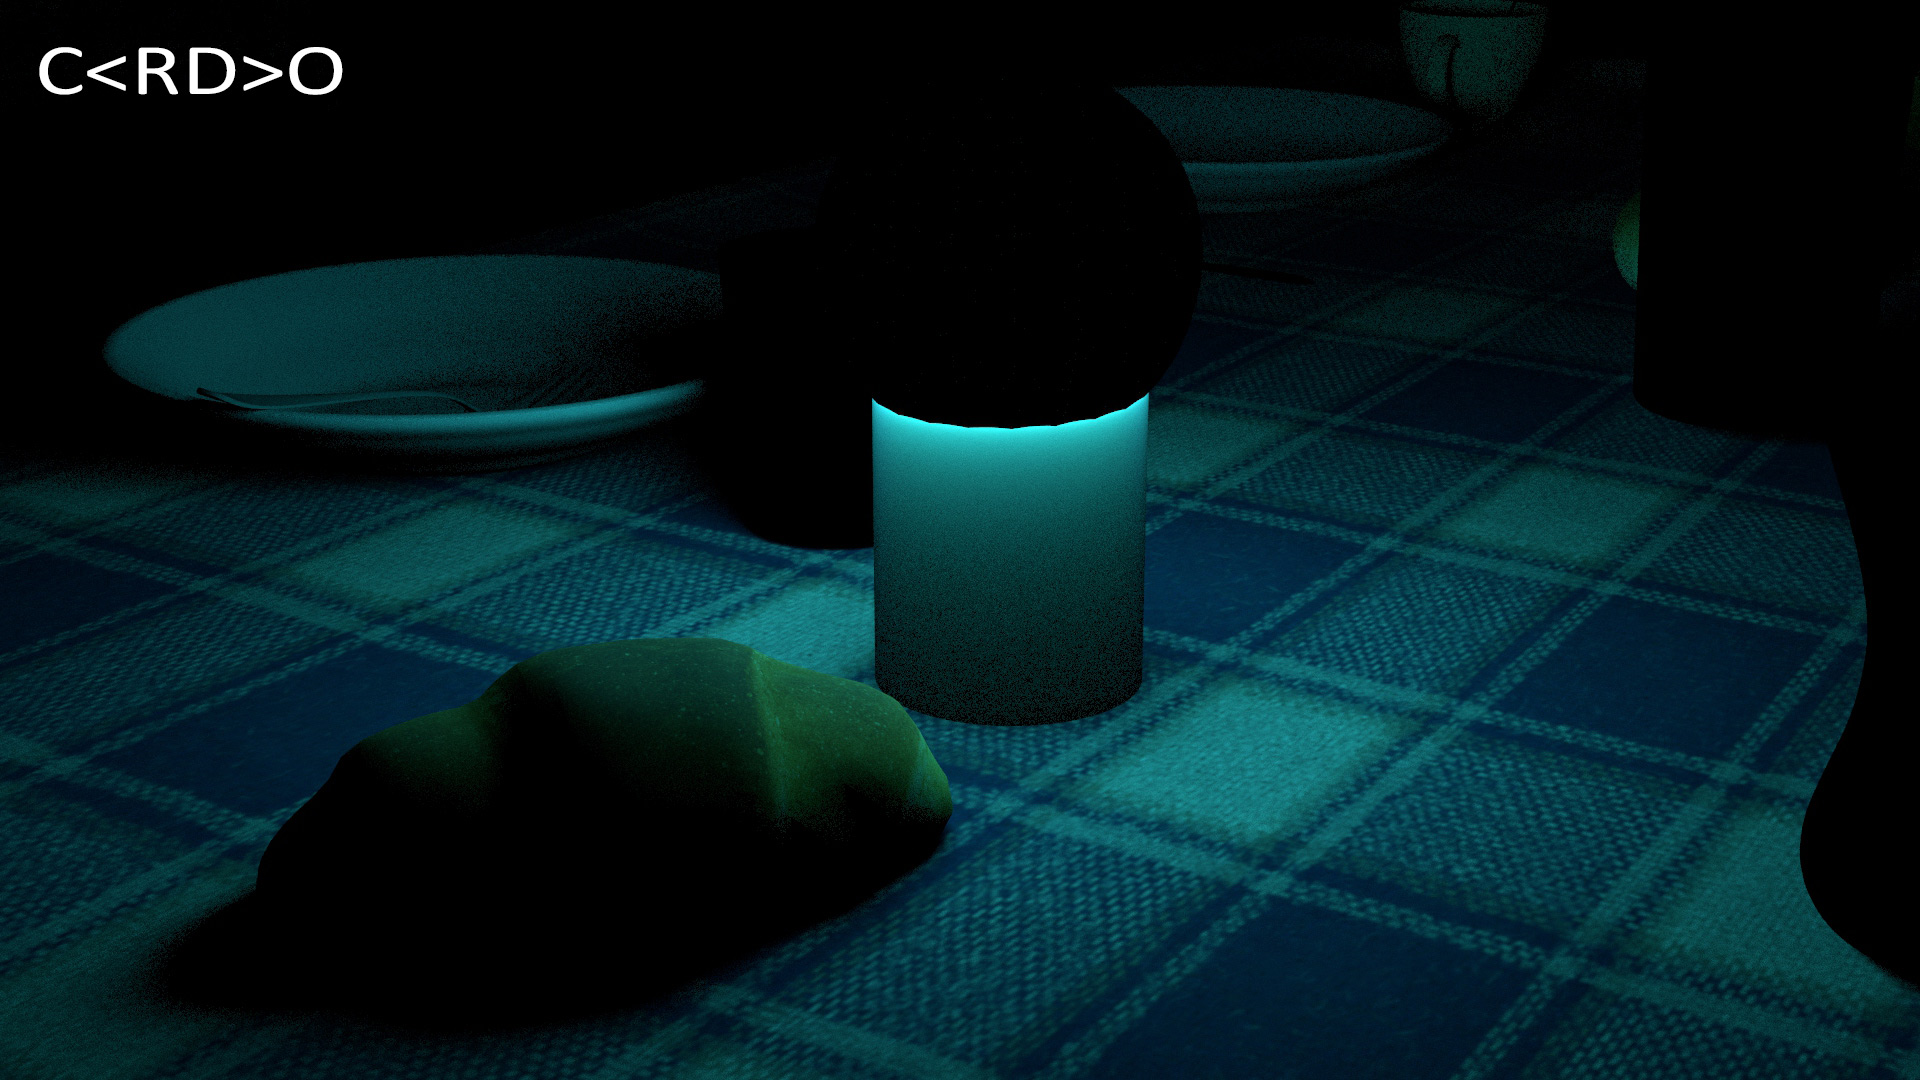
- C<RD>DO for the indirect light due to the emissive mesh. An important aspect is the use of the sequence of events “DO” which says to respect the order, unlike the bracket operator we saw before.
Finally, let’s render the AOV that simply shows the emissive mesh from the camera’s point of view. I modified the built-in AOV holding this expression C[LO] with the simpler one CO, just to limit the render to the emissive sphere and excluding the HDR render.
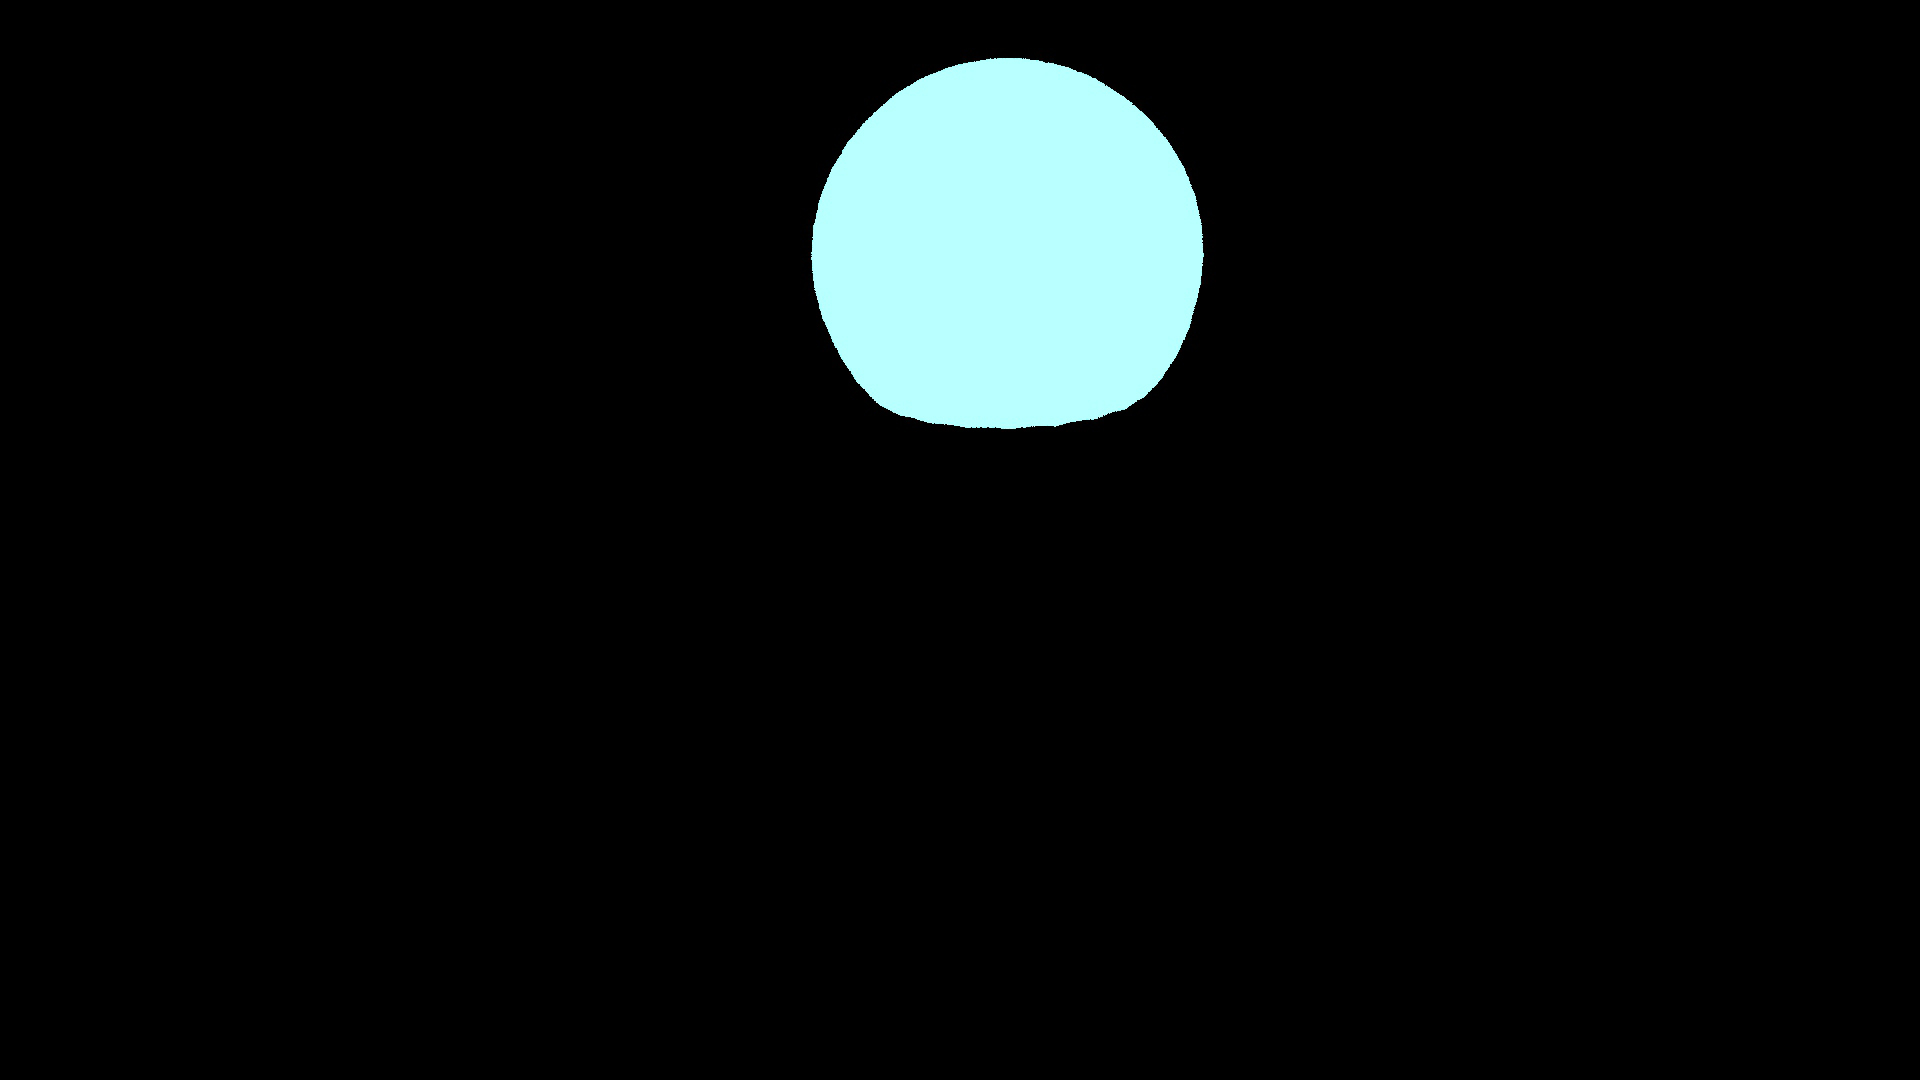
As final step, we blend the three custom AOVs to generate the direct and indirect light from the emissive sphere

A Last Touch With Specularity
Specular reflections are not present in the last render, but we can build them up with custom expressions too!
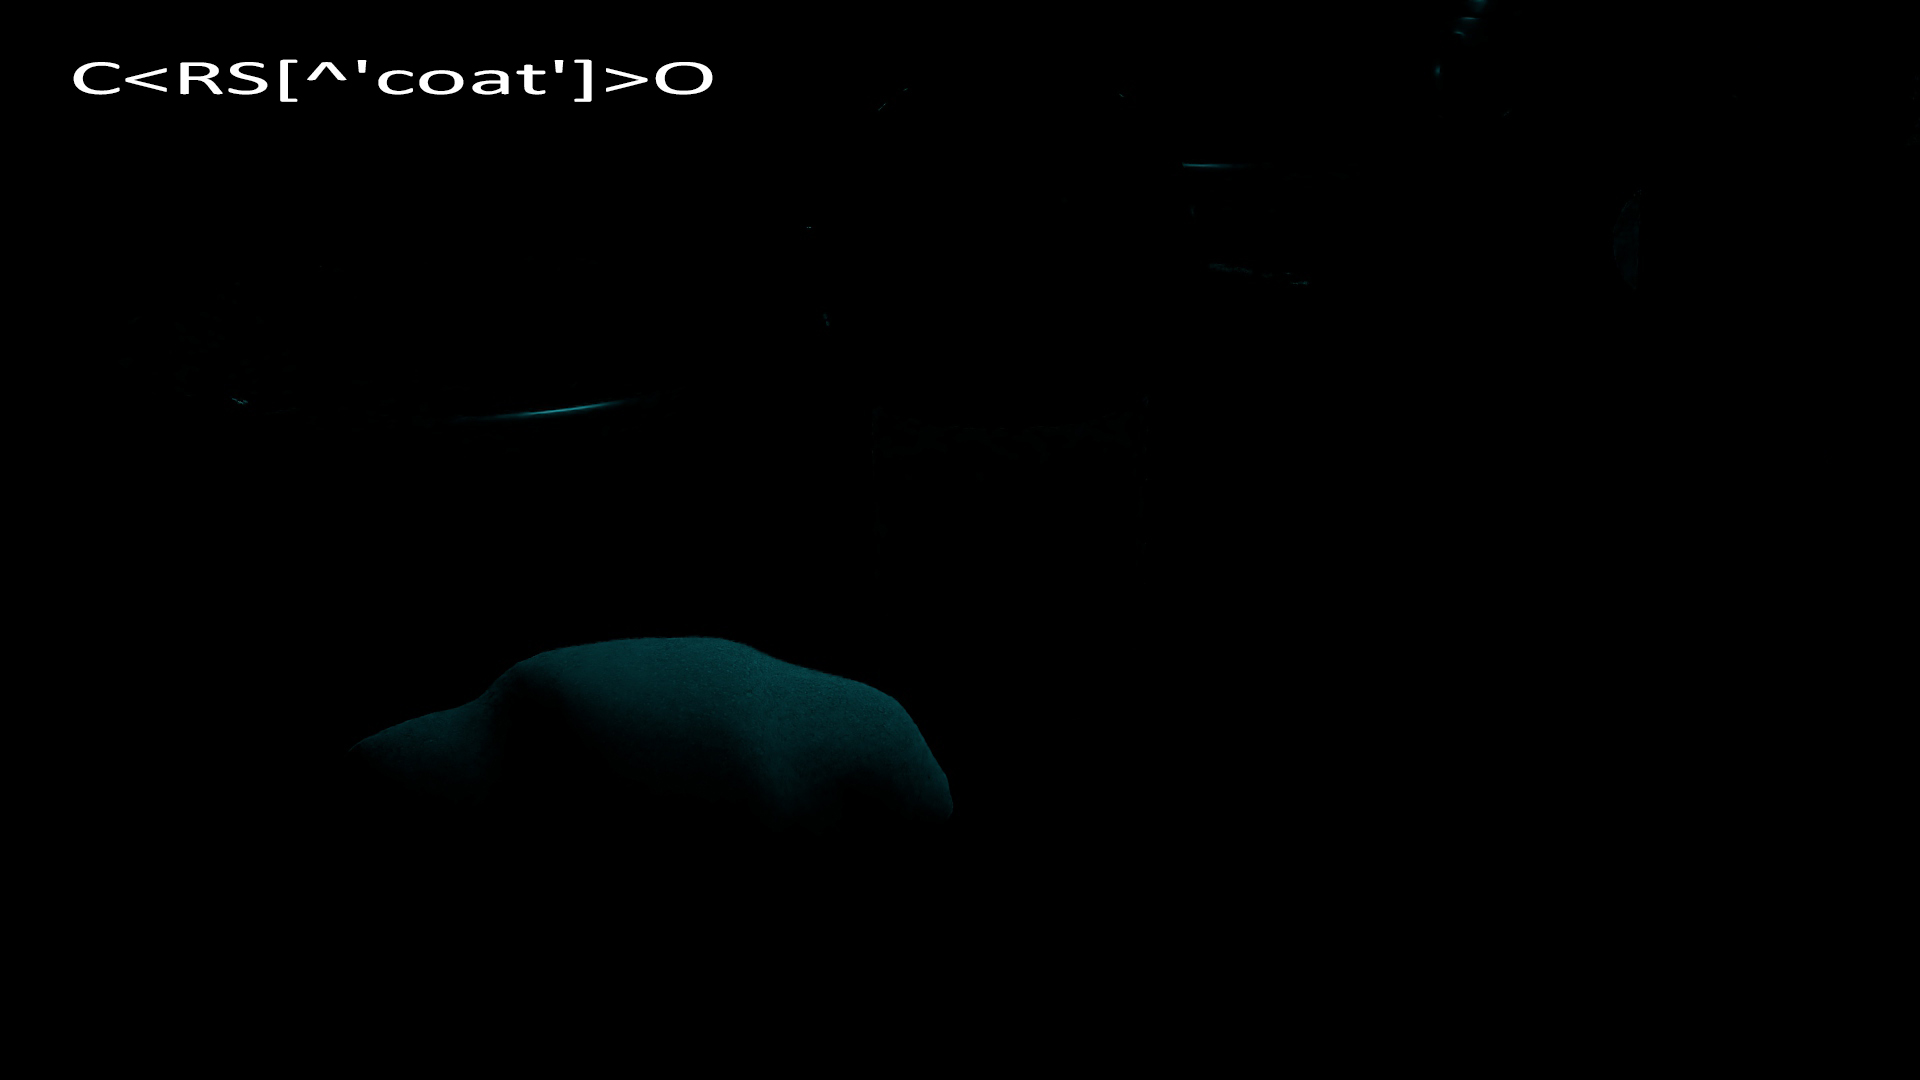
If we write C<RS[^’coat’]>O we want to capture the direct specular reflections for the emissive source by excluding rays from coating materials.
Although we don’t have a coating material here, I decided to keep it anyway, to show you an example of “^” operator, meaning everything except something.
For the record, a coating material describes a reflective layers on top of the others, like the clear-coat layer for car paint or extra oily layer from the skin.
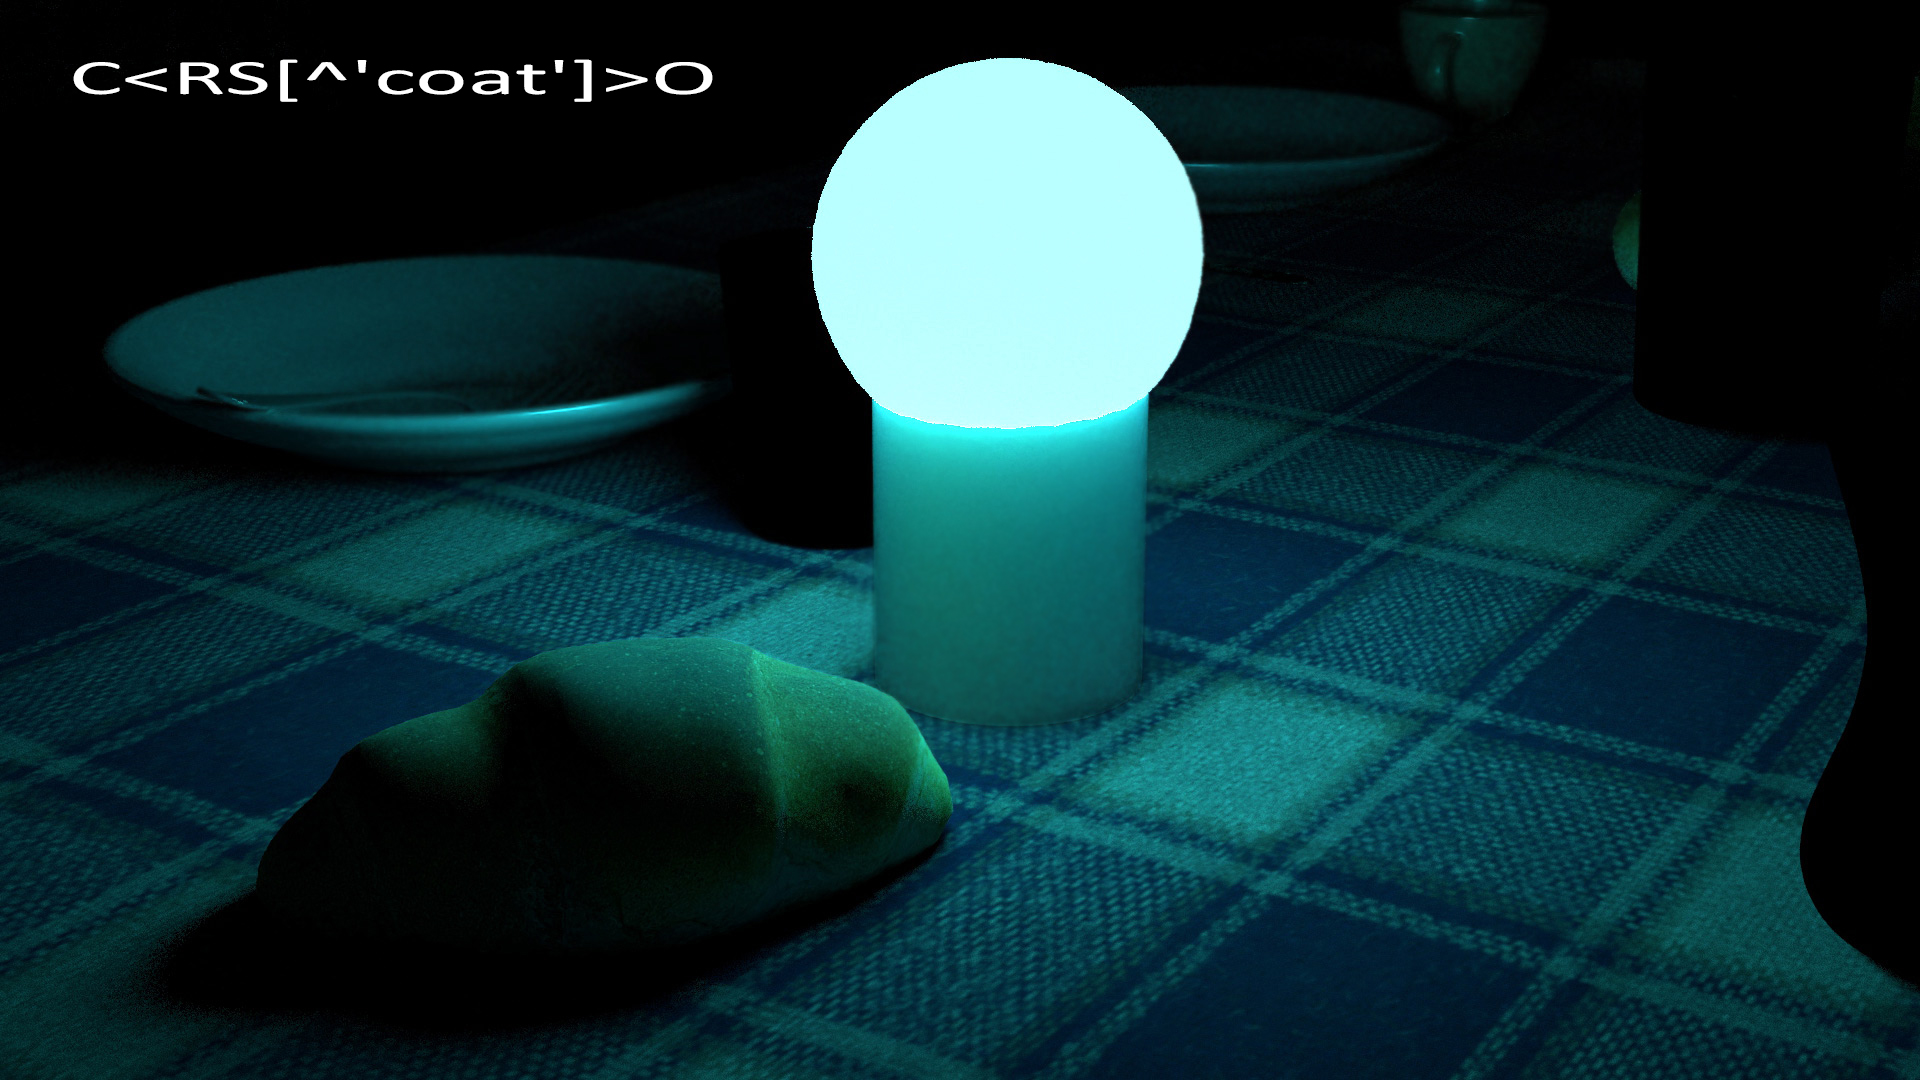

The direct specular reflections are quickly visible on the dishes, the mug in the background and the bread, which has some roughness.
I invite you to experiment with the indirect specular reflections by building up a proper regular expression.
Final Considerations
Light expressions are a valid tool for 3D artists, because they allow breaking down the render in custom AOVs.
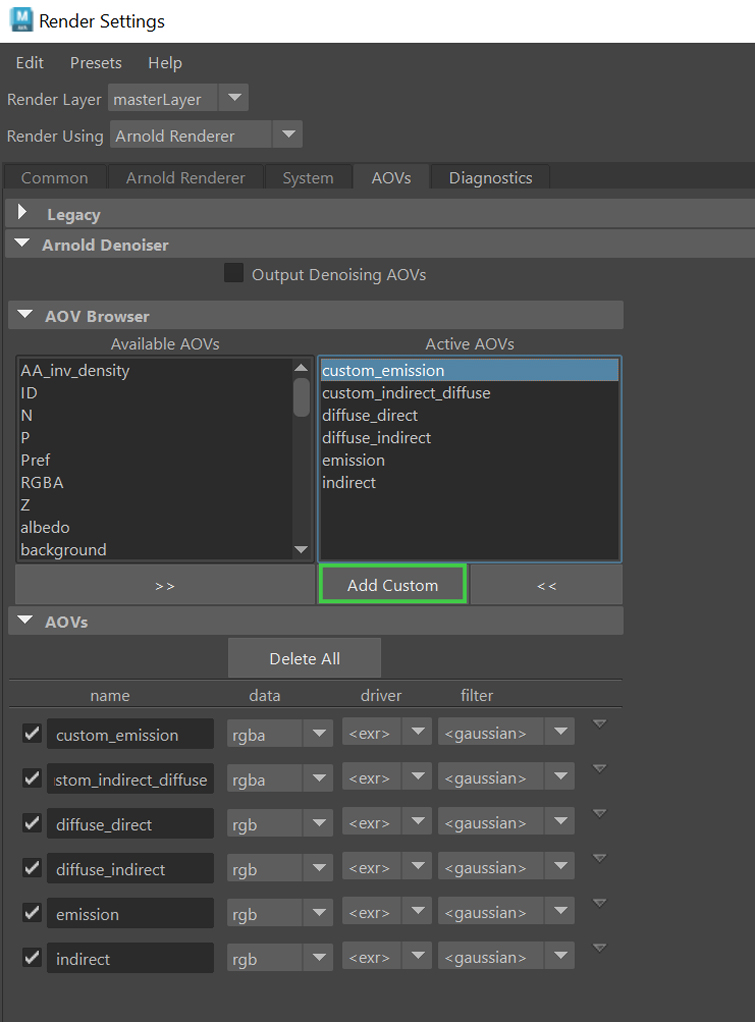
In Arnold for Maya, building a custom AOV is a piece of cake.
From the Arnold Render Settings, open the AOV tab and click on Add Custom. Give the AOV a name and confirm.
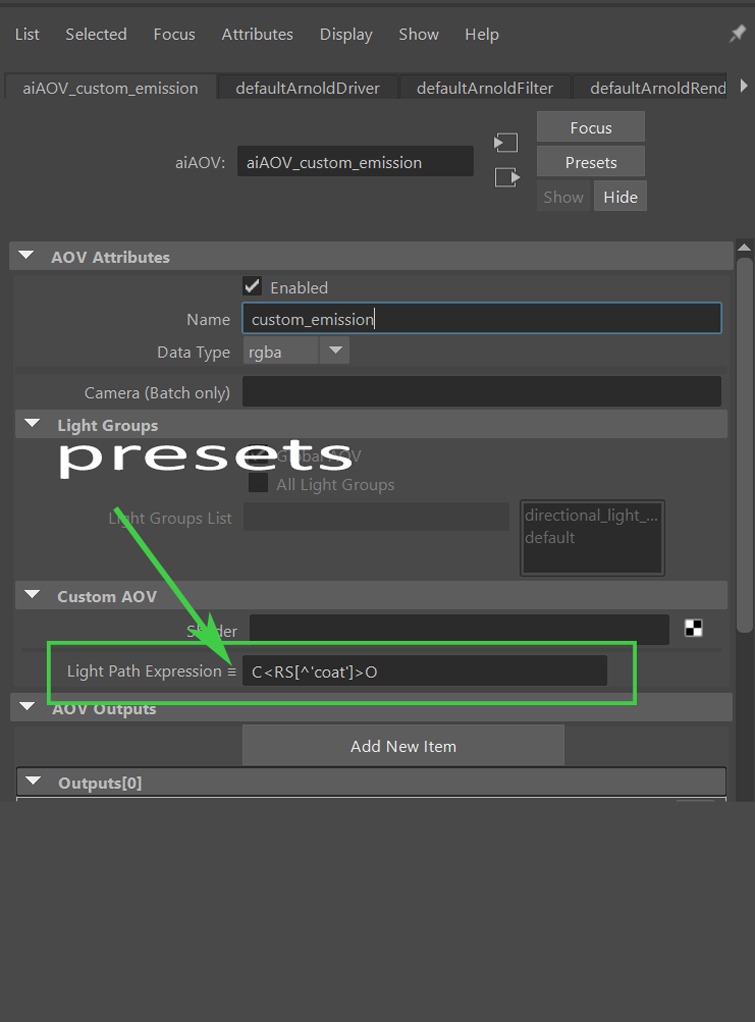
By double clicking on the new AOV in the Active AOVs list, and checking out the Attribute Editor, there is an input field called Light Path Expression.
From there you can either start typing your expression or choose a list of presets that assist you in the creation.
At this point, you can render your custom render pass!
Hope you enjoyed this tutorial and I invite you to follow me at my Linkedin page.