Aging 3D assets is a good exercise for texturing, and it also creates more realism while showcasing your 3D models.
You, as artists, have certainly heard of PBR (physically based rendering), expecially if you are into 3D texturing.
As a refresher, when you texture props in a realistic way, PBR comes in handy by providing a method for texturing. This approach aims to achieve photorealism in a very good way, so that light behaves correctly in the interaction with surfaces. Consequently, concepts like Conservation of Energy or Microfacet theory are vital to modeling how light physically interacts with a 3D object.
With PBR, we are also able to age props and this is what we are going to talk about in this article.
As a base, we will consider a 3D stove that you can find at my personal Artstation page. The main tool used was Substance Painter, which is quite popular in the industry, however, I won’t get into technical details here (if you want to have a more in-depth look at some of my techniques used in Painter, read this article instead).
What we will discuss is how I aged my asset and I will also give you some advice and tips on how to work on your next piece.
Where to Start: From New to Old, or Vice Versa?
You have probably asked yourself whether it’s better to start with a brand new stove and make it older and dusty, or to just start by modeling an old stove.
Well, there’s no hard rule, of course, but nowadays, tools as Painter make the process easier both ways.
Remember that some texturing techniques have changed over the last years and software like Painter has simplified the process.
The artists work now by creating and destroying new layers, using generators, procedural masks, and so on.
Layers are independent from each other and that’s a great advantage in terms of a non destructive workflow… as in, we don’t need a particular effect like rust or dust, we can hide the corresponding layer without affecting what we have underneath! The old-school methods of texturing use a destructive workflow and require, in general, more time in terms of work.

So to the question, “What’s the best way to start?,” I would answer… it’s really up to you. If you begin with an aged version like I did, the passage to a cleaner one is fast: we practically hide layers and reveal the clean content underneath.
On the other hand, producing a cleaner result first is faster, but building new layers requires more patience and time. What matters is not what comes first but the simplicity of using a workflow based on layers.
A word of advice: choose Substance Painter or any 3D material authoring tool, if you want to make the process easier.
First Steps in the Aging Process
Objects have a lifecycle: they are built, they perform some functions, they age, and they are thrown away once useless or broken.
As artists, we first want to:
- Identify at which stage in the cycle we want to represent the details (e.g., 4 months after purchase, instead of 8 years of intense use, etc.)
- Imagine the environment (house, cellar, garage, etc.) or the weather conditions (humidity, for instance) the stove has been exposed to
- Use our imagination as much as we can, to enrich the textures with compelling but justified details (e.g. scratches on metal, fingerprints, etc.)

We’ll start by discussing the old and dusty versions of the stove, and finish with the clean one.
Producing Details In an Old Stove
Let’s dig into some of the details that I created.
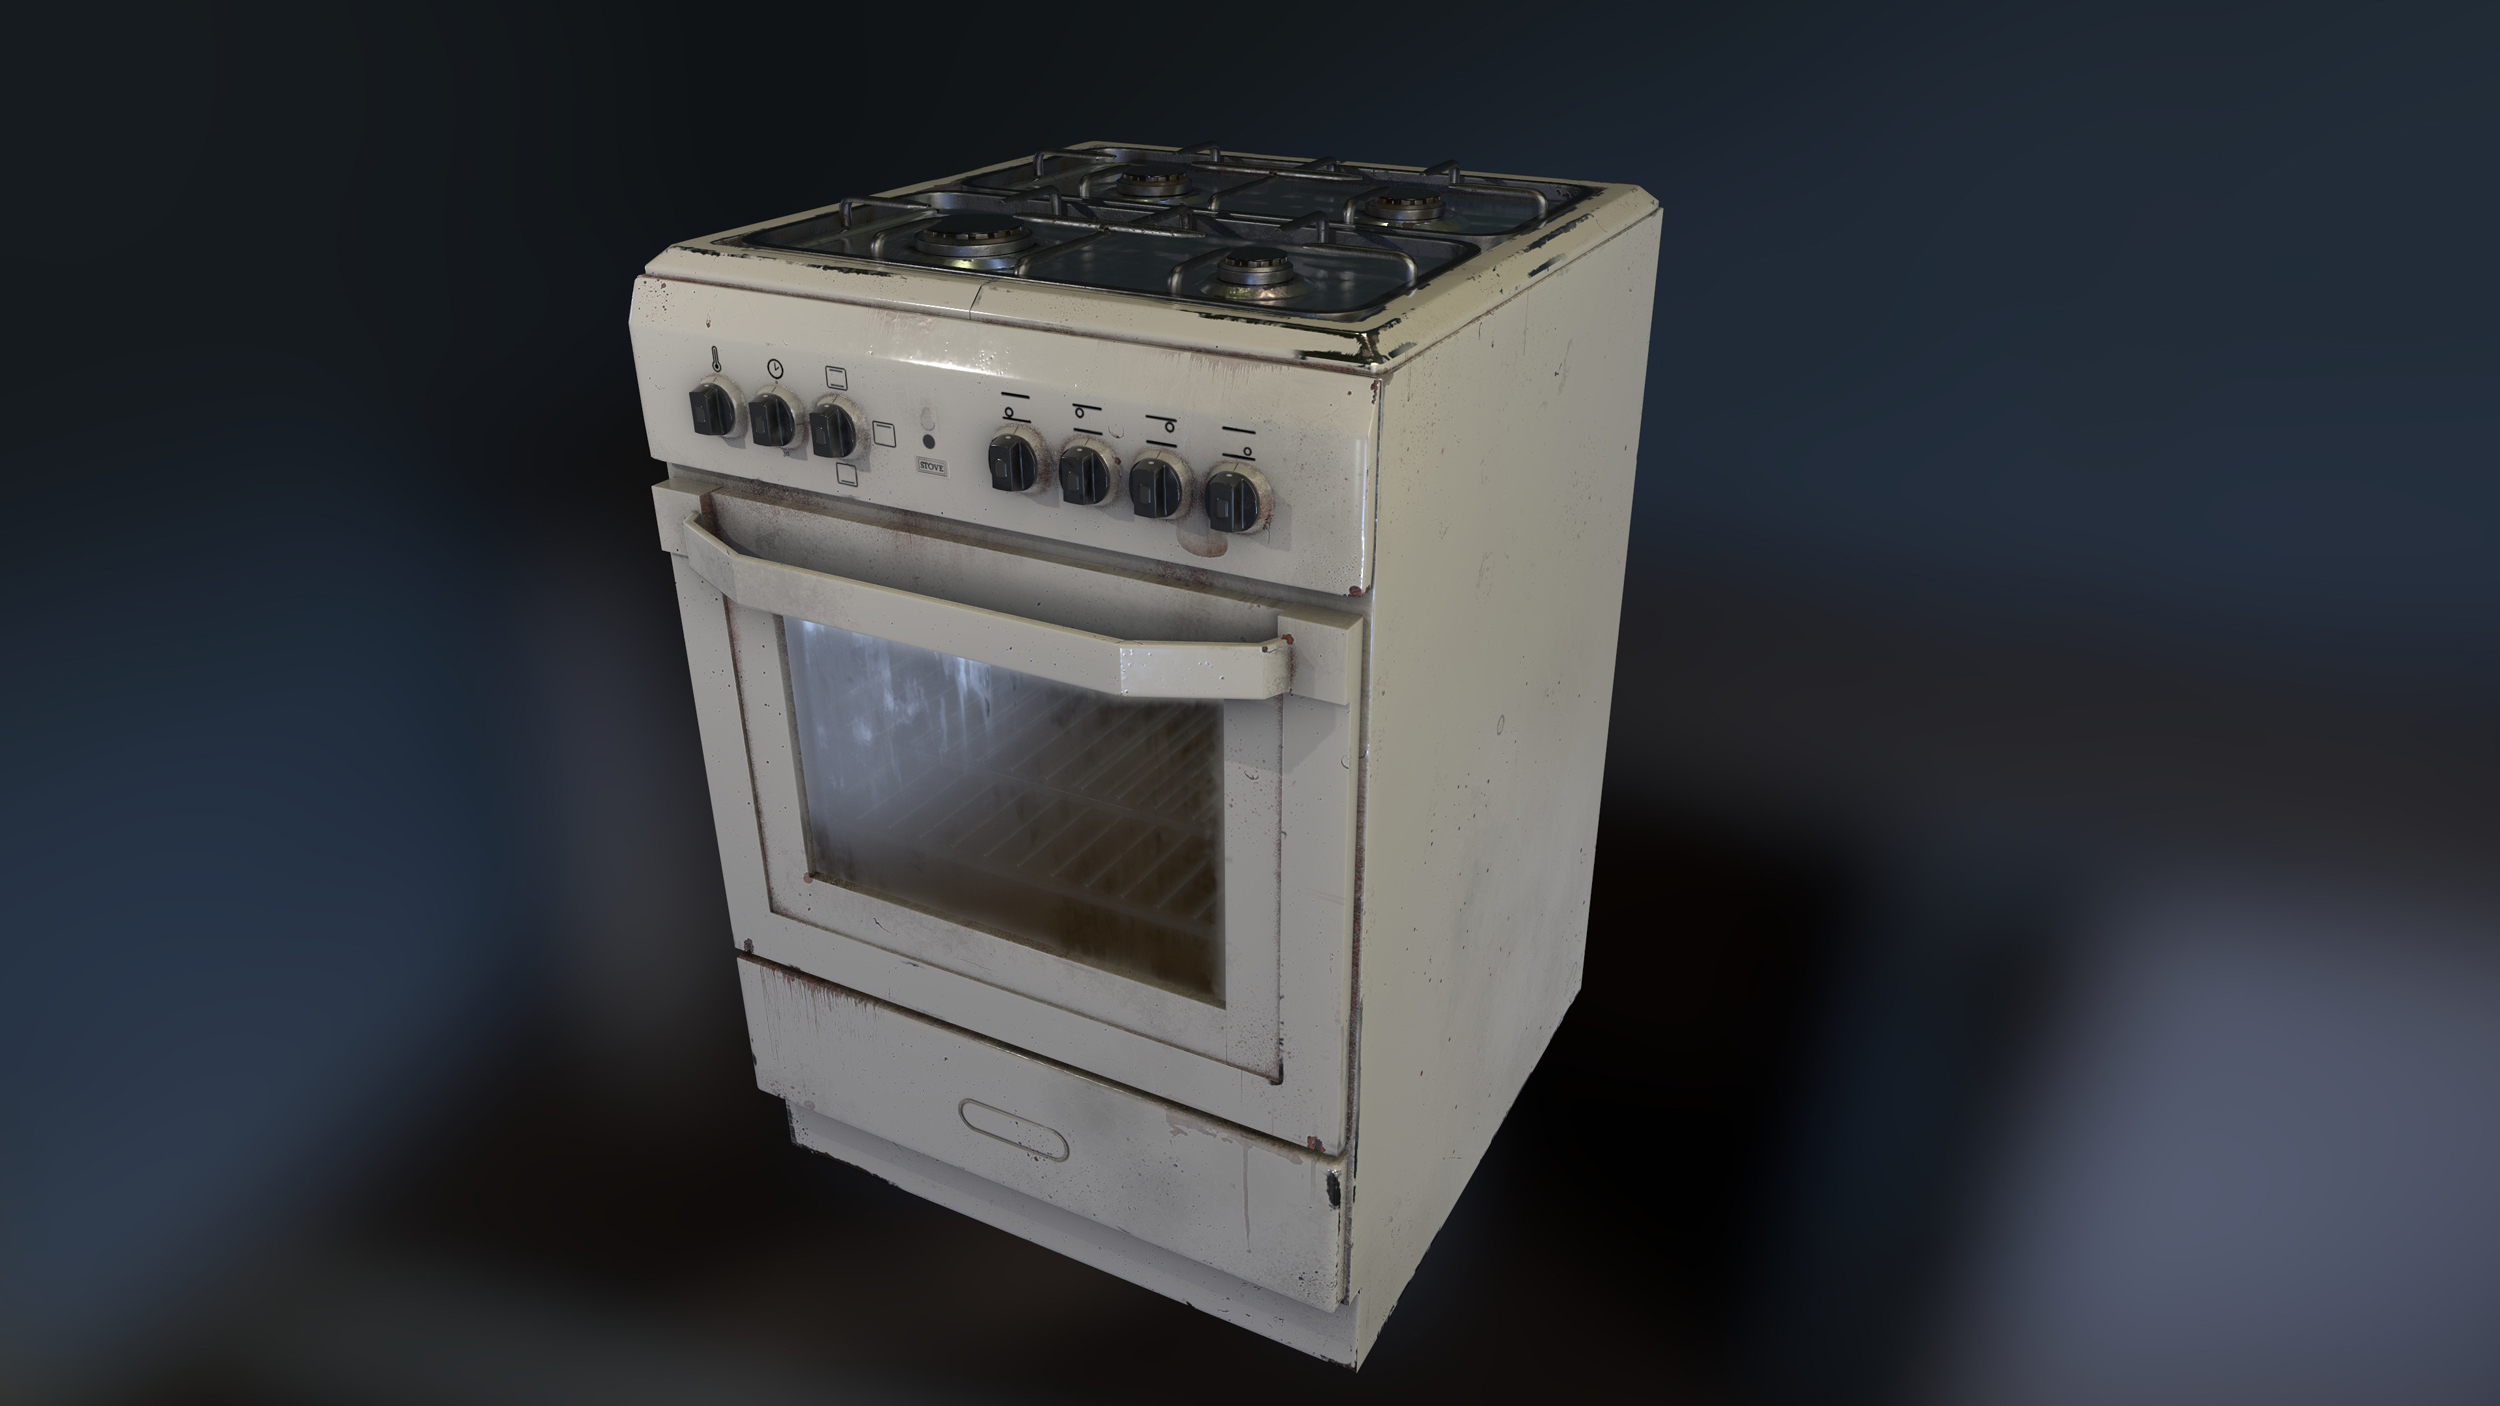
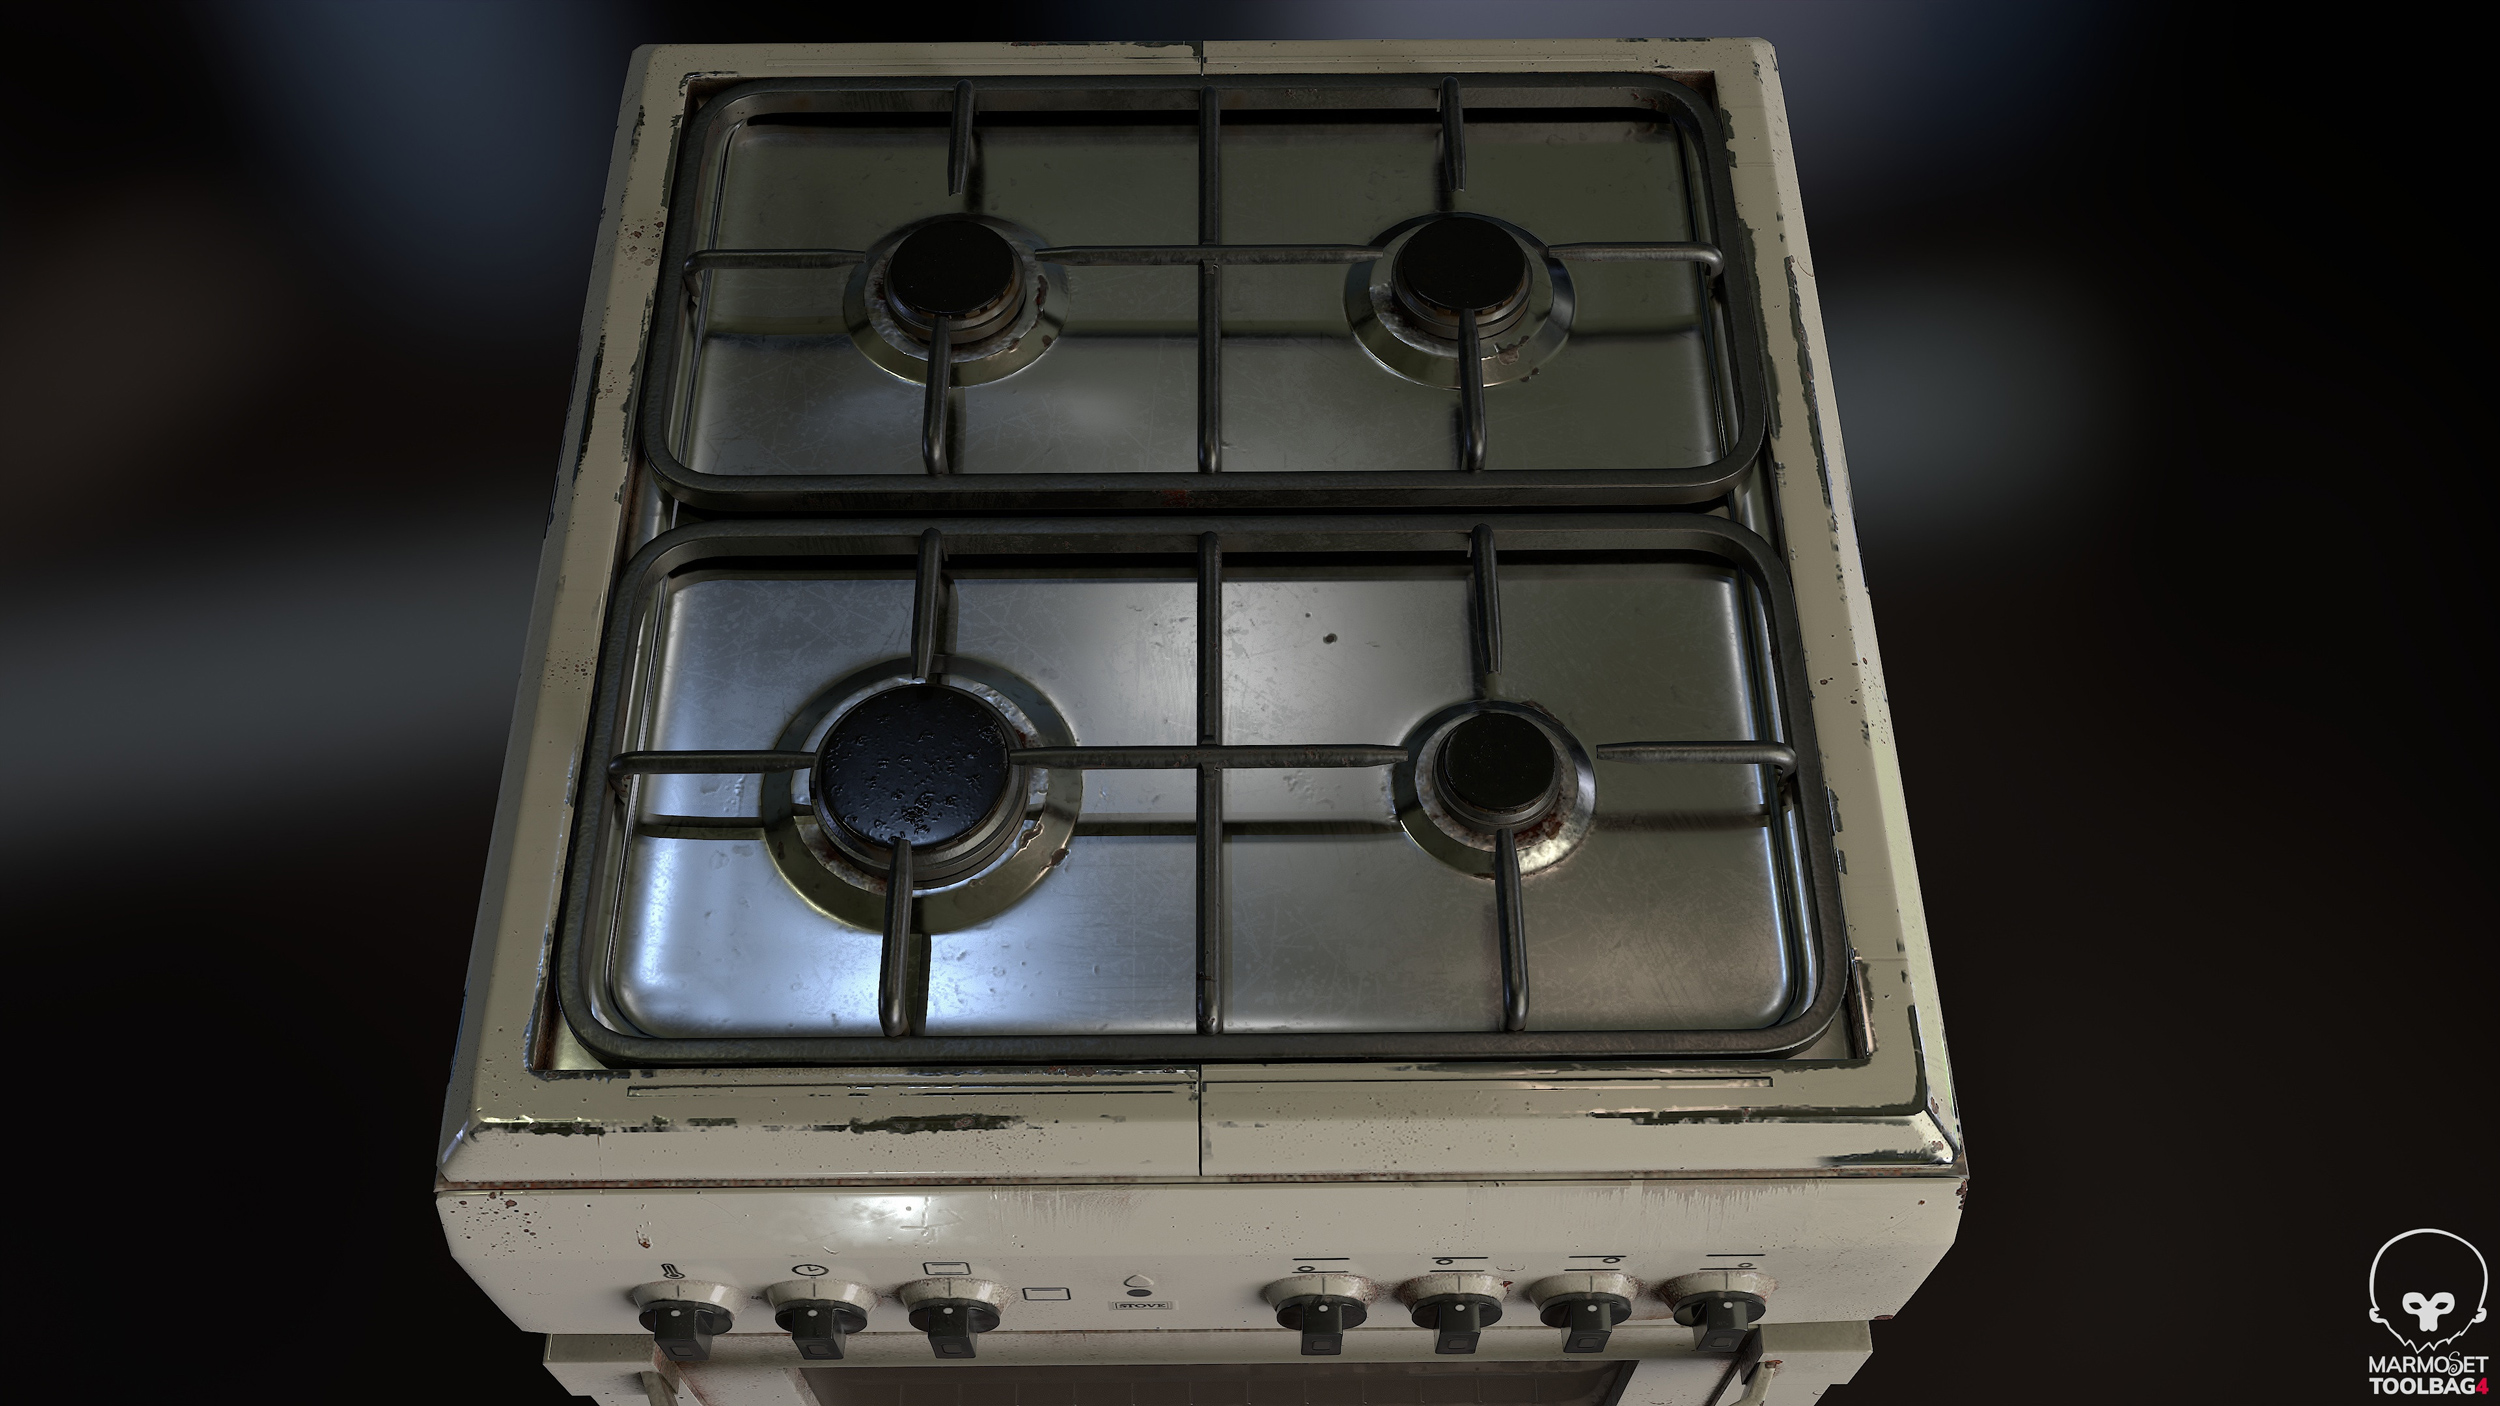
Overall, the stove looks old and as though it’s been exposed to oxygen and moisture (like humidity) for a long period of time. In fact, it’s the presence of rusty parts that indicate that.
The first challenge is connected with how to paint and create details in the most natural way. It takes practice, observation, and a bit of knowledge.
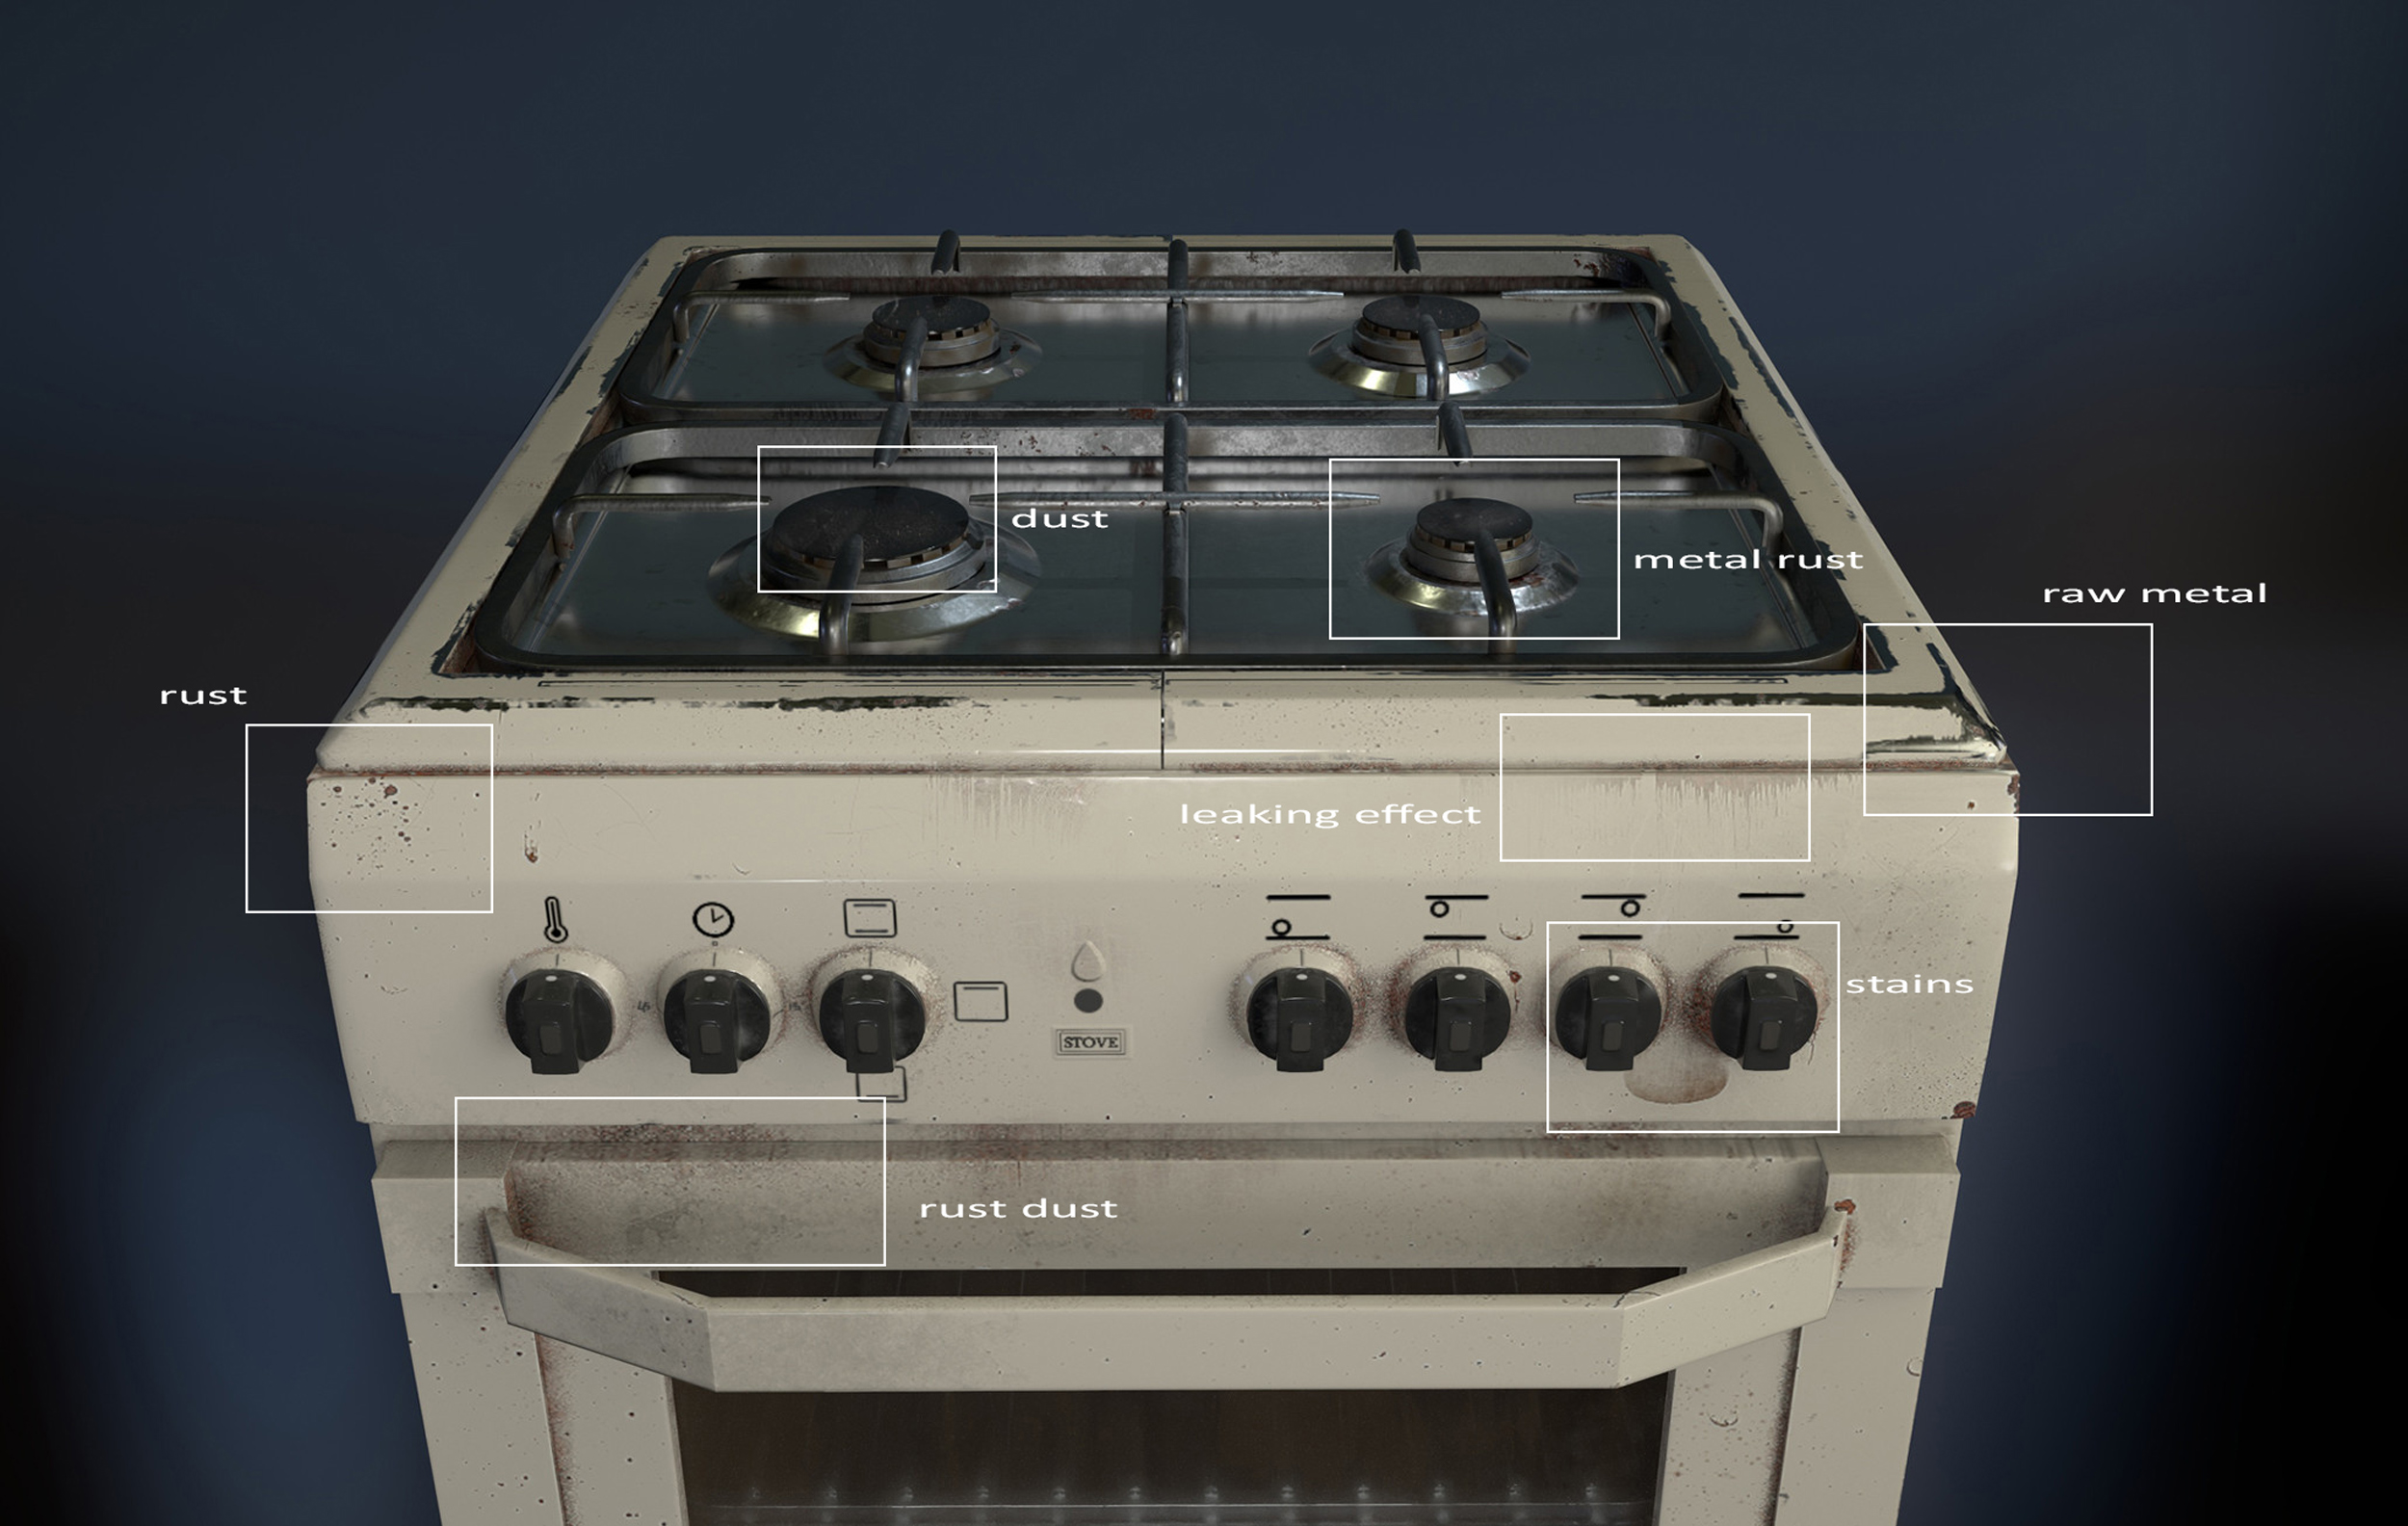
For instance, you have to know that some dust particles tends to accumulate in occluded areas where they get trapped. When their quantity increases, some others start spreading gradually over the flat surface.
Water and humidity accumulate in narrow spaces, are also responsible for the appearance of rust in metals; even with that in mind, some other random areas where metal corrodes can also present rust here and there. No strict rules here, but it’s good to have at least some notions and common sense on how to layer the details.
Sometimes you can even introduce a leaking effect connected with the rust or liquid, which dries off.
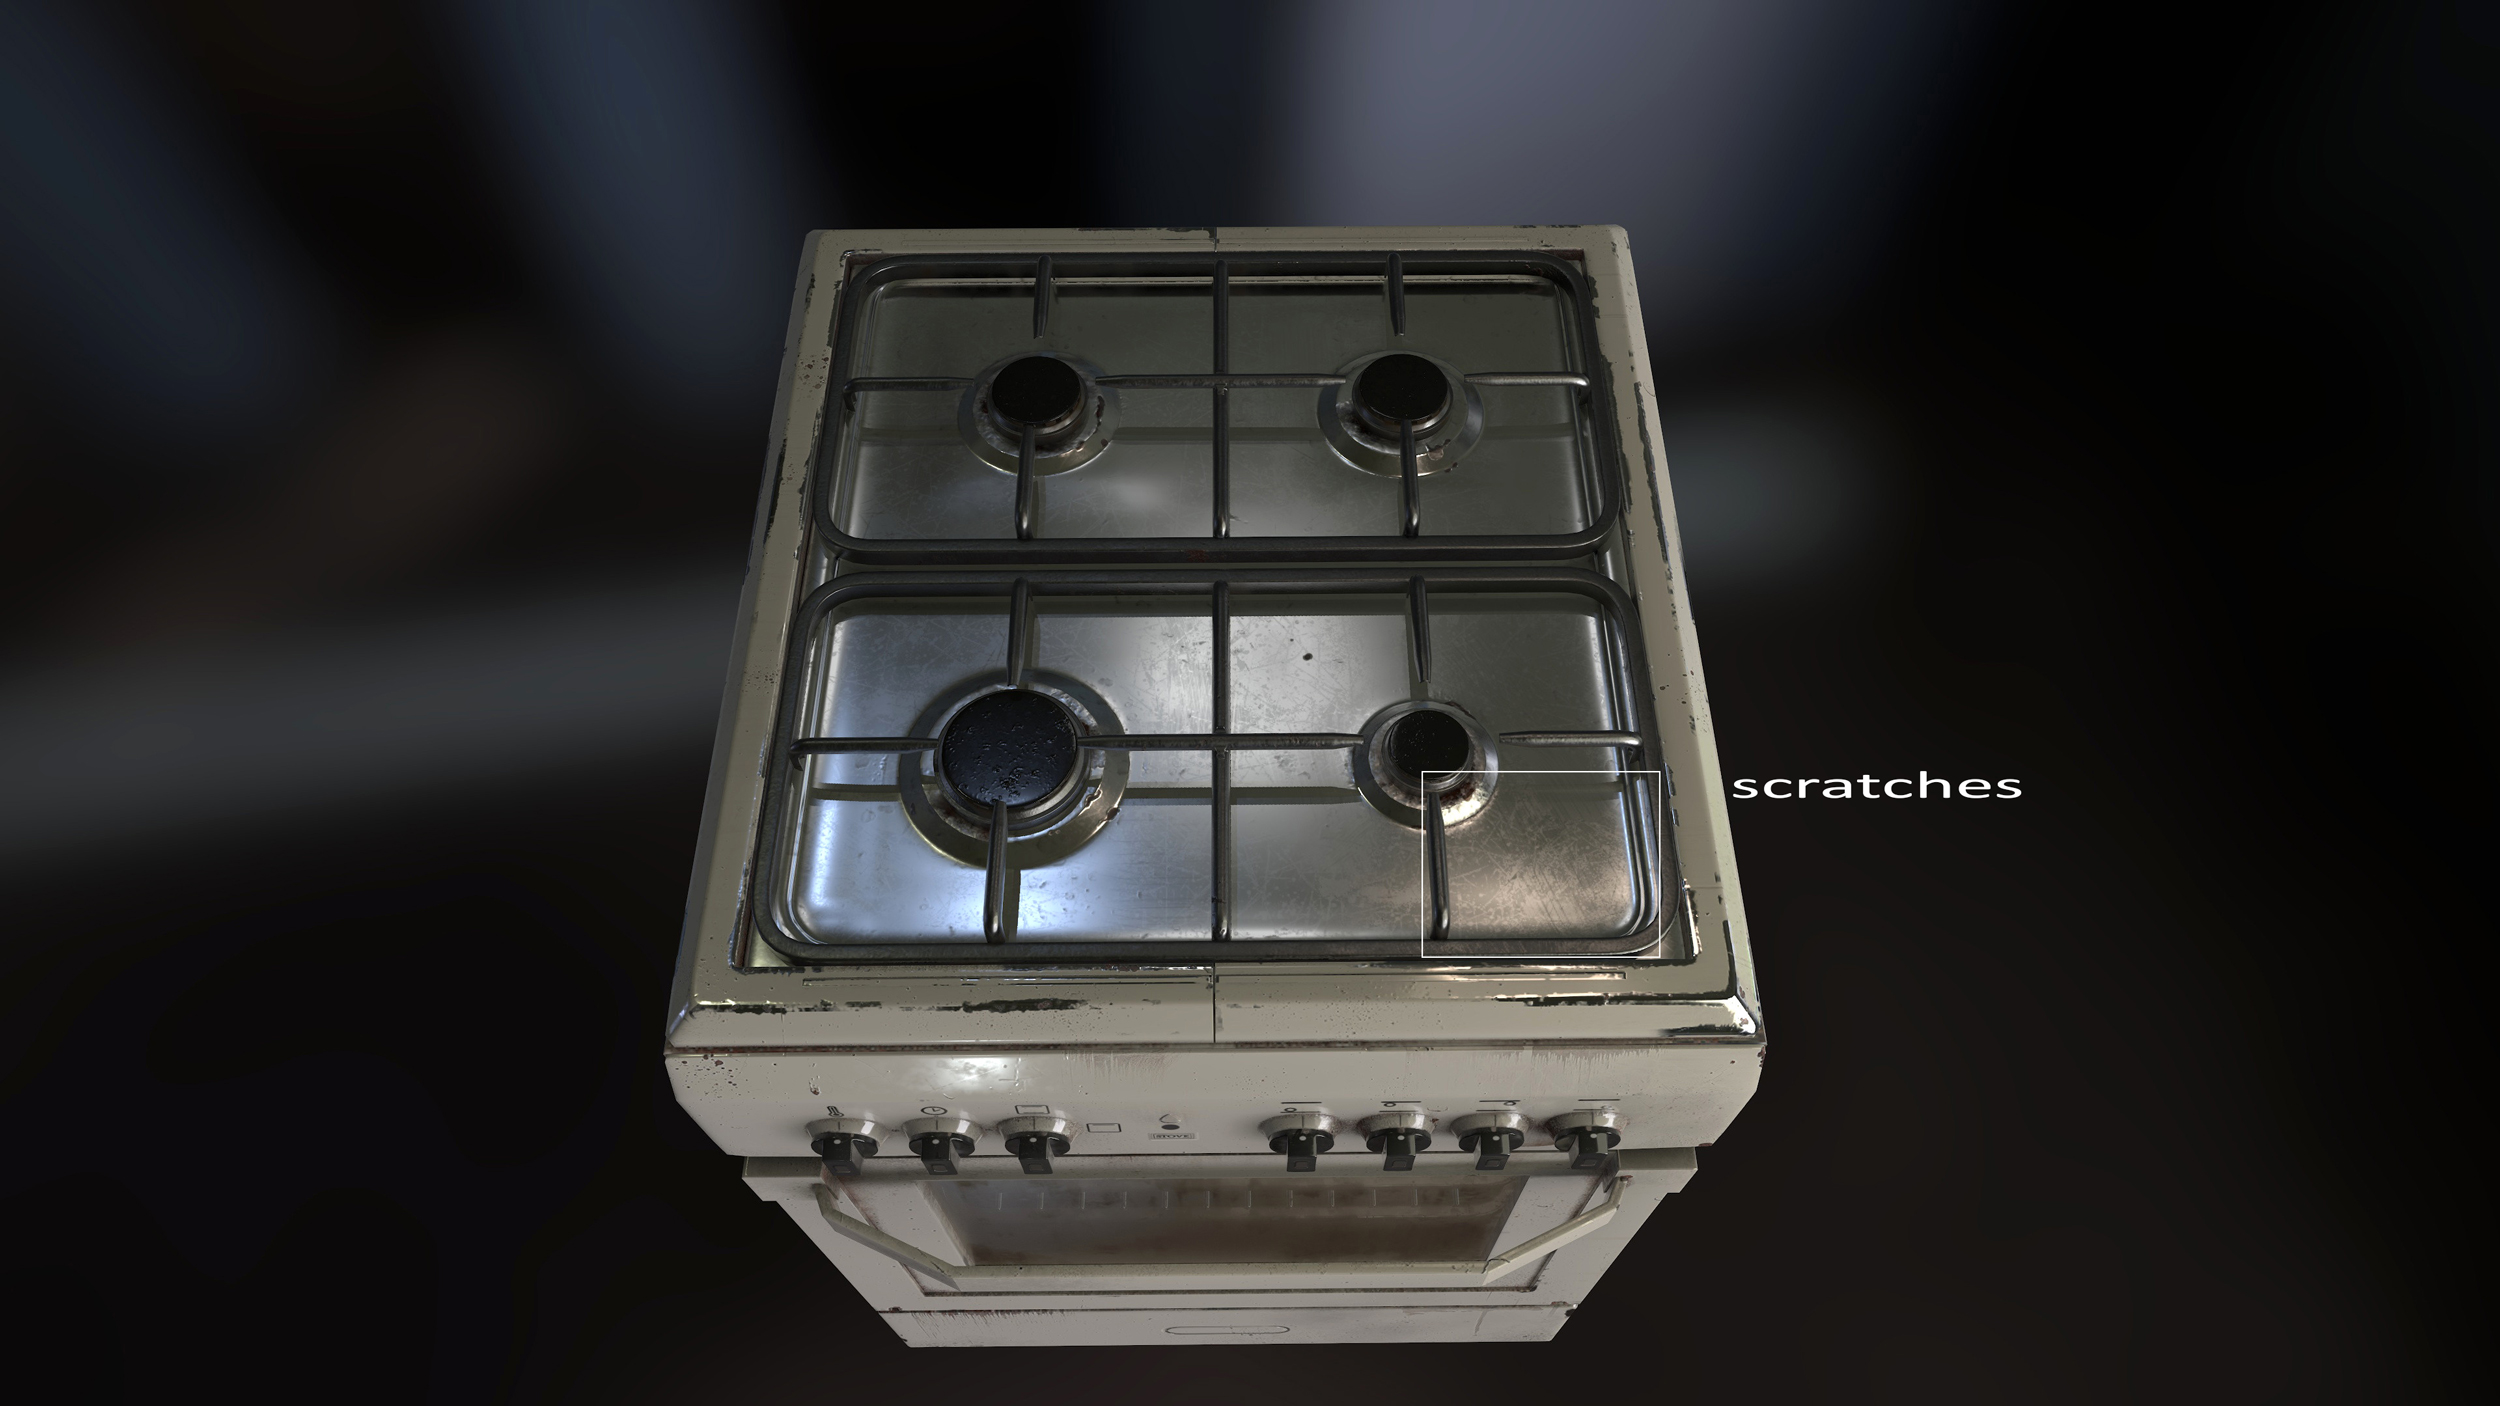
When we imagine an old stove, we can also think about how we’ve been utilizing it over time. In the image above, the presence of scratches might indicate the extended use of a scrubber sponge to clean up the metal surface, altering its roughness.
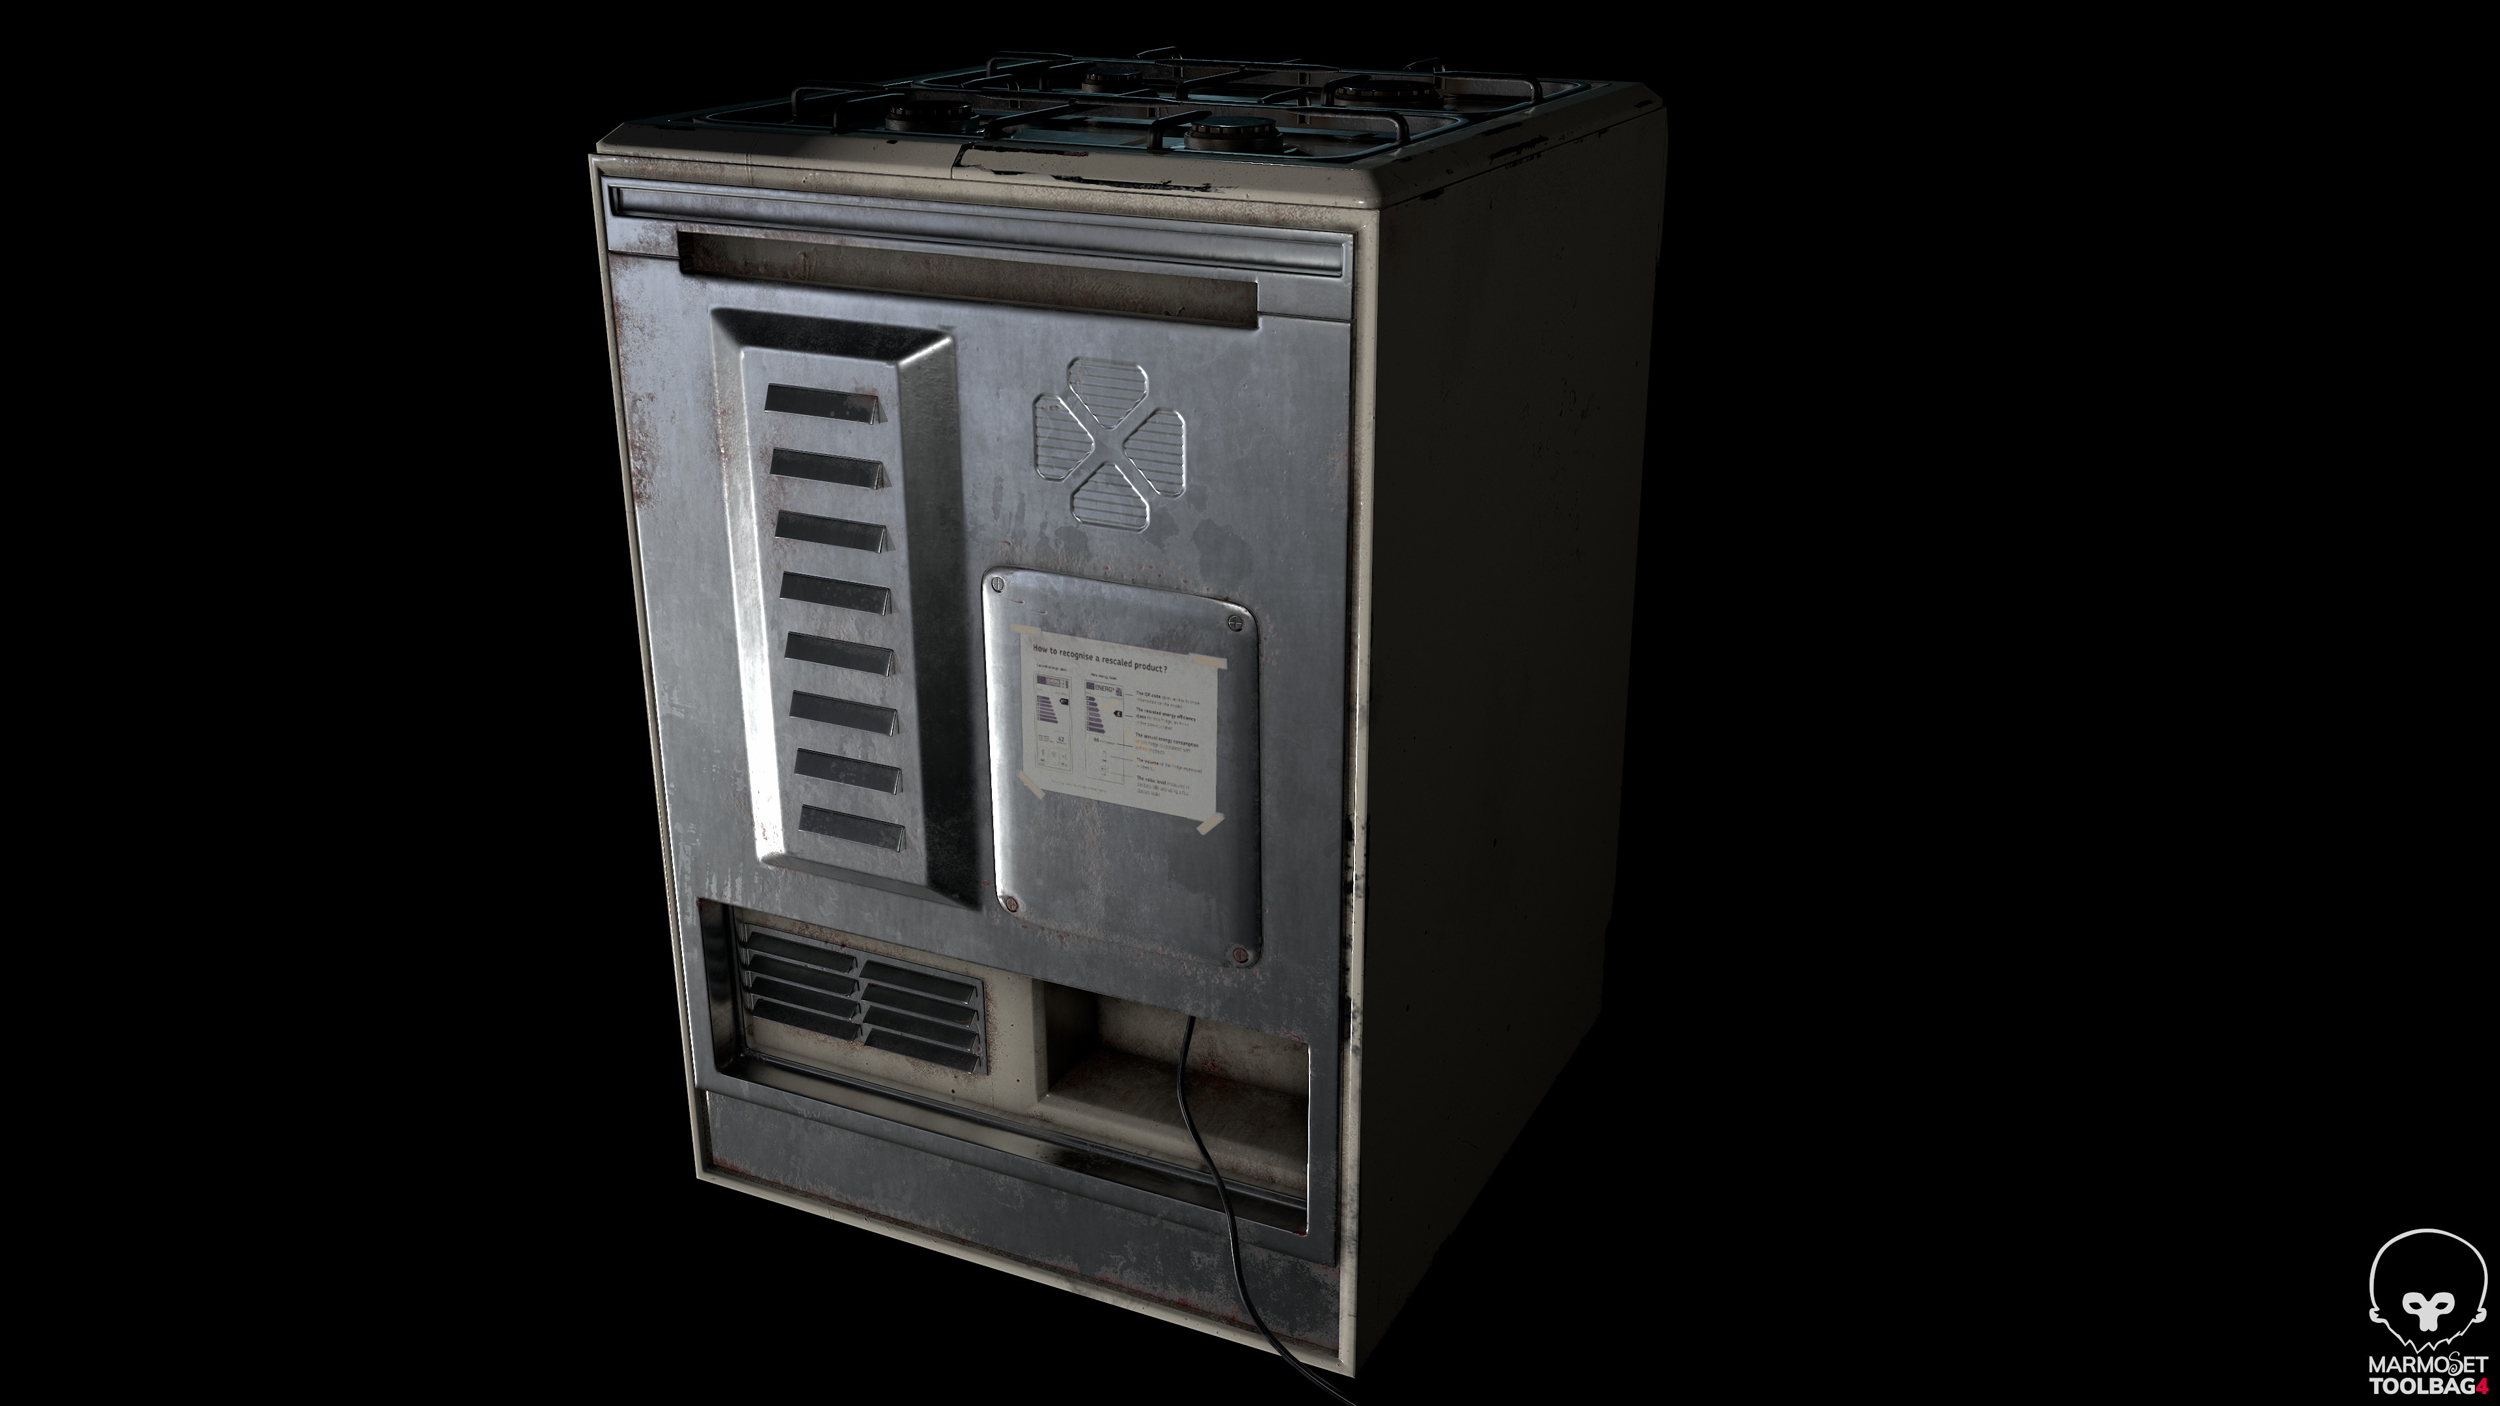
Likewise, the back of the stove is mainly represented by a metal surface with rust. Notice how it starts spreading along the edges and then it’s present on some other areas; some screws have rust too!
To make the object more interesting and real, think about adding some additional features like a sheet of paper that you see in the previous render. Many times, appliances come with instructions or useful information directly attached to the surface – tell a story, use tape to affix the paper to the metal, as though it had accidentally fallen down to the ground at one time.
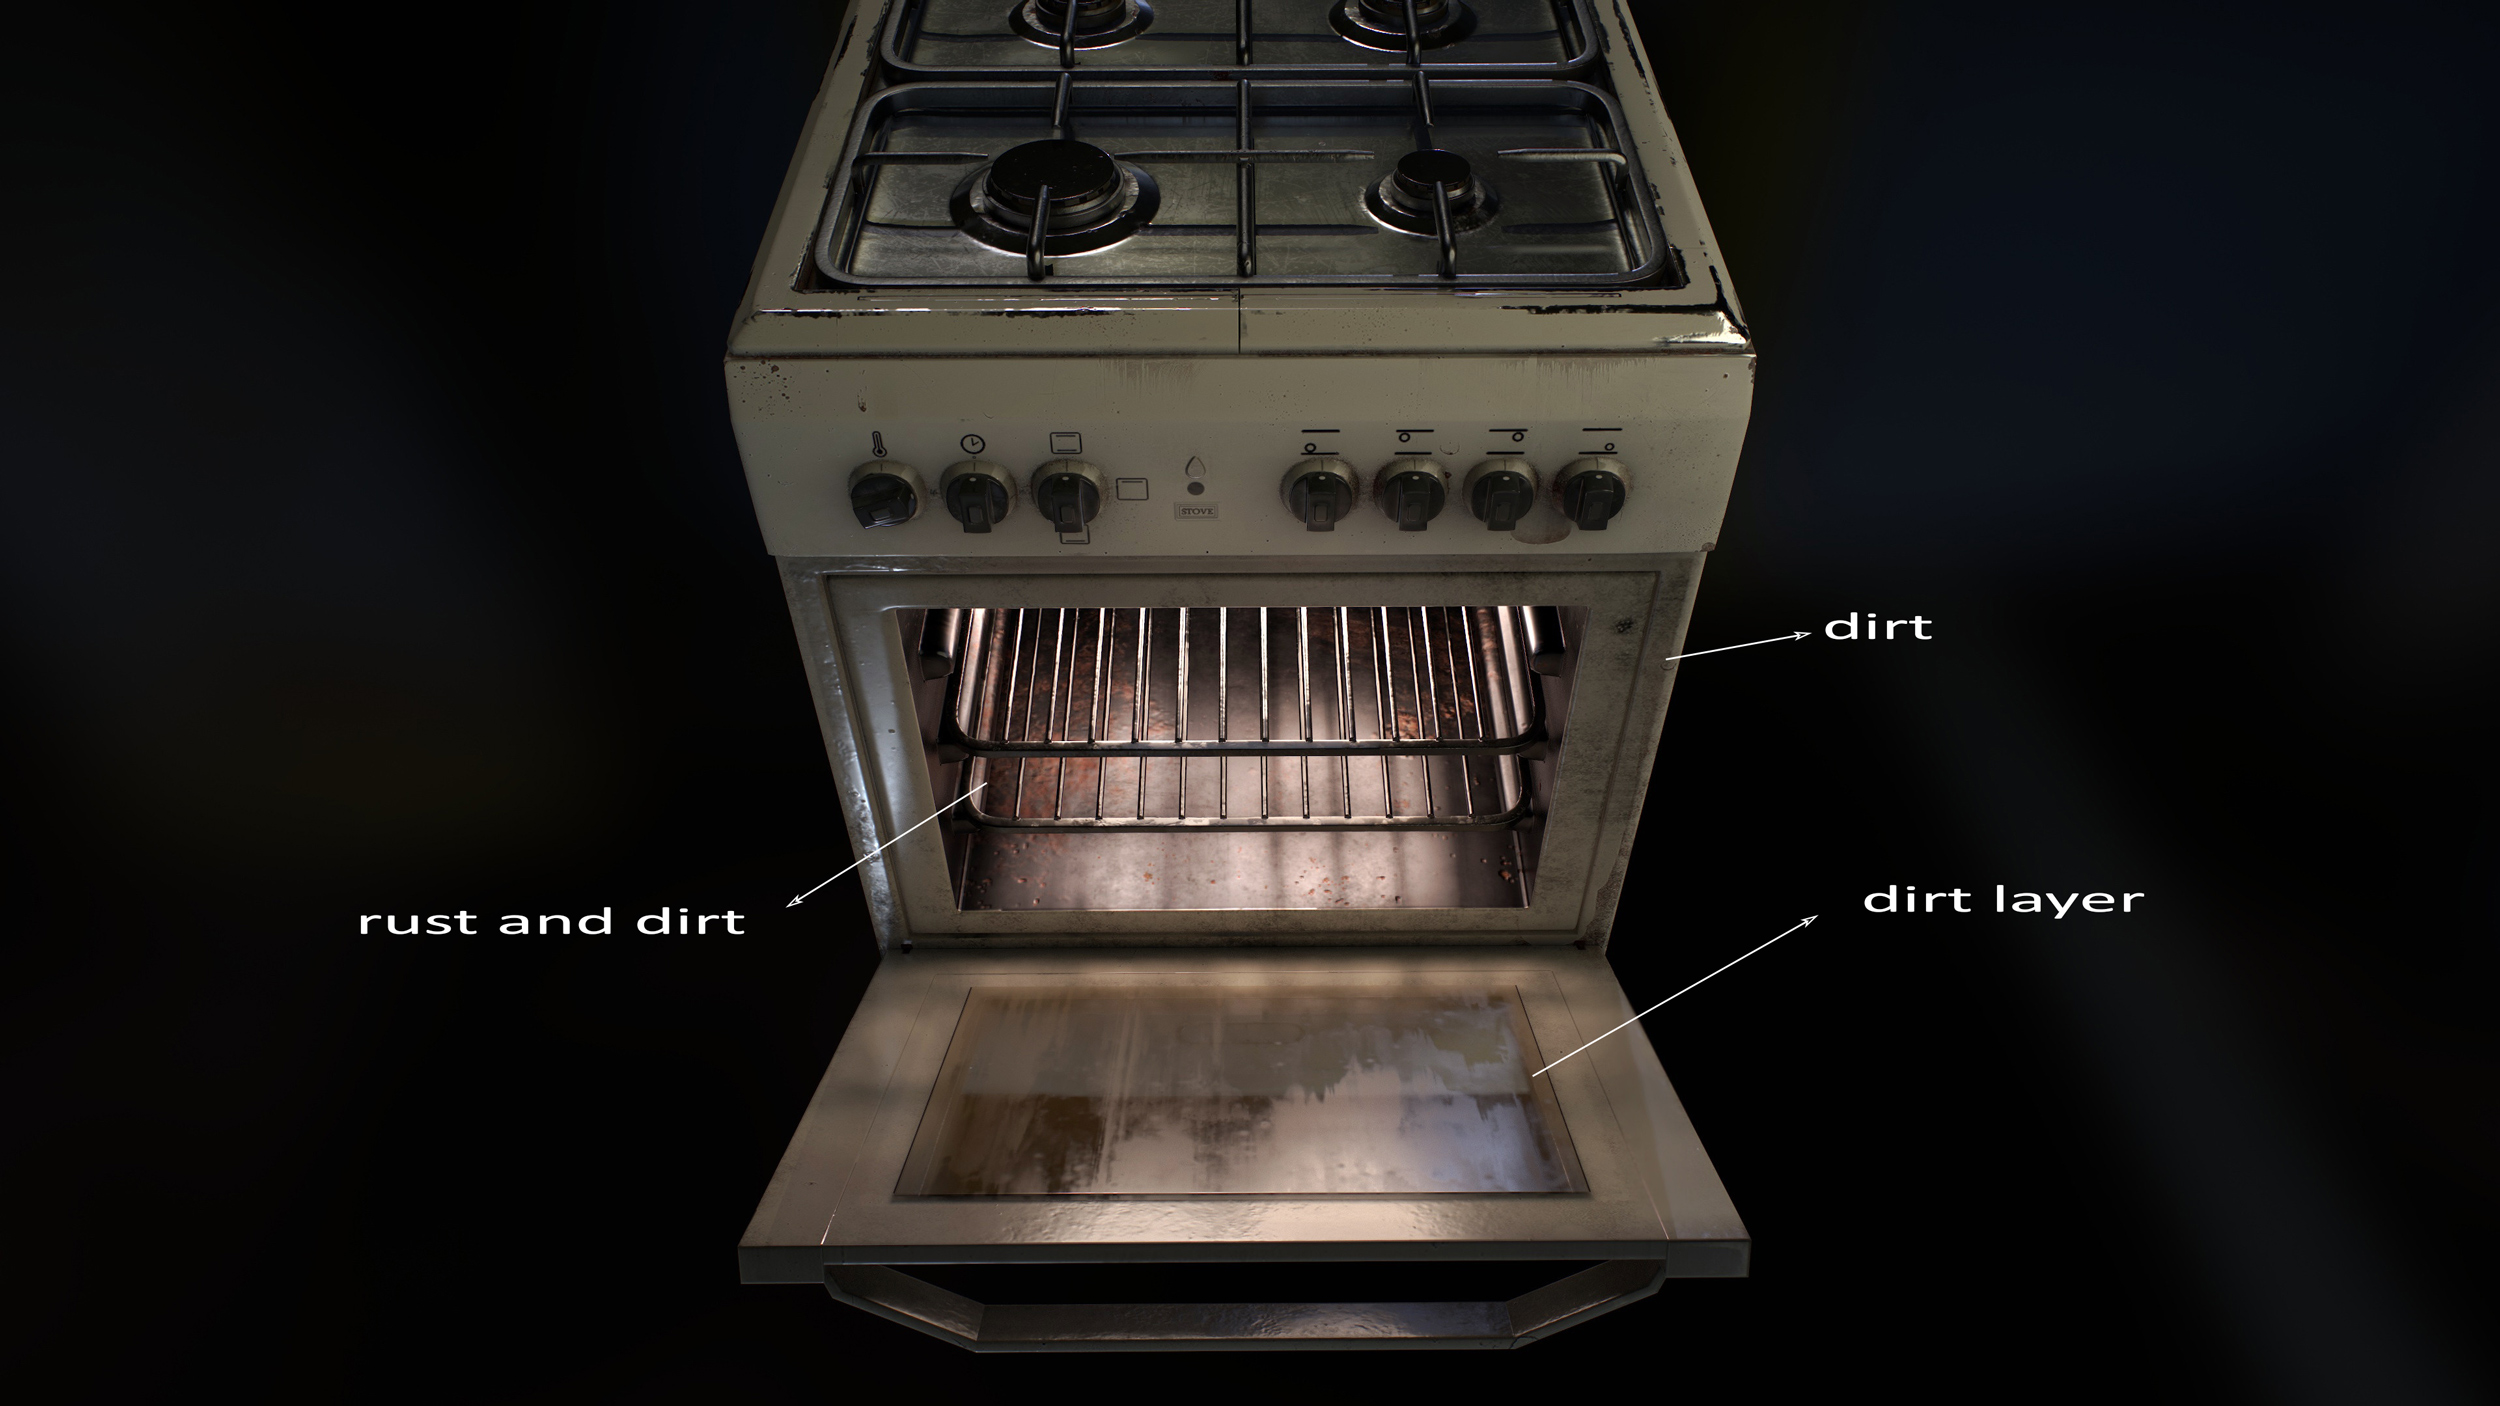
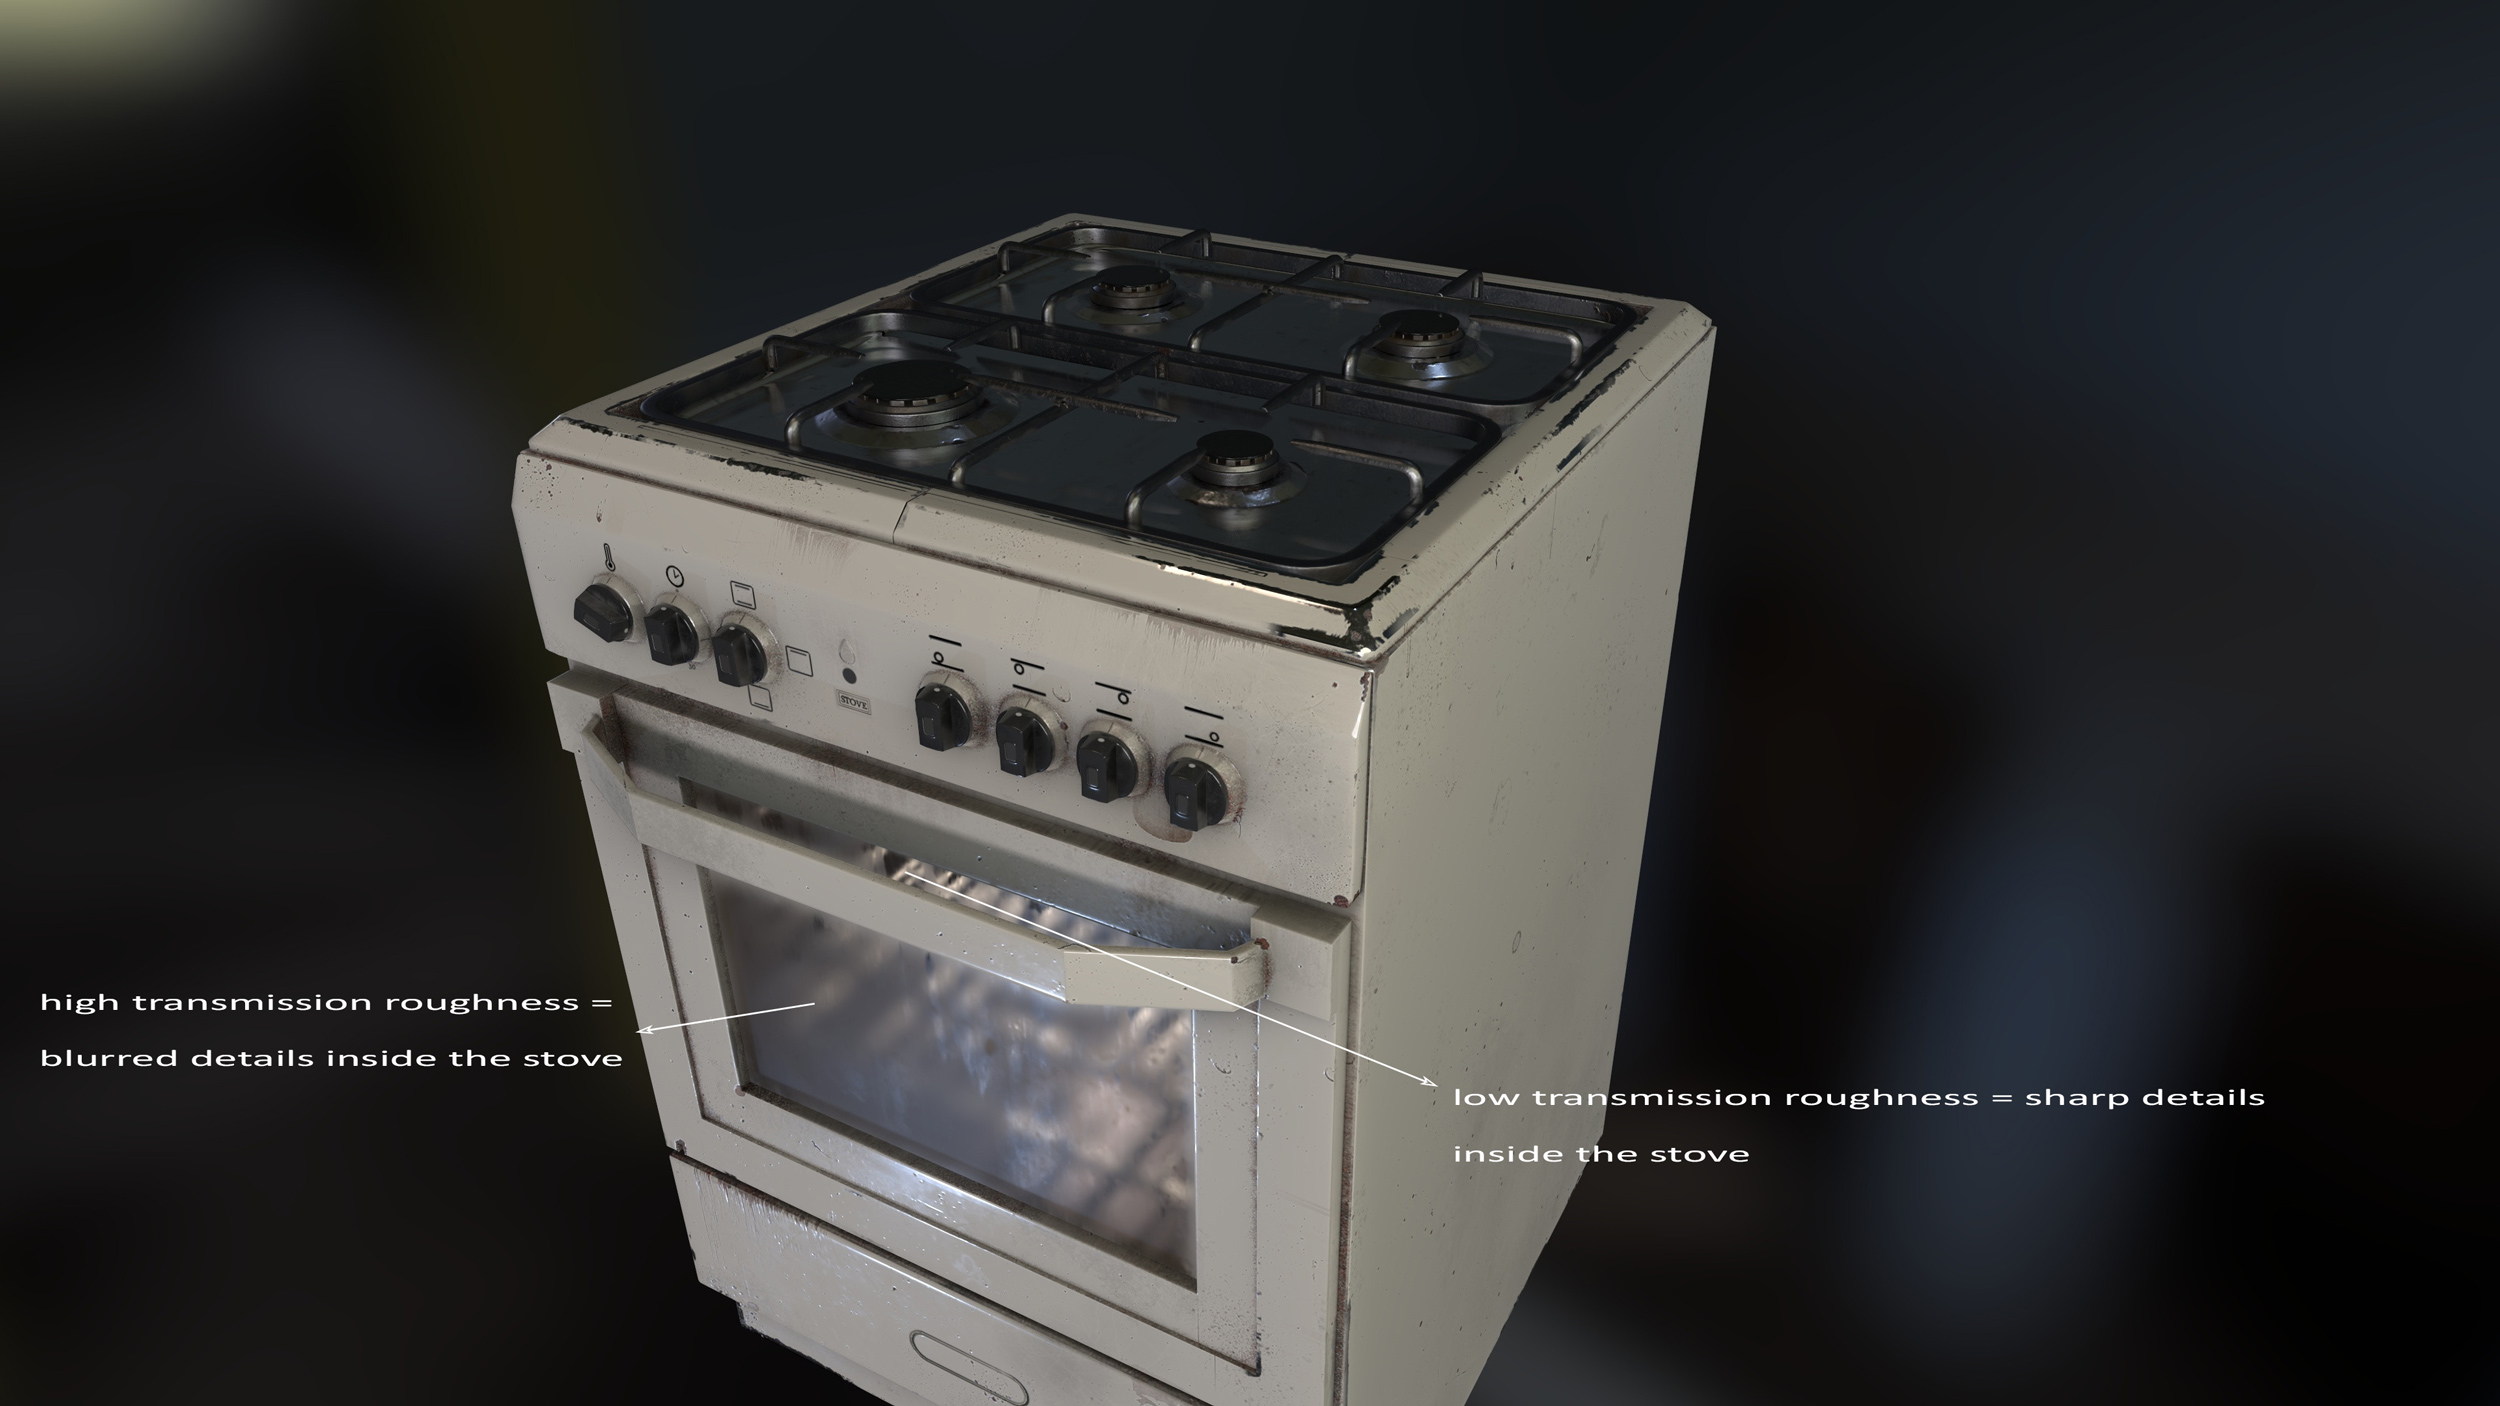
The glass has a sort of patina and a thick layer of dirt: my advice is to work on the opacity of the effect, change the roughness, and add a coat layer to manage the dirtiness color. Also experiment with different transmission roughness values, so that you will have a clear transmission through the glass vs a blurred one.
In the following image, you can notice how some areas inside the stove are blurred and some others are clearly visible, due to the different transmission roughness.
Old, Dusty, and Dirty Too
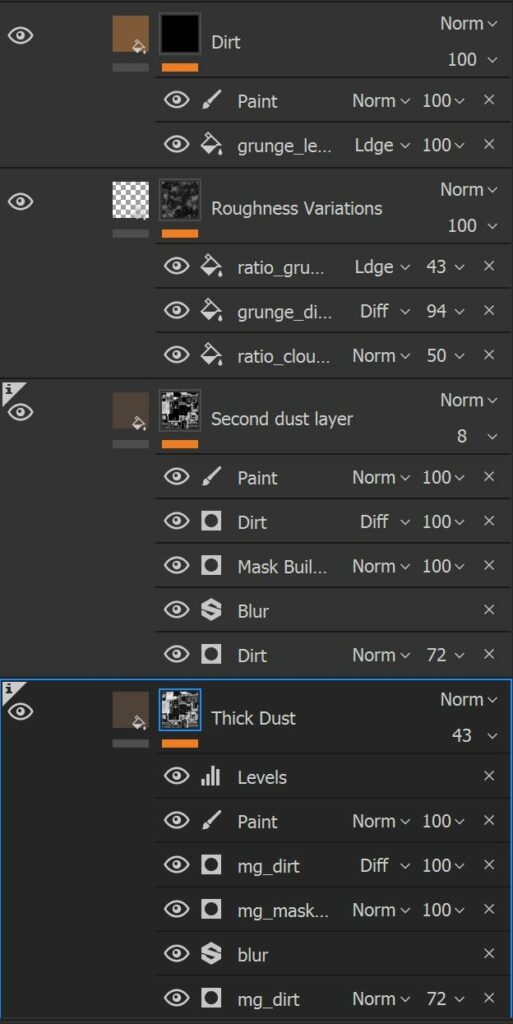
Let’s take a step forward in the aging process. What if we store the 3D stove in a cellar for months, or maybe years? By leaving the stove uncovered, dust starts piling up more and more.
The trickiest part here is to create different dust layers and smoothly combine them together. Most of the time I prefer creating custom masks to reveal my effects in the different channels (albedo, roughness, etc.); these masks are created by using procedural maps, generators, bitmaps, and paint layers.
Experiment with layers and if you don’t like one of them, hide it and move ahead. Now is a good time to remind you of the non destructive workflow in Painter; you can always restore your layers later and nothing will be lost!
The roughness is also fundamental in PBR and depends on your creative side. I tend to make dedicated layers for roughness to have an independent control. I also use blending modes between layers to merge different roughness maps. Again, no rules here, just observation and practice.
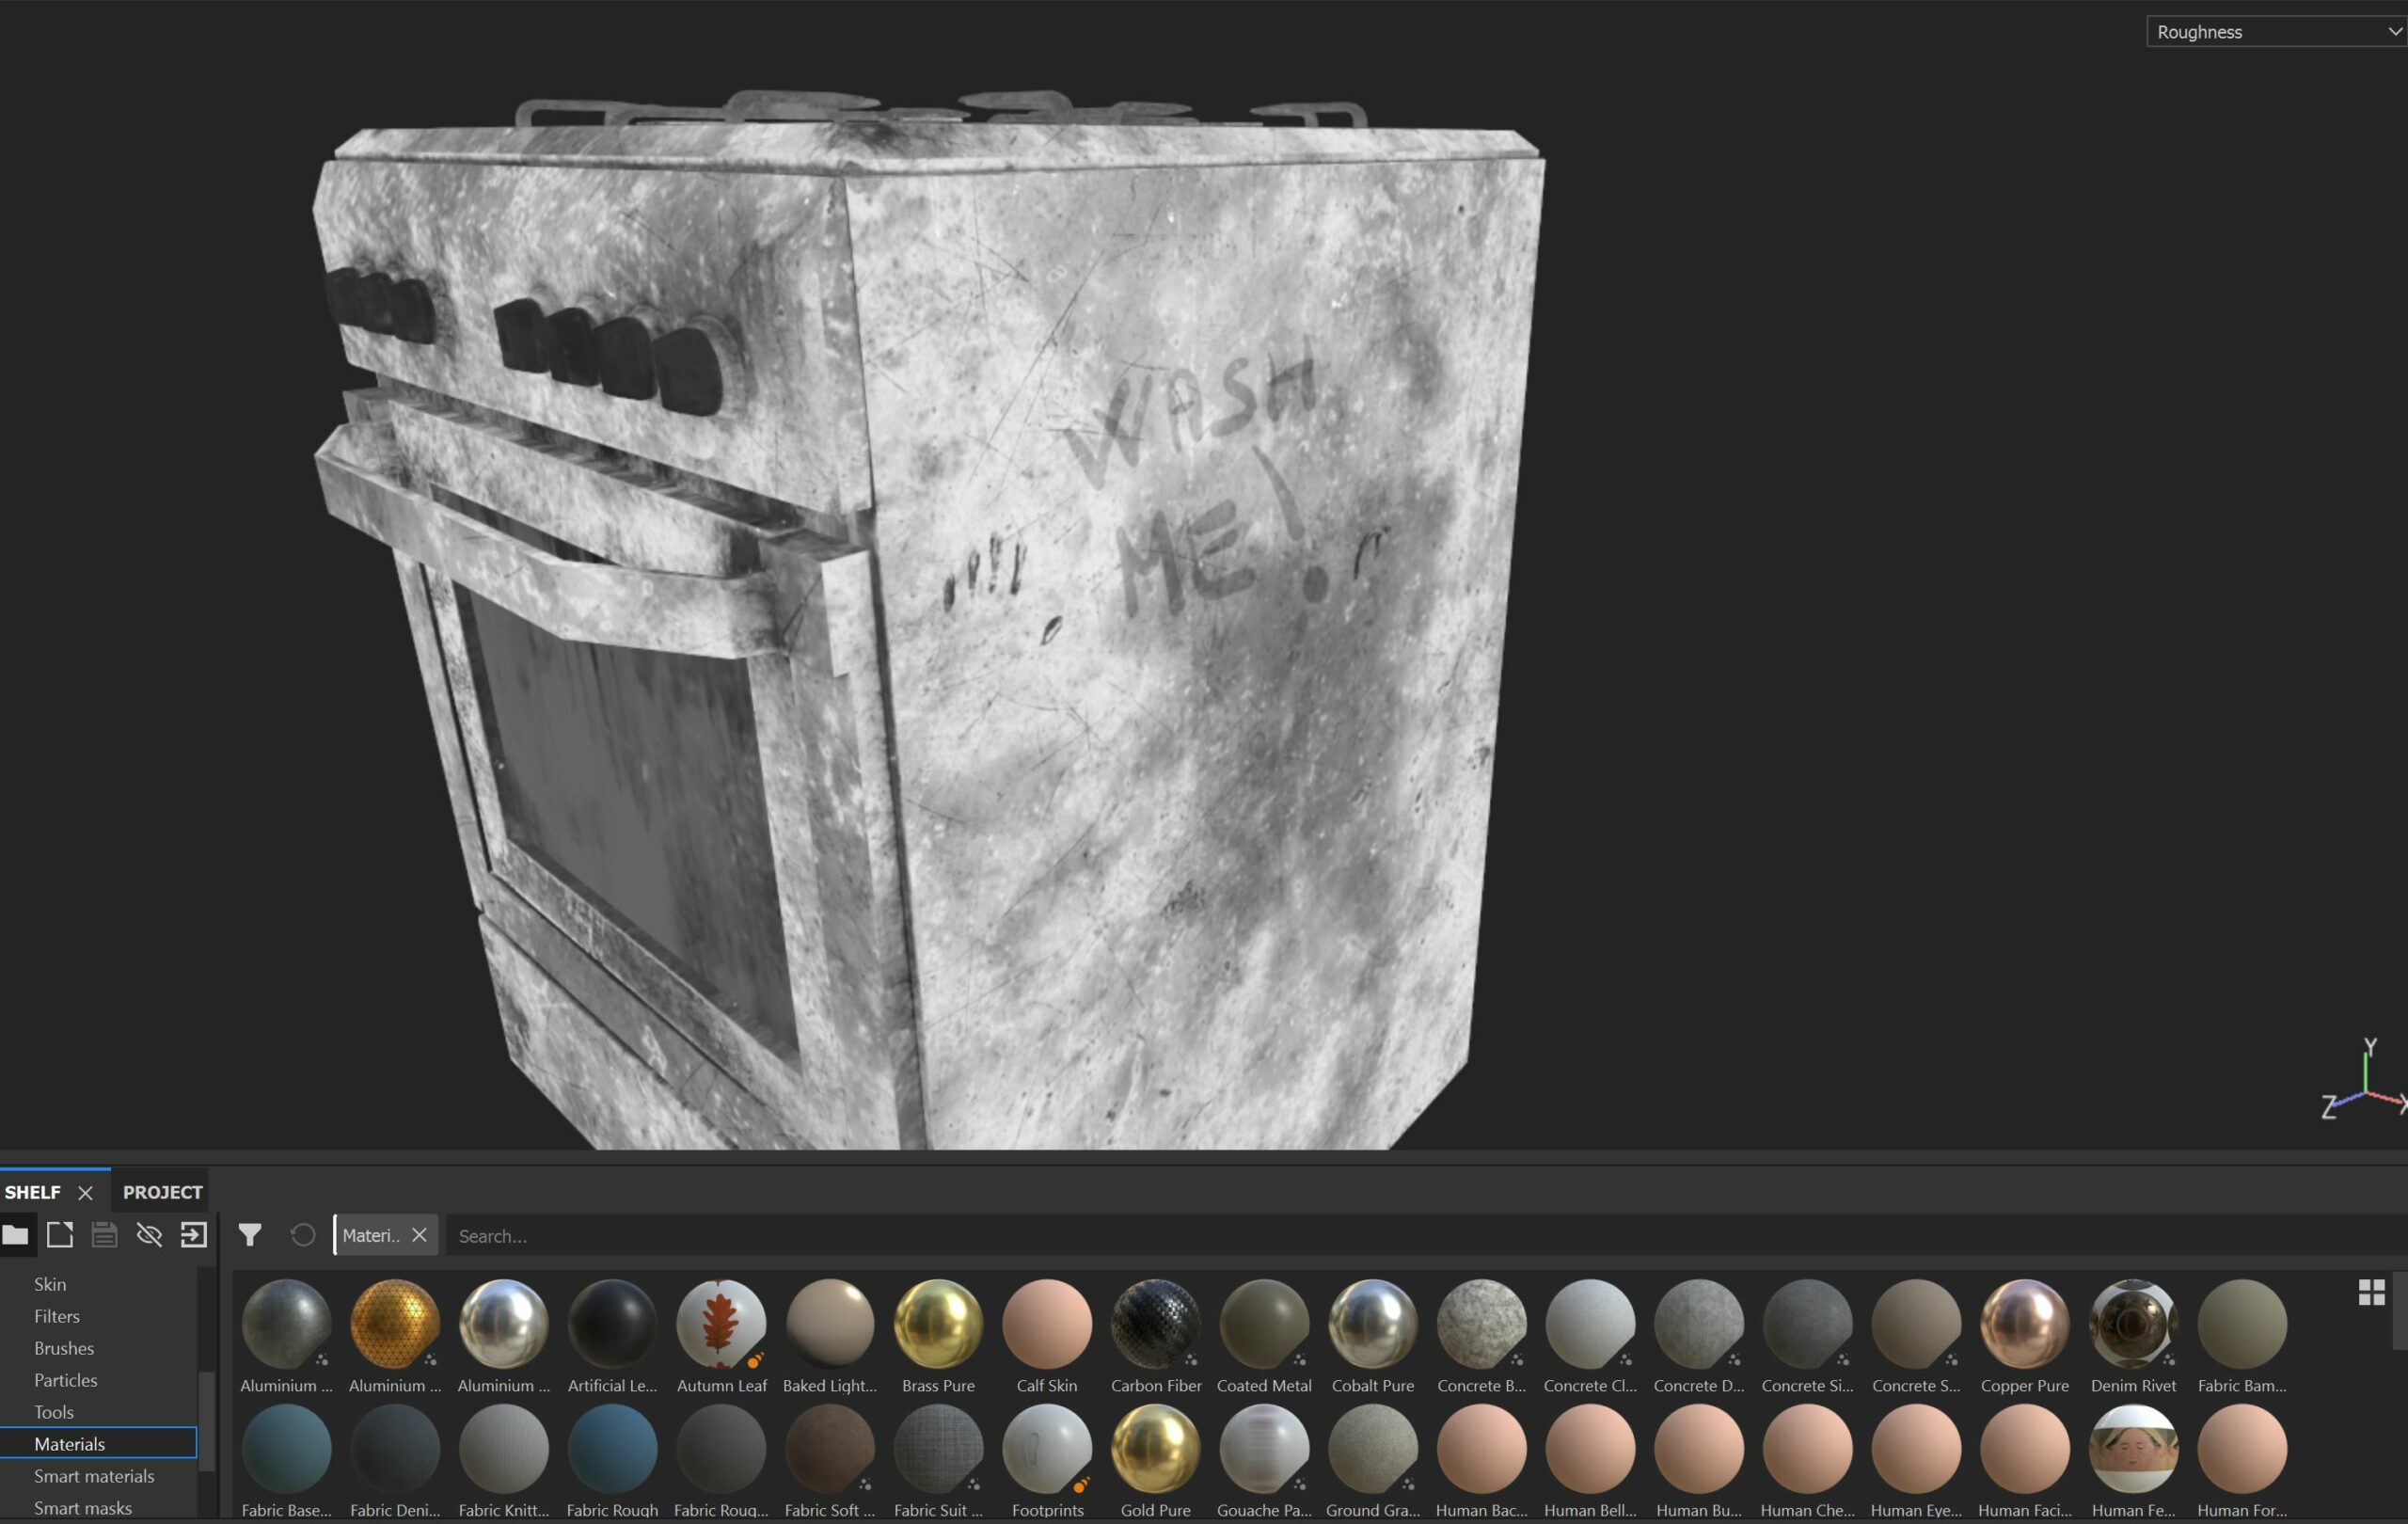
If you consider the only base color (albedo) below, you’ll see how I built some color variations which include dirt, some stains, dust, rust, etc..
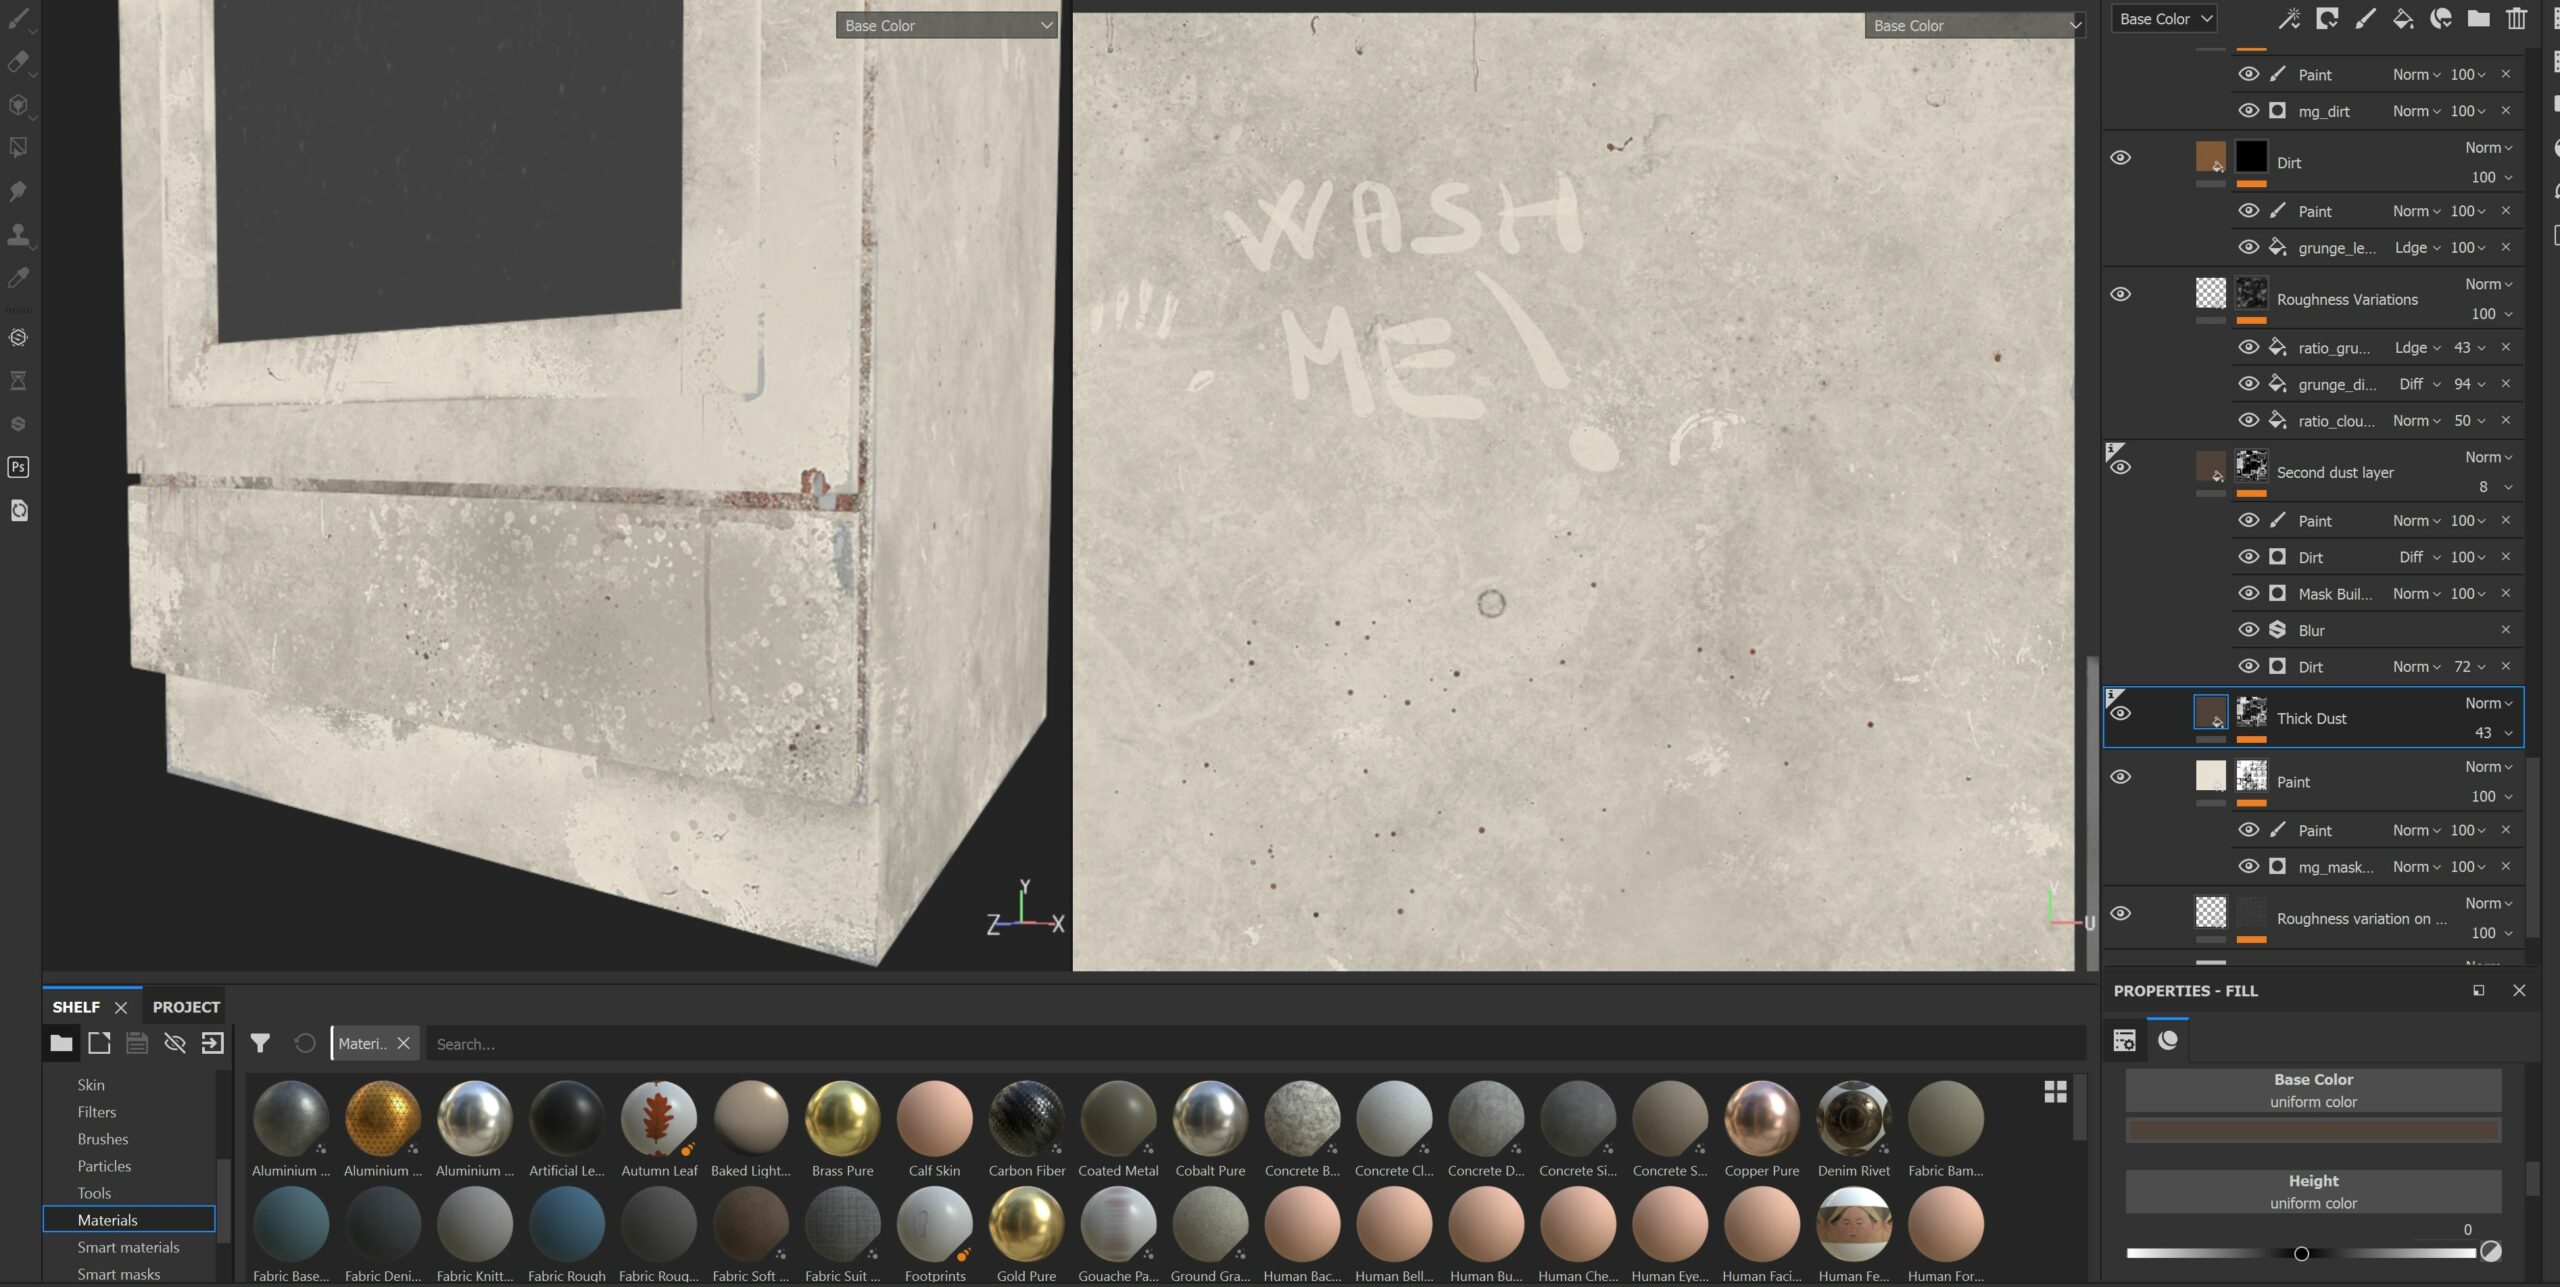
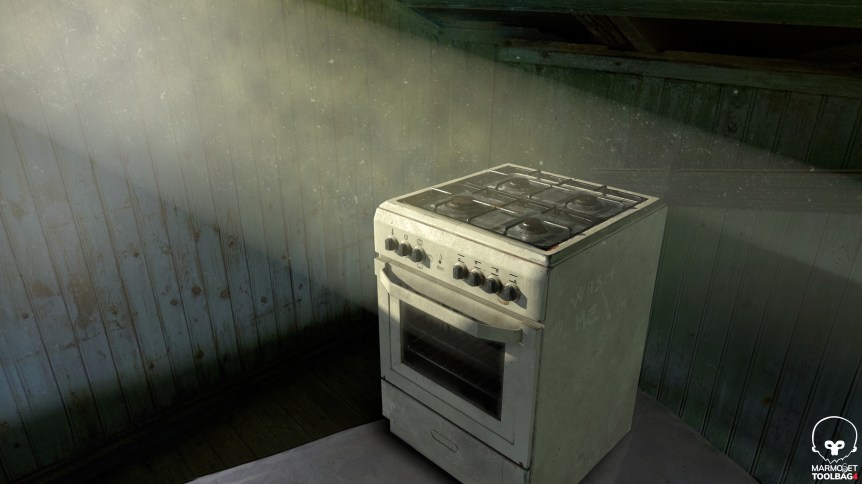
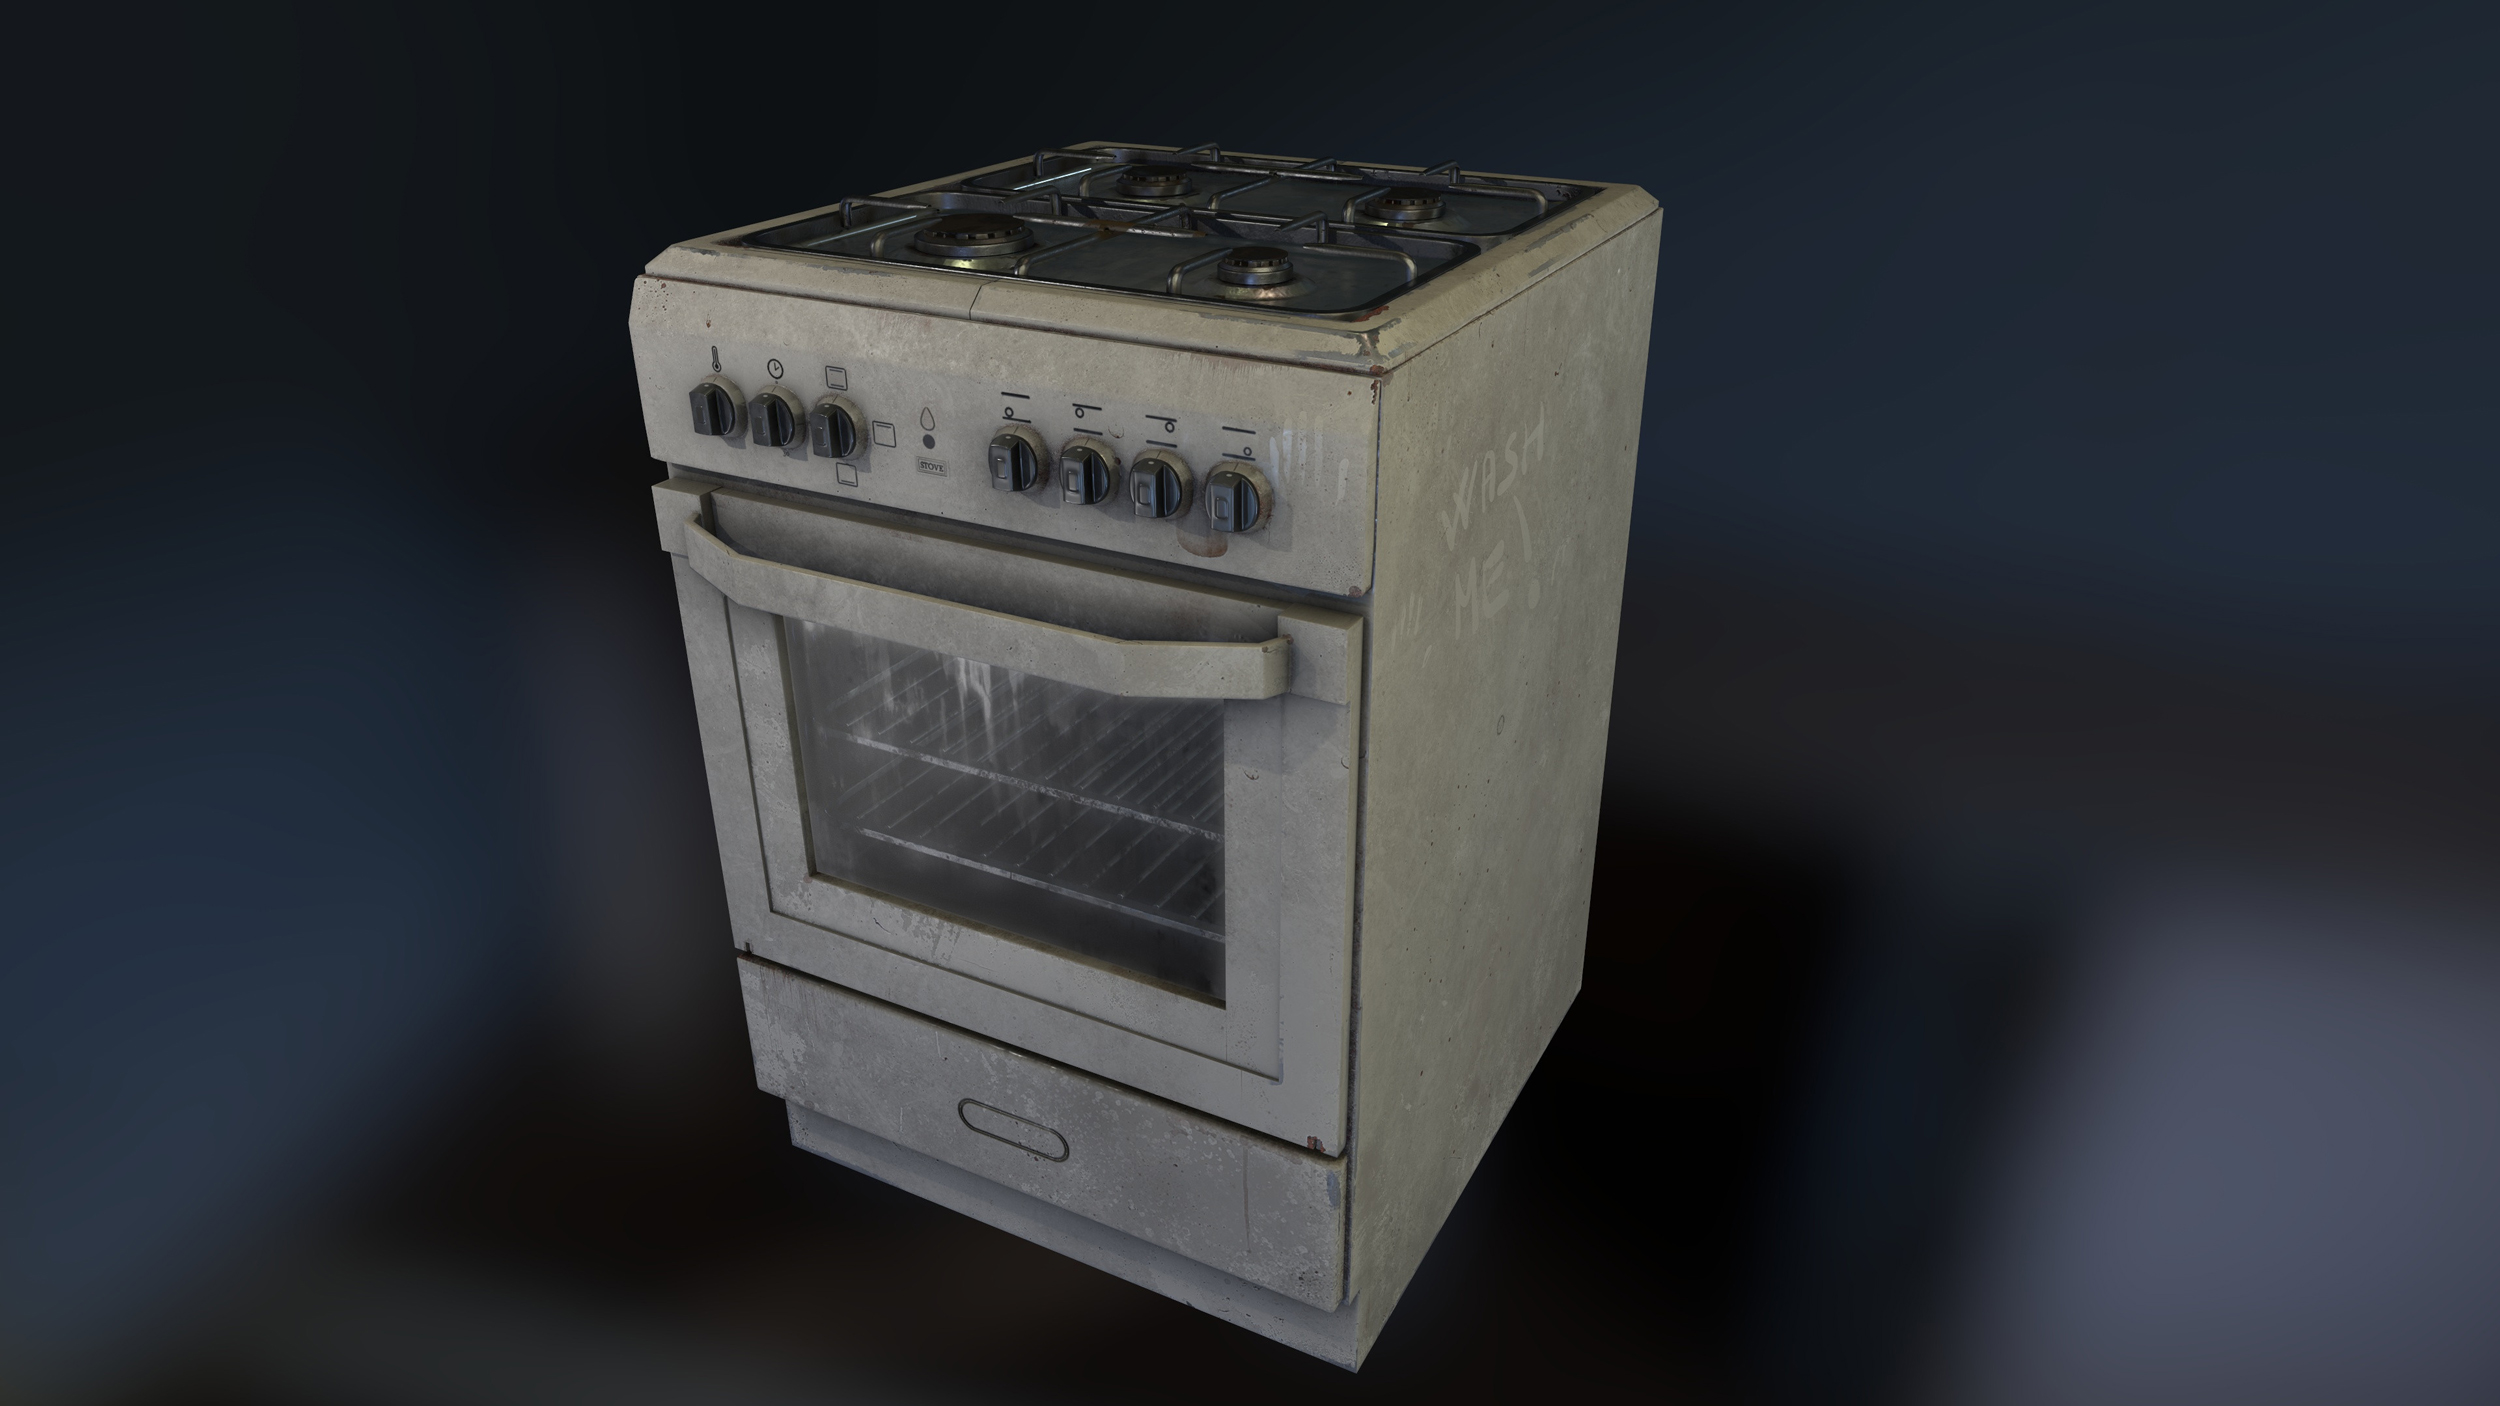
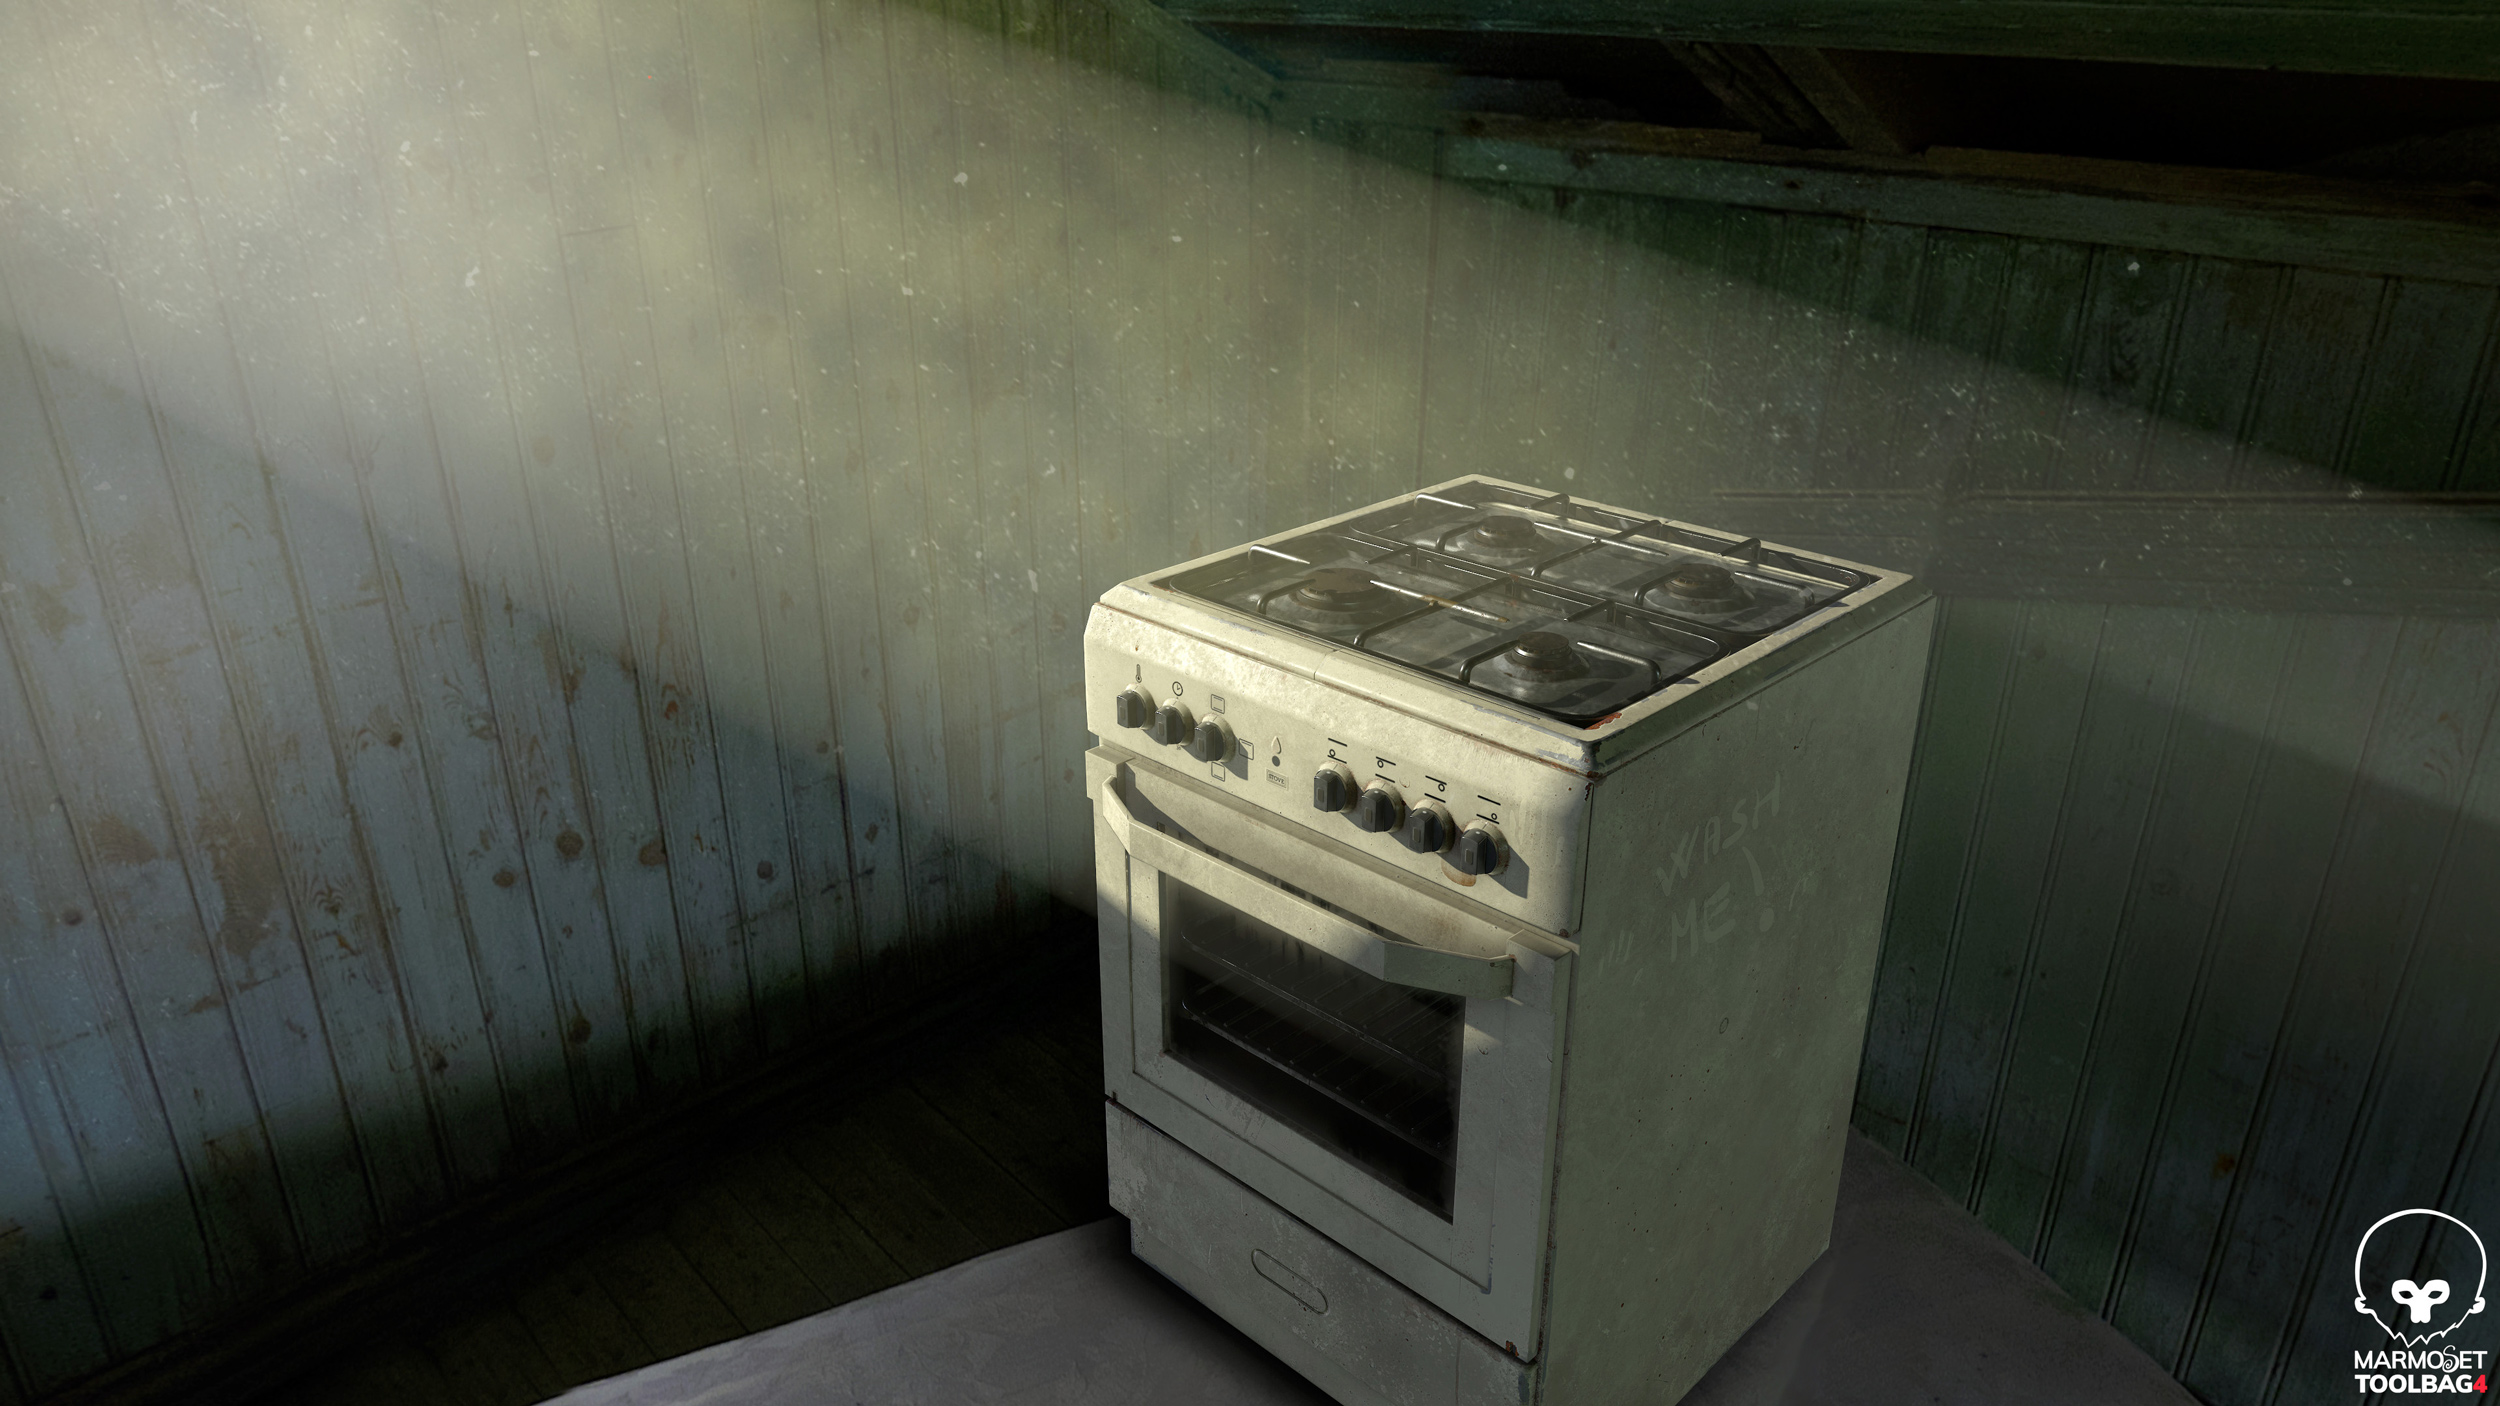
A last detail involves the hand made writing “Wash me!” on the surface. It’s good to create a message which reinforces the state of an object and remarks the fact that an appliance is dirty and needs cleaning. (To see the turntable of this version of the stove, I again invite you to follow the link to my Artstation page.)
Finally, I also decided to integrate this 3D stove in an environment with a volumetric light.
Let’s Clean Things Up!
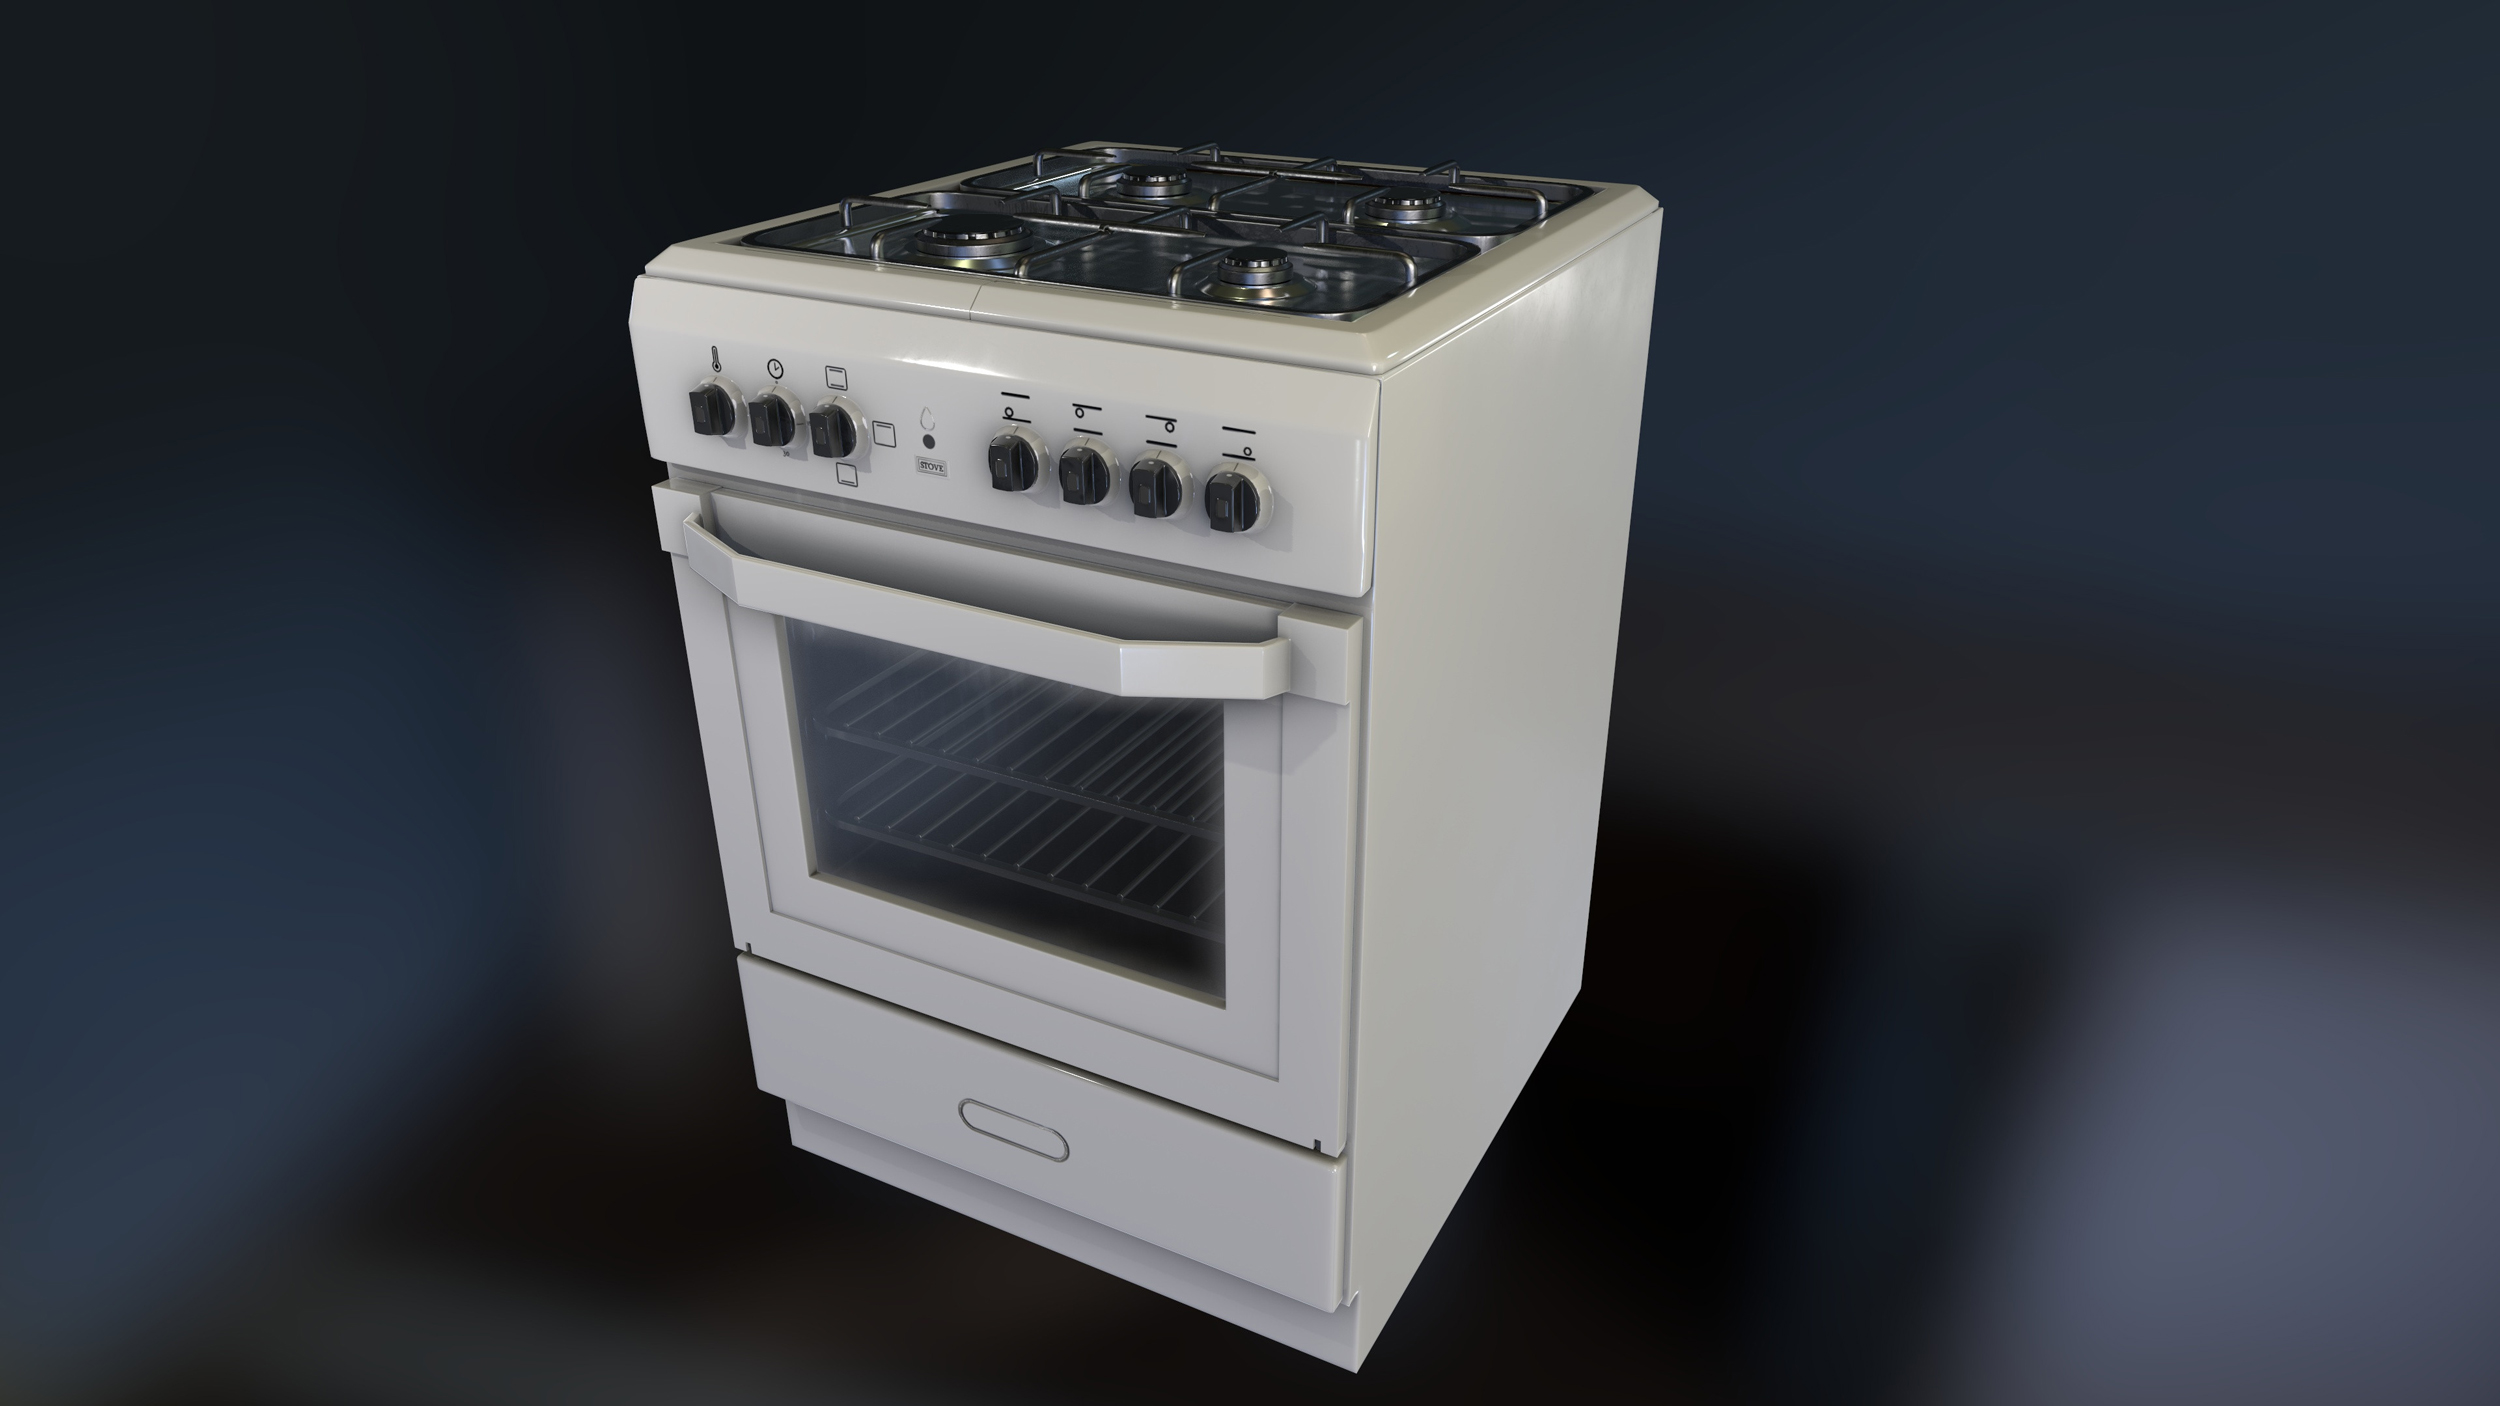
Let’s step back in time for awhile, and here we find a brand new stove, just out of the box! No dirt, stains, or other materials telling its story.
A common thought is to associate the word “brand new” to the complete absence of defects like small scratches, and that’s correct to some extent. Nonetheless, as texture artists, we are used to looking for micro details and those are always present and vary on a surface, even though the product is new.
From the manufacturing process, the surface undergoes treatments which are barely visbile to the naked eye but they change the roughness details anyway.
That is to say, we cannot leave the roughness as a solid grayscale color, but it’s better to introduce some small variations here and there.
That’s exactly what I did for this version.
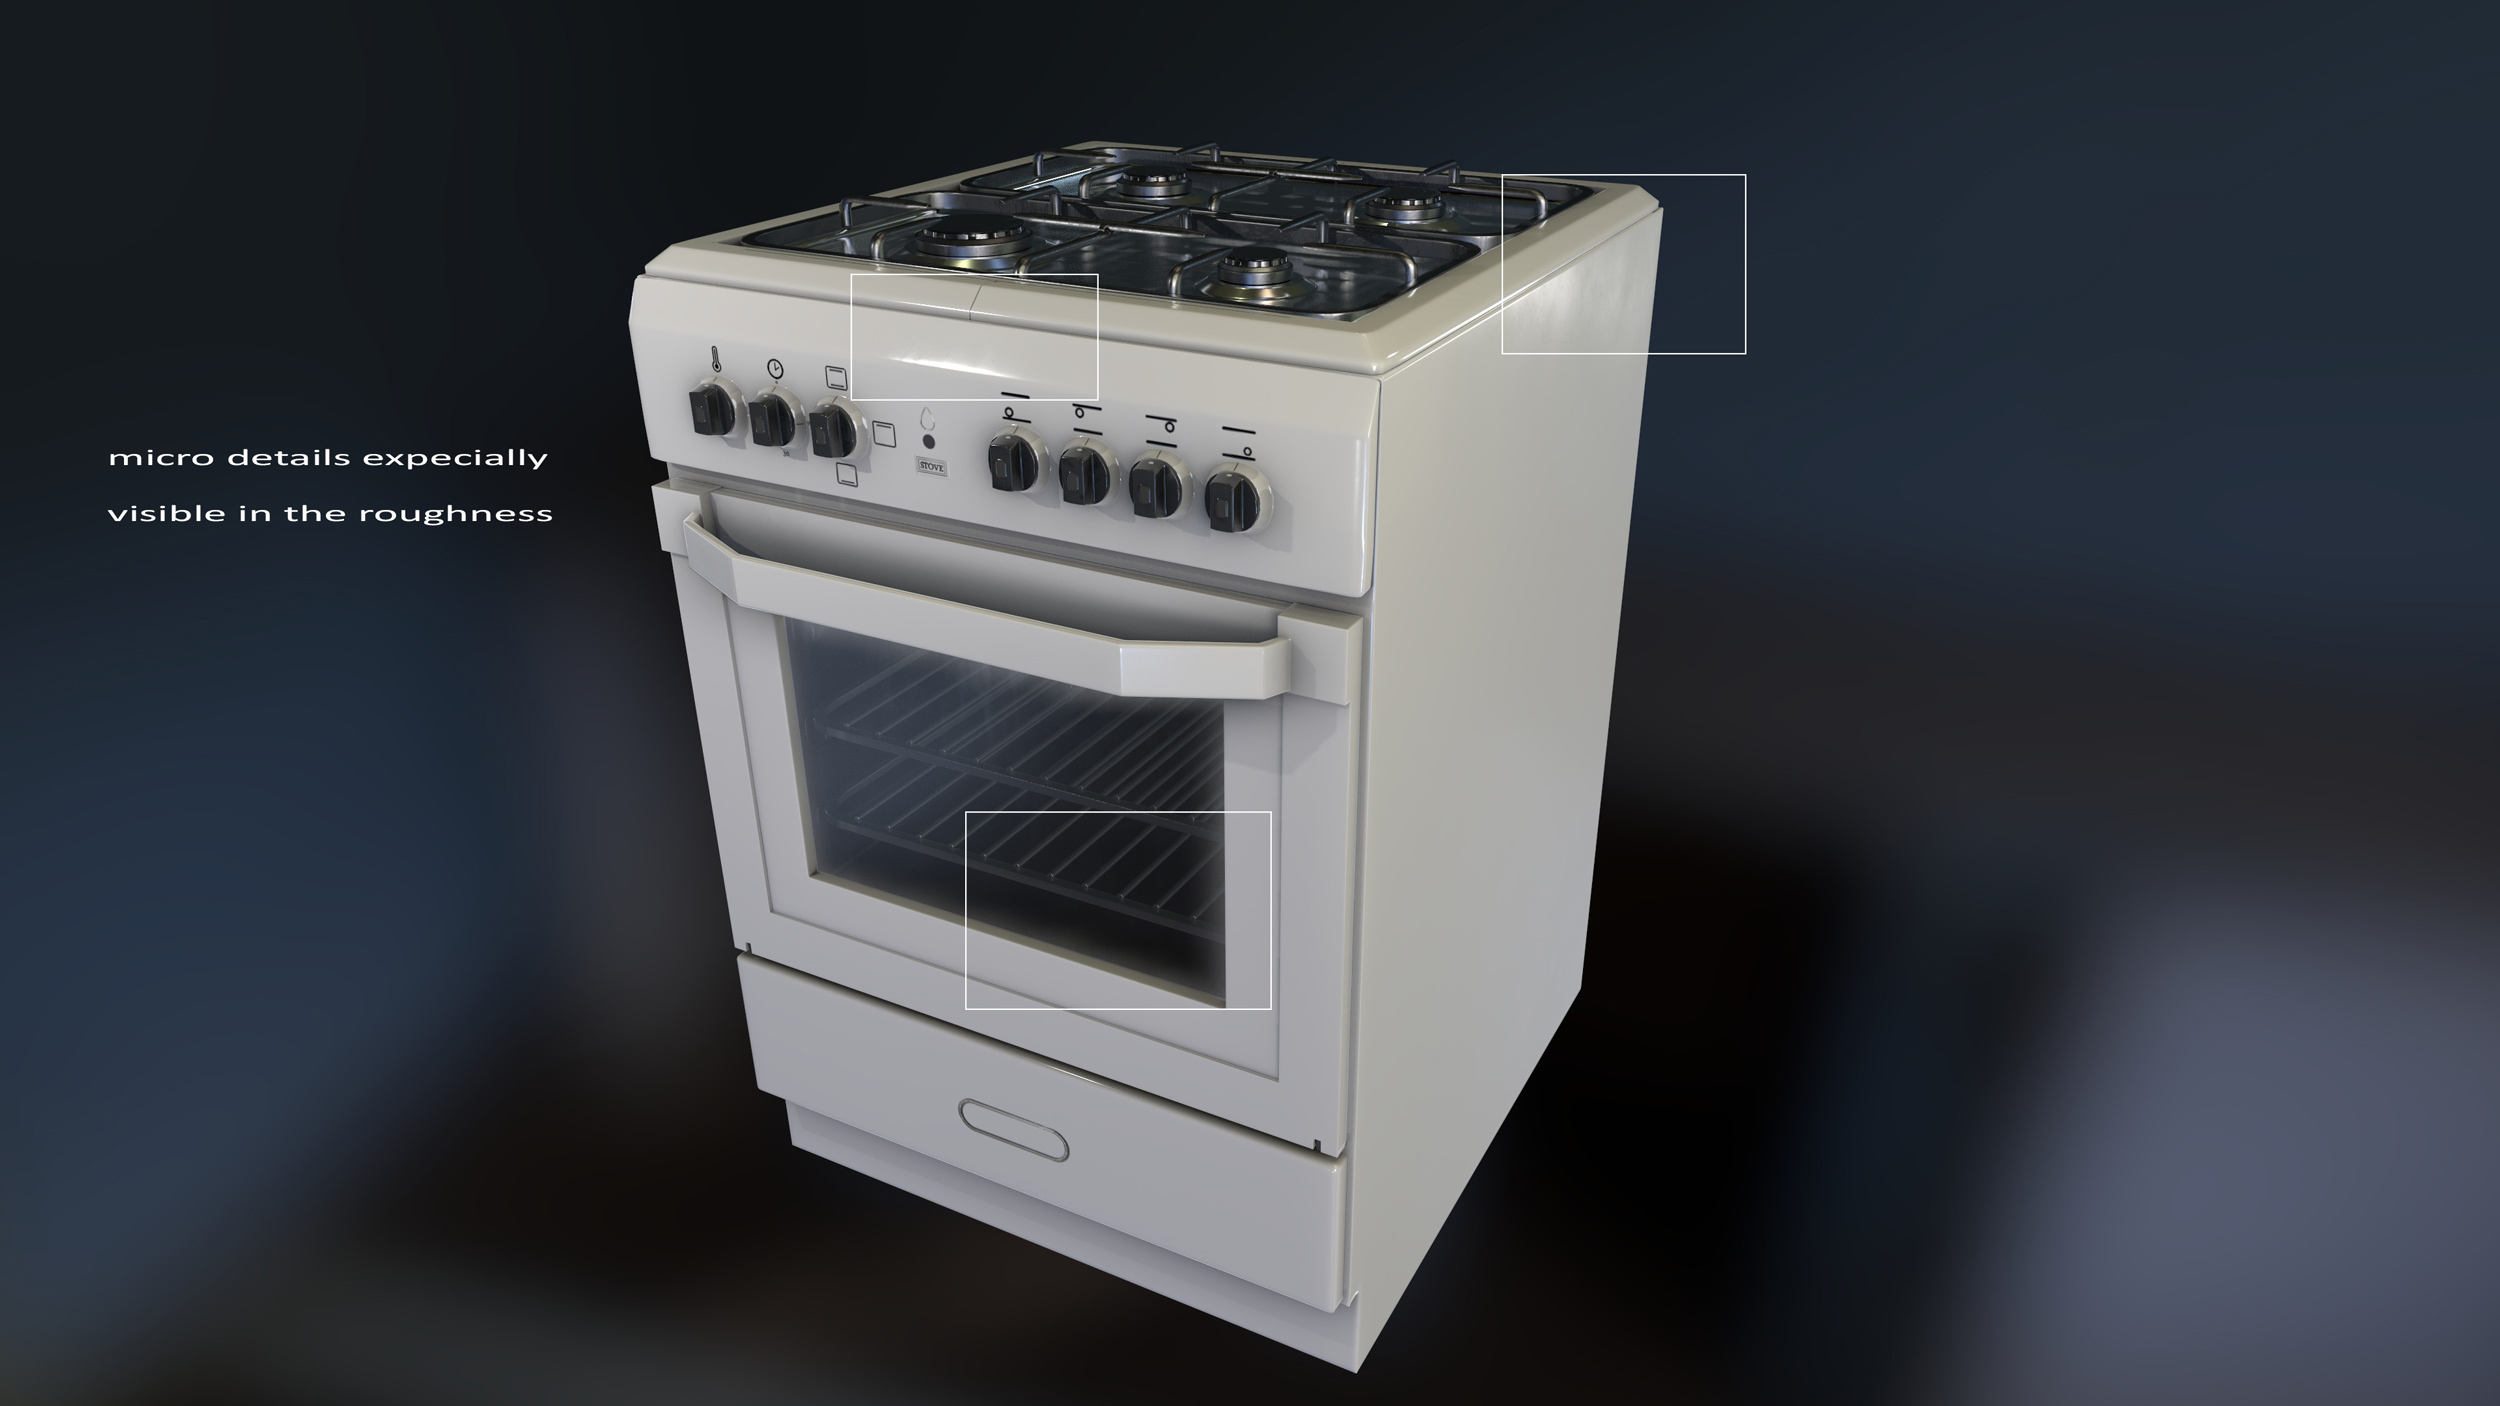
In the previous image, you can simply notice that the roughness still has some small variations on the surface.
Materials are not perfect in nature, even if they are manufactured. The roughness can be subtle like in the following situation
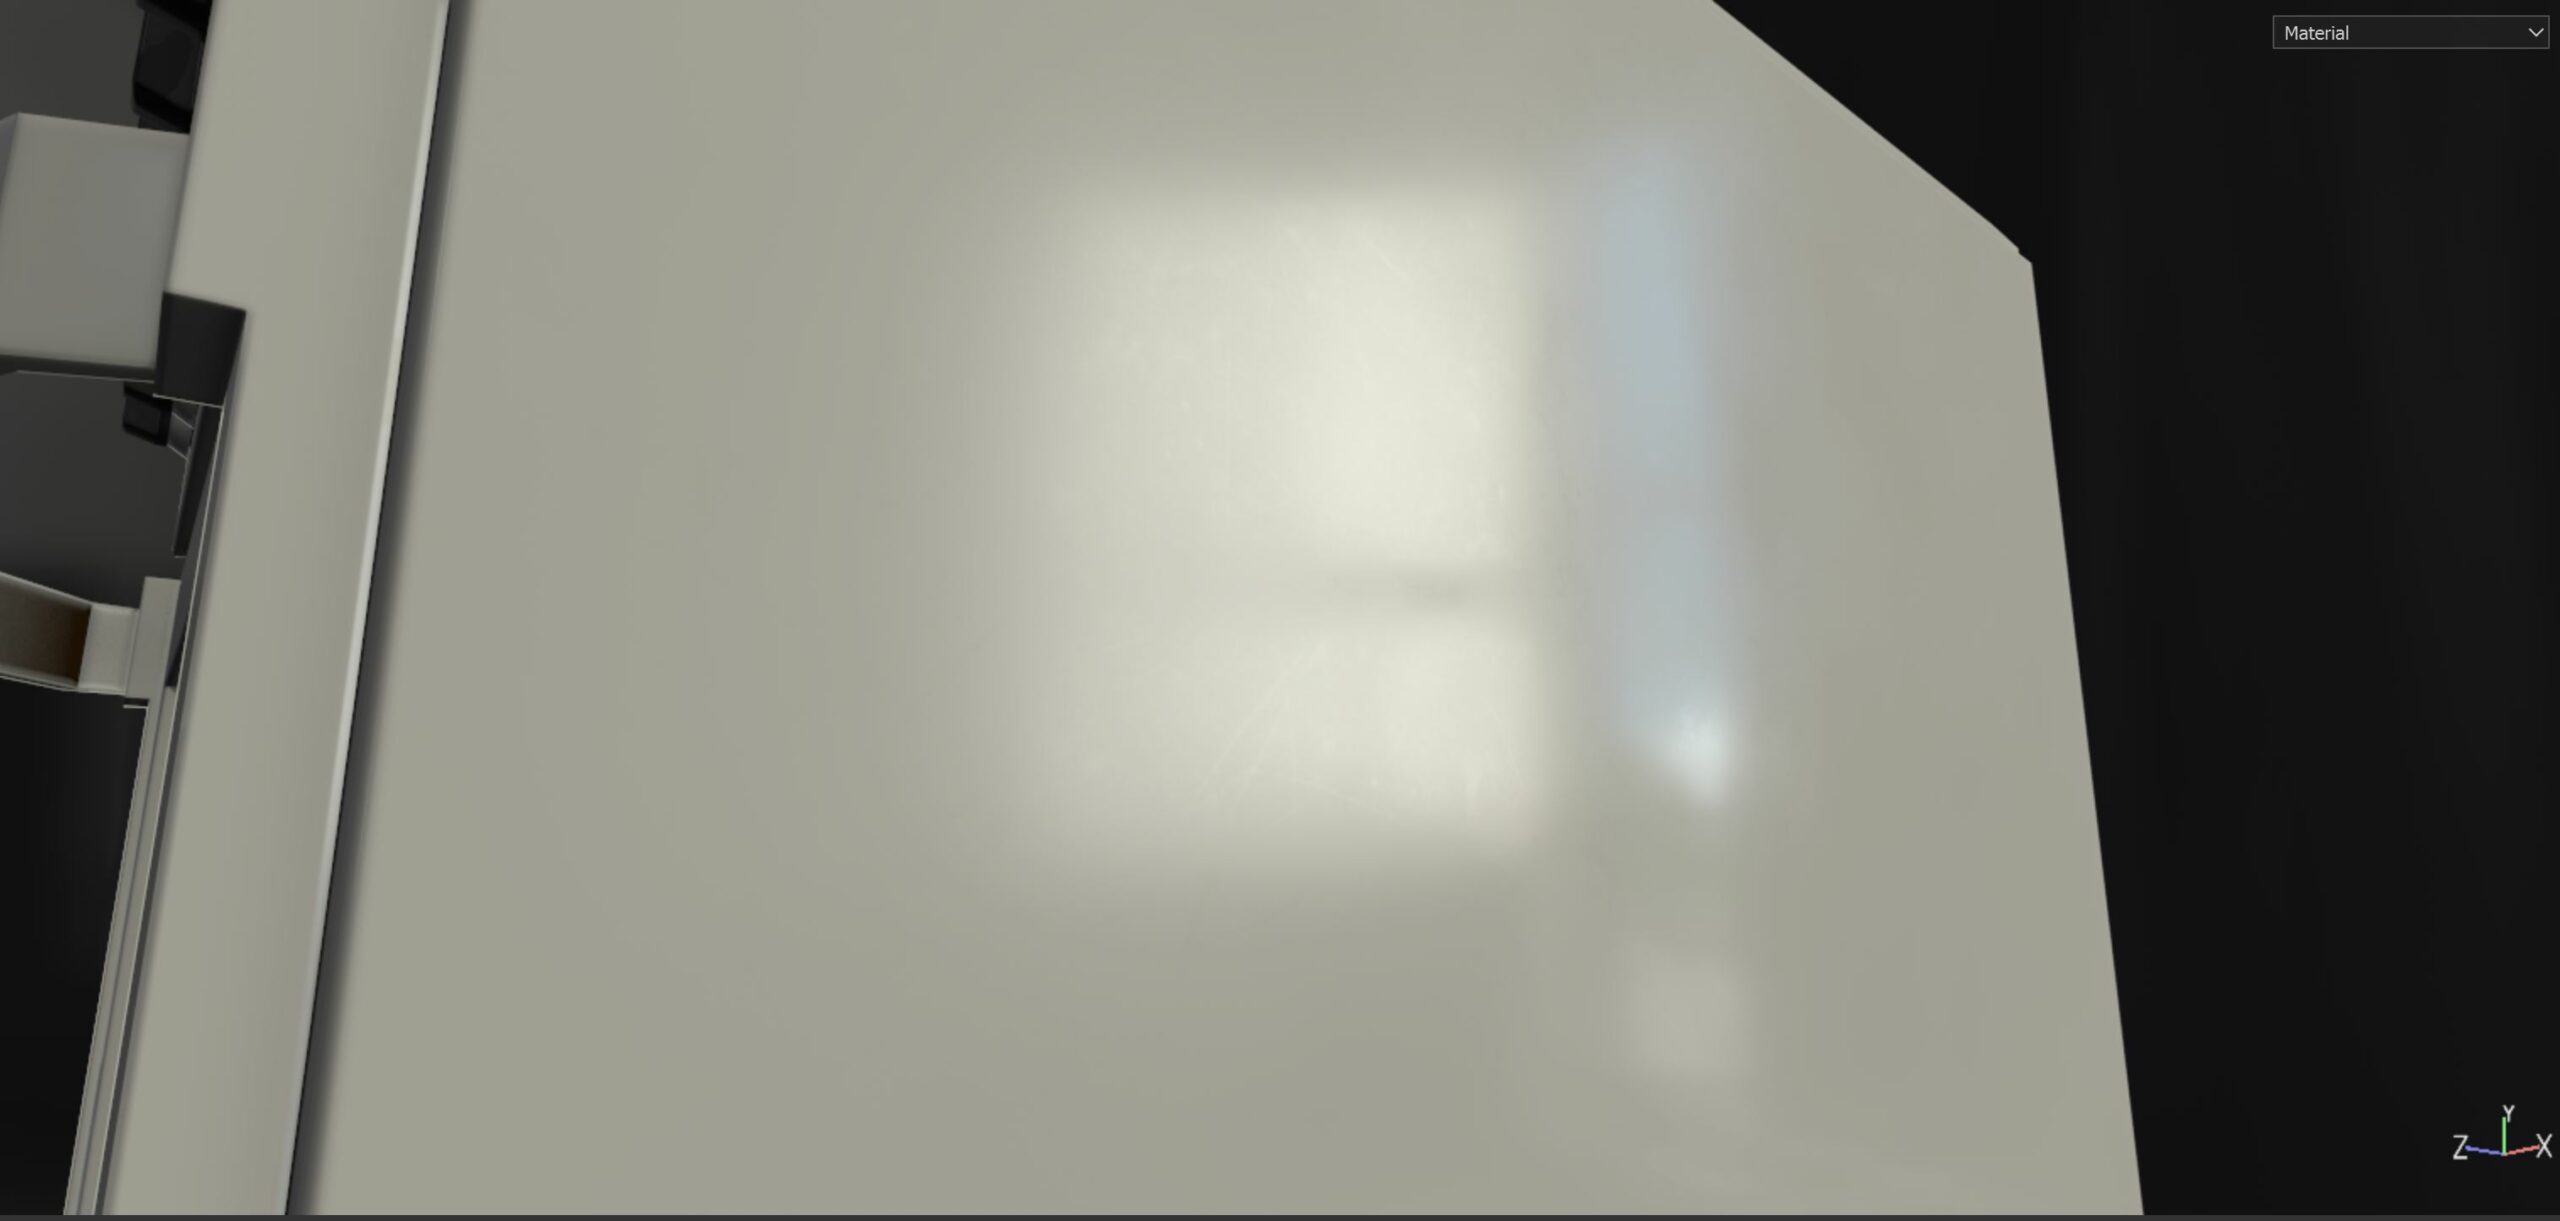
By observing brand new props, I must admit that the roughness map is affected more than any other map, like the base color. However, the base color might also have some small variations. The choice is ultimately up to you. Just remember that any material in nature, although apparently defect-free, is never perfect but always shows some small imperfections.
Conclusions
This part brings us to the conclusion of the article.
A few bits of advice for your next project:
- Choose a common asset you can directly observe in nature, in order to study its material in depth.
- Use specialized software like Substance Painter which makes the texturing easier.
- Don’t be afraid of trying new materials as well as creating new complex layers: Painter uses a non destructive workflow!
- Paint and create the details in the most accurate way. If you fail at the beginning, remember that you learn by your mistakes… and references are always your friends!
- Tell the story of your asset by considering its age, the weather conditions it has been exposed to, or by adding awesome and justified details (e.g. fingerprints)
- Don’t underestimate the apparent simplicity in the creation of a brand new product. Materials have always tiny imperfections on clean surfaces and your maps should take that into account
Thanks for taking the time to read my article and I really hope you can take advantage of my tips for your next work!
My name is Francesco Furneri and I’m a 3D artist with more than 10 years experience in 3D Computer Graphics. I specialize in 3D Modeling and Texturing and have worked for 3D companies as a modeler, technical artist, and texturing expert. I also freelance in the States, creating organic 3D models of characters and prop textures. Check out my Artstation page, and feel free to contact me.