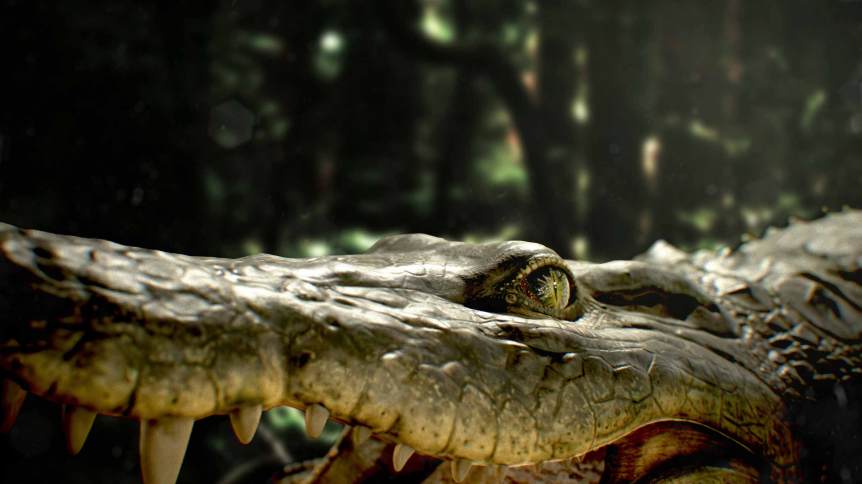
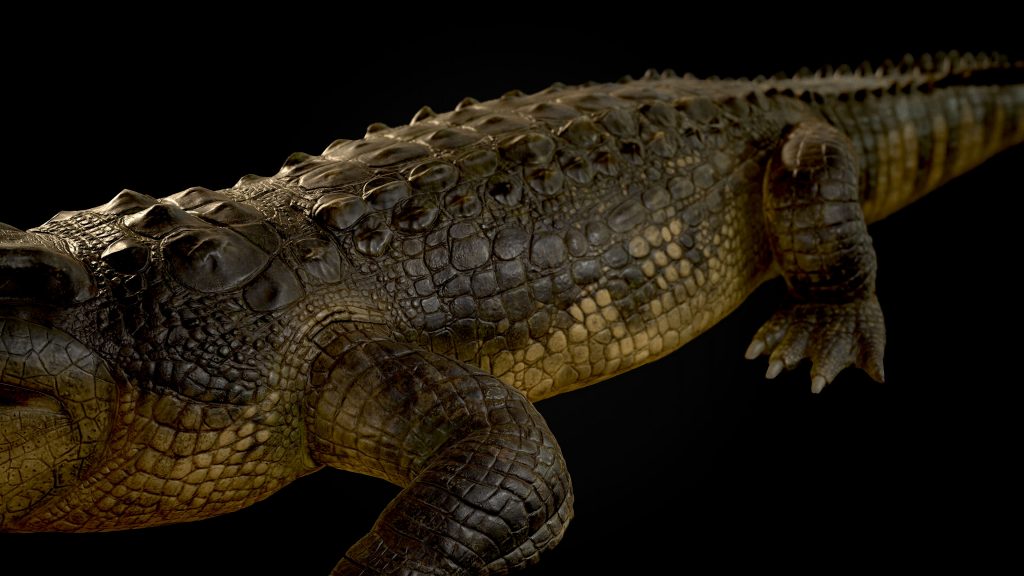
Have you seen our newest homepage image? It was created by TurboSquid Modeler Francesco Furneri, an expert in designing details that bring his 3D models to life. Having previously published a guest article on this blog on creating procedural rock details, he recently sent us his newest tutorial to share with our artists and customers. In part one of this two-part tutorial, Francesco dives deep into the details of his latest project, The Crocodile, which is now available for purchase on TurboSquid.
Hi there, my name is Francesco Furneri and I’m a 3D artist with more than 10 years experience in 3D Computer Graphics with a specialty in 3D Modeling and Texturing. I have worked for 3D companies as a modeler, technical artist, and texture specialist. I am also a freelancer in the States, creating 3D organic modeling for characters and props texturing.
I created a two-part tutorial for my latest model, the Crocodile Project.
In part one, I’d like to share the work that I did in Substance Painter, which is the result of materials and texture maps that you see in my renders. I want to thank TurboSquid for giving me the opportunity to share this article with you and I really hope that you find this description useful for your ongoing projects.
Introduction
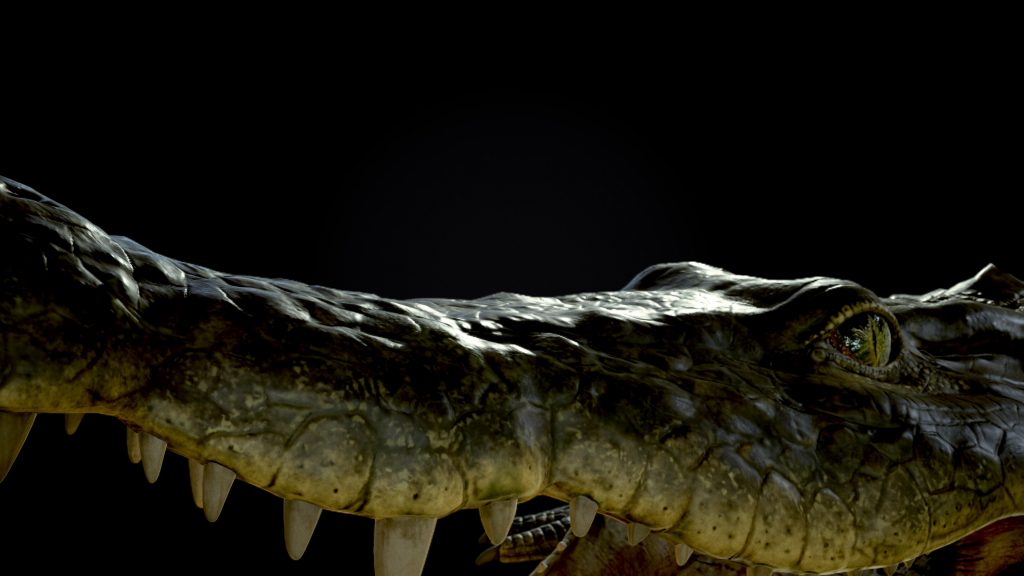
The project was born with the idea to model a 3D crocodile (in particular a Crocodylus porosus), with an organic look and all the proper features of that species.
I wanted to model the crocodile from scratch, starting inside of Maya and creating all the micro details in Zbrush. The model has been rigged to be animated in Autodesk Maya. I posted a video tutorial where I explain the rig features, but I won’t be talking about the modeling or the sculpting in this article, as they are quite standard steps. Instead, I will explain how I deepened the texturing and offer some useful tips for you to do the same.
Substance Painter
As many of you already know, Substance Painter is the ultimate 3D material authoring tool. The goal is to create professional textures and materials to be applied to your 3D mesh. In this project, I wanted to leverage the most important features inside of Substance to create cool details on my 3D model.
Why use Substance Painter?
First of all, it’s essential to note the main features that this awesome tool offers:
- A very intuitive approach based on Layers (it is reminiscent of Photoshop) with a non-destructive workflow (that means you can create and edit part of the work without compromising the whole structure). It’s a bit similar to Substance Designer or Houdini in terms of procedural aspects, and some of them, like Substance Designer, are node-based to manage the changes with ease.
- A large set of brushes and particle brushes that react to physics (e.g. varnish pouring down a wall)
- A big library of procedural maps like dirt and grunge maps
- A texture baker, that comes with Substance, with the possibility to generate output and intermediate textures. Intermediate textures will be used during the texturing to improve the quality of the final result. I will be explaining more about that in this article.
- The use of smart masks which detect part of the model according to some baked textures and allowing you to add details there
- The use of materials and smart materials
- Alpha, stencils and other cool features
For time’s sake, I won’t discuss all of these features because this is not a Substance Painter course! I will only detail some aspects I used in my project.
This is the main interface I worked with:
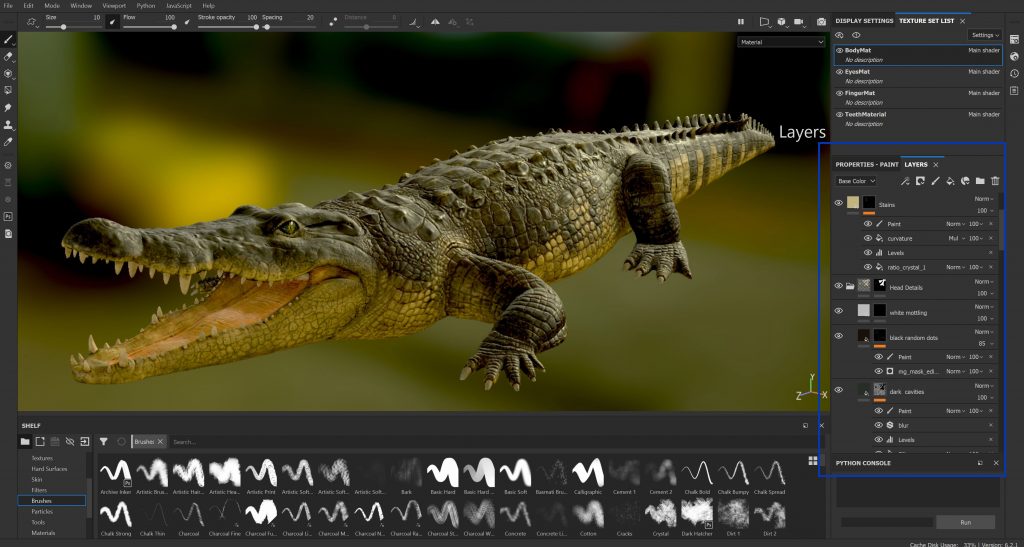
On the right-hand panel (in blue) there is the Layers section, which I’ll describe in a minute.
In my workflow, I usually start off with a Fill Layer and I build up all the color variations on that with a stack of layers.
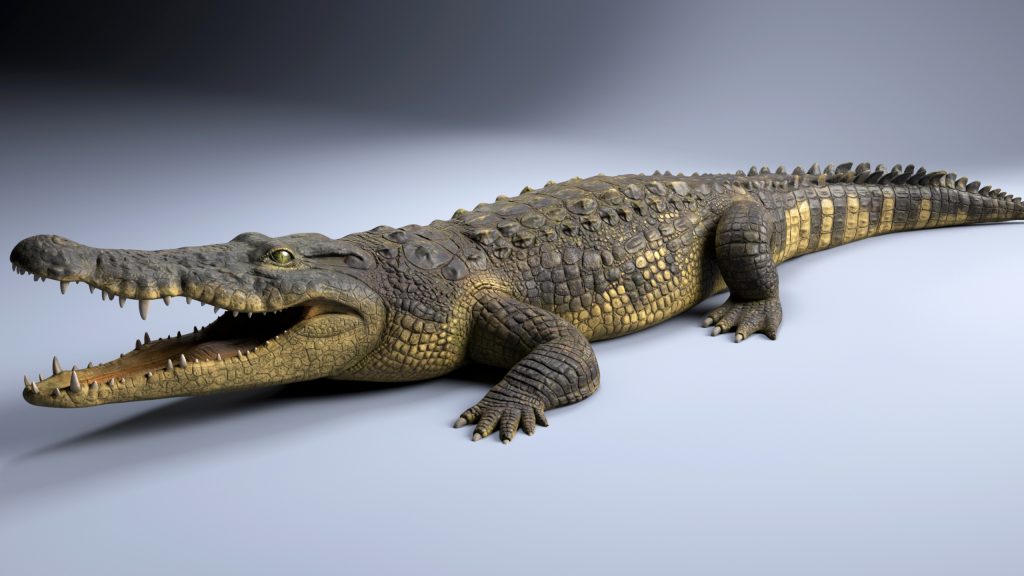
In order to study the crocodile, I took advantage of different photo references by finding some key colors: I used a yellow/brown color (with more saturated variants) to paint the lower part of the body, while I applied cool hues for the upper part, starting with a grey / dark blue, to finally have the results shown in my renders.
Furthermore, I decided to introduce some green shades, especially to add some small details in the concave areas (for instance the result of algae and dirt around the crocodile’s scales).
Then, I chose a very well defined and basic color palette:
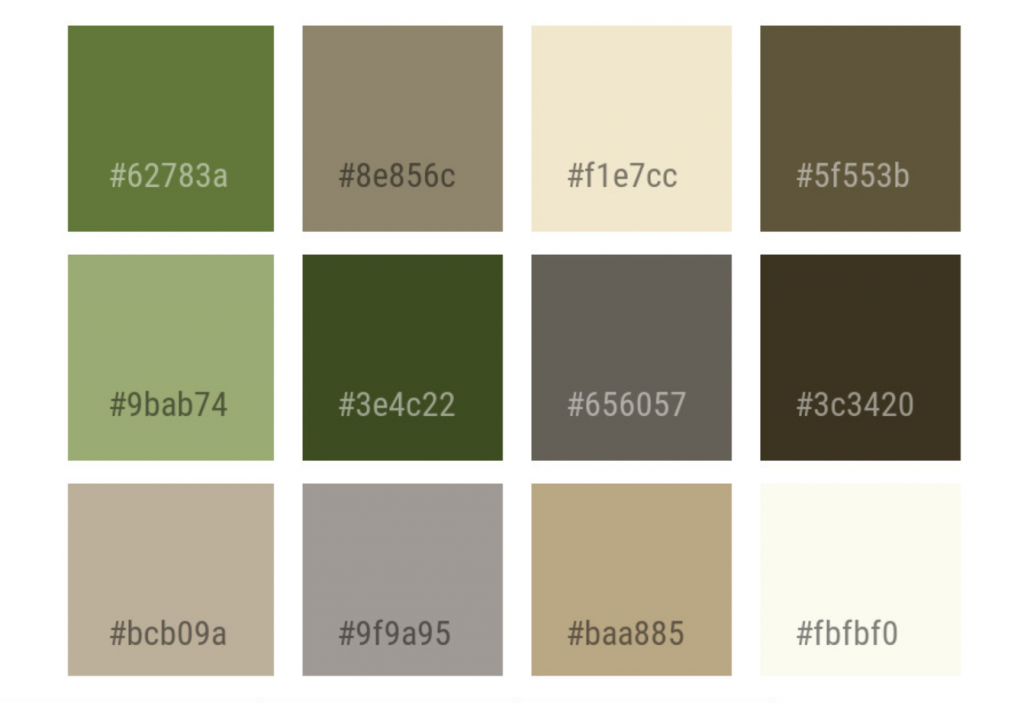
I organized my project in folders:
- Head Details
- Tail Details
- Upper Part
- Yellow Part
- Adjustment Layers at the top of the list to tweak some parts.
Finally, I worked on the roughness map that will be described at the end of this article.
Every folder contains different layers with applied masks, adjustment paint layers to manually paint or modify the mask, etc.
Let’s see what the folders contain.
Exploring the Layers (The Lower Part)
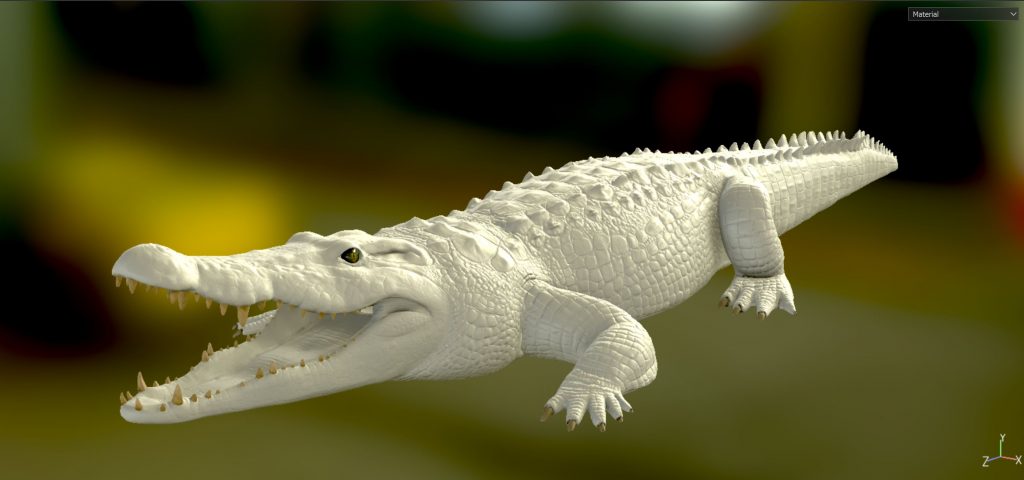
Let’s get started with a clean crocodile, with just a normal map applied, which has been baked in Zbrush. As I said before, Substance Painter is also a texture baker and is responsible for producing useful texture maps. This entire process is called texture baking.
Before talking about texturing, the baker creates the following maps:
- Curvature Map: this represents the convex and the concave areas where we can add details (like dirt, for instance)
- Thickness Map: this map measures how thick or thin a part of a mesh is and it’s often used to create some SSS effects (Subsurface scattering)
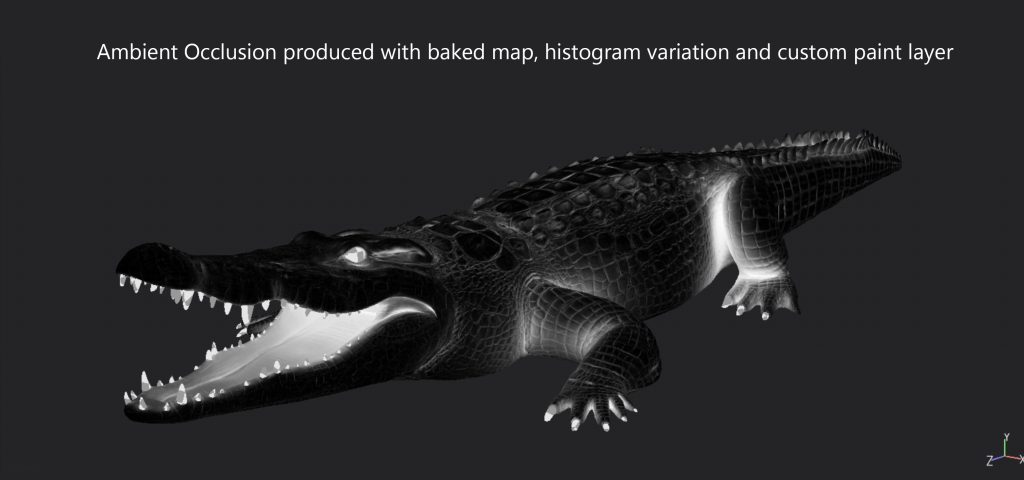
- Ambient Occlusion Map: it creates soft shadows in occluded areas of the model; it’s also used to add details in those parts
- Position Map: a map that stores the vertical position of the mesh (its height from the ground); it is generally used to add details along a specific direction (especially the Y-direction)
If the goals of the previous maps are not so clear at the moment, I’m sure you will understand better in the following part of the article. For now, consider them as Utility Maps that are created to simplify the texturing– for instance, it would be hard to manually select the concave parts of a model; with a Curvature Map, you have them stored and ready to use as masks to add dirt and details in those parts.
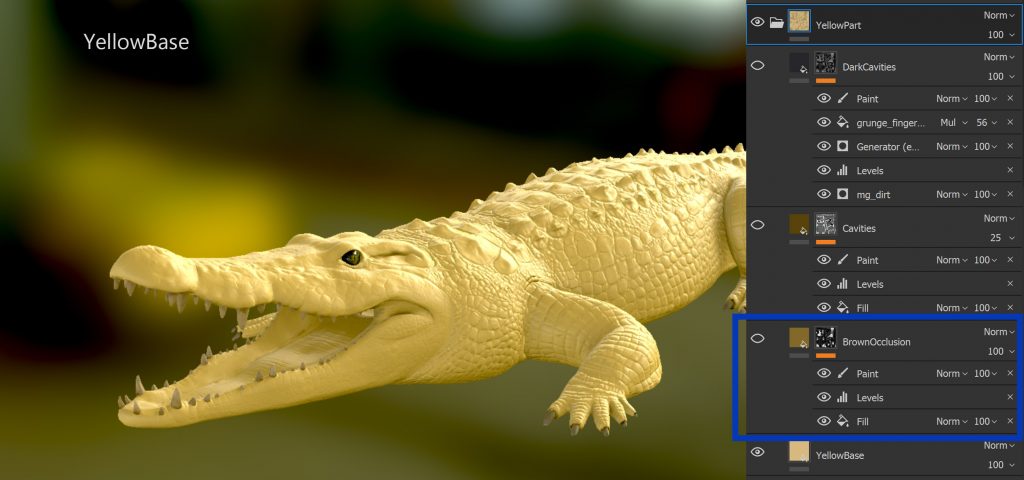
Let’s consider now the folder named Yellow Part.
From the bottom-up, it contains the following layers:
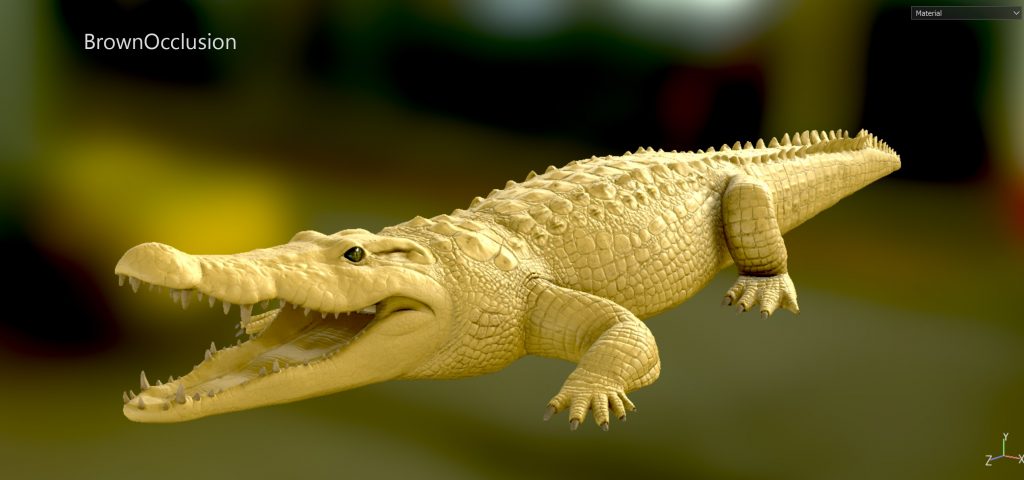
- YellowBase: the base color to apply to the model
- Brown Occlusion: a layer to add details in occluded areas of the model
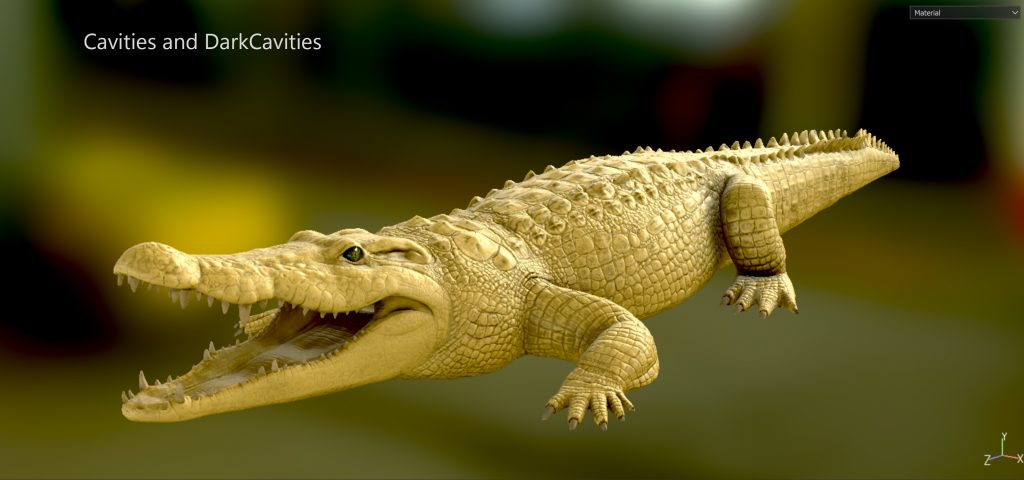
- Cavities: a layer to insert color variations and dirt between a scale and another
- Dark Cavities: a layer to boost the presence of color variations in concave areas and to make the albedo more interesting
Everything is then filtered to create a smooth transition between convex and concave parts.
We now add more layers to have a first result.
Consider that a specific layer may contain sub layers with filters, adjustment paint layers, generators, procedural maps, etc. These effects are applied to create a custom level mask. For instance, the layer called BrownOcclusion (in the following figure), inserts brown hues into occluded areas. As a first step, I load the Ambient Occlusion Map which is shown beside the color slot and is associated with the sub layer Fill, then I add an effect to modify the histogram of the mask (Levels), and, finally, I apply a Paint Layer to manually paint my custom mask.
It should be clear how the BrownOcclusion layer works with the Ambient Occlusion mask and the sub layers. I choose the brown color and I reveal it in the brighter areas of the mask. The mask is the result of the baked AO, with a histogram effect and with a manual painting.
In the dark areas of the mask, the color from the below YellowBase is used: as blending mode I used Normal, which is simply an alpha blending (like in Photoshop).
Tip: Always consider the layers from bottom up.
To sum up, adding details in cavities (e.g., Cavities Layer) follows a similar approach: we start from a base color, and we add a Curvature Map as layer mask. The mask is then modified by filters, histograms, and generators in order to produce a custom one. At the end, the bright areas take the current color of the layer, while the dark parts blend with the layers below, according to the applied blending mode.
Just for the record, the generators change the appearance of a mask by analyzing our baked maps. The interface has sliders to set the influence of each of the maps to determine the final look of the mask.
Instead, the smart masks are similar to generators, but they work for specific purposes (e.g., a dirt occlusion smart mask automatically uses the ambient occlusion to determine the occluded area). On the other hand, the generators work in a more generic way.
You can also use a combination of procedural maps (e.g., grunge maps) to create highly customized level masks.
I wanted to detail the parts between the scales, where typically dirt and other elements are likely to accumulate.
For the other layers, the process involving the texturing is almost the same, but we’ll see some other examples to add details.
Exploring the Layers (The Upper Part)
For the upper part of my model, I looked at different references to decide what details to add.
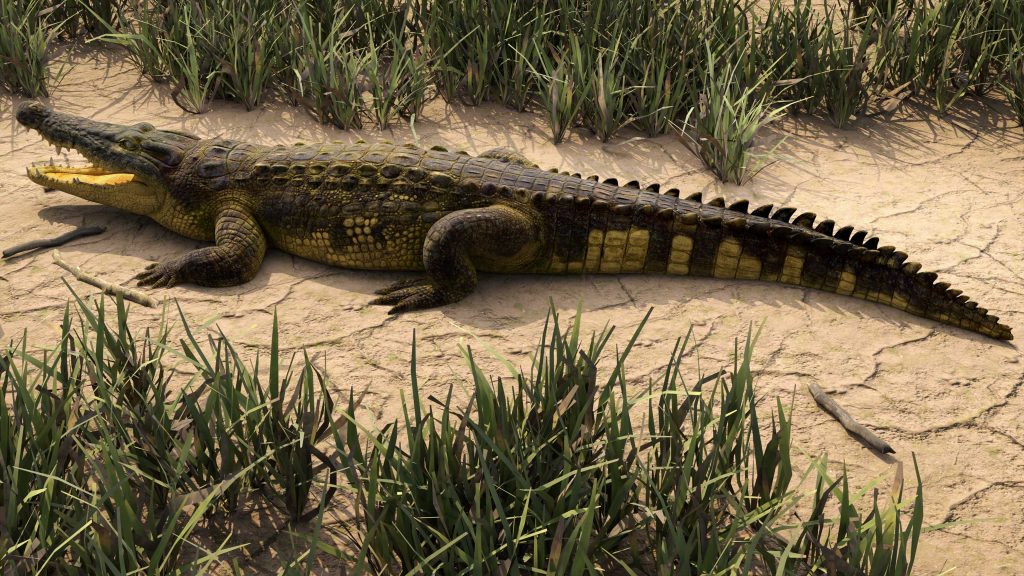
Keep in mind that crocodiles live most of their life in swamps and marshy lands, thus, it’s not difficult to find some residual greeny parts in their body, like the presence of wet leaves, algae, and other natural elements. For that reason, my goal was to add the effect of those elements on some parts of the model, without exaggeration.

You can easily see green residues and other elements on the scales, as well as in other areas (Algae and Dirt in cavities).
On some scales, I decided to create some irregular patterns, giving a breakup with white / creamy color that blends with a dark blue hue (Color Breakup). Furthermore, on other scales, I added a Dotted pattern (e.g., the rear paw) that is one of the features, amongst others, that makes crocodiles different from alligators.
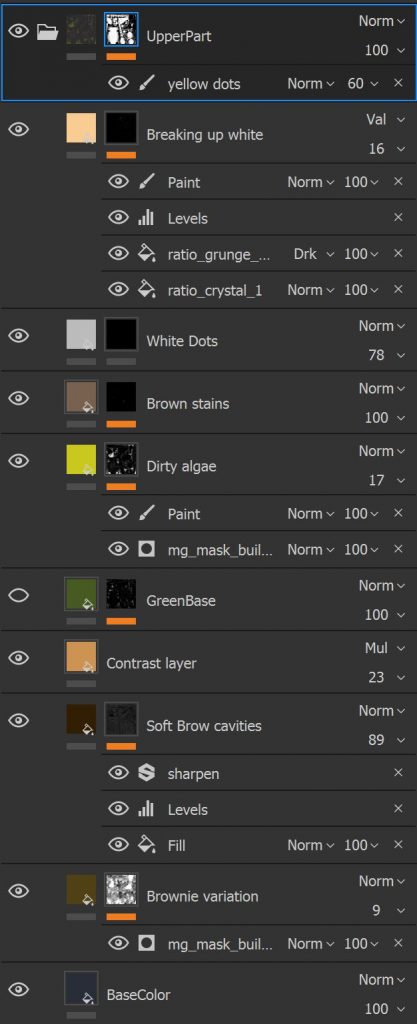
I started off from a BaseColor with a dark blue shade and I added some details in the cavities little by little, in the same way I did before.
Afterward, I added some green parts (e.g. GreenBase, DirtyAlgae) based on custom masks that I’ll show you right now. The white parts of the mask are related to the presence of algae and they are located between scales, in occluded areas, towards the crocodile’s belly, where the model touches the ground.
In general, notice that during the creation of the mask, I used a mix of both procedural maps (grunge, etc.) and adjustment paint layers to manually add or remove some parts.
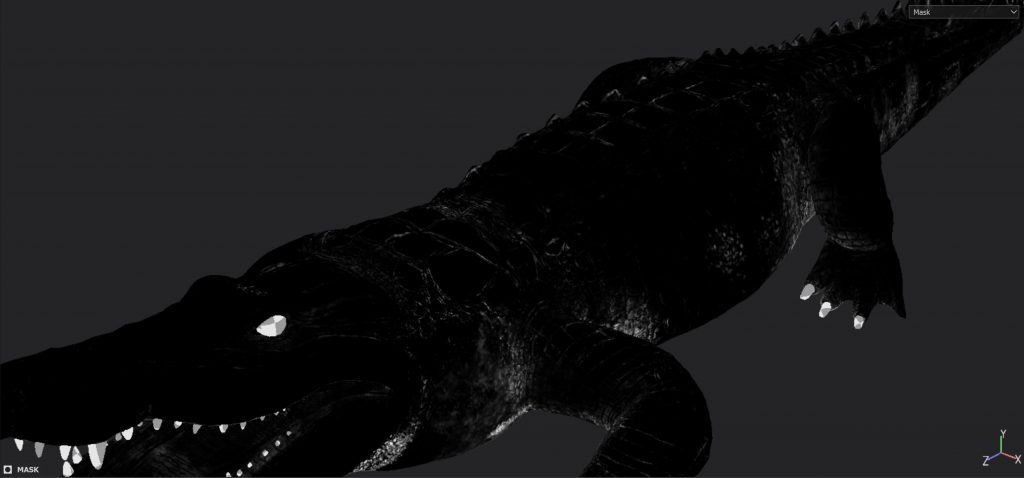
About the White Dots and irregular shapes: I used brushes with a more organic look to break up the base color. The shapes also contain stiggy lines and resemble the mottling pass that artists use for texturing characters.
Bear in mind that texturing is essentially connected with the blending between layers; the use of masks guarantees that one layer is put on top of each other in a smooth and integrated way.
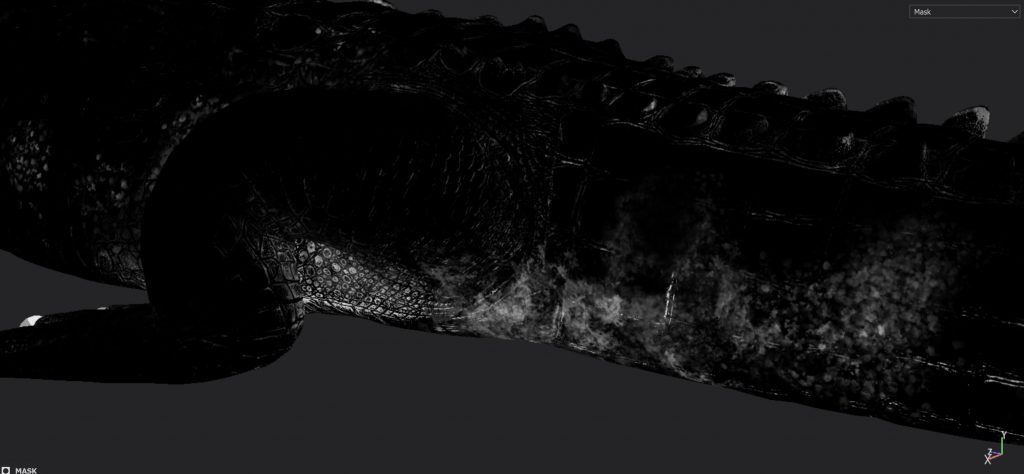
Finally, to add more breakup to the parts (Breaking up white), I created a mask starting from a procedural pattern (ratio_crystal_1), blended with another map (ratio_grunge_map_014). I then modified the histogram and I manually painted the mask with a Paint Layer.
The pattern evokes the presence of pale patches, which are visible in some crocodilian species.
Tail Details
The tail approximately follows the same principles explained before: we start with a base color, we add a series of generators, adjustment layers, paint layers, etc., to create custom masks and to overlay the layers properly.
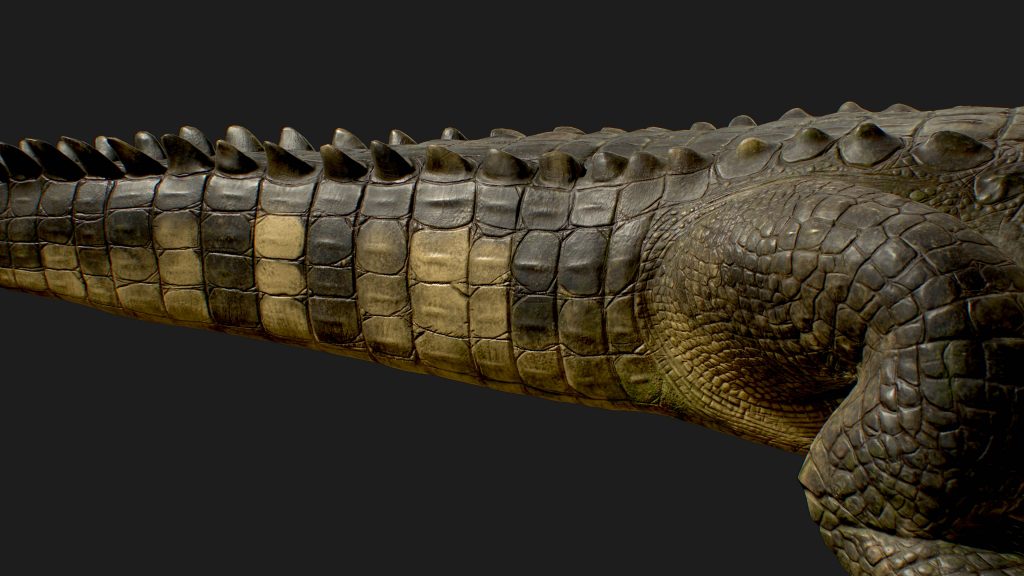
As you can see, I kept the layer called Yellow Part, but I masked some areas out by producing random vertical stripes.
On top of those stripes, I added elements such as dirt, some green color (to evoke the algae), and I generally emphasized the separation between scales by adding a dark color.
If you look at the surface of the some scales, you can notice the dirt following a vertical direction, as if it was almost a leaking effect that I observed in real photos.
A word of advice: in addition to collecting photo references, it is necessary to think about creatures– as well as objects in real world– as elements living in an environment, thus, they interact with the nature of that environment. For example, the green and the dirt suggest that my crocodile comes from a swampy territory, in strict contact with a dirty terrain and that makes it more natural and real.
Some artists underestimate those details and they simply start by painting one color on top of each other without a proper observation. If it’s true that the work might be a bit longer, it’s also true that you will get subtle but interesting details at the end of the process.
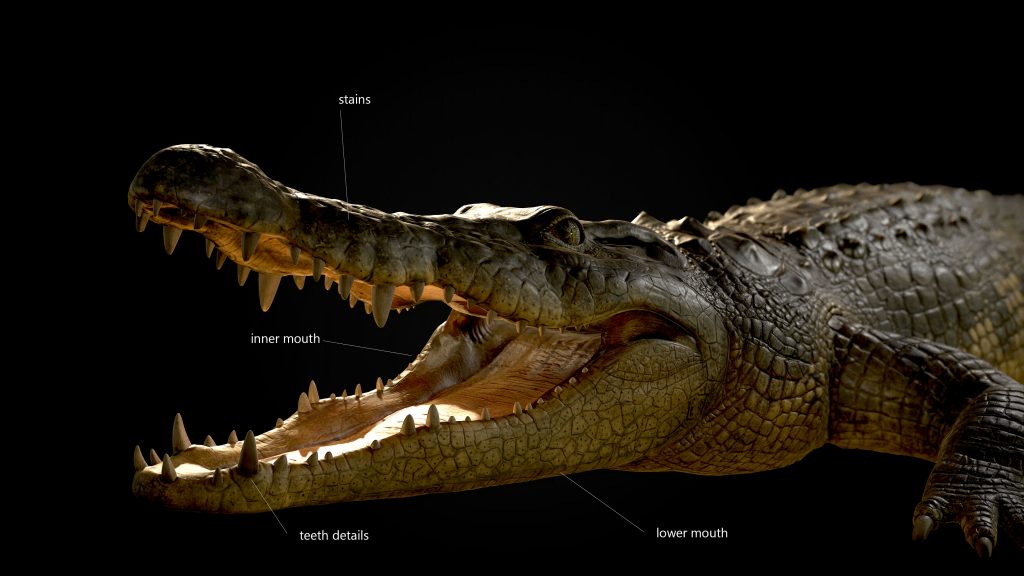
Head Details
The head, like the upper body, was the part that took me some time to complete.
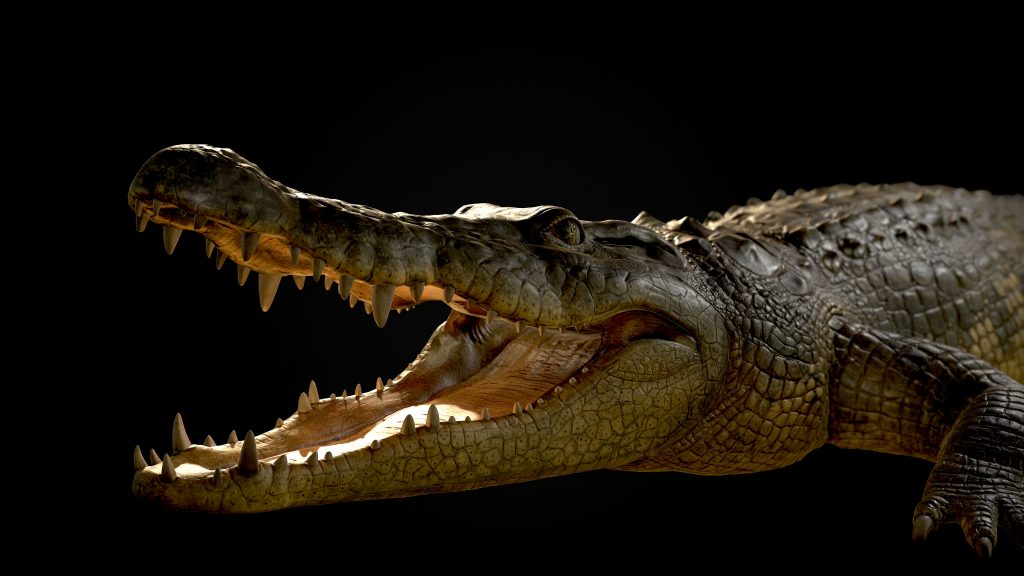
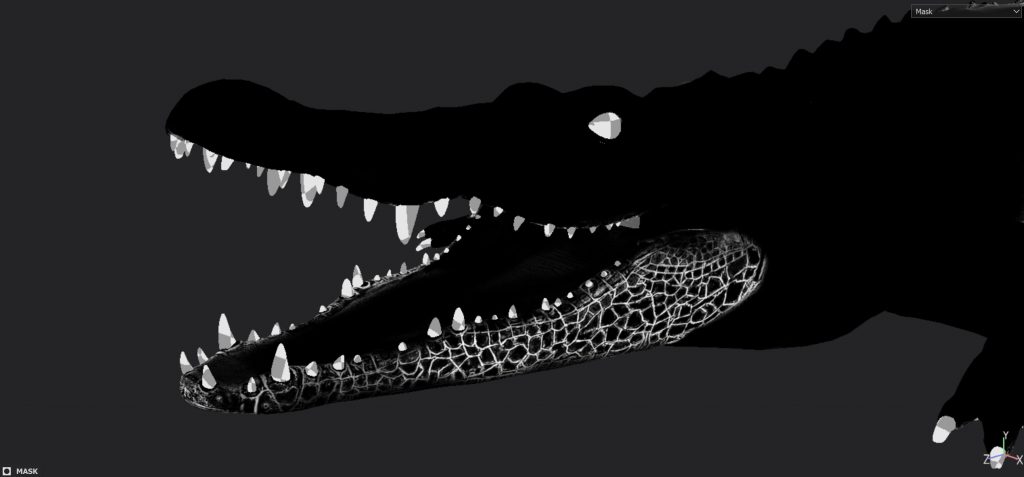
This crocodile has the visible presence of some irregular scales on the lower part of the mouth (starting from the jaw). On that part, there are also black dots and some green elements; I observed that feature in my species (Crocodylus porosus), but not all the species, share the same pattern.
For the lower mouth, here are the levels applied:
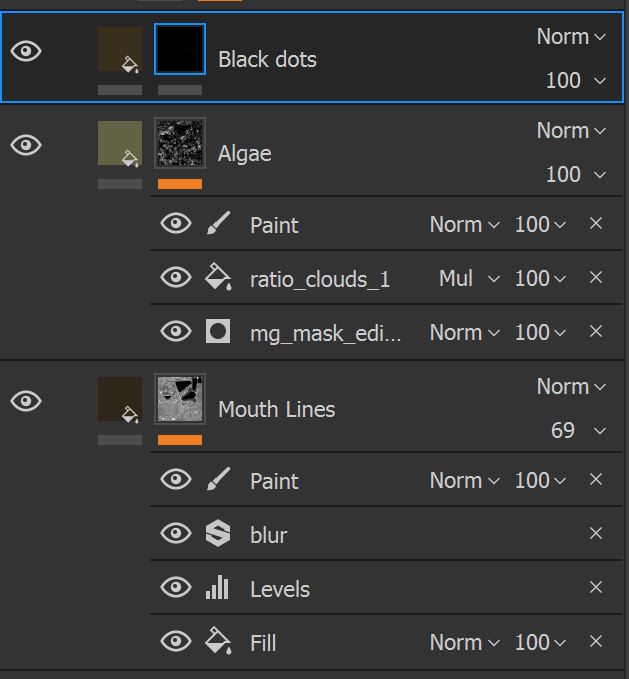
The Mouth Lines layer is created from a Fill Layer with my curvature map. I then add adjustments to my histogram (Levels) to invert the selection and to select the concave parts. I add a blur filter to smooth the mask out.
At the end, I use a Paint layer to manually remove part of the mask, especially on the scale surface. That’s because my curvature map also keeps some areas on the surface, but in this case, I just need the part close to the edge.
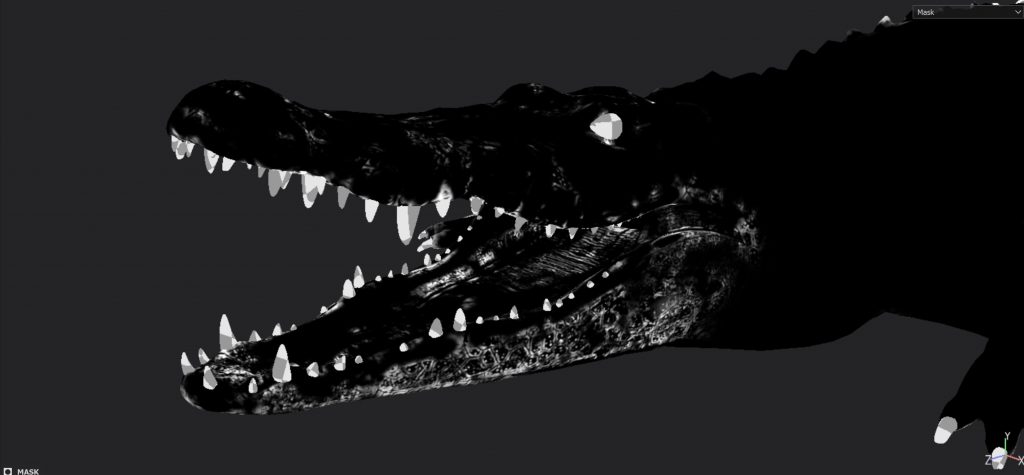
This is my final mask after applying my changes:
The Mouth Lines layer has a brown color.
I also have a layer called Algae that uses generators and procedural map with a cloud look, to detect some areas in the edge and to add some randomness in the distribution with a cloud noise.
To randomize more, I added a Paint Layer on the top of the list to have more control over the part with and without the green color.
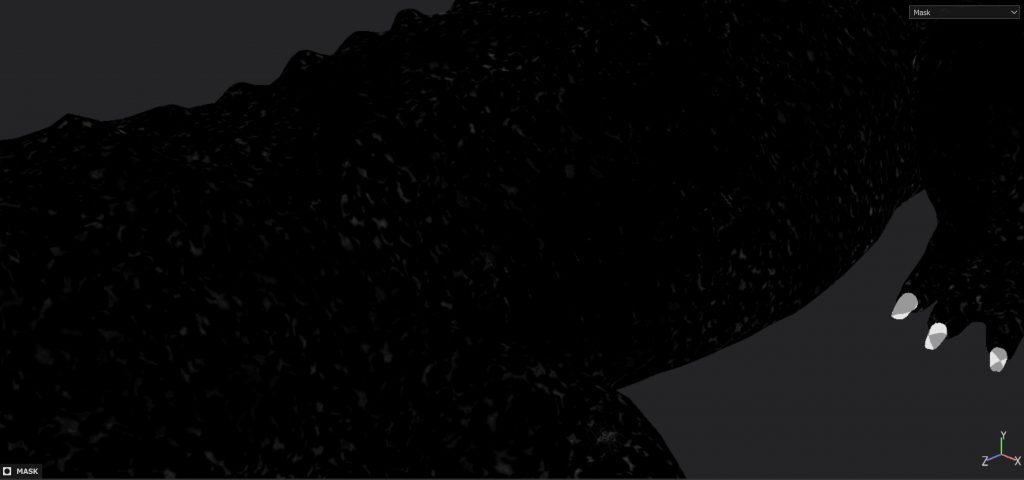
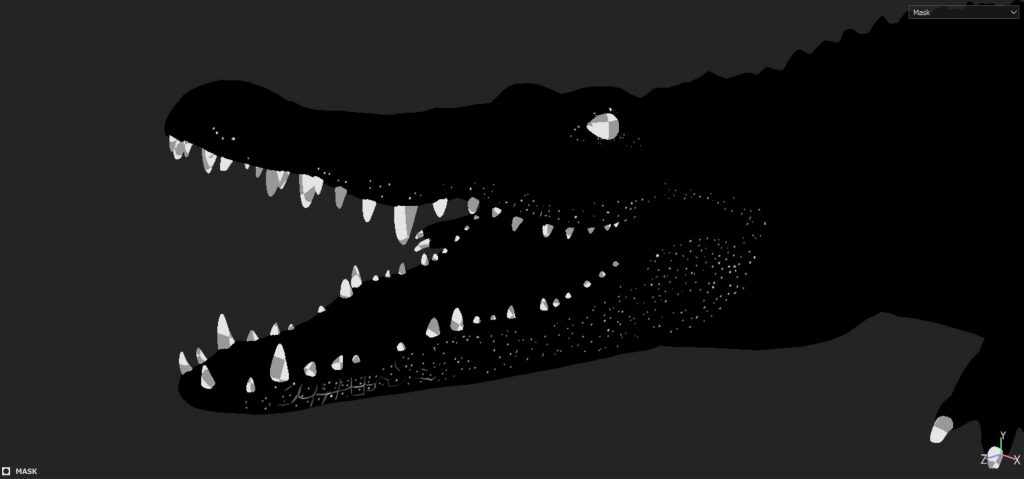
In the last layer, which is the simplest one, called Black dots, I added small dots on the scales. This is achieved by painting dots on the level mask so the white part of the mask reveals the color.
With the Black dots layer, I could have simply used a Paint Layer without adding a mask, because they are just brown dots on a surface.
The reason I didn’t do that is quite simple, as I want to keep a non-destructive workflow. If I ever decided to change the dot color, or to change the roughness value, the use of a mask makes everything very easy. With a simple Paint Layer, that wouldn’t be possible unless you decided to repaint the dots from scratch.
As you see, even for very simple layers, the mask is very powerful.
For the Inner Mouth Details these are the layers:
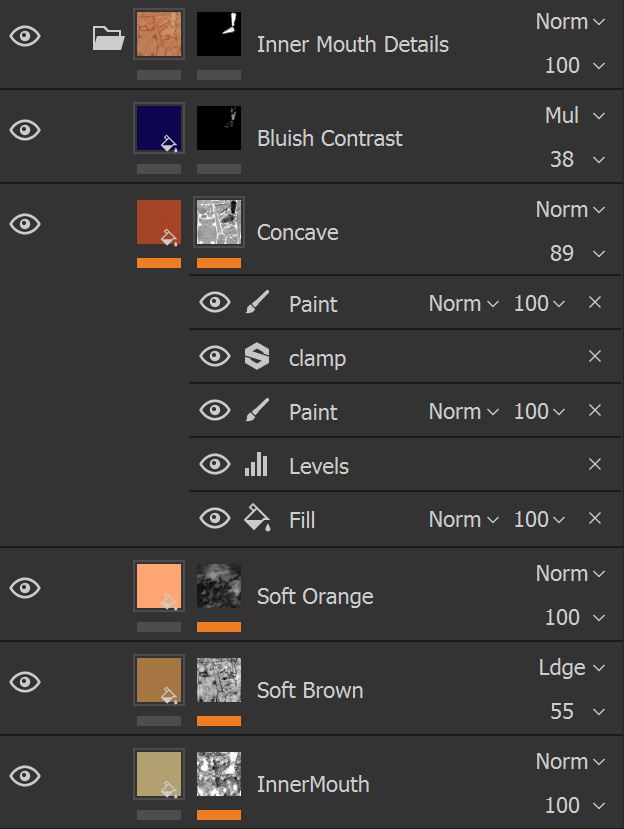
Without going too much into detail, I tried to isolate the mouth with a custom mask.
Generally, the crocodile’s mouth has colors that go from light brown, yellow to a soft red / orange, created with the Soft Brown and Soft Orange layers. Despite what you may think, the inner mouth doesn’t have vivid colors and, even in some species, the dominant color is a very pale yellow.
With a Concave layer, as the name suggests, I wanted to emphasize the concave parts by putting some more organic red. Finally, a small amount of blue color (Bluish Contrast) at 38% with a Multiply blending mode, was essential to cut some saturated areas and to add more contrast in some parts of the mouth.
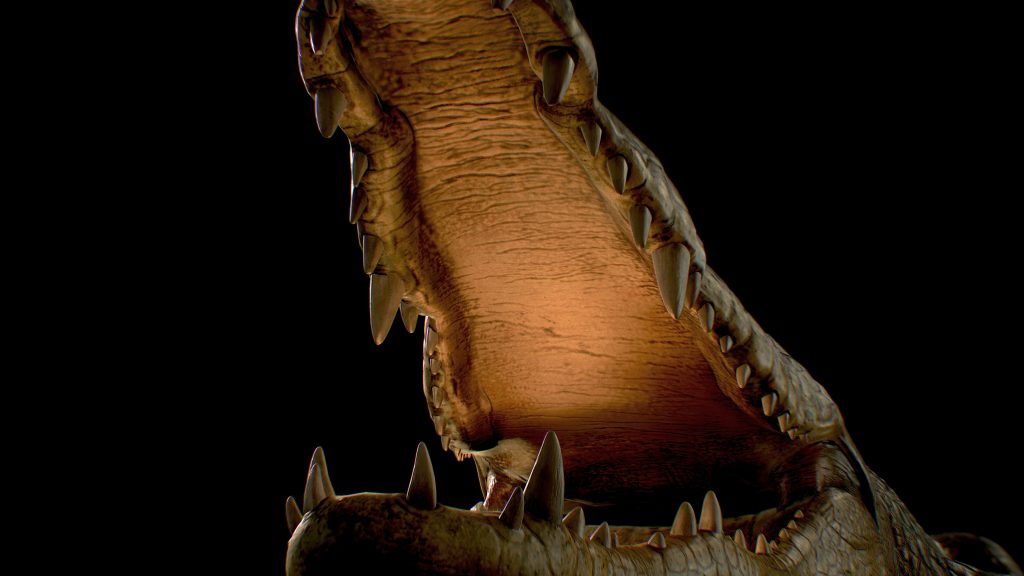
Around the teeth, there is a dirt layer to make that part more realistic and with a more natural transition to the gums, because it’s easy to believe that the tooth base has some residue and dirt.
Furthermore, for the teeth and nails (that I won’t discuss in this article), I followed a similar technique with masks, overlay of procedural maps, and generators.
An interesting detail that I wanted to add to the upper mouth is the presence of yellow stains that run along the side part of the mouth. Some species have that pattern in other area of the body too; some others, have the entire body covered by those stains.
For instance, I also reapplied the same soft pattern on the rear paws.
To achieve the result that you see above, I used a procedural pattern with the control over the distribution and without repetition. After some studies, I found the ratio_crystal_1 map interesting to apply and I used it on the entire mesh.
The benefit of working with layers is that you can decide how and where to apply the textures but also, you can modify the distribution and, in a second time, you can limit the texture to particular areas.

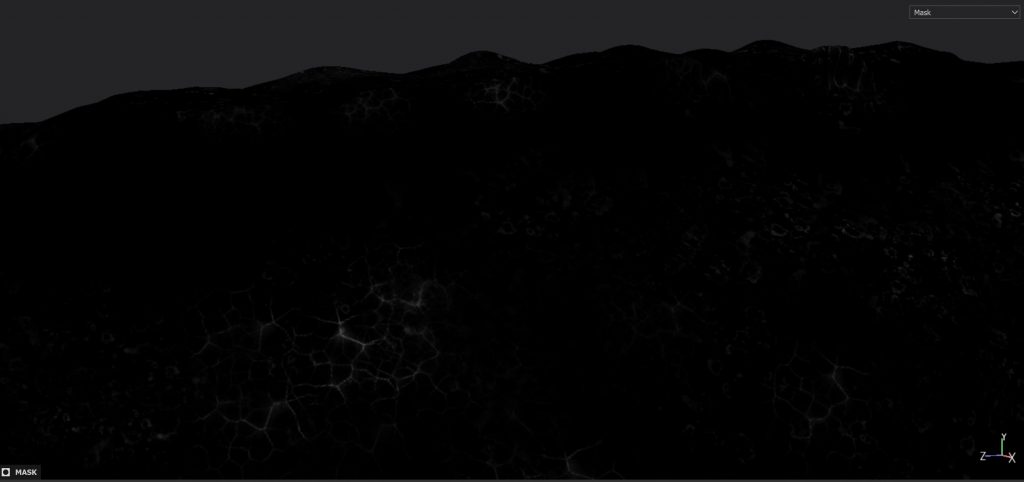
Here is the global application of the ratio_crystal_1 map on the crocodile.
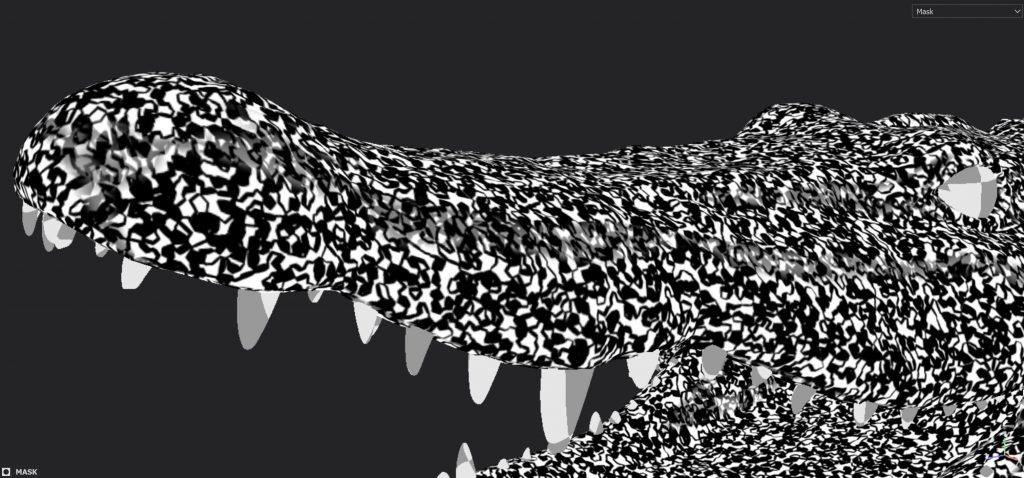
With just one map applied, you can easily notice that, apart from the chaotic result, the pattern has a sort of repetition, which is not what we want. Furthermore, the mask intensity is too much for our purposes.
The use of procedural maps has to be planned with attention, because without the option called triplanar projection, you might find some texture seams that break the continuity of the procedural pattern.
While modeling the character, it is better to position those seams in hidden areas of the model. Substance Painter comes in handy with the triplanar projection but it’s a good habit to always hide unwanted seams. Another solution to remove the seams is simply adding an adjustment paint layer to the mask and paint on the seam to reset the continuity.
Getting back to the yellow stains, as a second effect, I applied a change to the histogram (Levels) to change some black and white values and applied a Fill Layer with the usual curvature map to limit the effect but, this time, on the surface of the scale and not in-between.
The result now is much better.
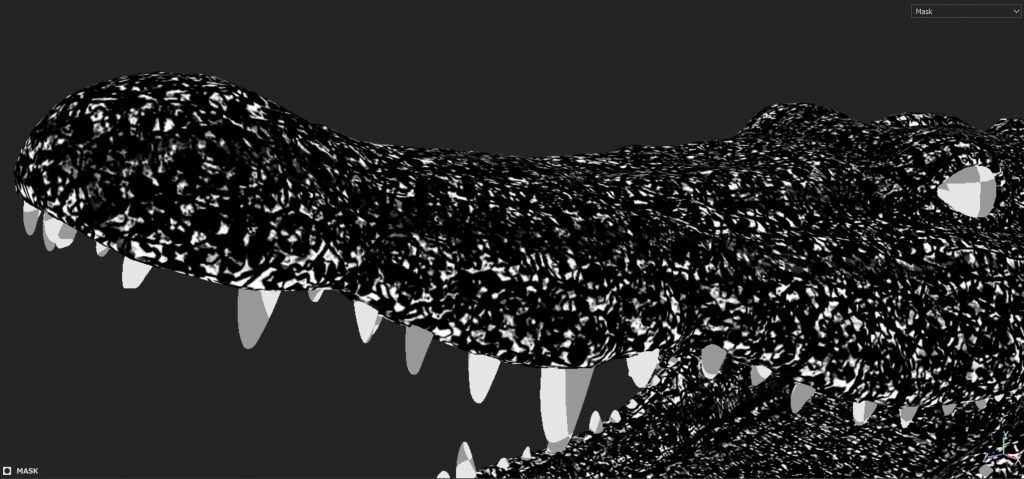
I have now a more interesting distribution, less strong and with not just black and white, but with an intermediate brightness.
Finally, I applied an adjustment Fill Layer to manually choose where to add the stains, to smooth the intensity with the advantage of deleting some parts, and to make the distribution more natural.
The result, blended with the other layers, has a soft but cool presence of random stains. You can easily notice how the stains have been painted on other parts of the crocodile’s body because the layer acts globally on the mesh.
A last note about the masks involves the possibility to restore the pattern on specific areas if accidentally deleted. In the example, if I manually delete a part of the mask, I can always restore it with the Eraser in Substance Painter. I have to select the adjustment layer, activate the eraser and then I paint on the area where I want my distribution back.
The Roughness Map
As explained in the awesome book PBR Guide by Wes McDermott (that I strongly recommend), the generation of a roughness map is a creative process without many constrains that requires creativity, as well as the other texture maps. It’s not always easy to understand how an object reflects the light in a specular way. On one hand, because the result depends on the light sources that interact with it and, on the other hand, it’s not always possible to physically have the object in your hands.
Here is the case of the crocodile that is not present in my territory (Italy) thus it was not possible to observe it directly. Photo references are key, but video references really come in handy to observe the animal as he moves.
The crocodile, in addition, is an animal living in the water as well as on the earth and the roughness values can be different in some conditions, due to the water droplets and the humidity on the body.
In my case, I tested out different roughness values and I finally used one that better reflects my renders and the some real examples in nature.
I’ll show you now my workflow used for the roughness in Substance Painter.
There are many ways to generate a roughness map.
If you look at real photo references, you can see that in occluded areas (in my case between one scale and another), the reflection has an higher value (imagine that there is dirt and other material there) and the concave areas have a dimmer reflection for the presence of self occlusion in those narrow areas.
With that in mind, we can deduce that the surfaces on the scales, instead, have the roughness with a lower value (and with a more concentrated reflection). The roughness I’m referring to is based on the Microfacets theory by Cook- Torrance.
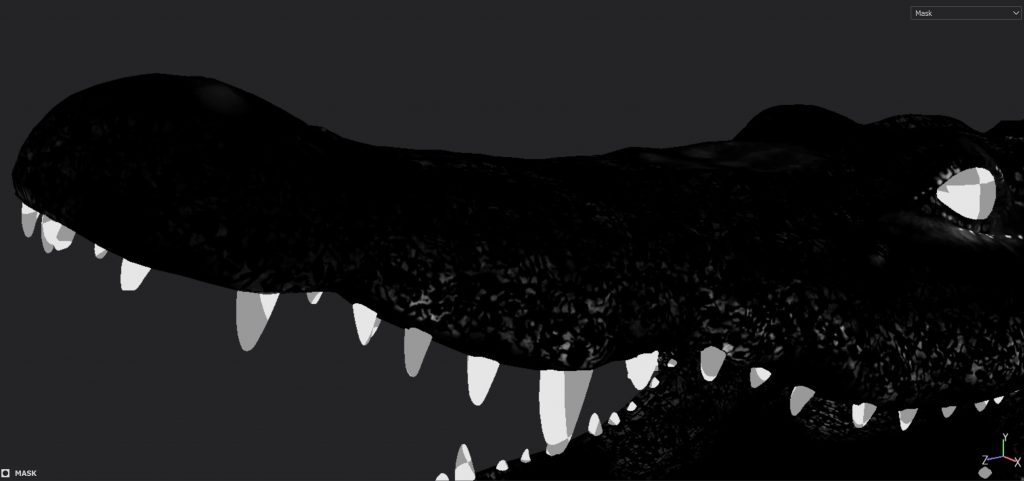
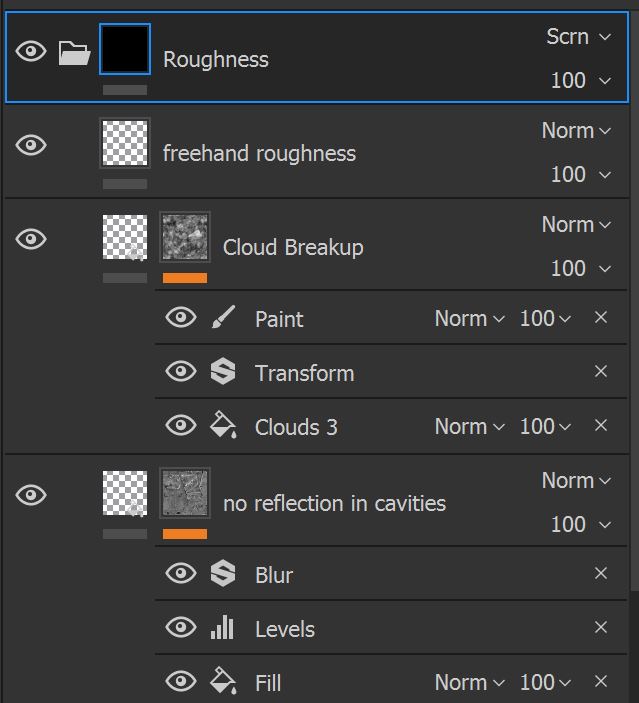
That being said, the first layer that I created, called no reflection in cavities, follows that hypothesis.
I also used the curvature map to mask the concave areas and I applied a blur filter to smooth the mask.
Consider the white color of the mask between the scales (high values) that has less reflection than the area on the scales.
The created map has a range of well distributed values but we can improve the breakup by adding another layer with a procedural map (Cloud Breakup). In this case, I used Cloud 3. I can always add an adjustment paint layer with manual painting.
Finally, I insert a simple layer (freehand roughness) to give more creativity to the mask with a simple brush.
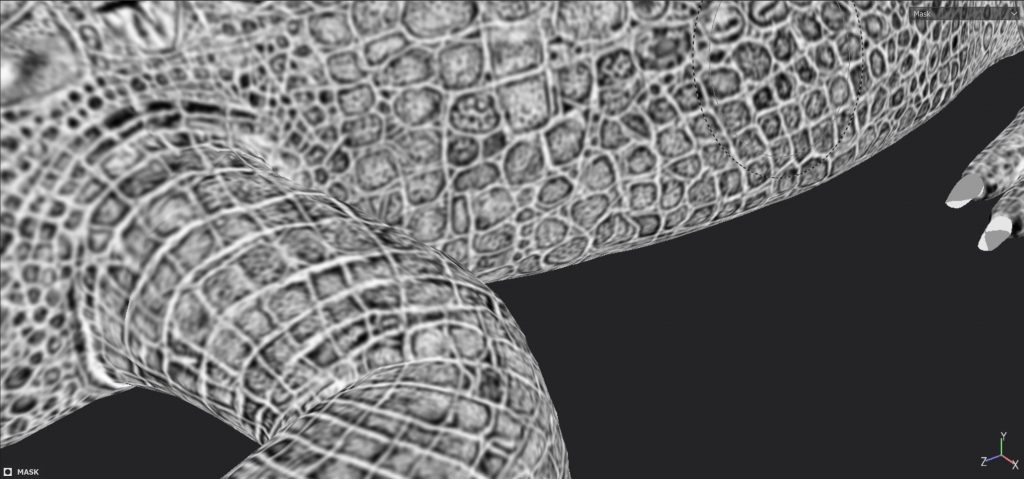
Note that the reflection is visible on the scales and we practically see small or very low reflection between the scales.
It bears repeating: the roughness map is up to you and it must be created with your own creativity and knowledge by observing the reality as best you can.
In my renders, I also tested high roughness levels to have a dry look and appeal and, in the future, it would be interesting to create a roughness map with lower values, to represent the crocodile just out of the water.
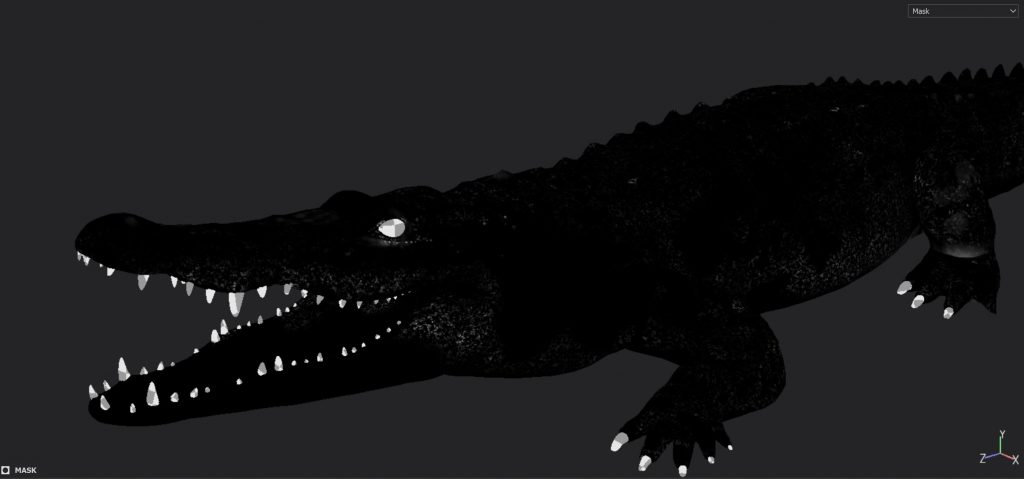
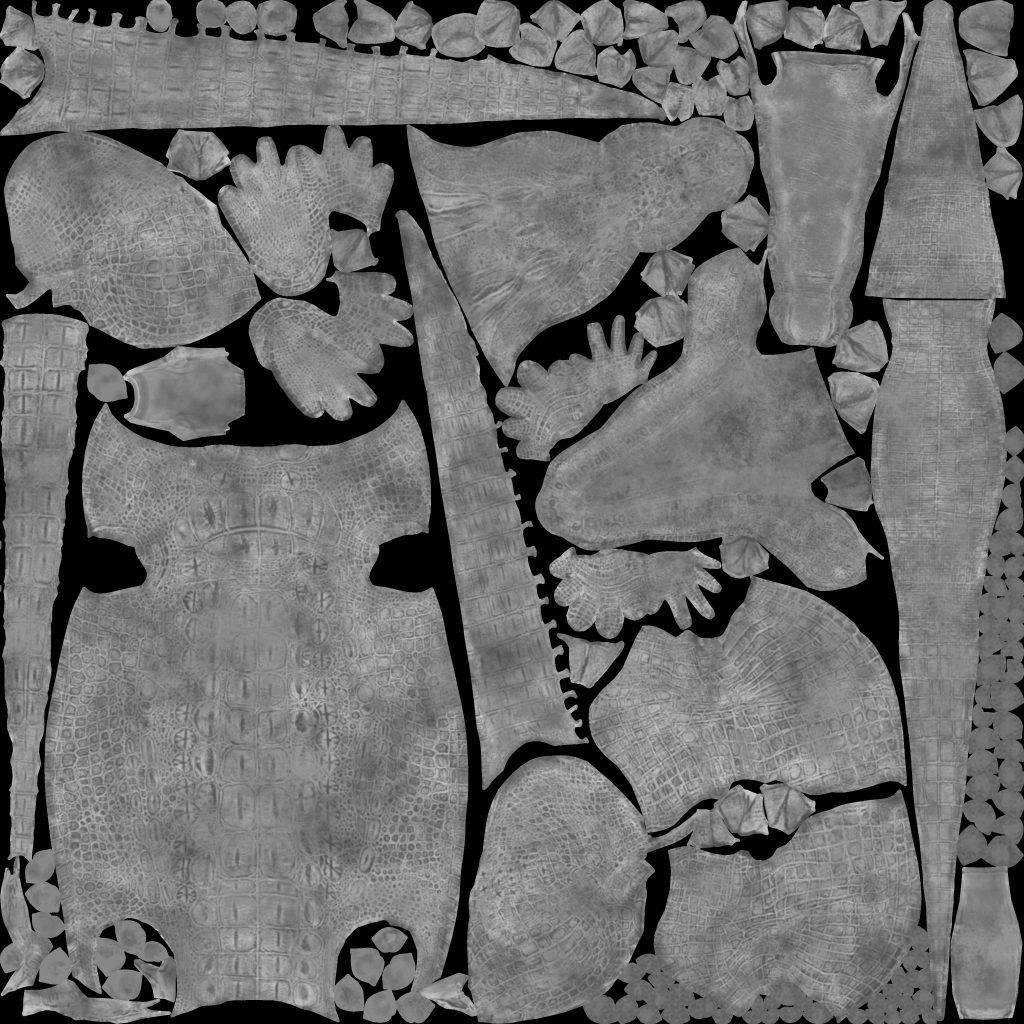
This is the roughness map projected on my UVs.
Final Bits of Advice
Before finishing the article I would like to leave you with some bits of advice, to encourage you with texturing and with Substance Painter.
- Before starting your work, spend part of your time by collecting photo references. Take as many photos as possible at first, then reduce the set to few pictures that better describe your idea.
- Texturing a character, a prop, or whatever, is not just using layers but is essentially trying, deleting, redoing, and refining your results until you come up with something cool.
- Don’t worry about the number of procedural maps, brushes, and masks in Substance Painter. With just few brushes and options, but with clear ideas, you can reach excellent results.
- While texturing your character, set an environment map with a natural illumination, avoiding many light sources with different color temperatures, saturated colors, etc. The more natural, the easier the texturing process is because your albedo color map will be more similar to the color that you see in a real environment and you won’t be deceived by “fake” diffuse colors.
- As you’ve seen, masks play an important role in texturing. Learn to produce new creative masks, to use generators, paint layers, etc. Don’t simply use existing masks in Substance Painter, but create your own art.
- Sometimes you may start the work with Smart Materials, which are presets of materials with layers that use your baked textures to simulate particular surfaces. You can then modify the smart material and have something custom
- Substance Painter has a set of filters to use on masks for instance. You could apply a blur effect or modify the brightness and the saturation of a texture and much more! Try and have fun!
- Substance Painter has also many particle brushes that reacts to gravity, normal map influence, life span of the particles and many other parameters. In some cases it is worth using them.
We’ve come to the conclusion of this first part of the Crocodile Project where we talked about texturing. In the next article, I’ll explain the lighting and the rendering aspects.
For any question, drop me a line. Stay tuned and see you soon!
If you’re also a TurboSquid artist with tutorials you would like to share on our blog, email marketing@Turbosquid.com.