When selling stock 3D models, I recommend providing as many file formats as you can. It is helpful to show to potential customers that everything works fine in another engine, without problems. Everybody has their own favorite engine, but since Unreal Engine 4 is so popular right now, it’s the engine I prepare all my stock models for.
First of all, before you start working in the engine, the model needs to be setup in 3ds Max.
Exporting the Model from 3ds Max
For real-time models intended to be used in engines, use Standard materials only. Engines can't see V-Ray, MentalRay, Corona, etc. The latest versions of 3ds Max and Unreal Engine have a very flexible bridge meaning 3ds Max standard materials can be read by Unreal Engine. So if material with textures is applied to the model in 3ds Max and then exported to Unreal Engine, the model will have the same ready material in Unreal Engine without any additional set up.
A very important point many artists forget about is naming. Make sure you give correct names to the mesh, to the texture maps, and to the materials. Be aware that they can't have the same name, as this can cause errors. It’s also a good practice to avoid non-Latin symbols and spaces. The names should be formatted so that they look like either of these: "CubanHouse" or "cuban_house."
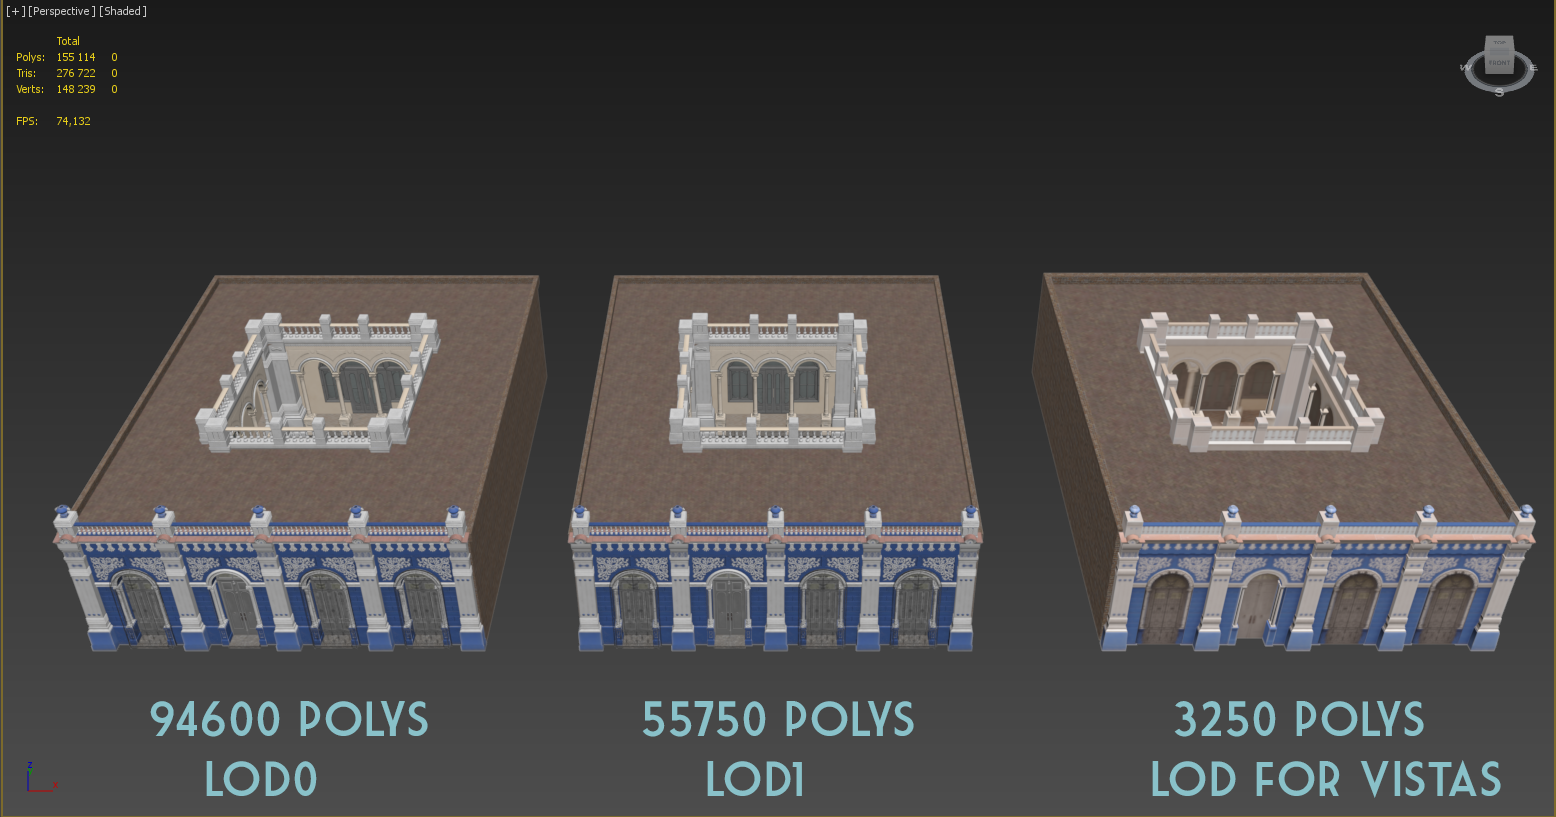
Unreal Engine has very nice tools to create Automatic LODs (Levels of Detail) and Automatic Collision, but creating LODs and Collision in 3ds Max instead provides more control and precision. Epic Games has some very cool documentation about it that you can read here.
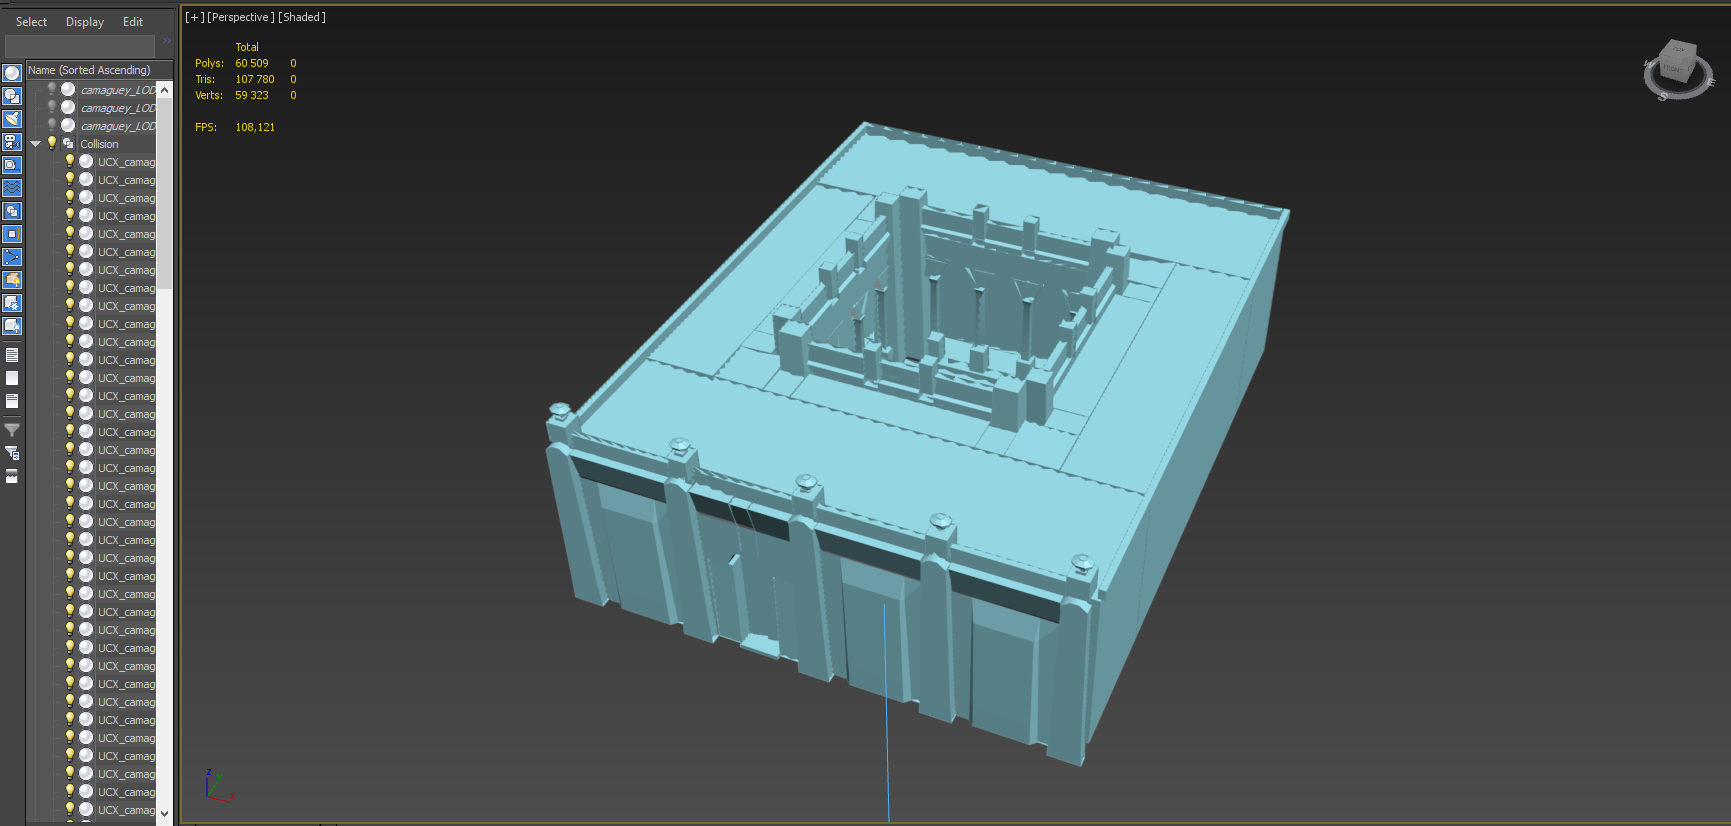
Here's what collision looks like. It is a very simple set of boxes, which covers the main mesh and prevents the character from walking through walls. It needs to be grouped and exported as FBX together with the BaseLOD. Try to avoid the intersection of collision boxes and convexes, because Unreal Engine may not read these files correctly.
Importing the Model into Unreal Engine 4
When a new project is created in UE4, this window will appear:
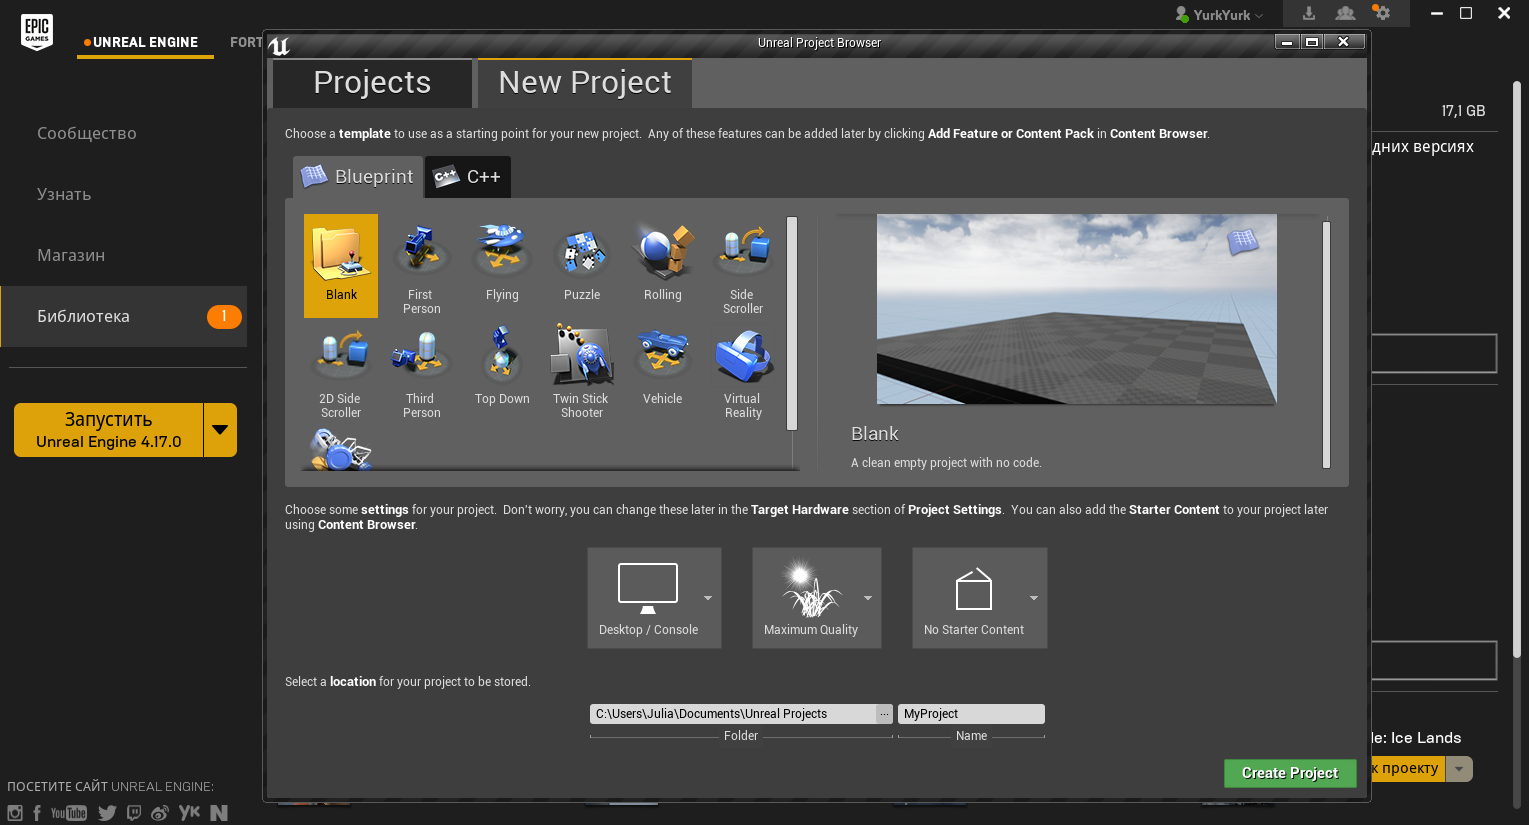
To create preview images, no game mechanics are needed, so I just created a blank project.
Once inside the Unreal project, I imported the FBX file:
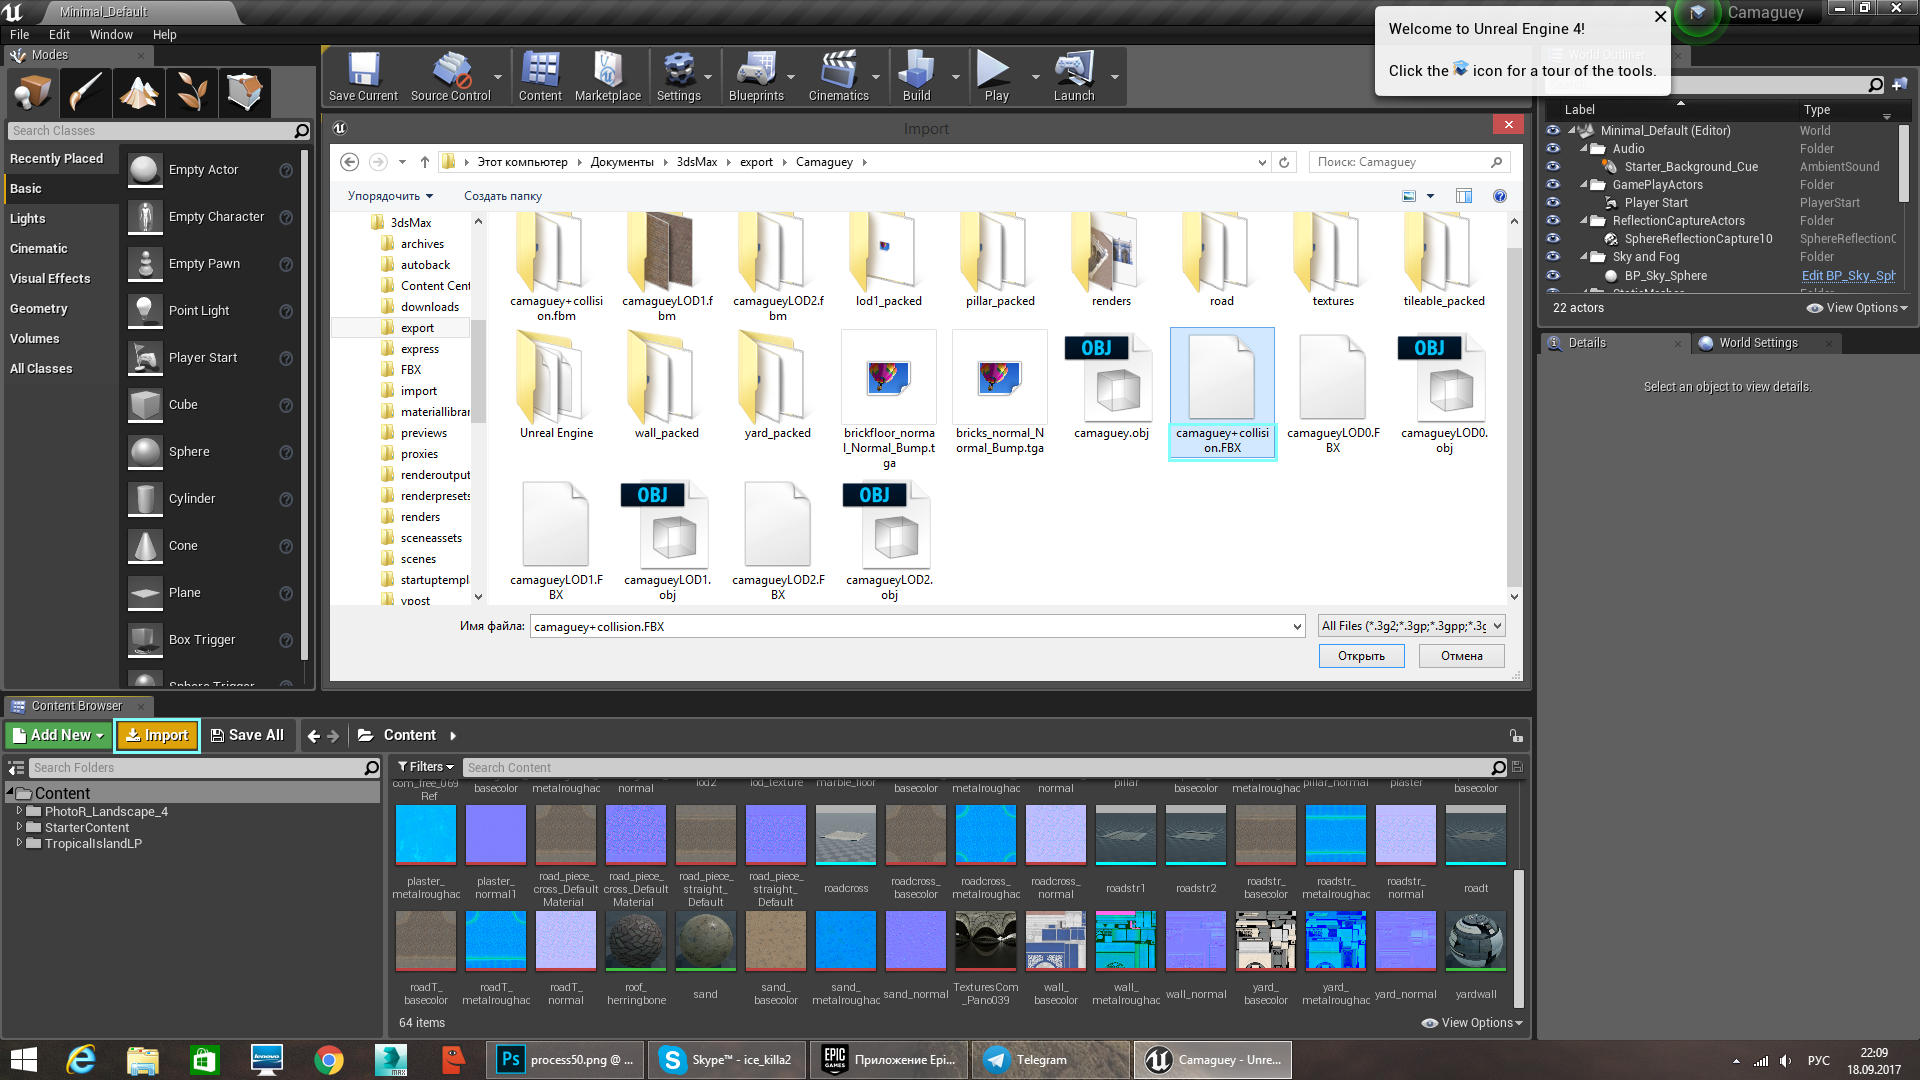
Here is an import window:
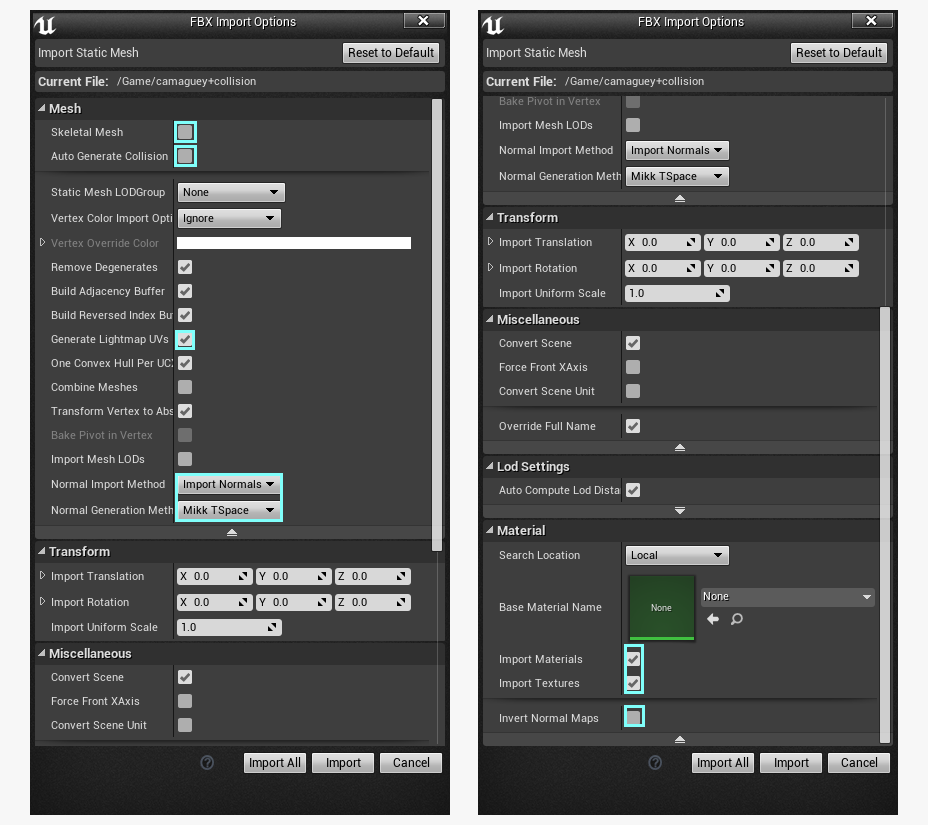
For architecture and other static objects, I leave most of the default settings, though there are a few that I’ll adjust. For instance, the skeleton isn’t needed for the static mesh, so, Skeletal Mesh can be unchecked. And if the Collision was created manually, Auto Generate Collision needs to be unchecked. Otherwise, the engine will replace the manually created Collision with an automatic one. Also, if a second UV channel wasn’t created with non-overlapping UV islands in 3ds Max, then the following settings need to be toggled:
- Check the Generate Lightmap UVs box
- Toggle the Normal maps using the Normal Import Method and Normal Generation Method pull down arrows
- If materials and textures will be imported together with mesh, check Import Materials and Import Textures
- If the OpenGL Normal maps were created with Y+, check the Invert Normal Maps box (Unreal Engine 4 uses DirectX normal maps with Y-)
Setting LODs and Shaders in Unreal Engine 4
Open Mesh Editor and check the collision to make sure everything is correct, and then set LODs:
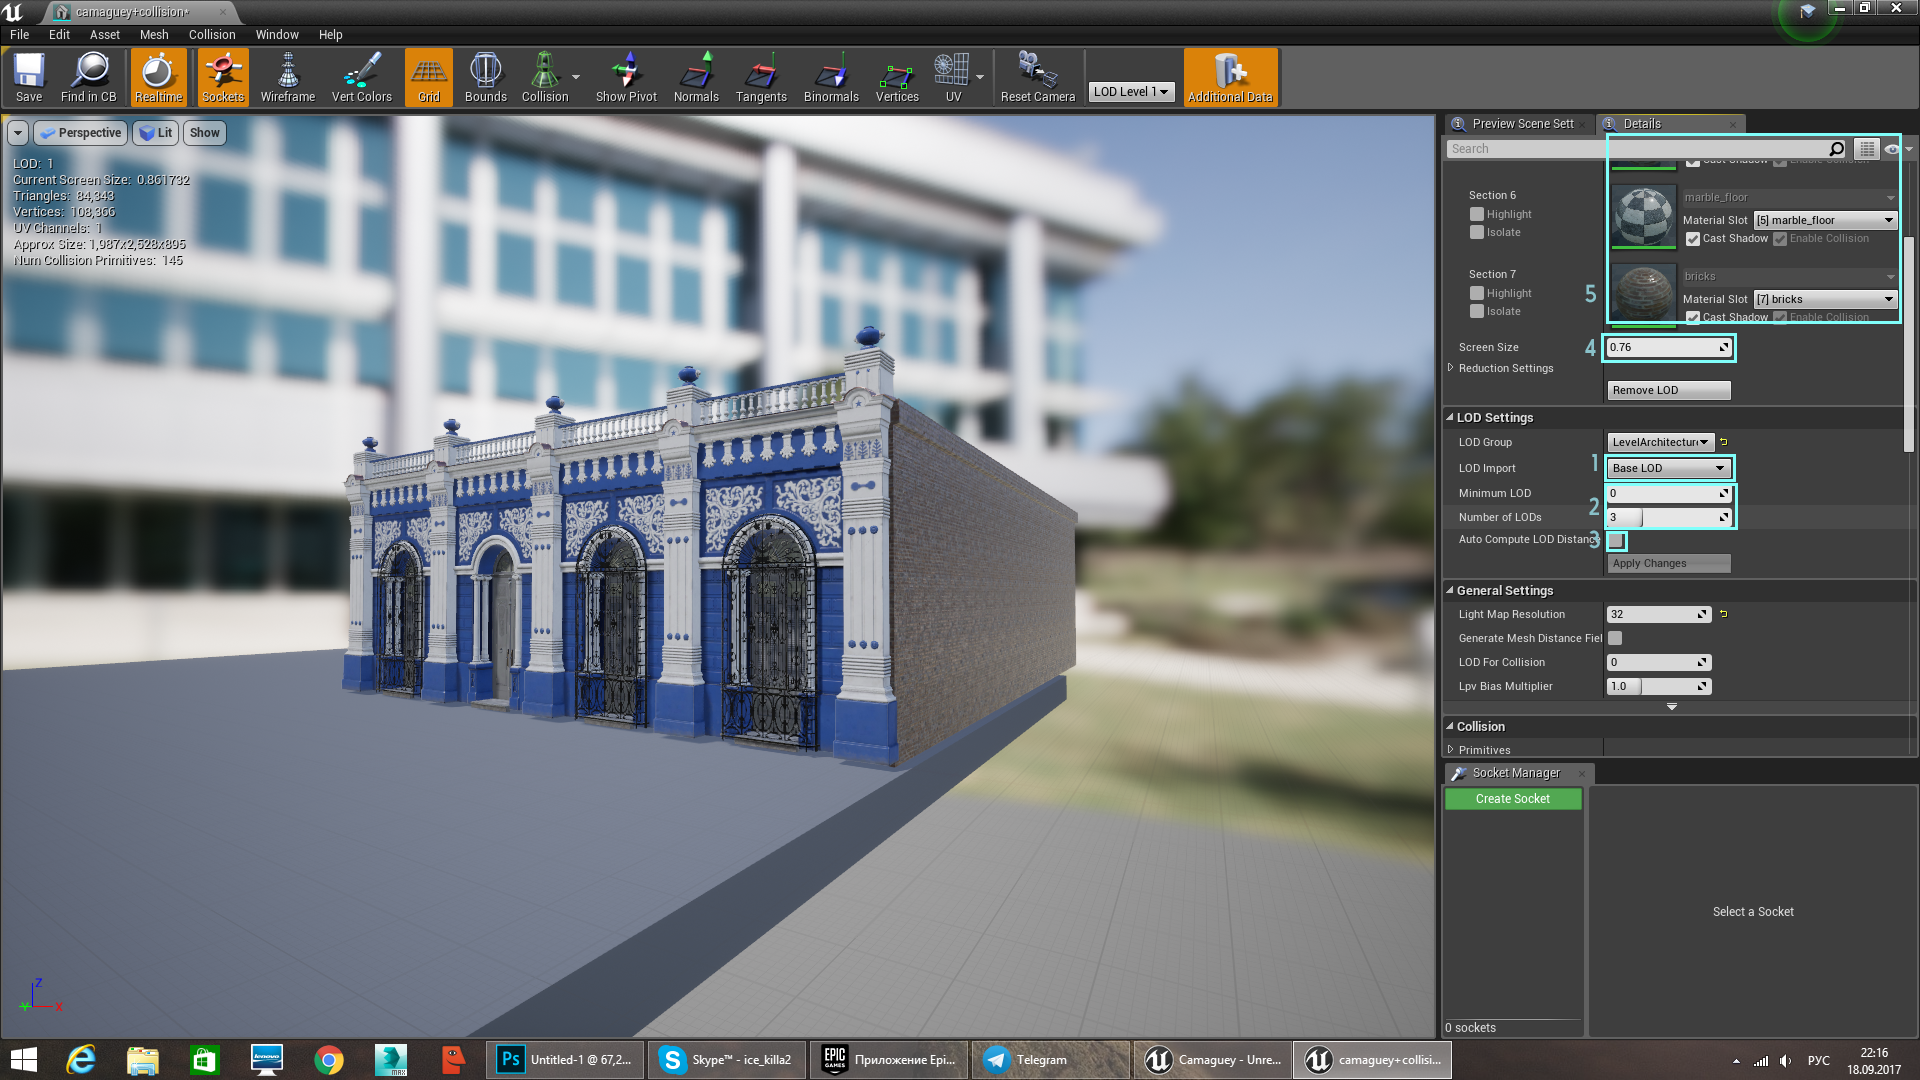
A more detailed explanation of Unreal Engine’s interface can be found here, but I’ll explain some simple initial steps shown in the image.
- Import LOD mesh via the LOD Import tab.
- Set number of LOD meshes using the Minimum LOD and Number of LODs tabs.
- If setting the distance of LOD switching manually is preferred, uncheck Auto Compute LOD Distance.
- Use the Screen Size tab to move the camera closer and away to find the desired distance to switch one LOD to another.
- Here are the materials for each LOD.
Now, to set up shaders:
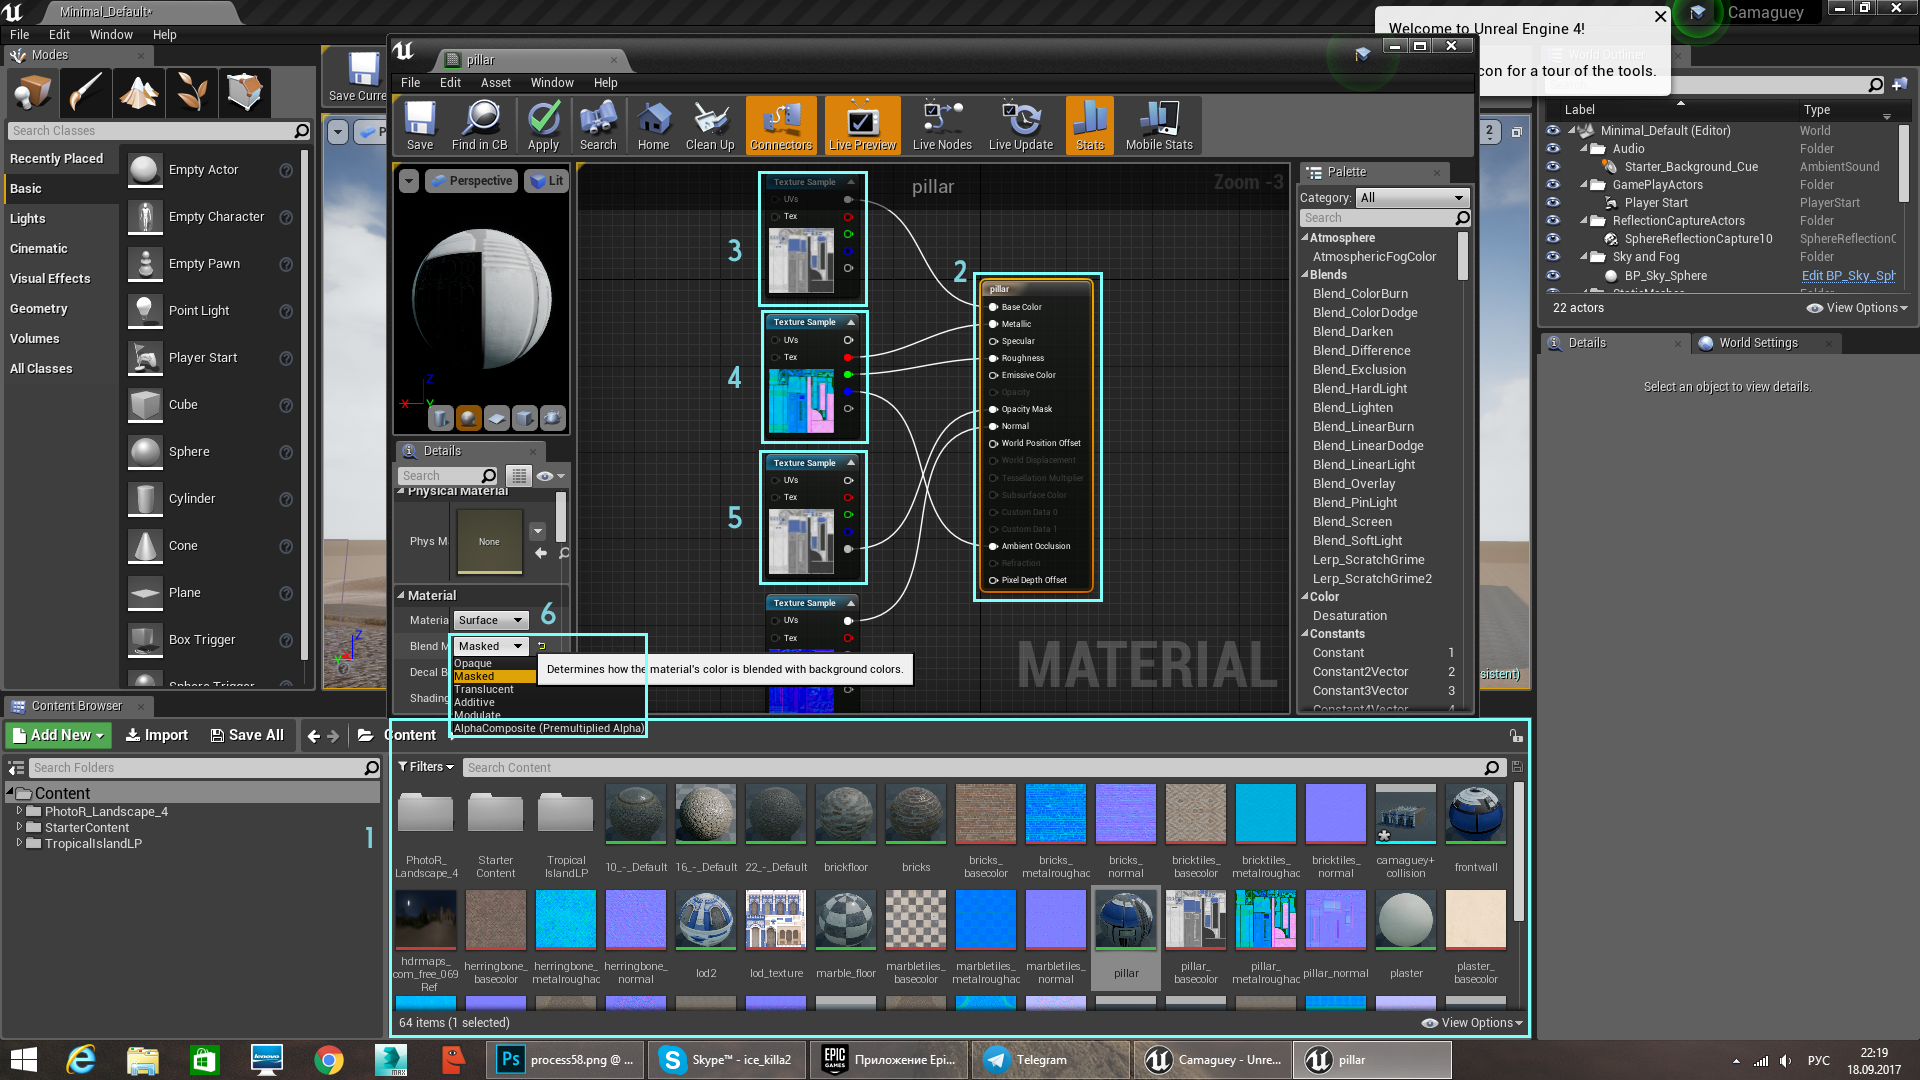
- Here’s my shelf loaded with everything. Drag the textures to the Shader Editor from here.
- In this Shader Window, the textures can be linked with according slots.
- Here’s the Diffuse texture connected by the main channel (RGB). Previously I packed Metallic, Roughness, and AO in one texture map. Now, the nodes need to be connected according to this image.
- This Shader uses Opacity Alpha Mask, which is packed into the Diffuse map.
- To use Alpha Masks, you need to switch to Masked Shader. Each Shader has its own settings and maps sets.
Rendering in Unreal Engine 4
Here are all the things which you need to make a nice image:
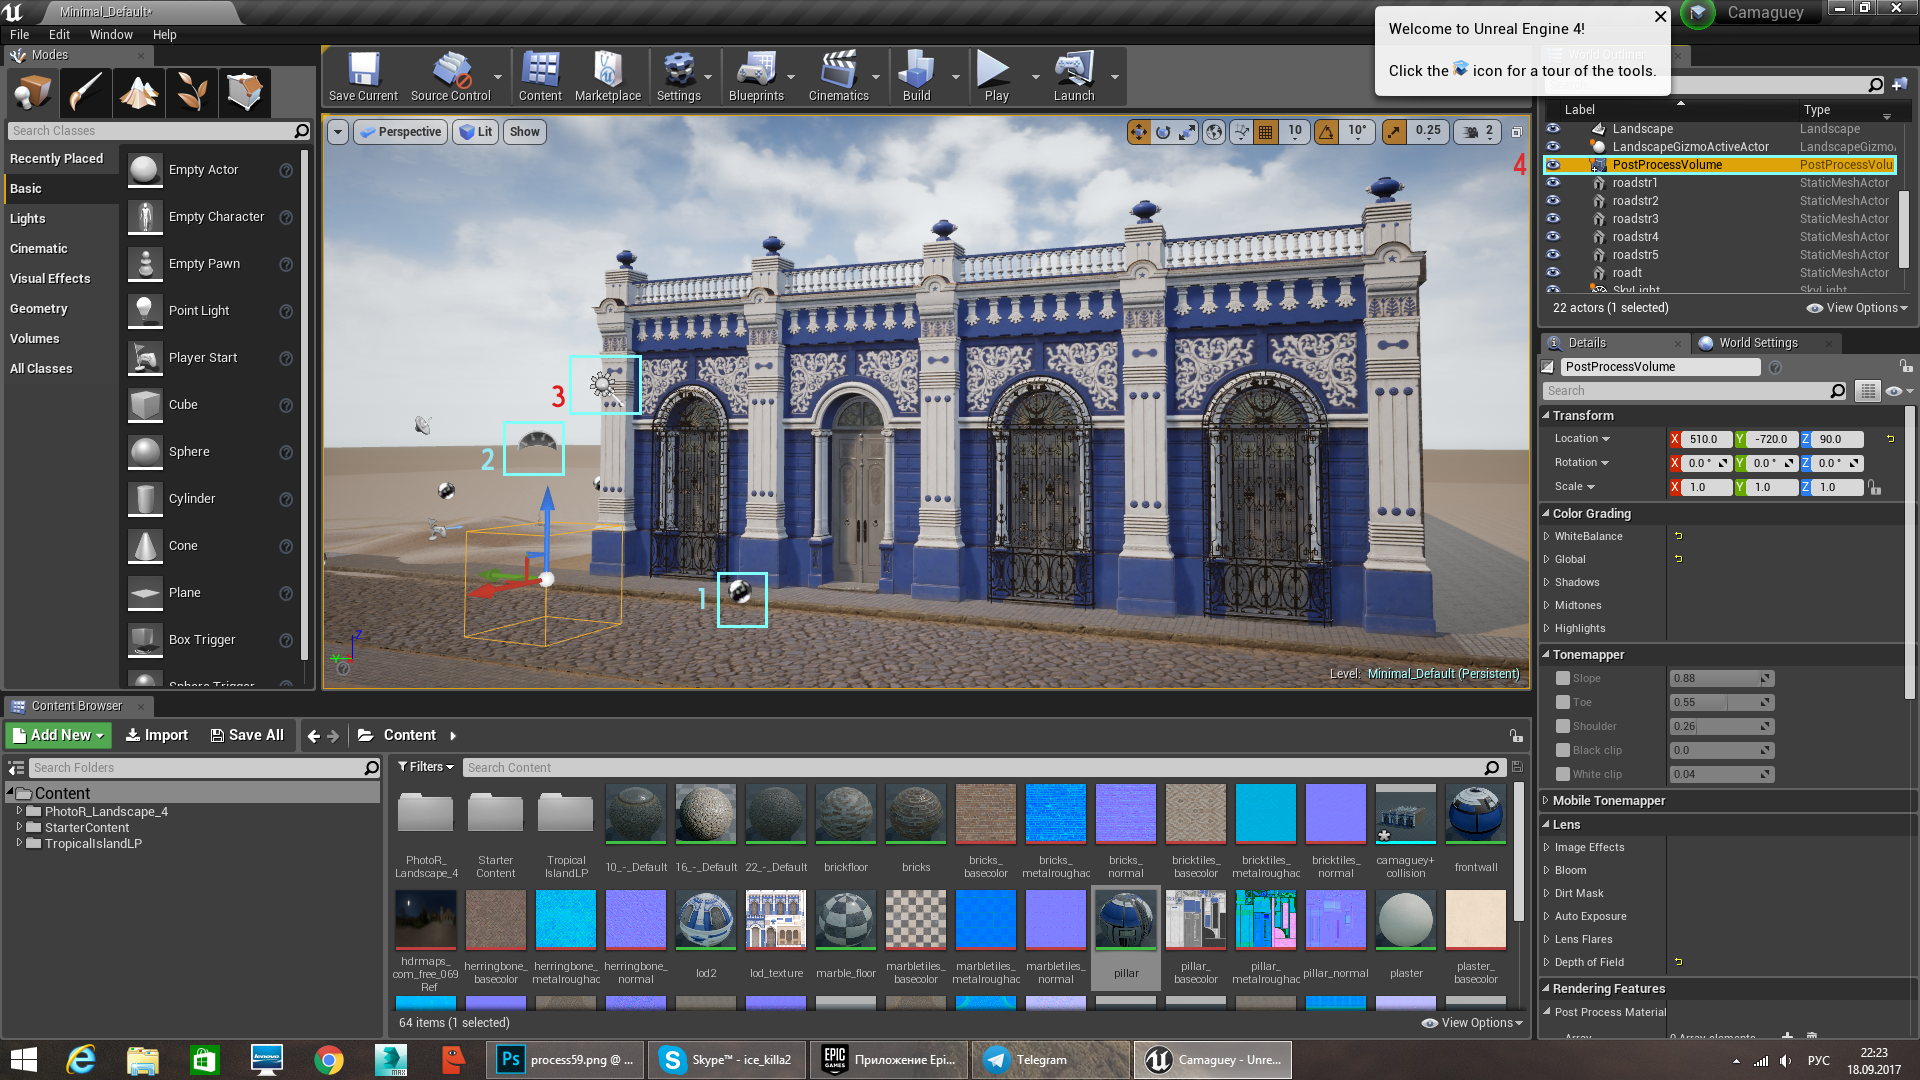
- Reflection Capture makes reflections work in the scene.
- SkyLight contains the setting of a skydome.
- Sun creates sun in the sky and allows for the toggling of temperature, time of day and shadows.
- PostProcessing handles different filters like White Balance, AO, Anti-Aliasing, etc.
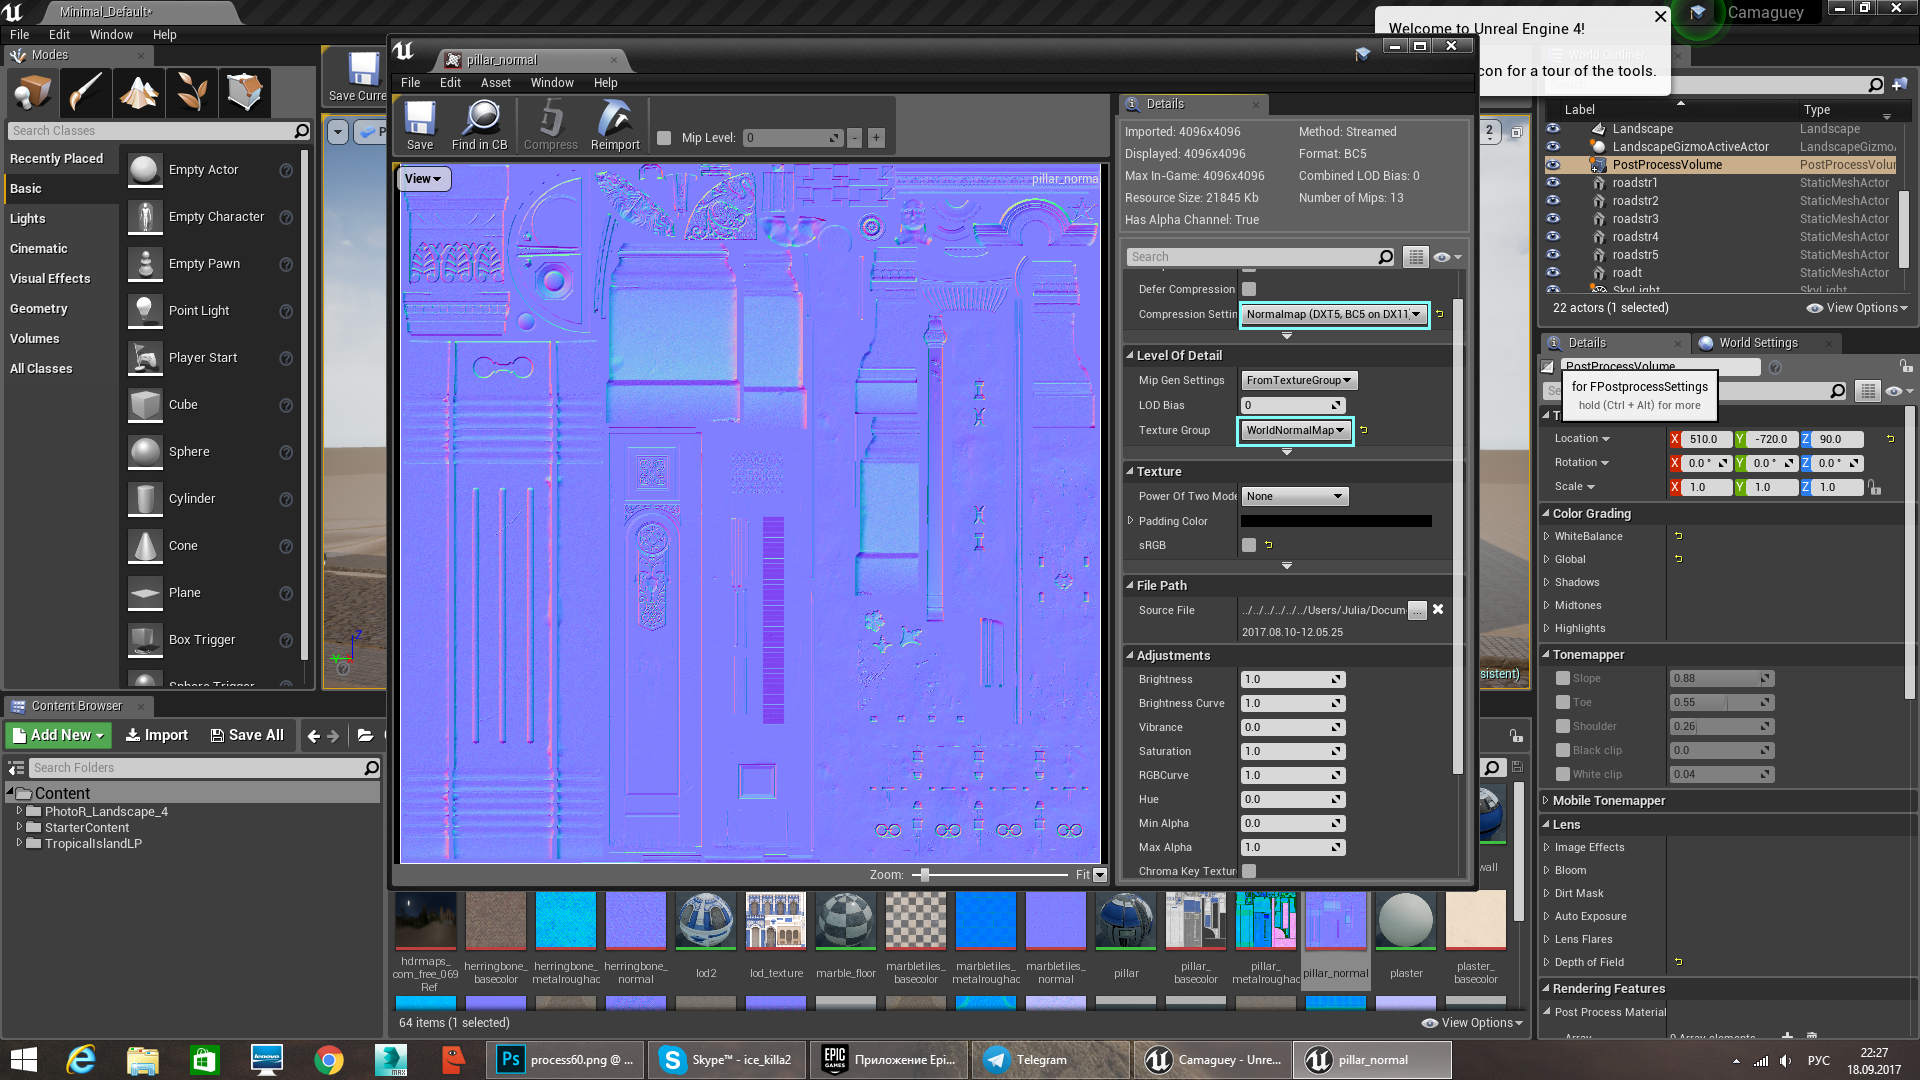
If the texture map has correct naming, there shouldn’t be any problems with the normal map. For instance, if there is a map called "wall_normal,” Unreal Engine will recognize word "normal" and will automatically convert the imported texture to Normal Map Compression. All other textures will be imported with Standard Compression.
If there are suddenly issues with the normal map, the map is probably named incorrectly causing Unreal Engine to import with Standard Compression (not the desired result). In this case, the compression method would need to be changed manually in this window:
Note: These are just basic minimal settings to provide in-engine screenshots for your customers.
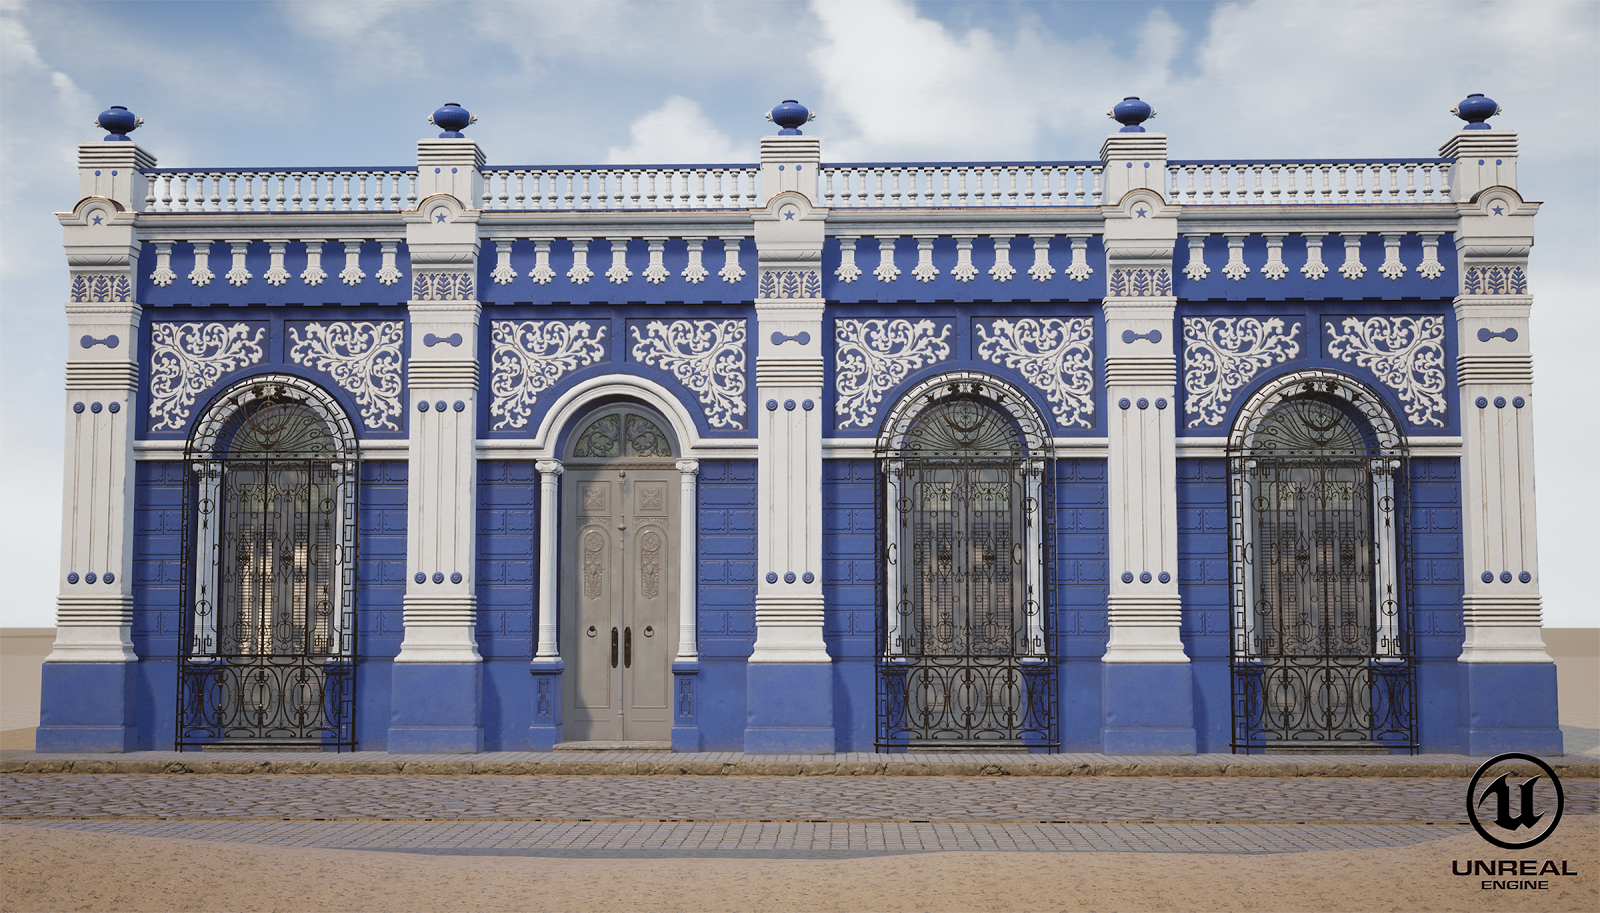
And here is an image made in Unreal Engine 4:
That’s the end of my tutorial for my Cuban House of Diversity model. I want to thank the TurboSquid staff and community for all their help while making this article. Especially to the Marketing team for editing my text and helping with publishing, Beau Perschall for all the support and comments, and Ben Bickle for useful tips and tricks.

