CheckMate submissions continue to come in fast and furious, and we couldn’t be more pleased. One of the most important things for an artist to understand is that we want to certify your 3D models!
In an ideal world, your products would pass CheckMate Certification on the first try, but it isn’t always so. Last week I blogged about zipping up your textures with your main product file, as failure to do so is one of the most common problems we see with first-time CheckMate submissions. Another common point is rendered preview images, particularly the Signature Image and Secondary Image.
Signature Image
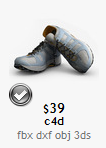
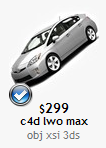
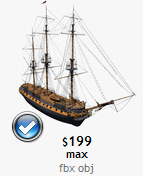
The Signature Image is the one you see in Search results. CheckMate requires this image to show just the 3D model itself against an off-white background (RGB 247.247.247). This gives customers an easy-to-view catalog of 3D models based on their Search results, where they can really see the shape and design of the choices that come up.
When customers look at Search results, they understand that the thumbnails on the Search page are going to be much smaller than images in the Product Preview. They scan through the Search results looking for the overall shape and design they have in mind, and if they’re interested, they’ll click to see more. A fancy background or text isn’t going to convince a customer they need your 3D model instead of what they came to TurboSquid for; if you feel you need something besides a good representative rendering to get a customer’s attention, then you should consider improving the Signature Image rendering, or maybe even the model itself.
Any 3D model can be made to look good against the off-white background, even if the model itself is white. Use of contrast, shadow, and slightly tinted lighting can make any Signature Image look great. A couple of examples are shown below.
There are some exceptions that don’t require the off-white background, such as interior and exterior architectural scenes. Refer to the CheckMate Lite or CheckMate Pro specifications for details. You can also see our Knowledge Base article on Signature Images to learn more, or see the videos below to learn how to make Signature Images using 3ds Max and Maya.
Secondary Preview Image
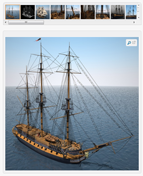
The Secondary Preview Image is the one that displays by default in your Product Preview after a customer clicks your Signature Image in Search results. The Secondary Image must be in the same pose, angle, and framing as the Signature Image, but you can use any background you like. This is where you show off your model’s special qualities, whether it’s photorealism, exceptional textures, or design appeal.
The idea is that a customer (1) searches for something in particular and, seeing your model’s Signature Image, decides it’s a good possibility and clicks the thumbnail. Then (2) your Product Preview comes up, showing the Secondary Image at 600×600 and displaying your very fine 3D model against a background that highlights its excellence.
The Secondary Image has to be in the same pose, angle, and framing as the Signature Image to avoid confusing customers. When a customer clicks your thumbnail in Search they expect to see the same 3D model in the Product Preview, and they’d get confused if they saw something else. Since the background changes, we keep the model the same to make a seamless shopping experience for the customer.
Please note that the Secondary Image comes up first in Product Preview only for CheckMate Certified models. For other models at TurboSquid, the Signature Image comes up first in Product Preview. You can learn more about Secondary Preview Images in our Knowledge Base.


