Welcome to this brand new episode where we will learn how to model 3D curly hair or textured hair in Yeti for Maya! In our previous tutorials, we learned the fundamentals of Yeti as a professional tool for hair and fur. If you follow my series from the start, you’ll discover this wonderful tool and learn the best practices in the industry. Here’s the list of articles I suggest you read before proceeding with this new part.
Getting started with Yeti for Maya: Creating Fur: In this part, you’ll learn how to use the Grooming Tool and the Yeti Graph Editor. At the end, you’ll be able to produce basic hairstyles and work with nodes.

Part 2: Creating Fur Variations in Yeti: The second episode explains how to work with hair clumping and make the result even more interesting — you’ll also find an example of use of expressions within the Yeti Graph Editor.
Yeti in Maya, Part 3: Braiding Techniques: Here I talk about more advanced topics and show how to refine the result for more realistic renders, like how to create flyaways on a braid with ease.
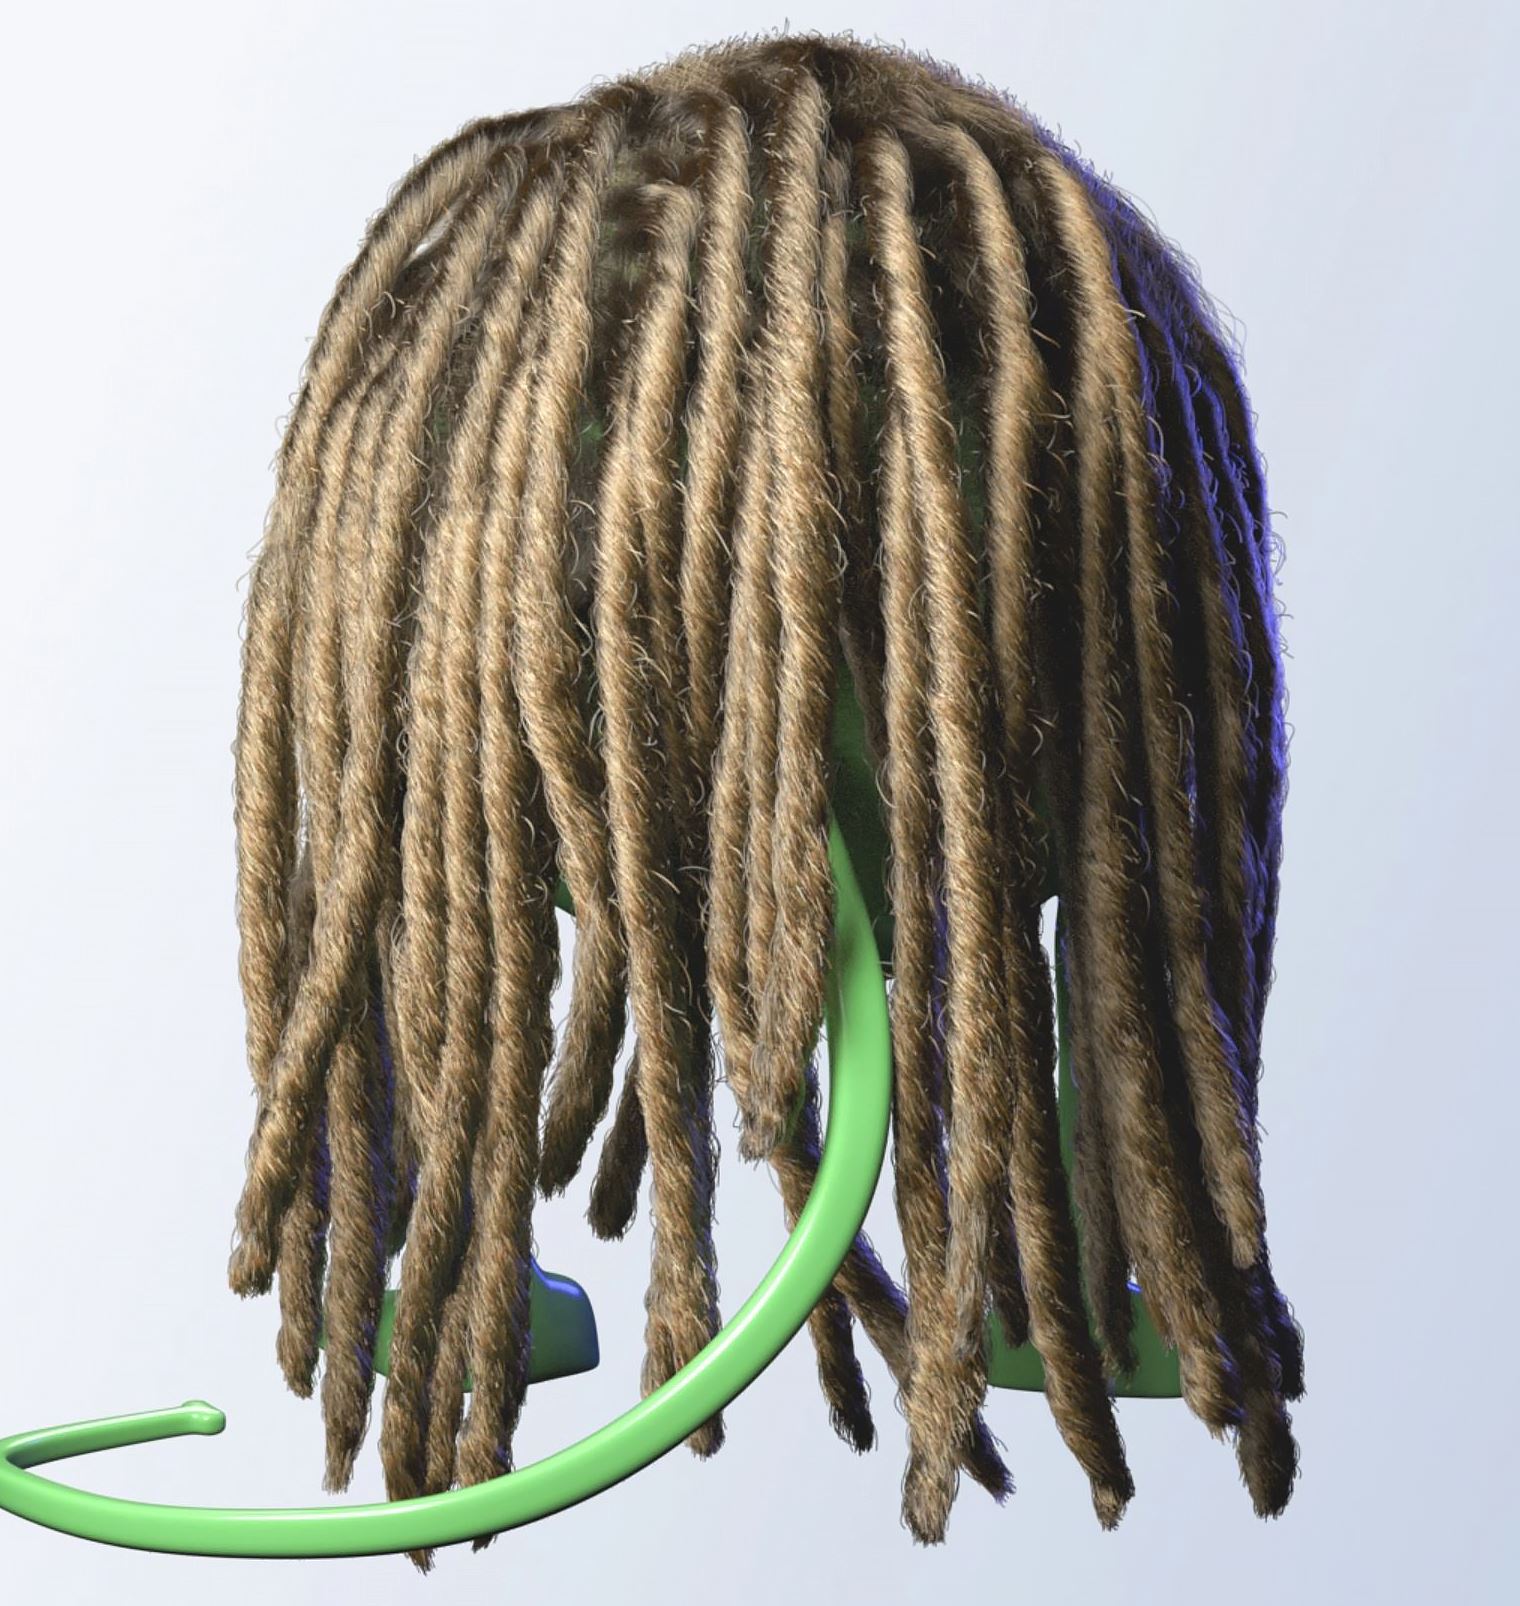
Yeti in Maya, Part 4: Dreadlocks: This part explains how to start from a single thread and distribute random instances throughout the character’s head. You’ll be using the Grooming Tool, the Yeti Graph Editor, and expressions.
3D Curly Hair Generation
We’ll be following a similar process as we did for the dreadlocks episode. In general, this is the workflow we will follow:
- Creation of a single strand.
- Generation of fibers from the previous strand with a curly / textured look.
- Application of expressions to make a thread a bit different from another.
- Hair scattering on a ref geometry.
This list is fundamental to save time while producing your 3D curly hairstyle. We’ll start from a single element and end up with many instances of the same one. Bear in mind, we won’t describe the steps for basic operations because we already covered them in the previous issues. When needed, refer to those parts for further details.
Creation of a Single Strand
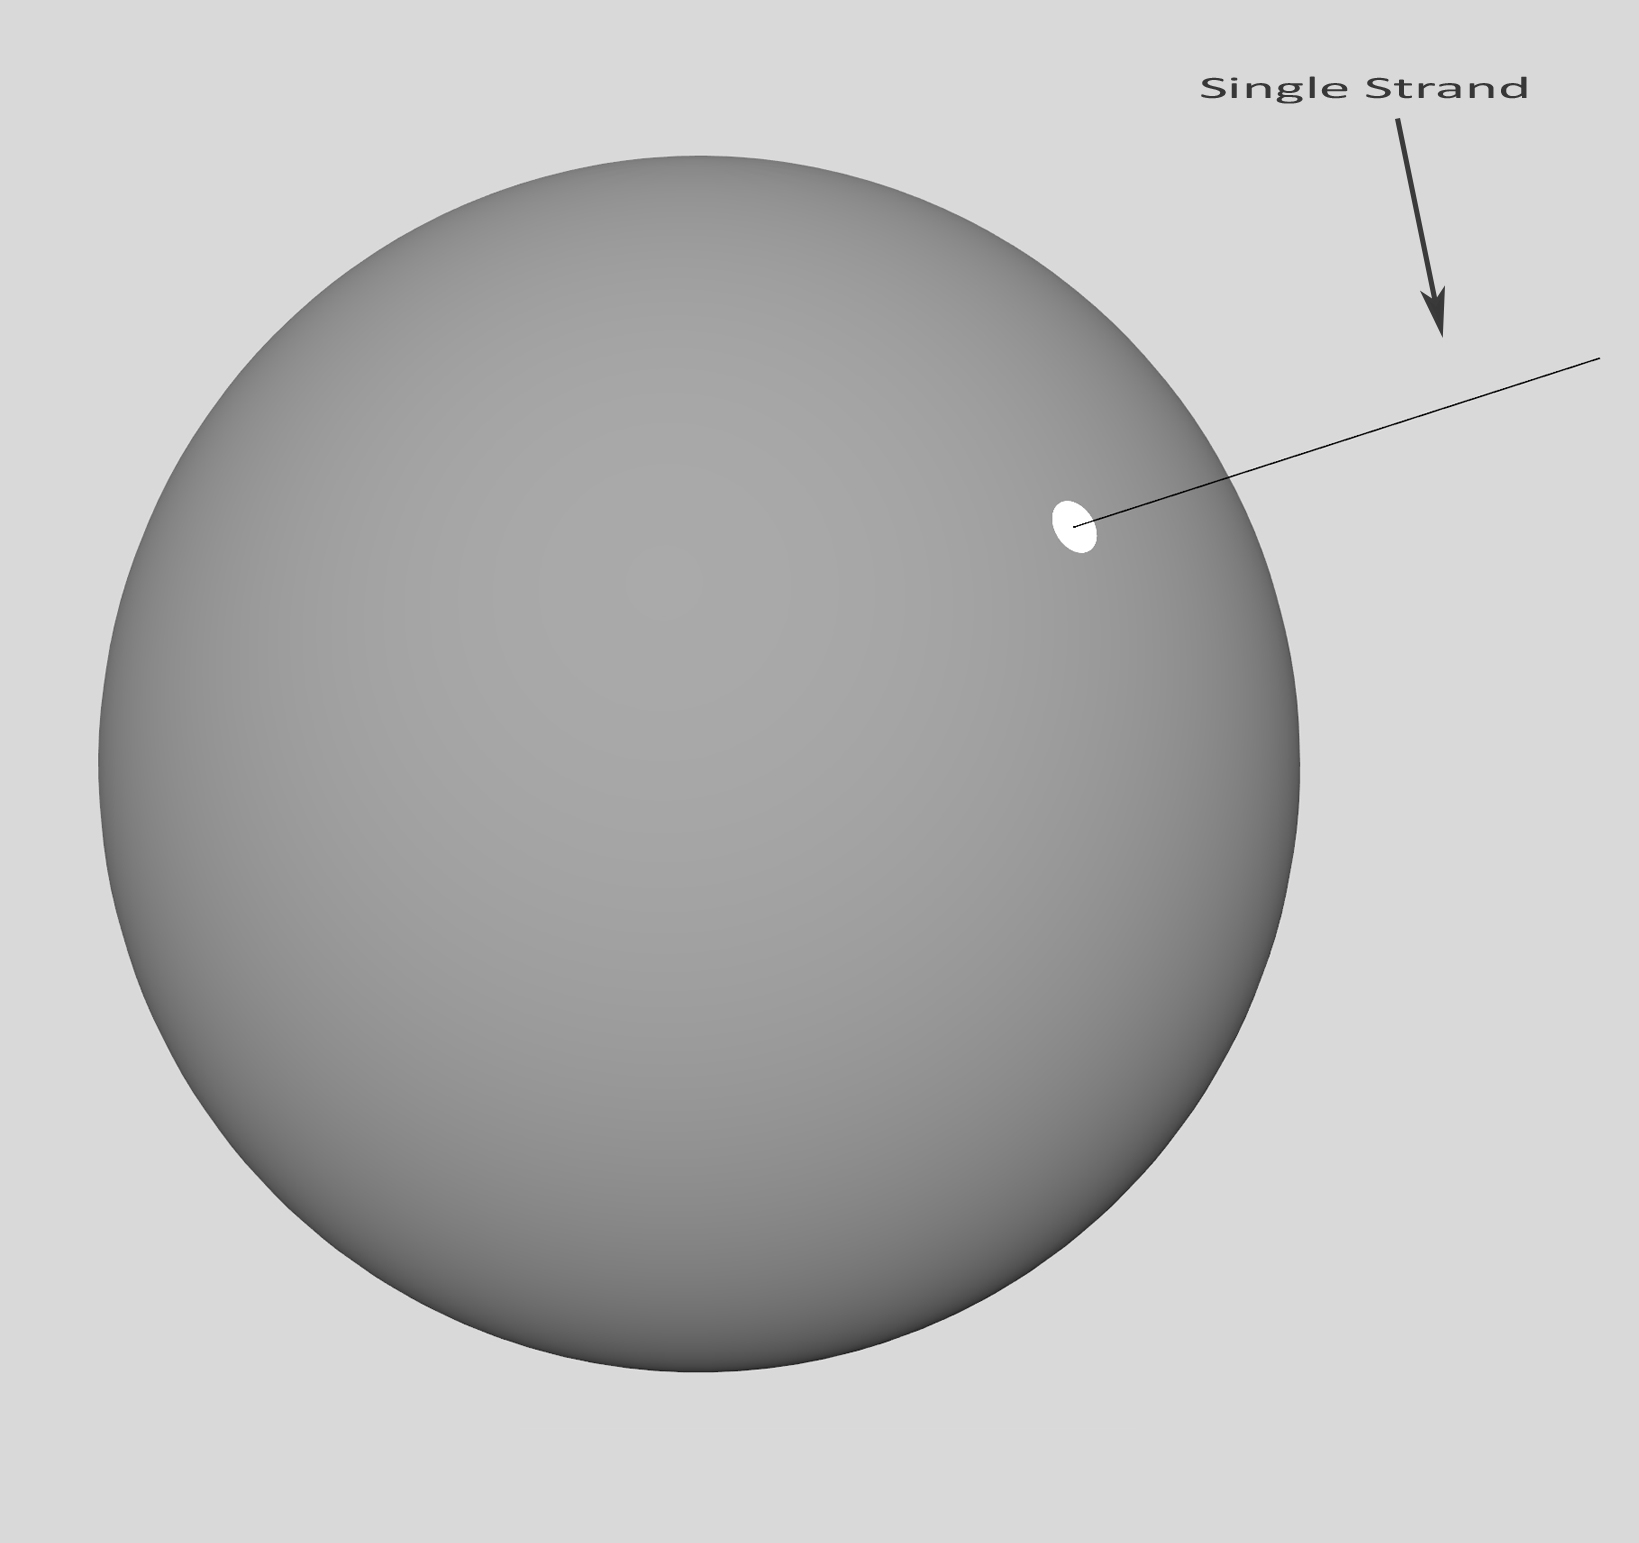
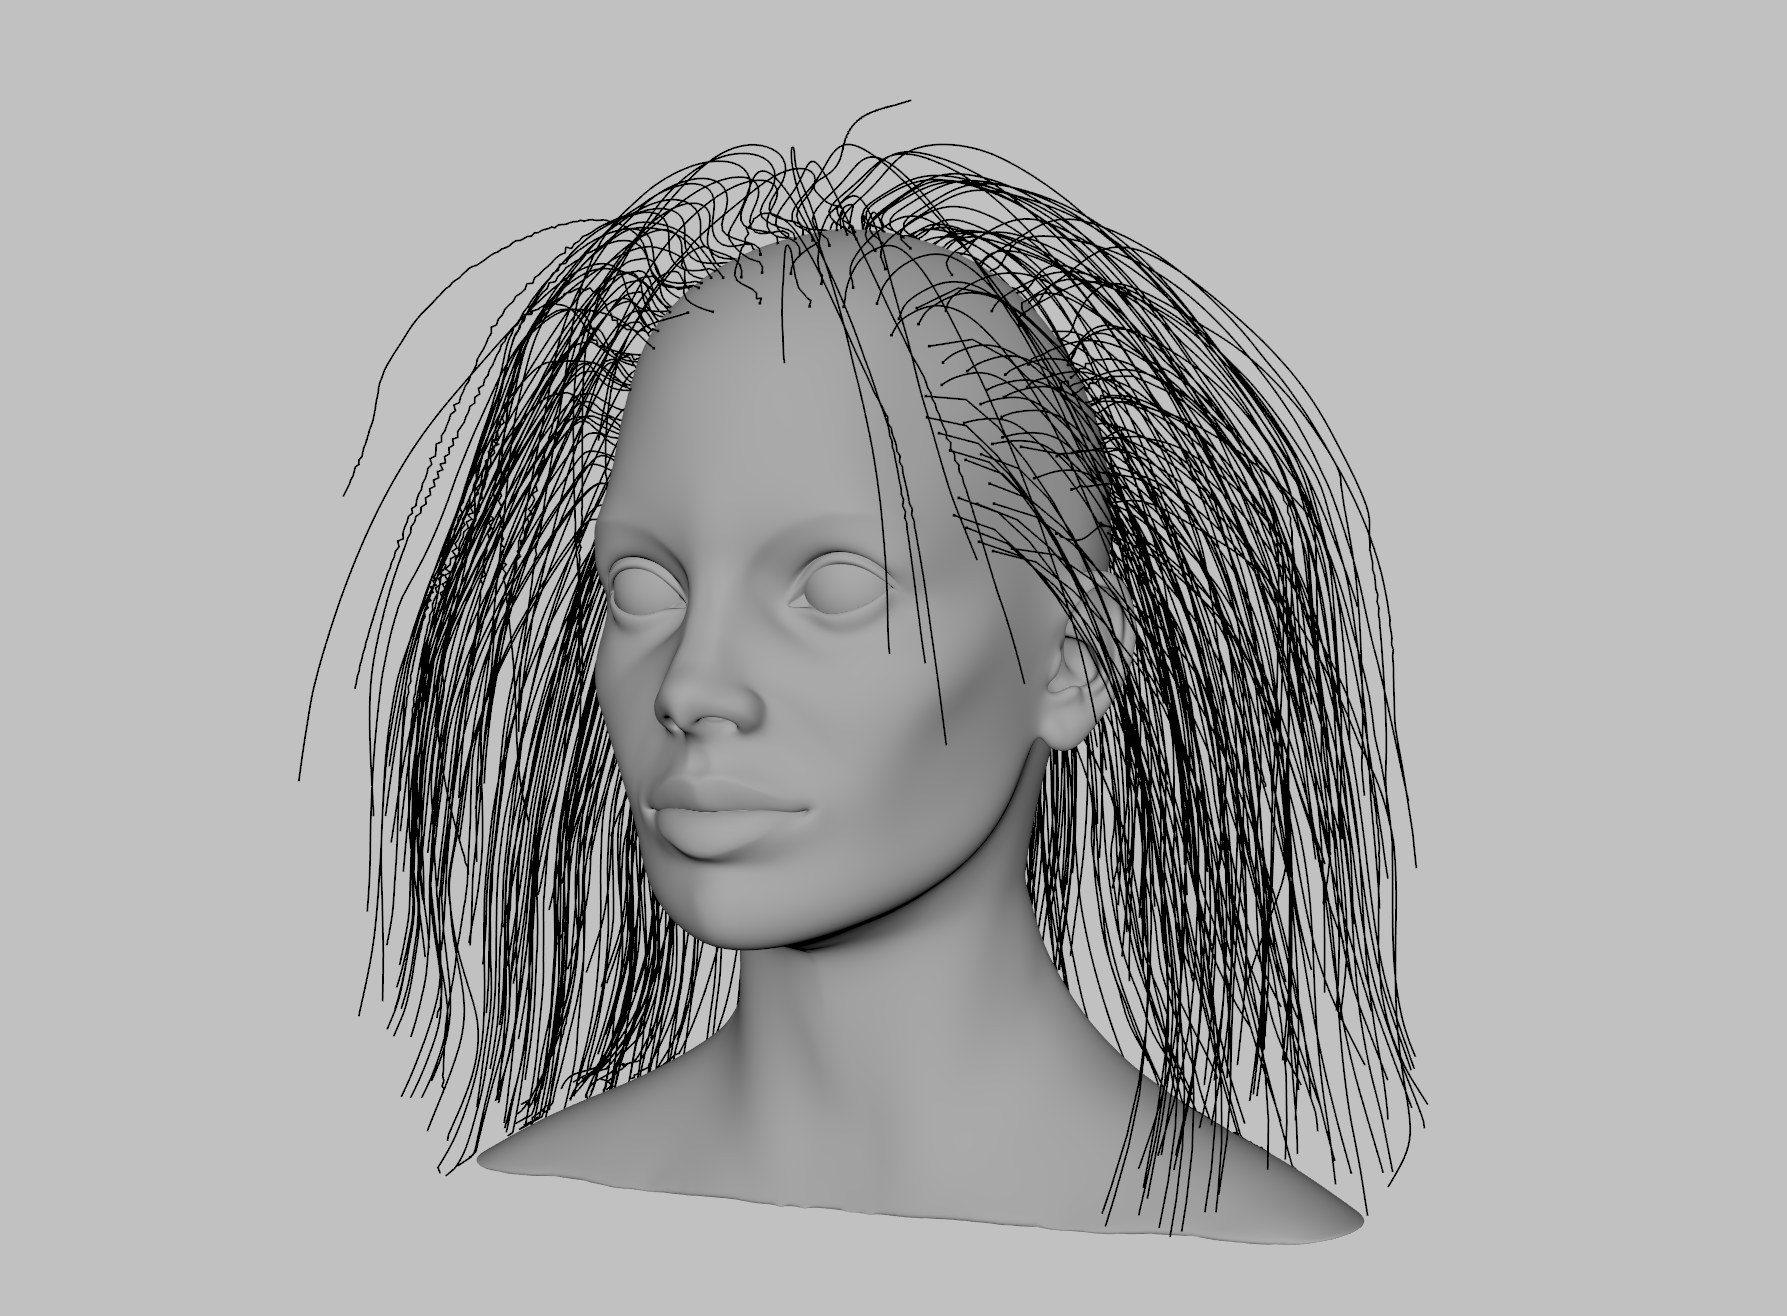
As we did for the dreadlocks, we have to add our initial strand. For simplicity’s sake, we’ll start from a basic sphere, but the final result will be applied to a real head. Here’s a recap of the steps to follow:
- Select the sphere, go to the Yeti menu and click on “Create Yeti Node on Mesh.”
- Select the sphere, go to the Yeti menu and then click on “Create Groom on Mesh.”
- Open the Grooming Tool, select the add Tool, and with a small brush size, start adding a single strand.
- Change its length as explained in part 1.
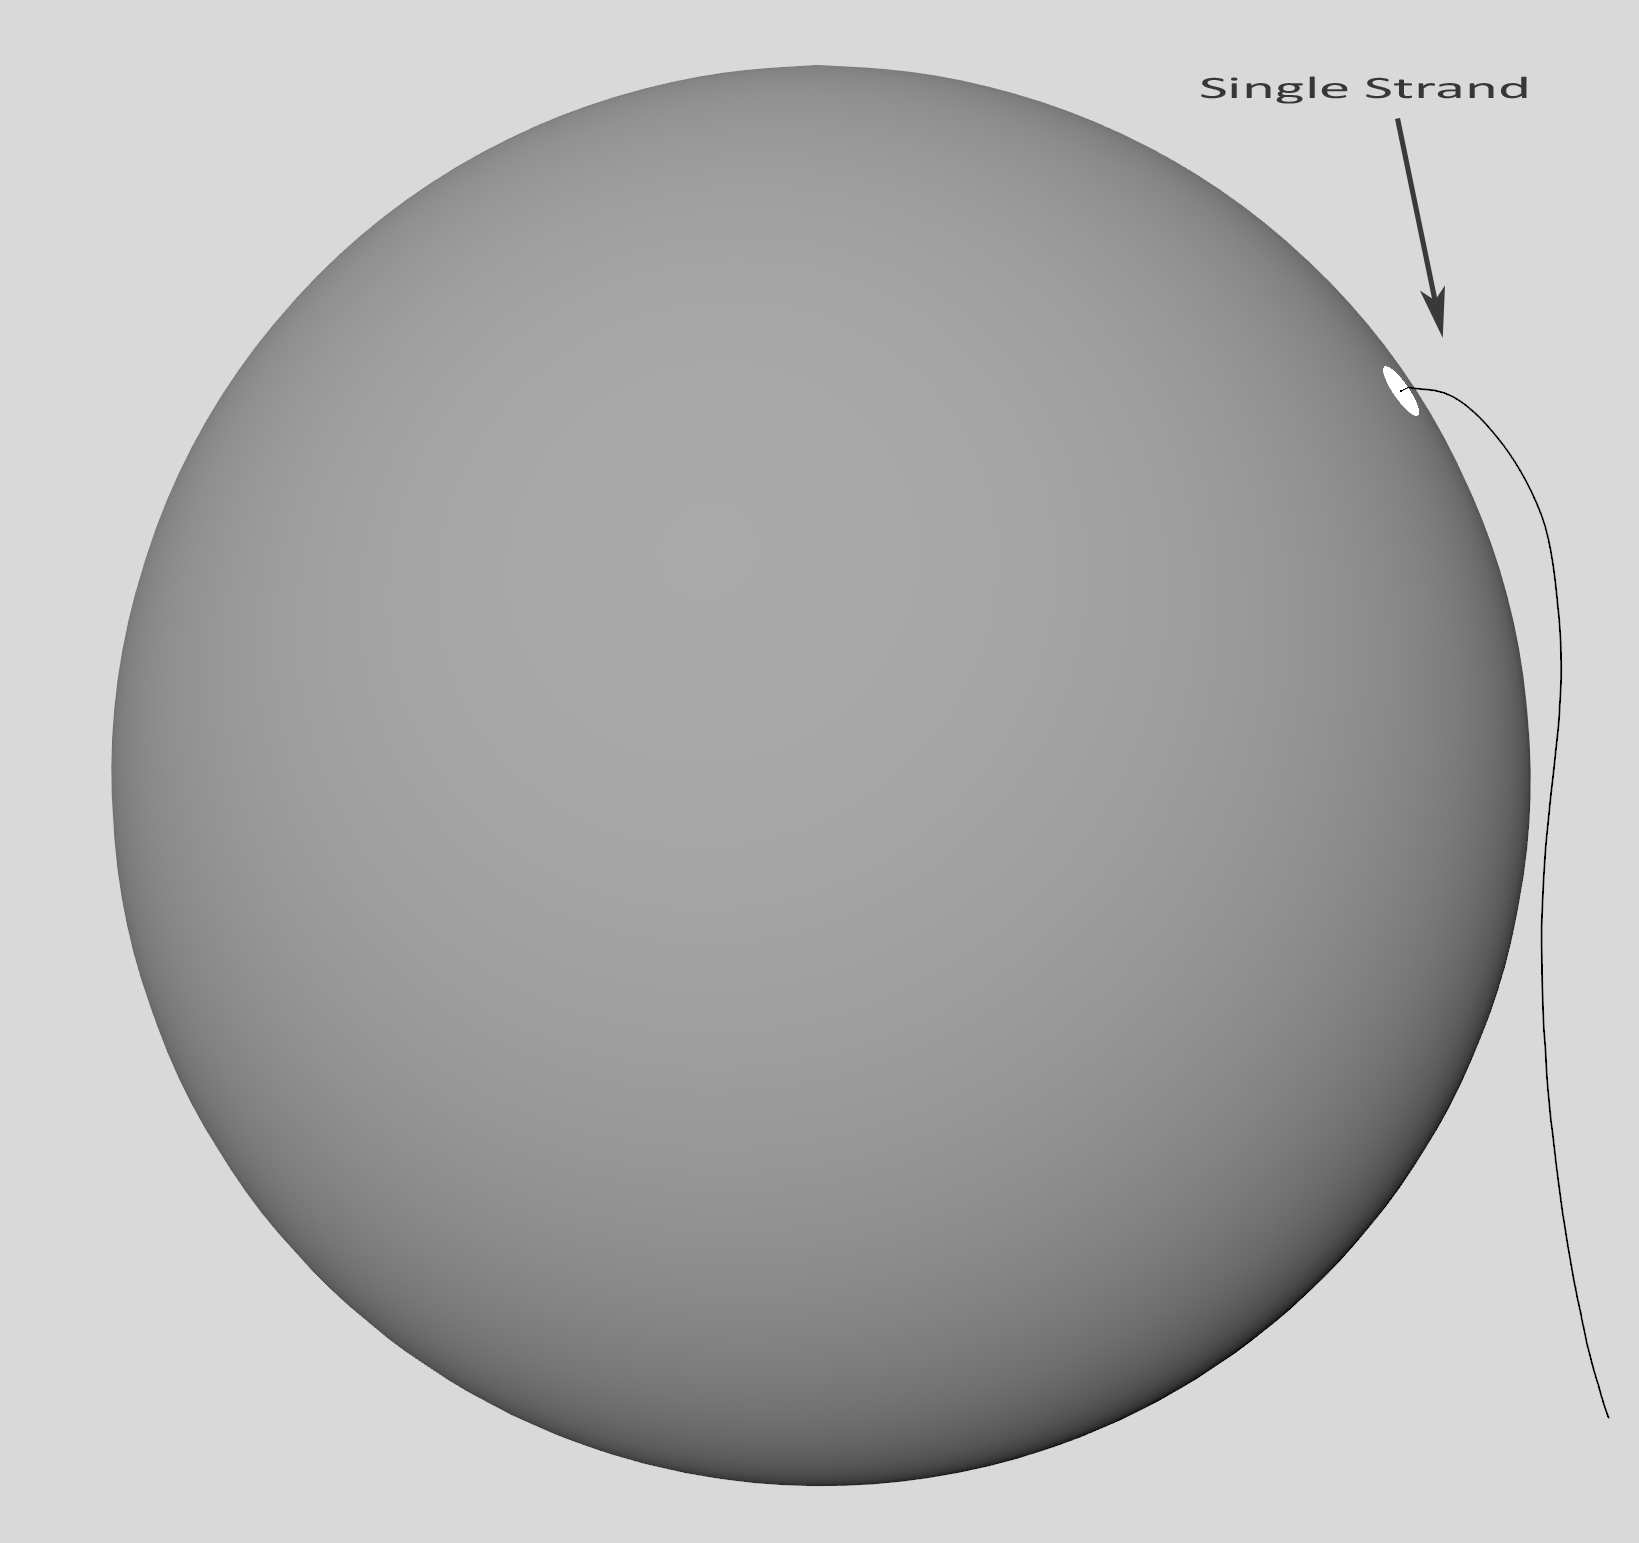
- With the help of the sculpt tool, give it a shape like in the following picture.
Generation of Fibers
We are now ready to use the Yeti Graph Editor and a few nodes that you already know. You might be confident with the Graph Editor, so I’ll give you a general overview and focus on particular aspects of it.
This is the main graph for the 3D curly hair. It’s not that complicated, and we’ll get through it in a bit.
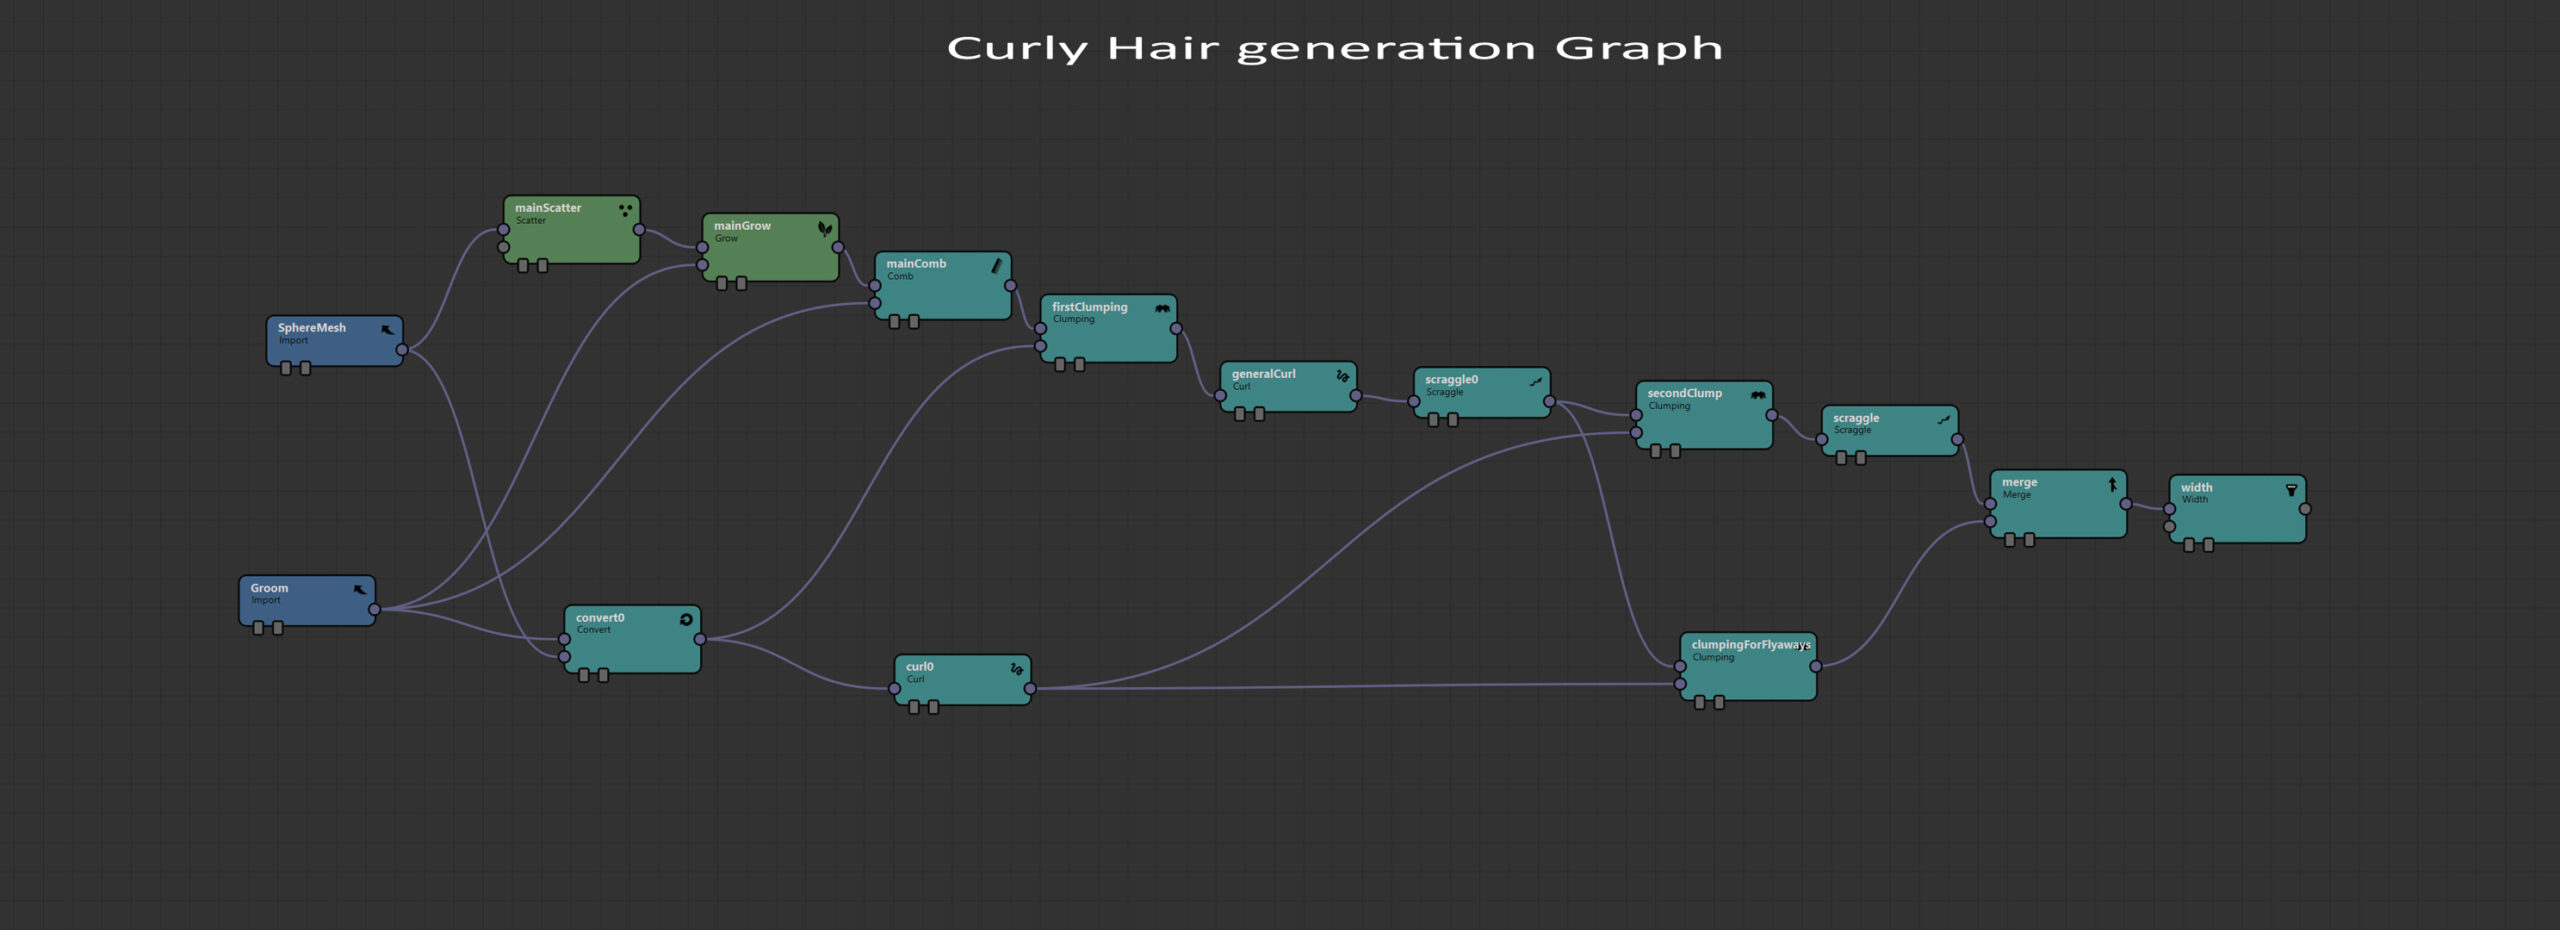
As we did in the previous networks, we’ll break it down by explaining the single parts.
Hair Clumping along the Single Strand
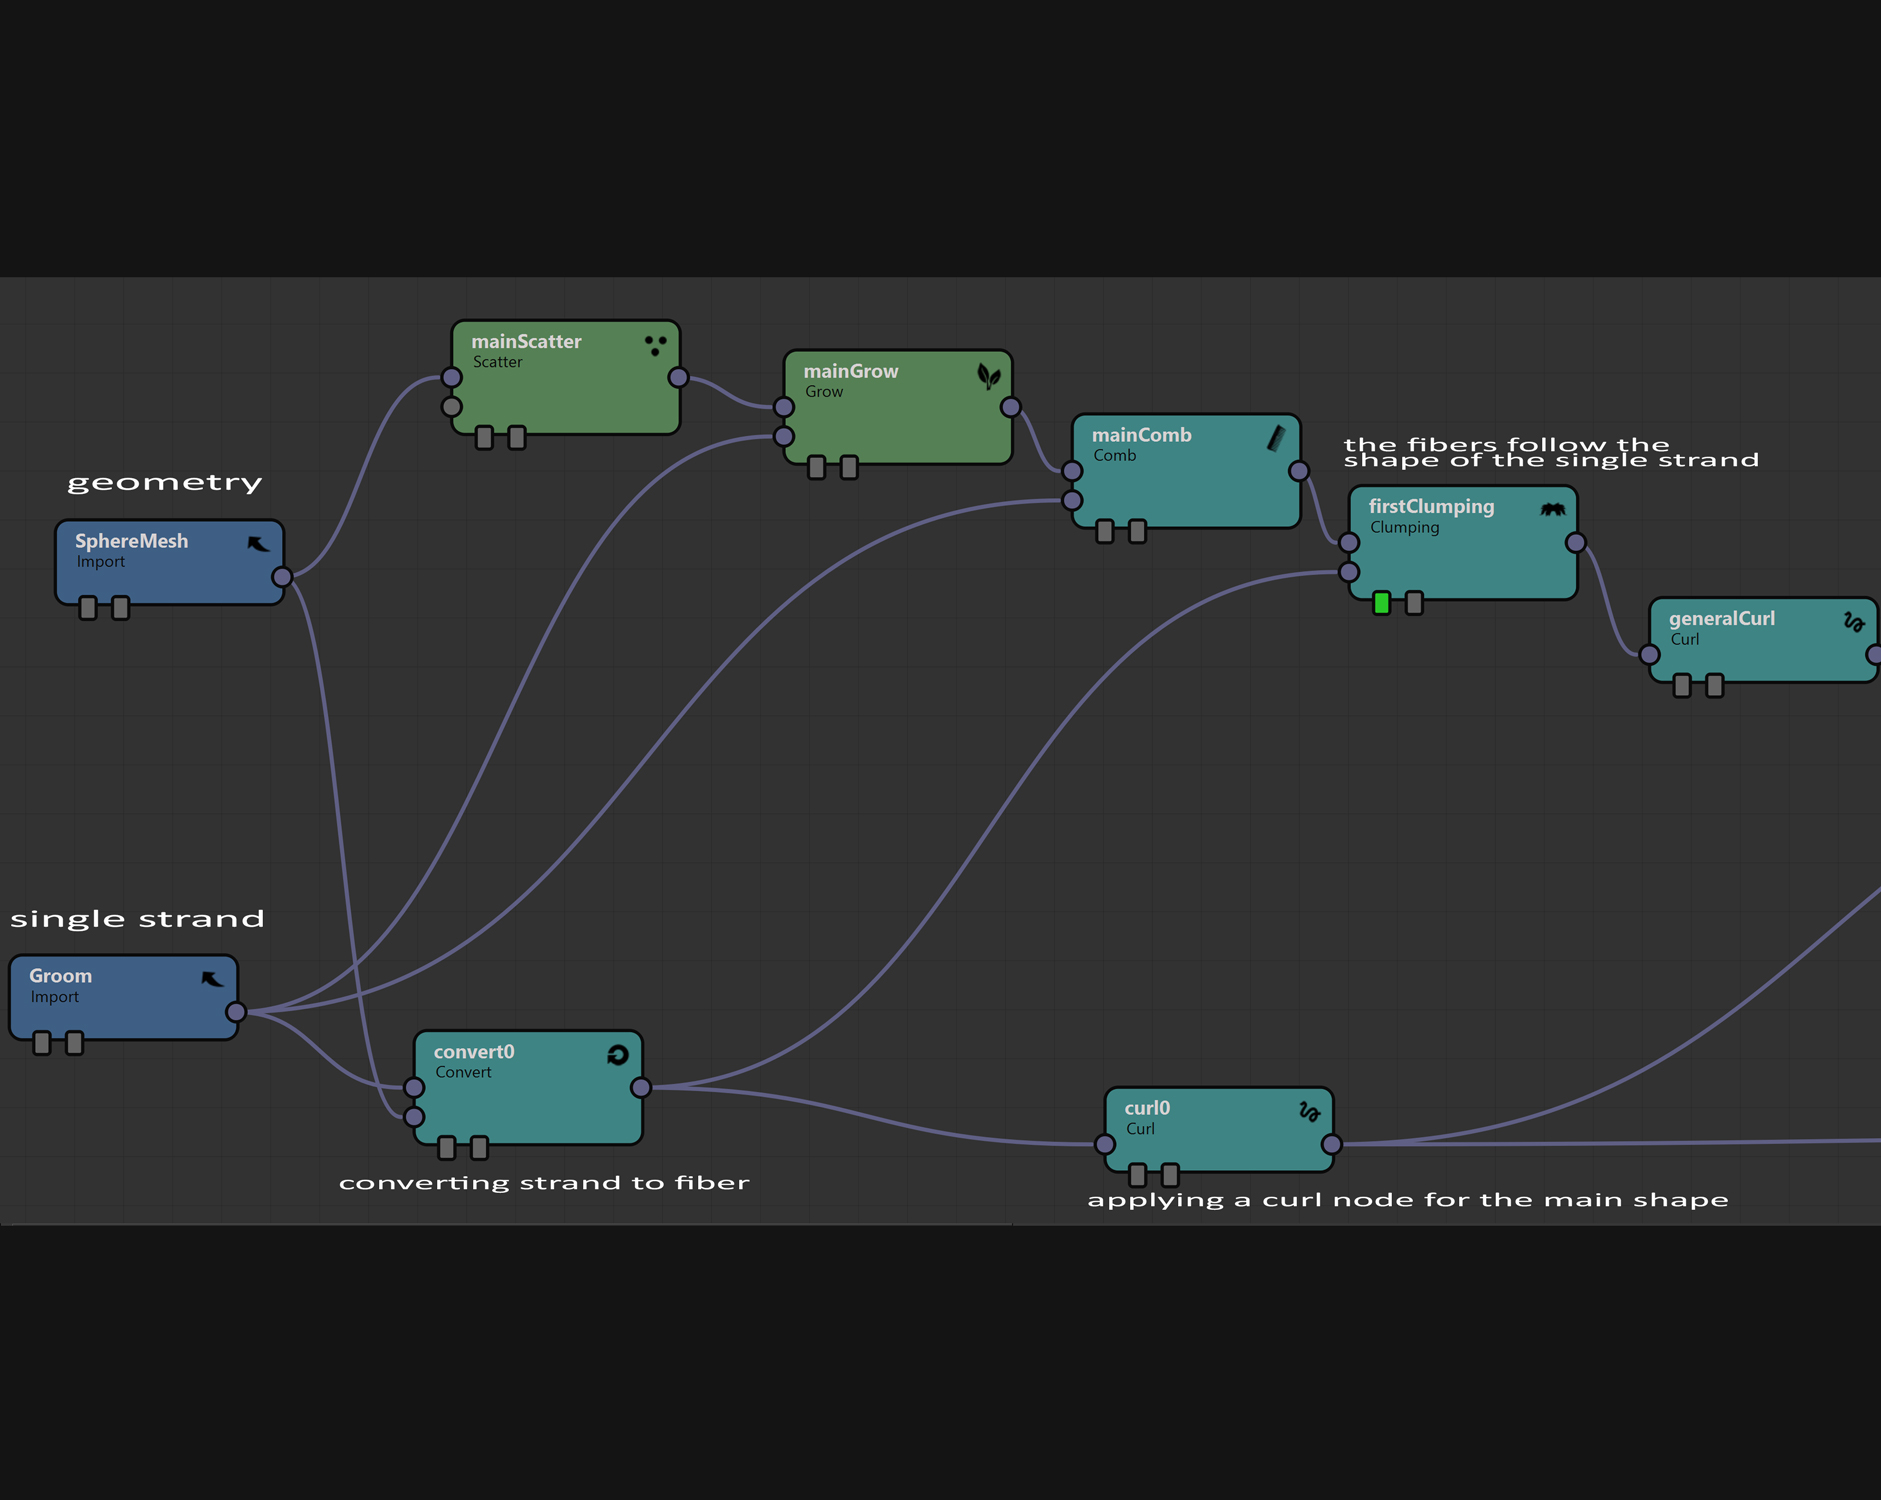
After importing the geometry and grooming, we want the fibers to follow our single strand. To accomplish that, we apply a first clumping node which has two inputs:
- The generated fibers—created from the mainScatter, mainGrow and mainComb nodes.
- A single fiber, which is the result of the conversion of our single strand—that’s because the clumping node accepts fibers to work.
We are simply telling Yeti to generate a bunch of fibers and make them collapse towards the single strand.
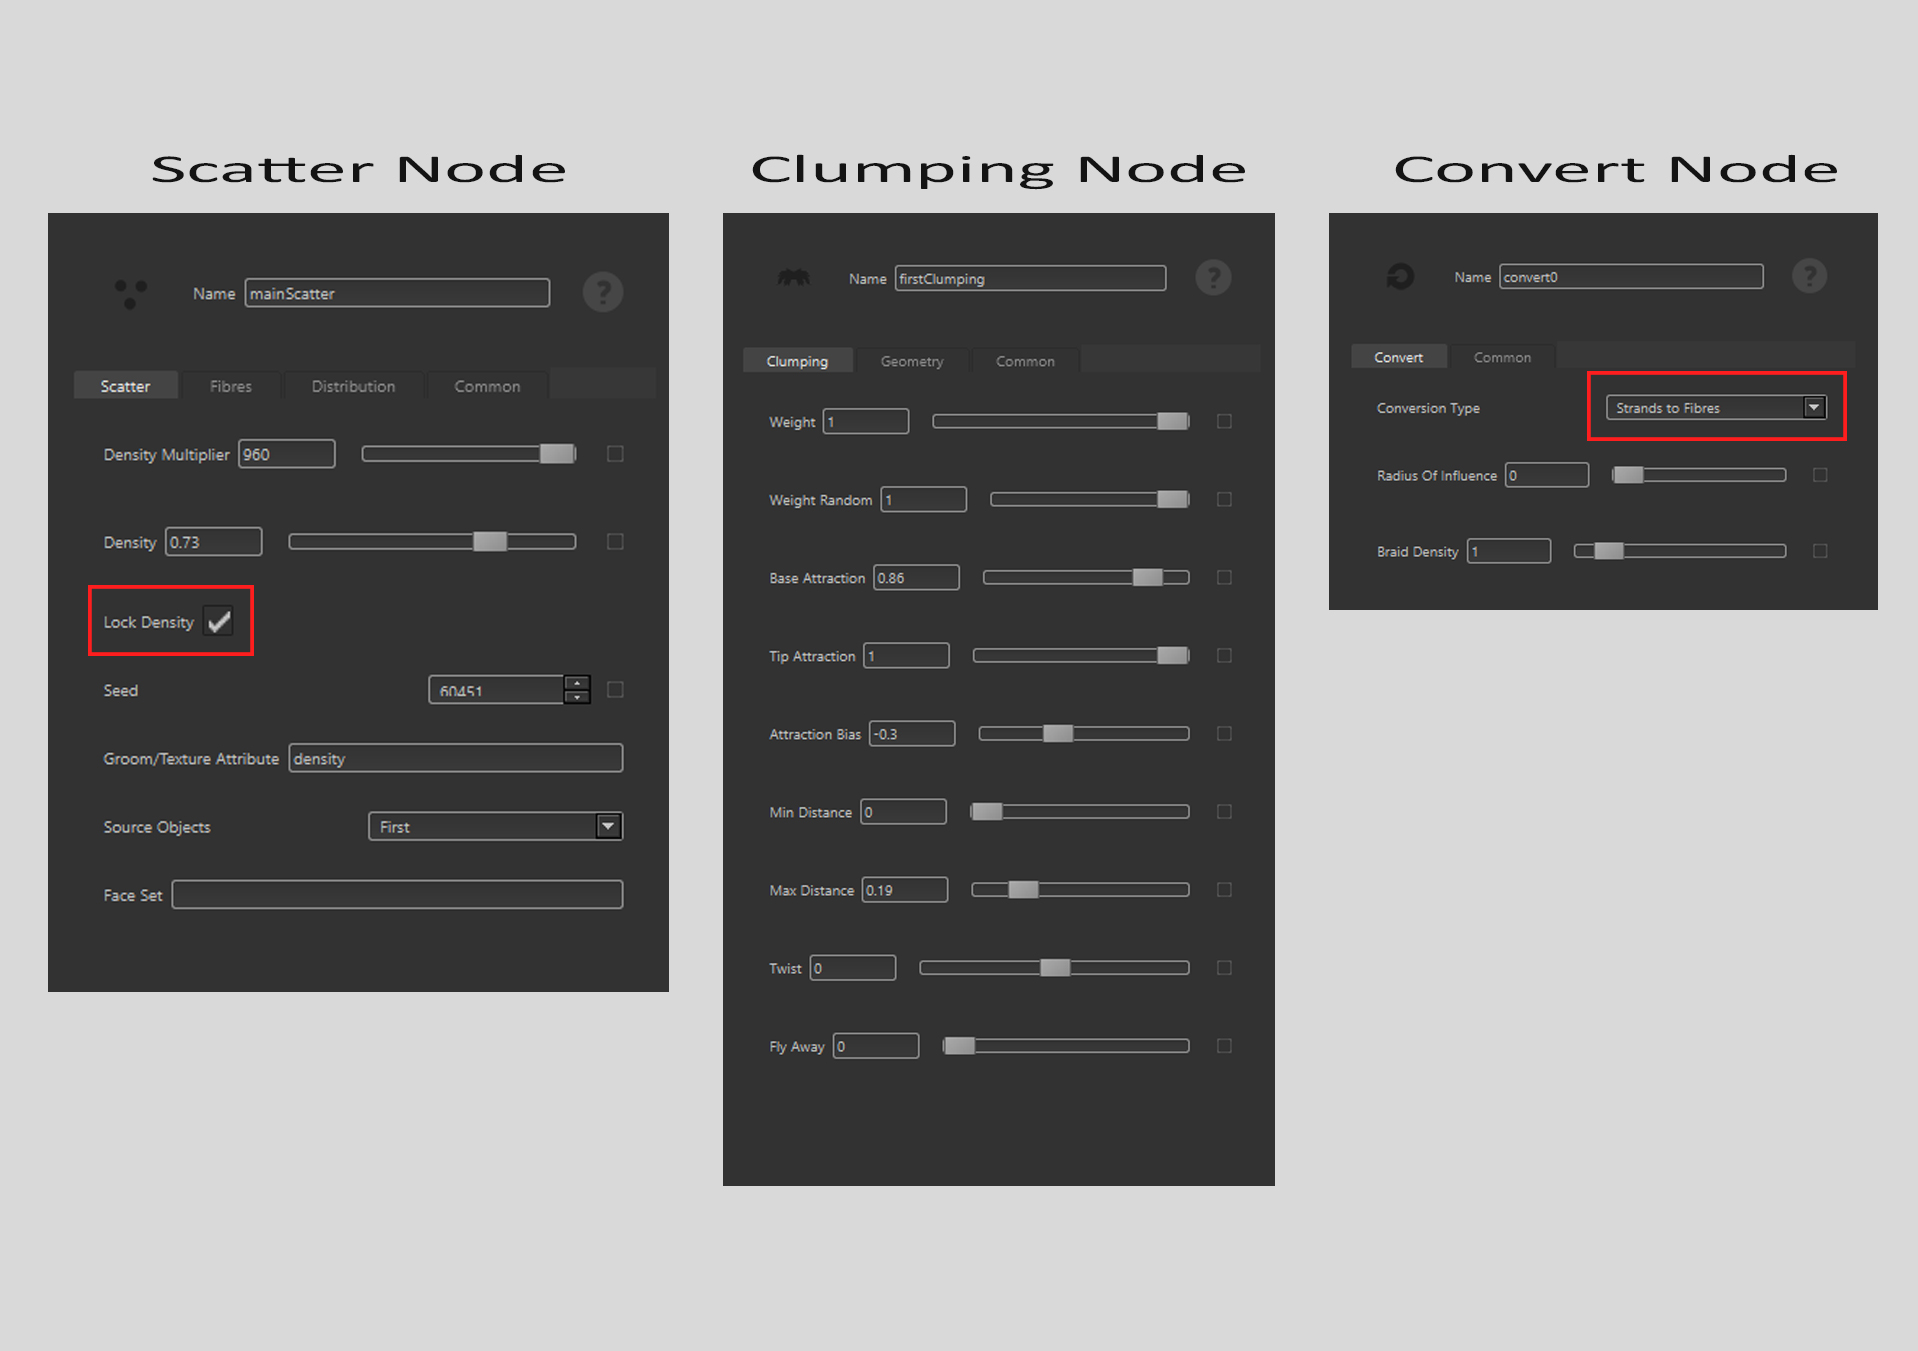
A few notes about the parameters we used for some of the previous nodes:
- In the scatter nodes, be sure to check “Lock Density.” This avoids having more fibers at render time, but just the ones coming out from the scattered points.
- In the Convert node choose “Strands to Fibers” as Conversion Type.
- The Clumping node has almost a standard setup.
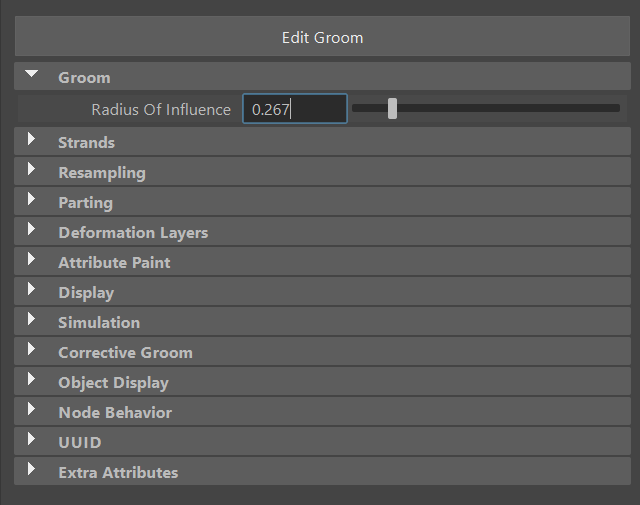
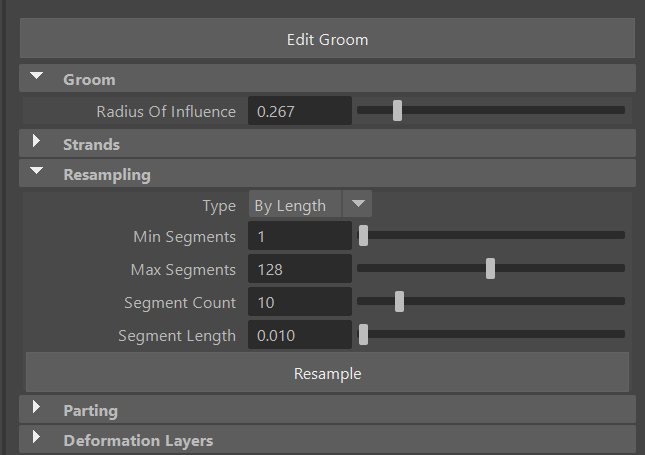
Note: Remember to set a proper Radius of Influence of your grooming element—this way you limit the fibers to a certain number growing from the root of your single strand. You can set a value by selecting your YetiGroom element from the Maya Outliner, and in the Attribute Editor there is a tab named Groom with Radius of Influence—set to 0.267 in our case.
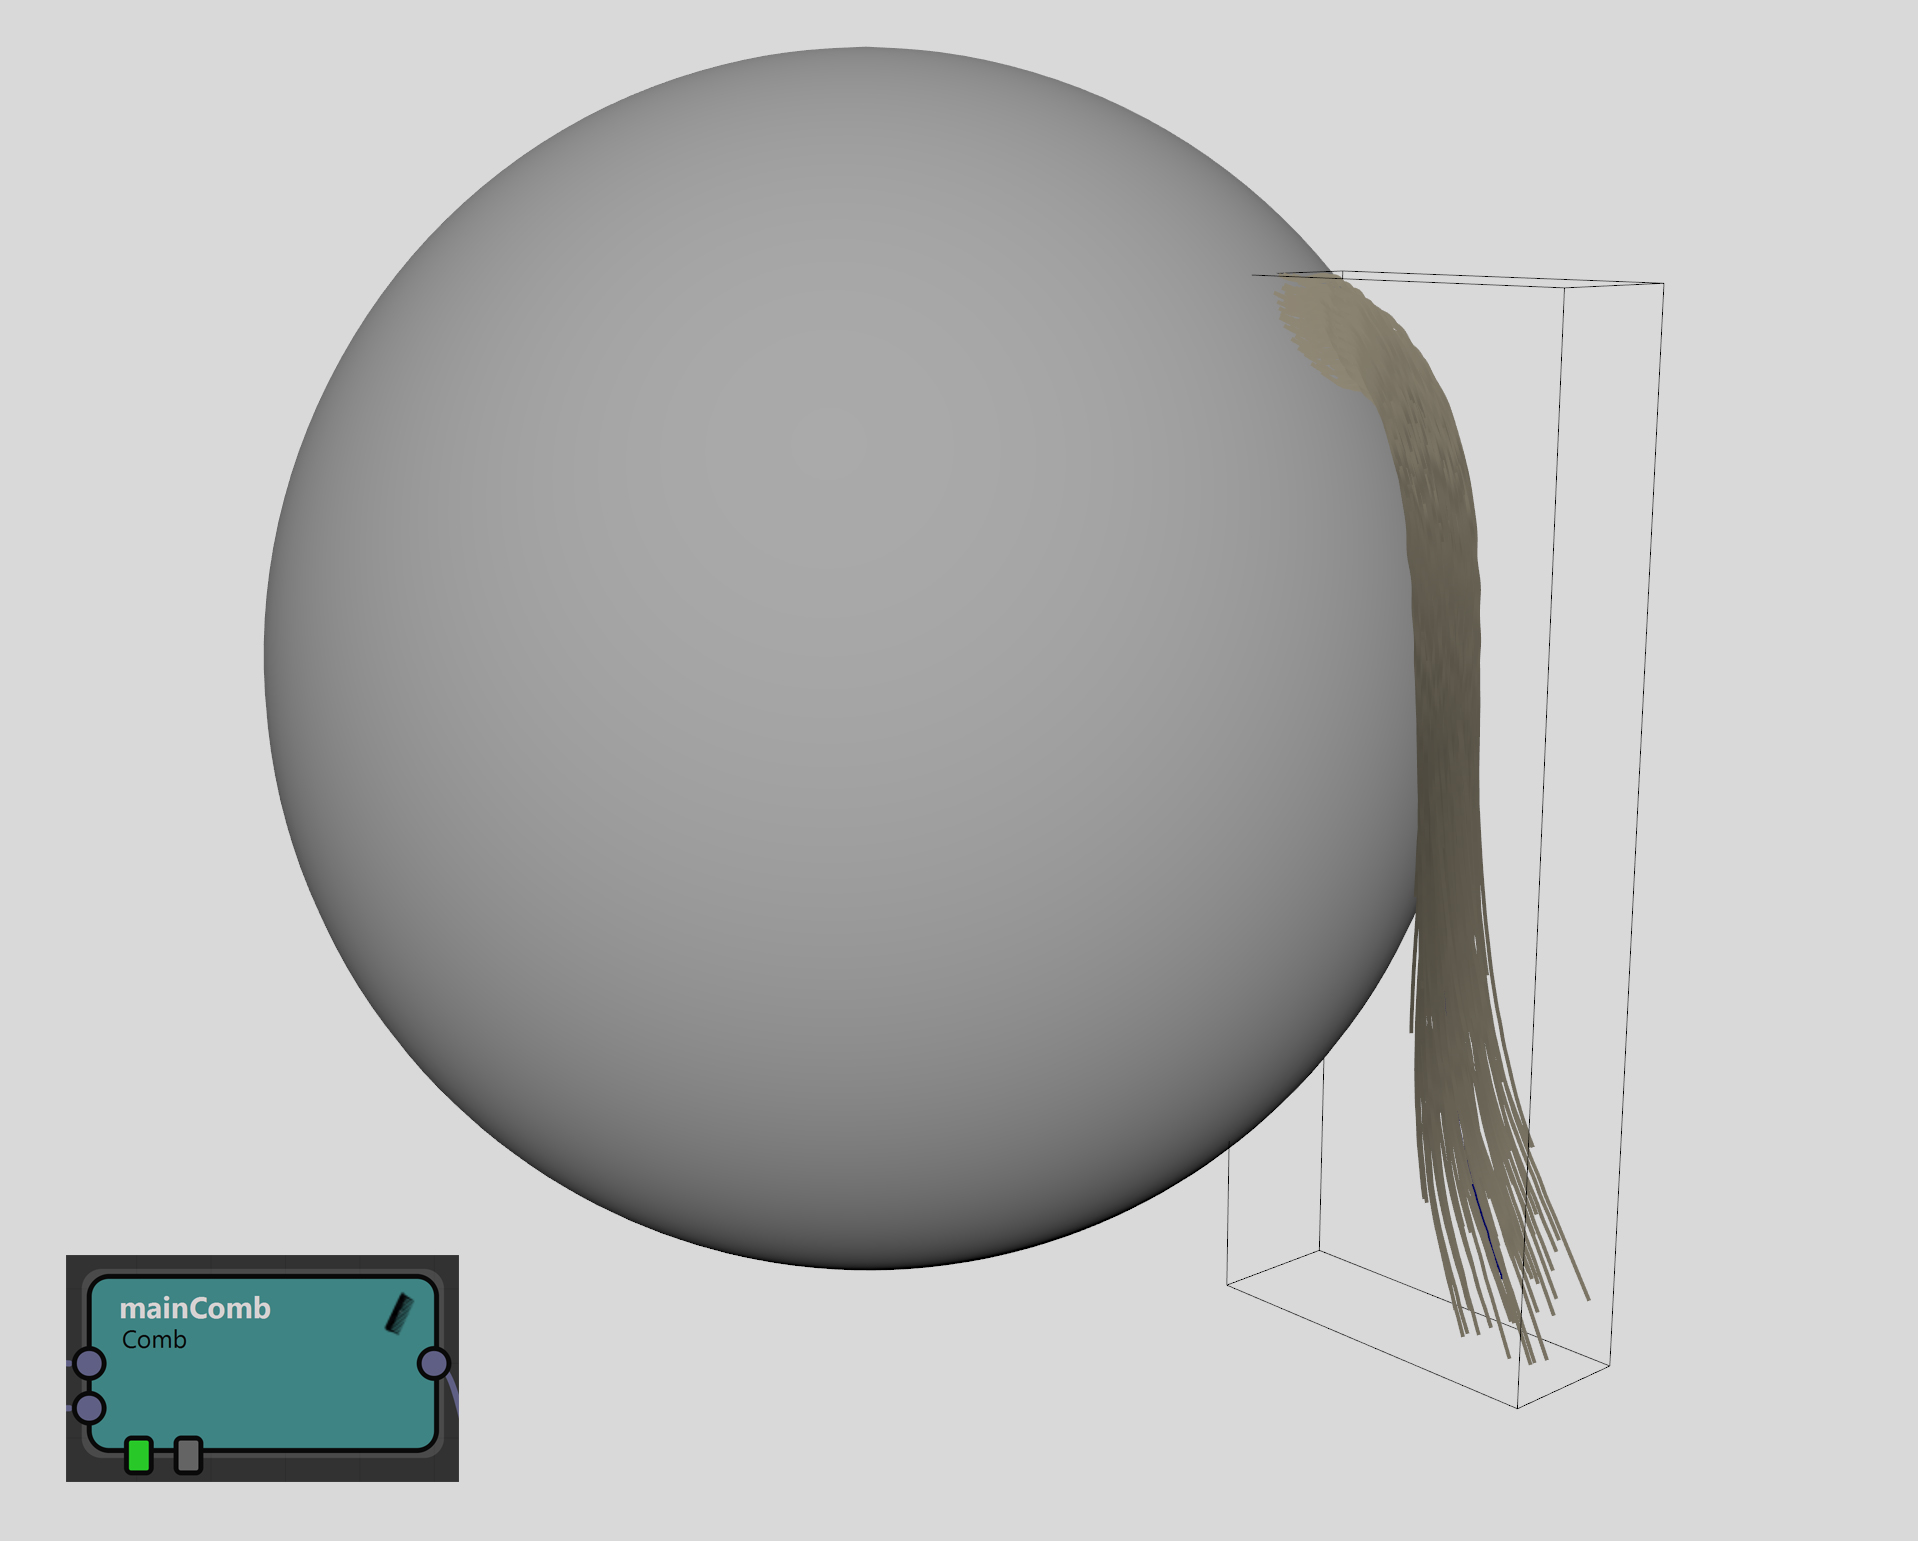
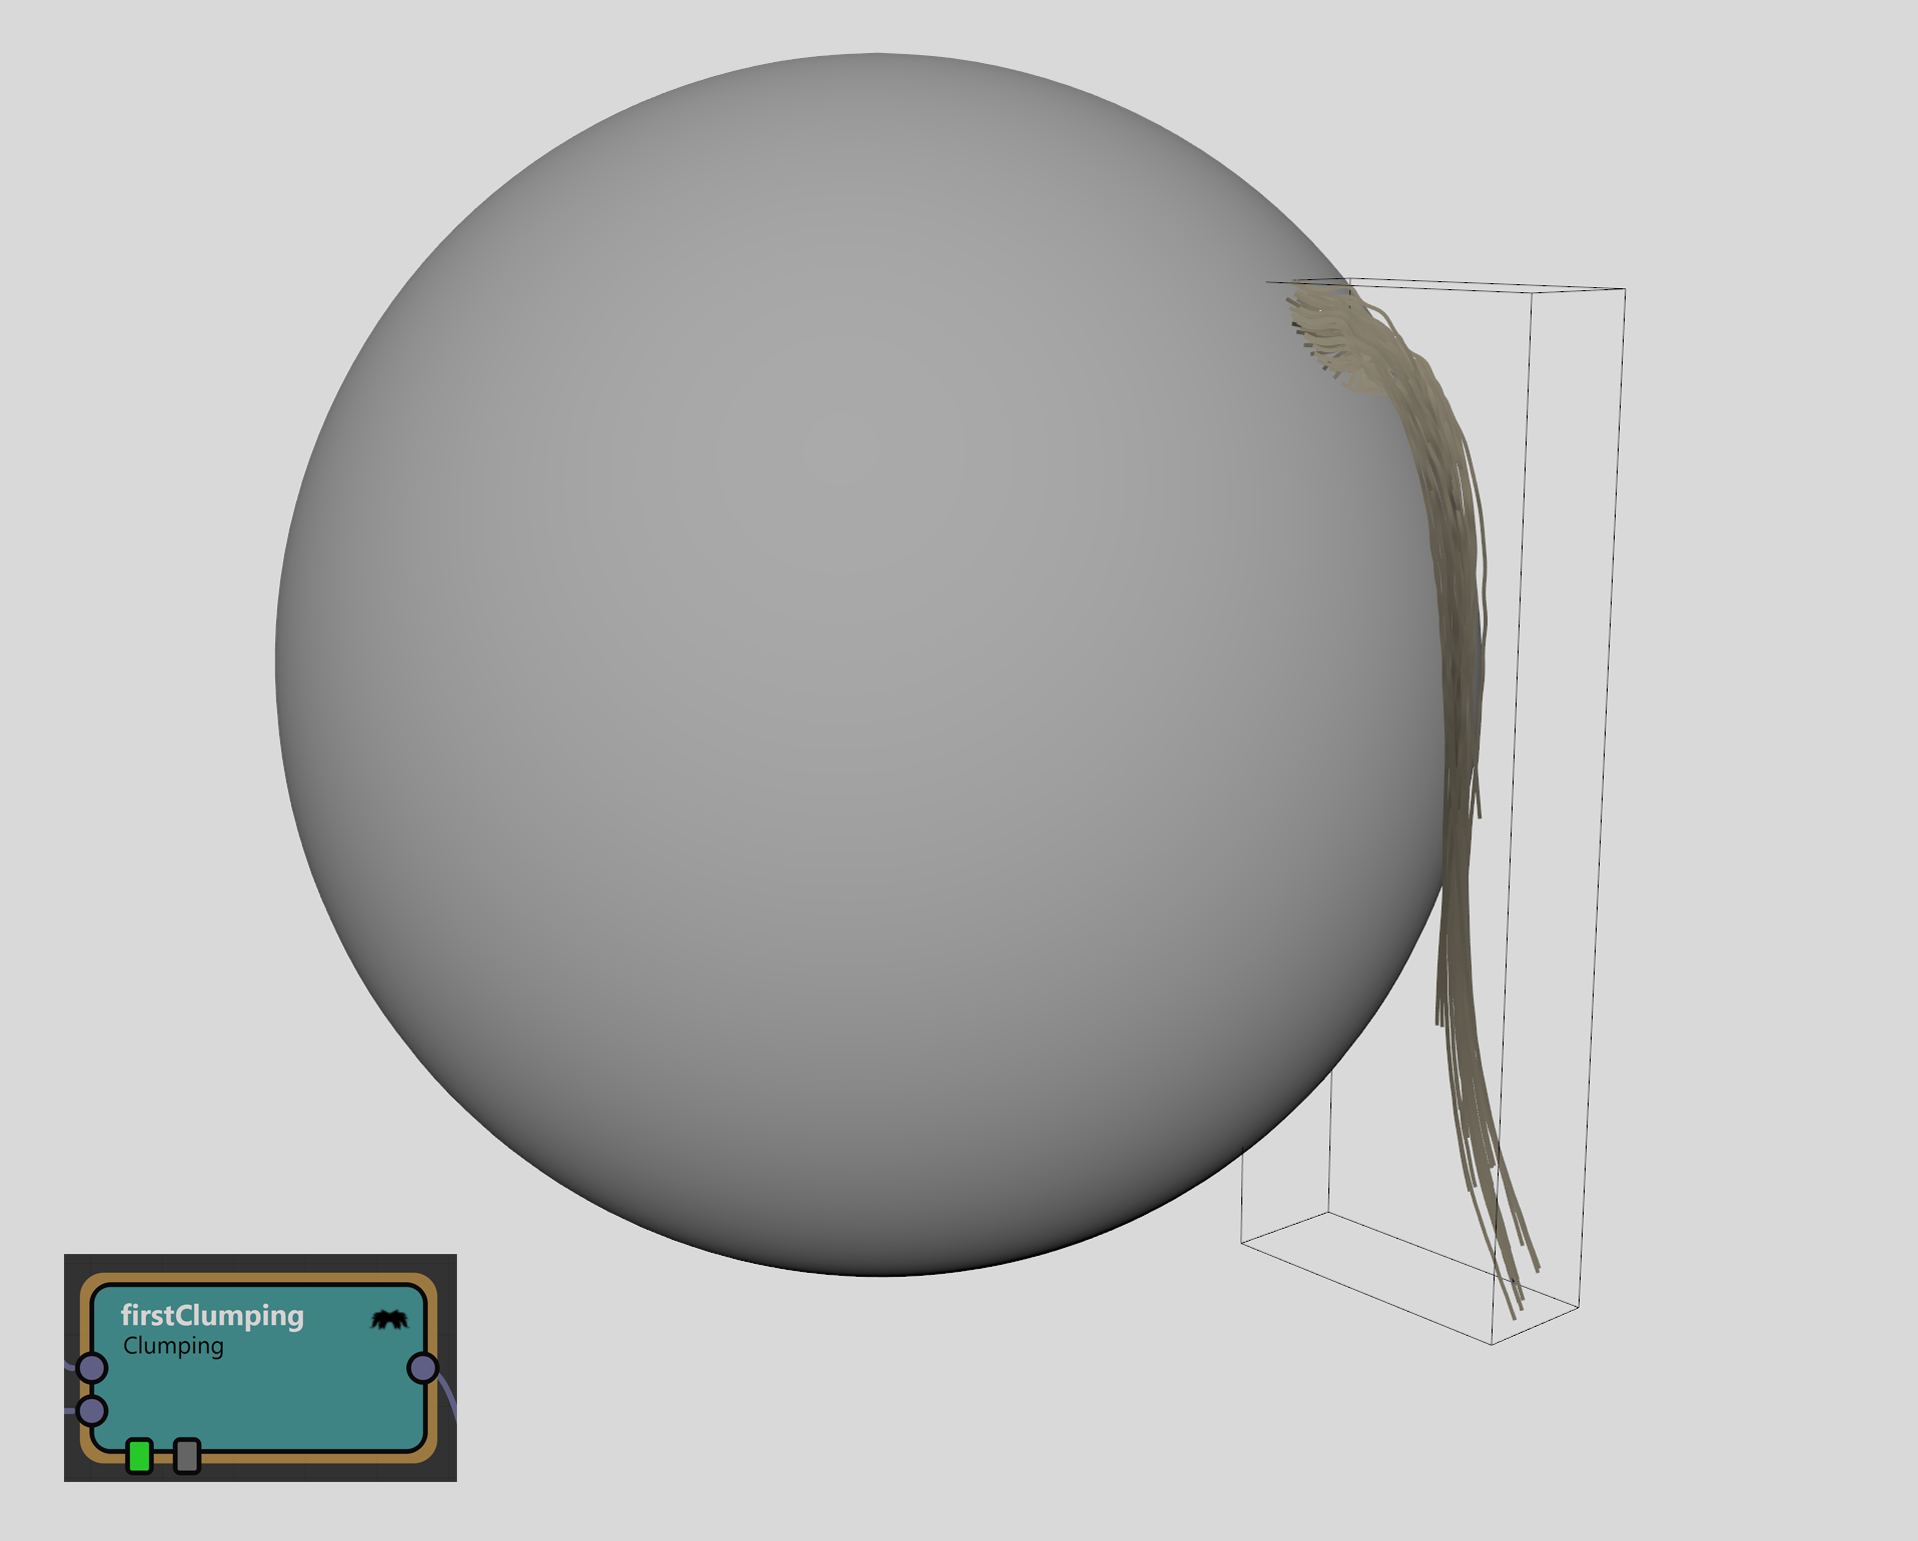
Here is before and after the application of the clumping node. Do you see that the strand works like a magnet for our fibers? That’s exactly what we want!
Creating the Basic 3D Curly Hair Shape
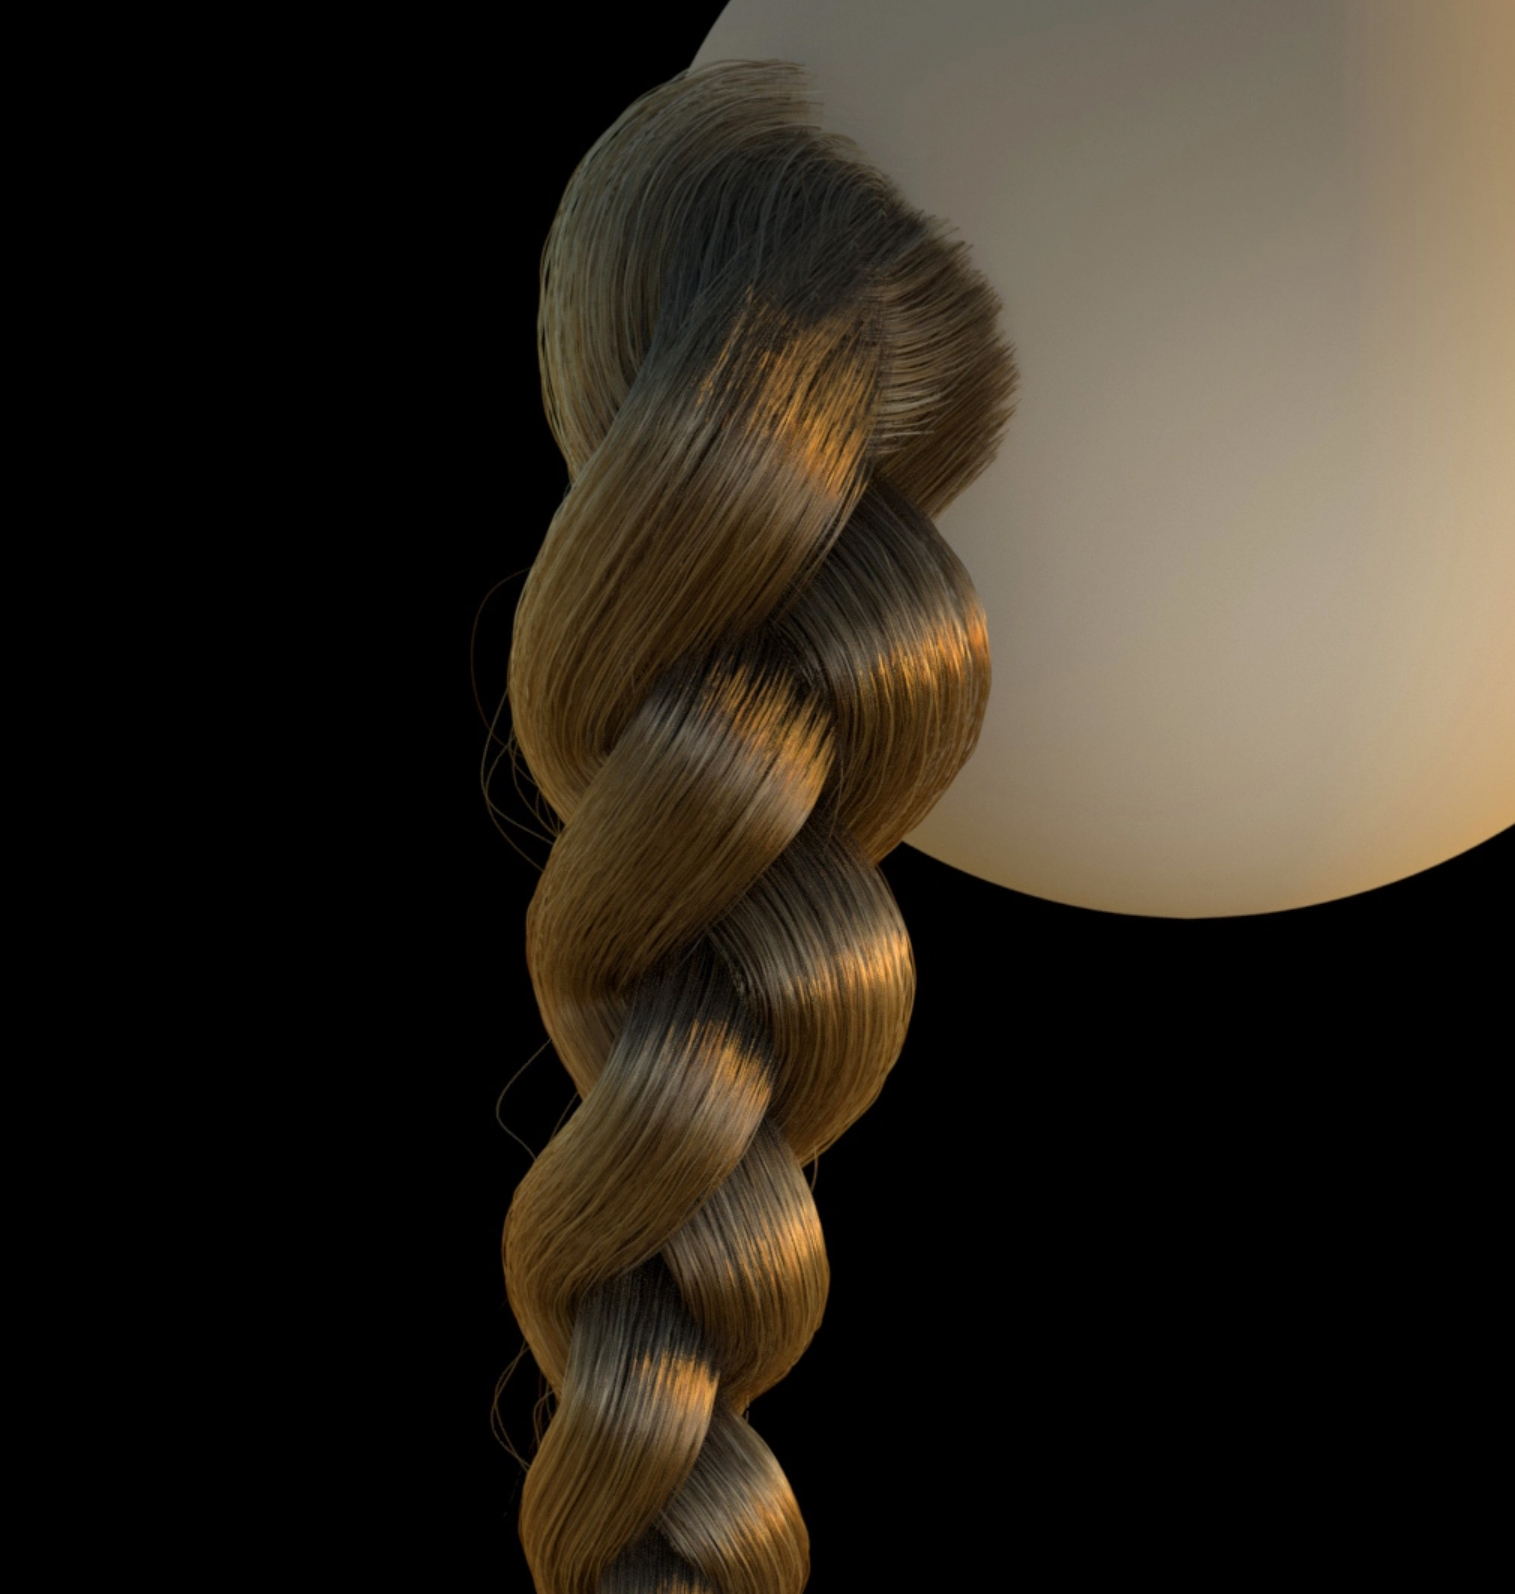
Considering the previous subnetwork, let’s explain the role of the curl node now. The main technique we will adopt consists of a basic curly fiber used as an element to guide the fibers we created before.
Simply put, we convert the single strand into a single fiber and apply a curl node to shape it.
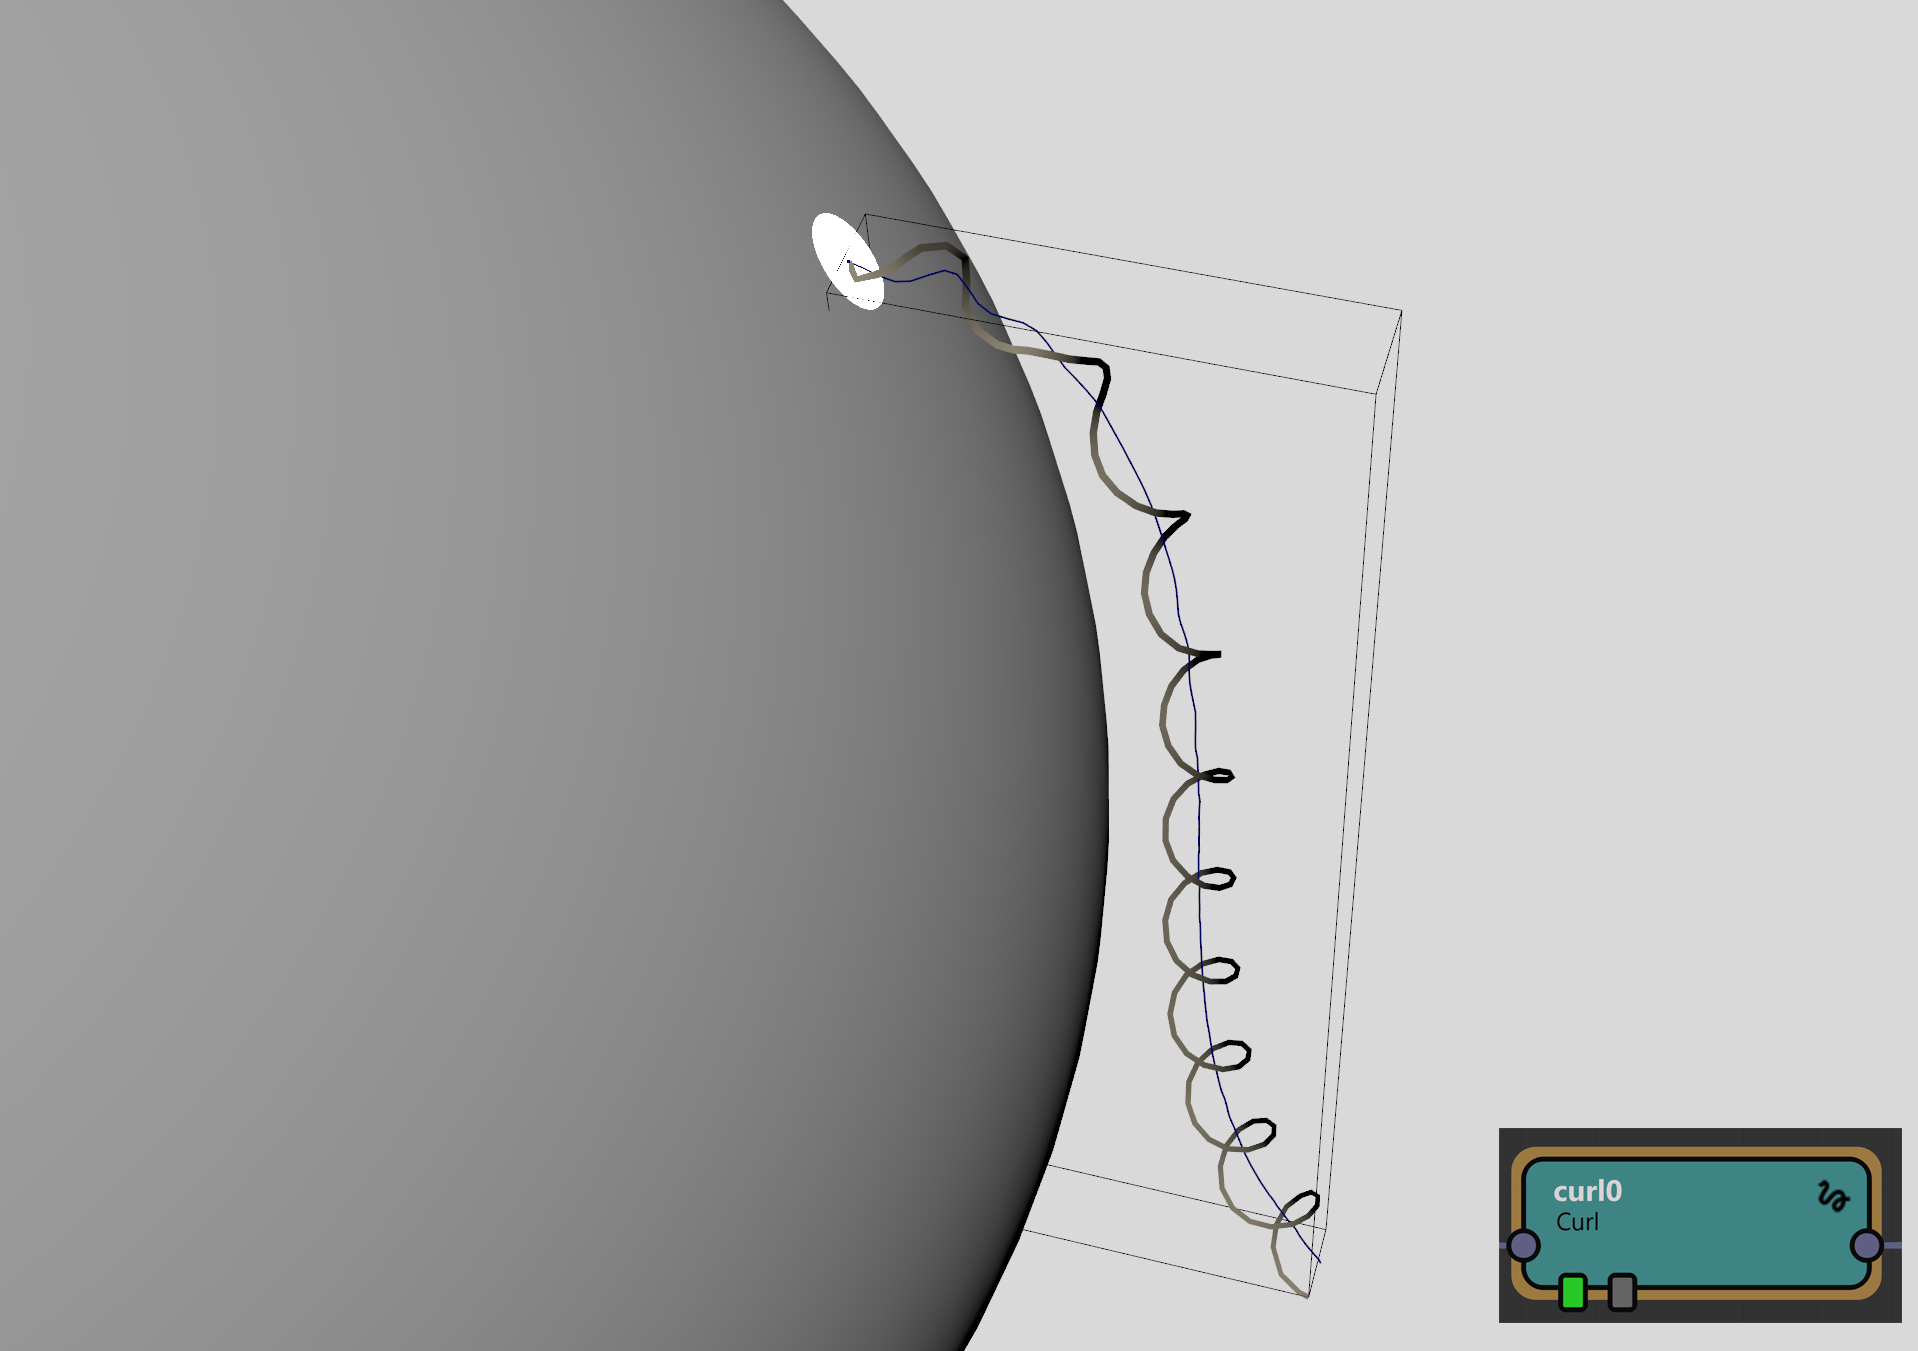
The output of this curl node will be used later in the article. For now we keep it as it is.
Note: if the curly fiber looks a bit jagged, you’d rather increase the number of segments for the initial strand! Yeti comes to the rescue by providing a Resampling tab that’s always located in the Attribute Editor of the YetiGroom element.
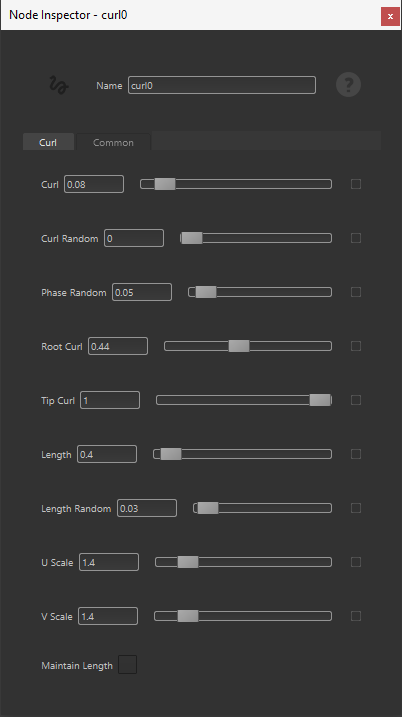
Finally, a quick look at the attributes for the curl node. We got a bit of phase randomness as well as for the Length. We’ll get back to some of these parameters once we talk about expressions.
Further Hair Clumping
Let’s consider the last portion of the network. Despite being simple to look at, this part required different tests and tweaks. The general idea is to adjust our fibers and apply a second Clump node. The result will be merged with a second layer which is responsible for flyaways.
At the very end, we’ll apply a Width node to make everything appear as real hair
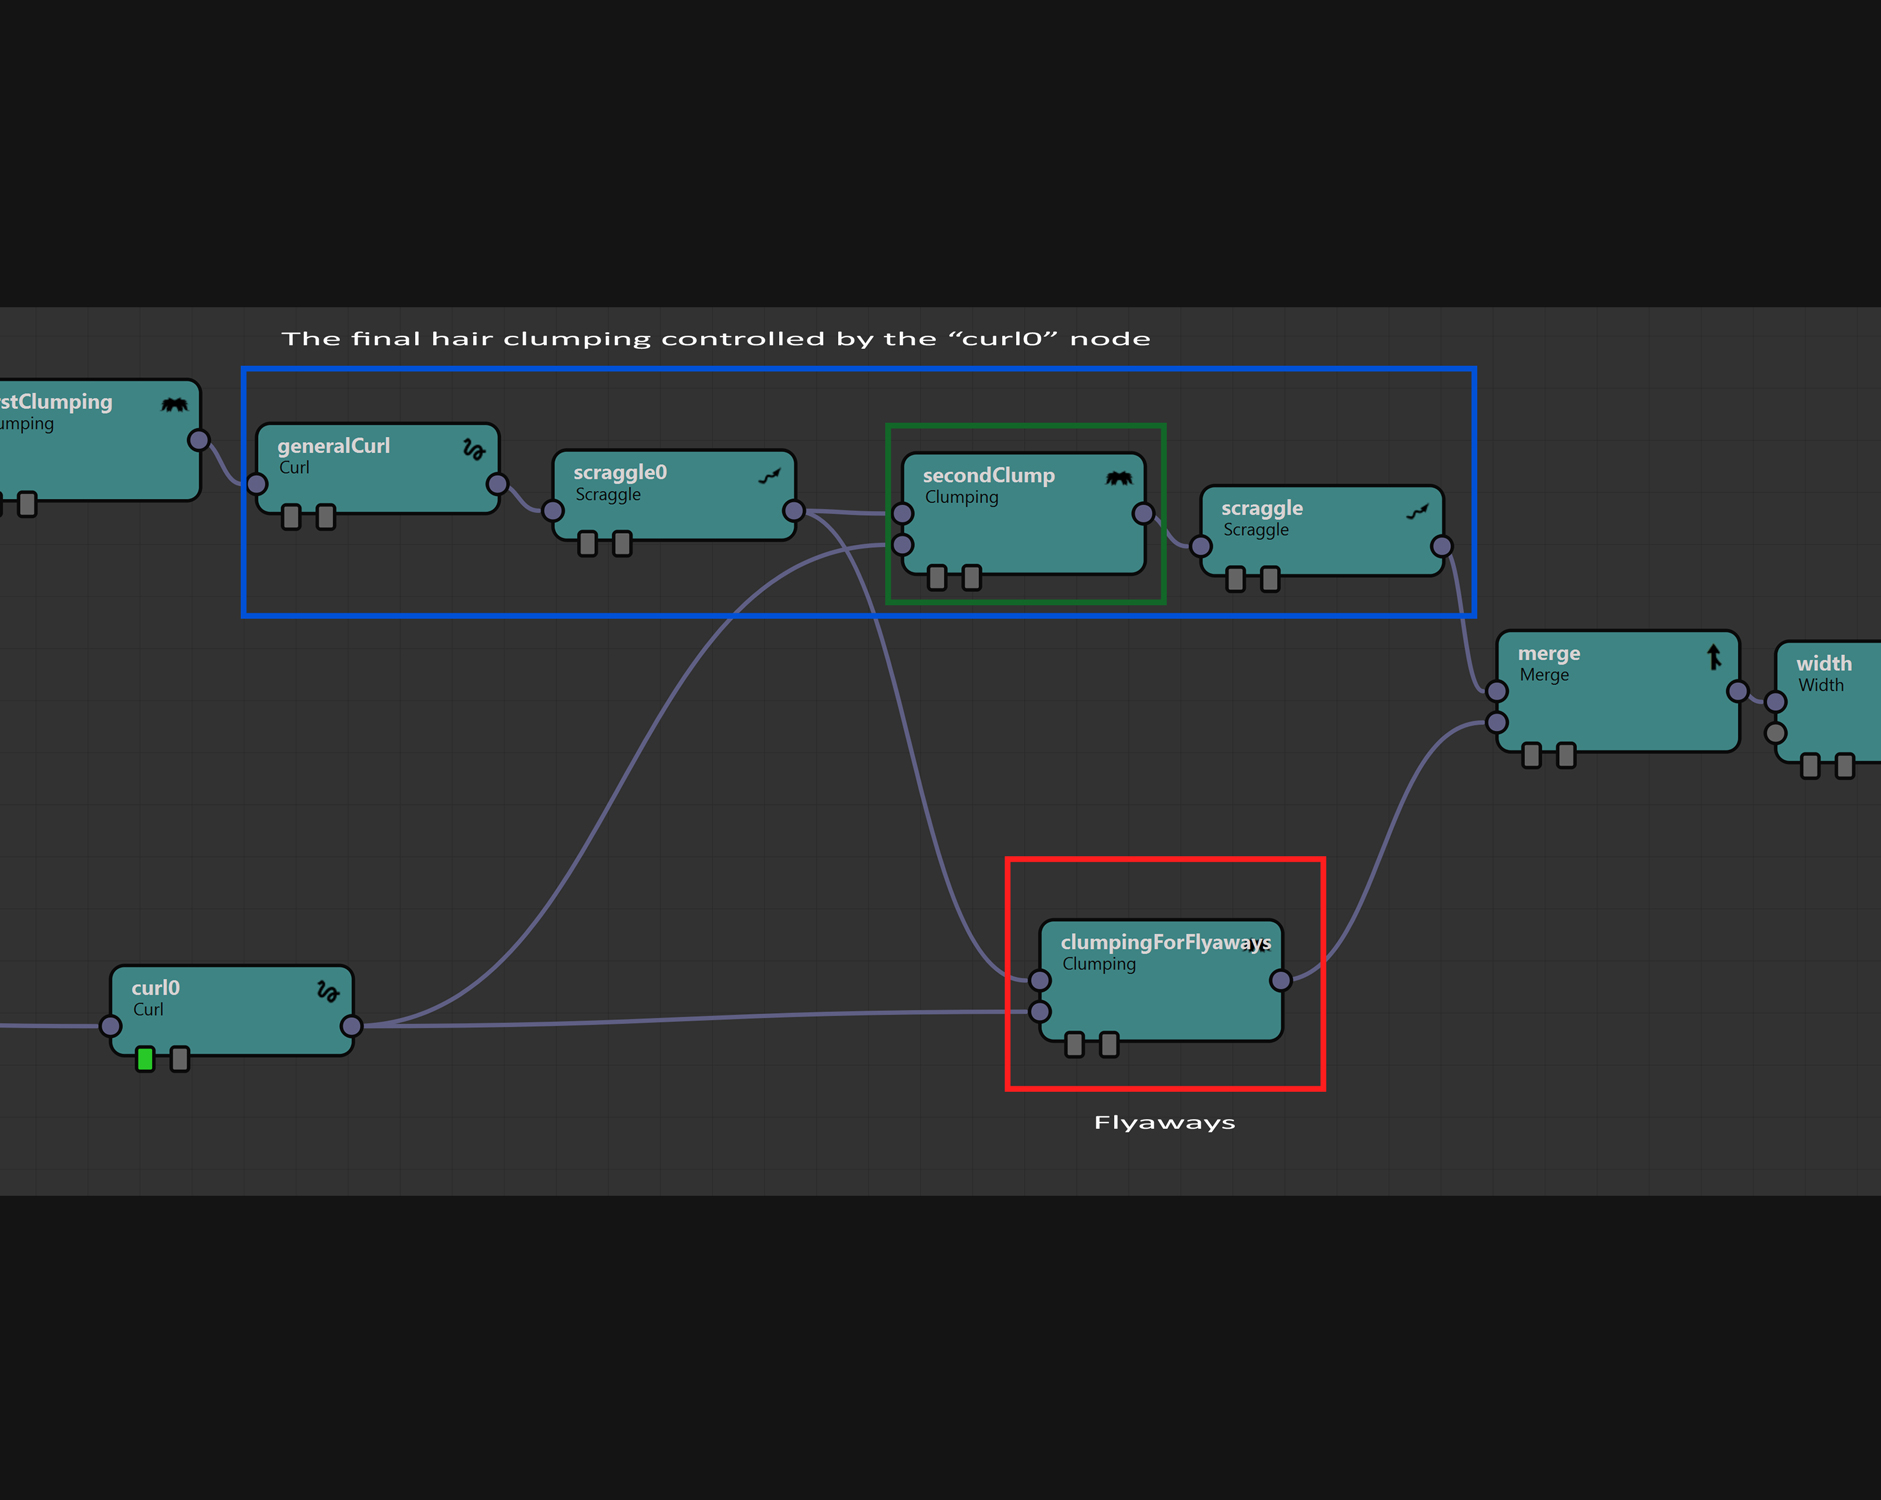
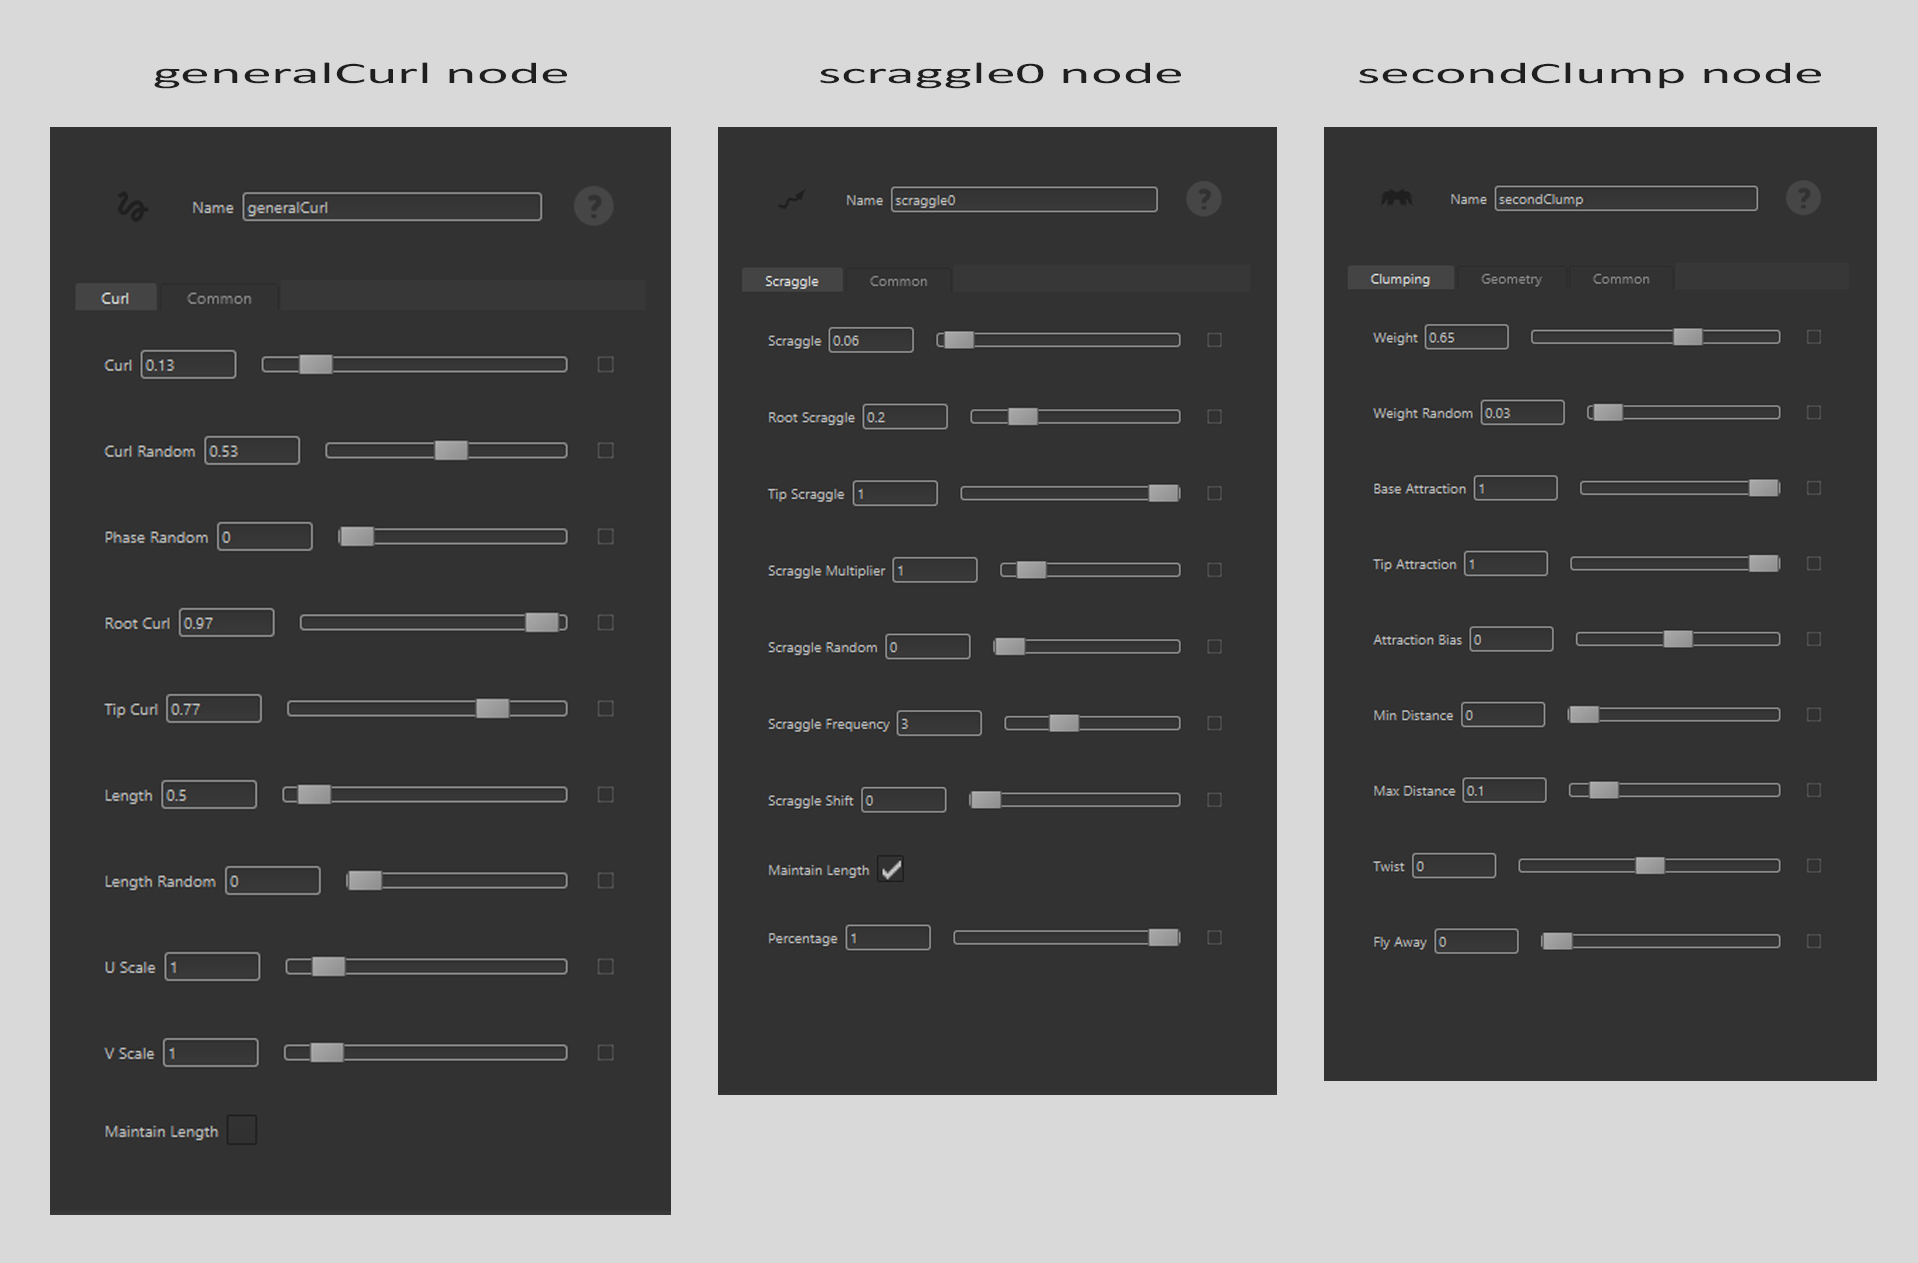
The “generalCurl” and “scraggle0” nodes give more volume to the fibers and randomize them a bit. That’s great to prepare the result for a second hair clumping. The result of the scraggle node looks ugly but it helps a lot.
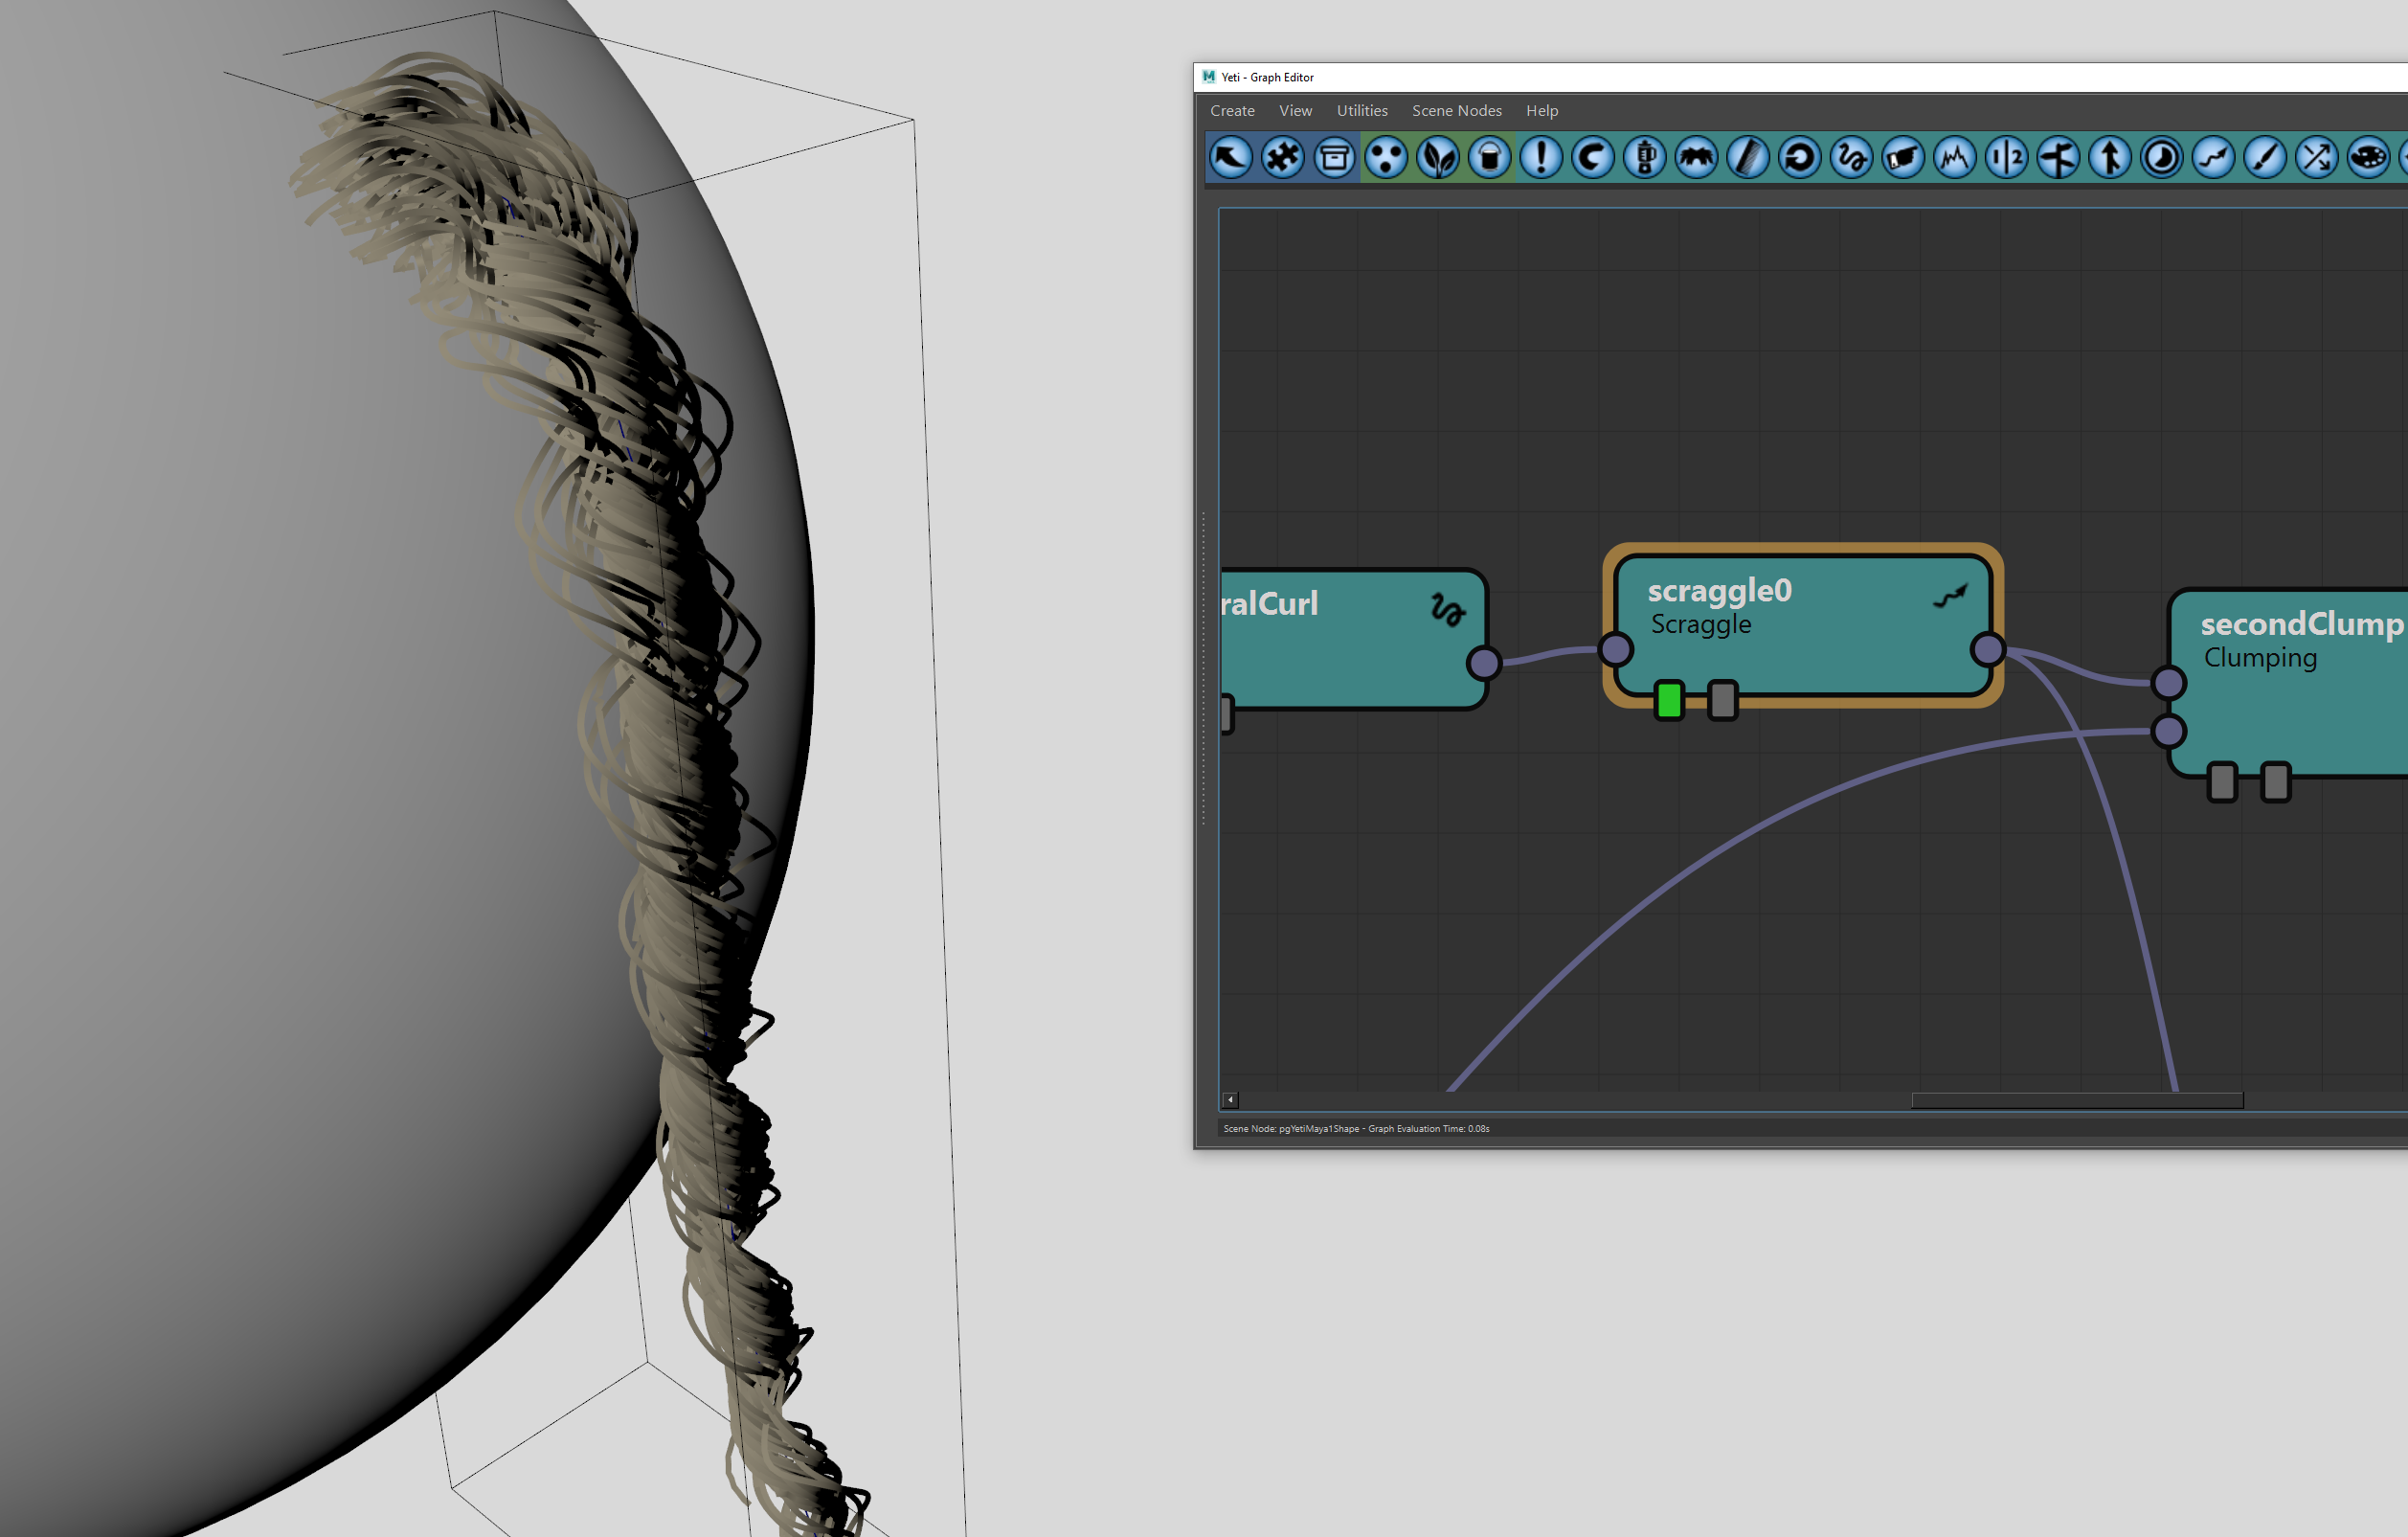
The magic comes from the “secondClump” node, which attracts the current fibers towards the basic curly fiber we built earlier. After that, we apply a new Scraggle nodes to randomize the fibers a bit more.

There are no particular settings for the nodes. Nonetheless, here is what I set in my graph.
Flyaways
If you observe curly hair, you’ll notice the presence of flyaways. I then decided to introduce a third hair clumping node called “ClumpingForFlyaways.” It has the same input as the previous “secondClump” node, but the parameter named “Fly Away” has been increased a bit.
Let’s combine the two parts by a Merge node and this is the result we obtain.
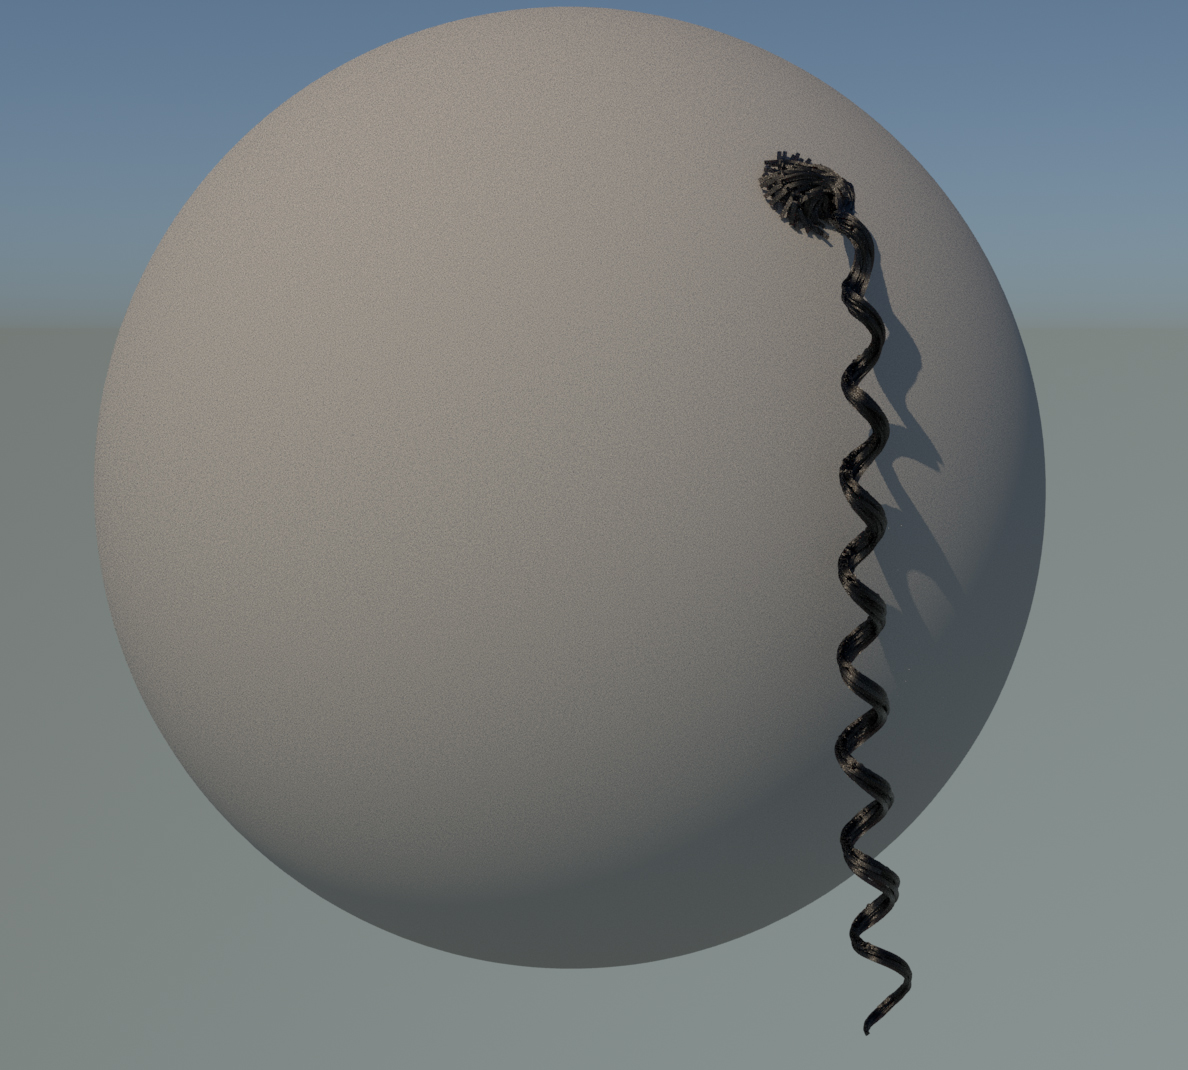

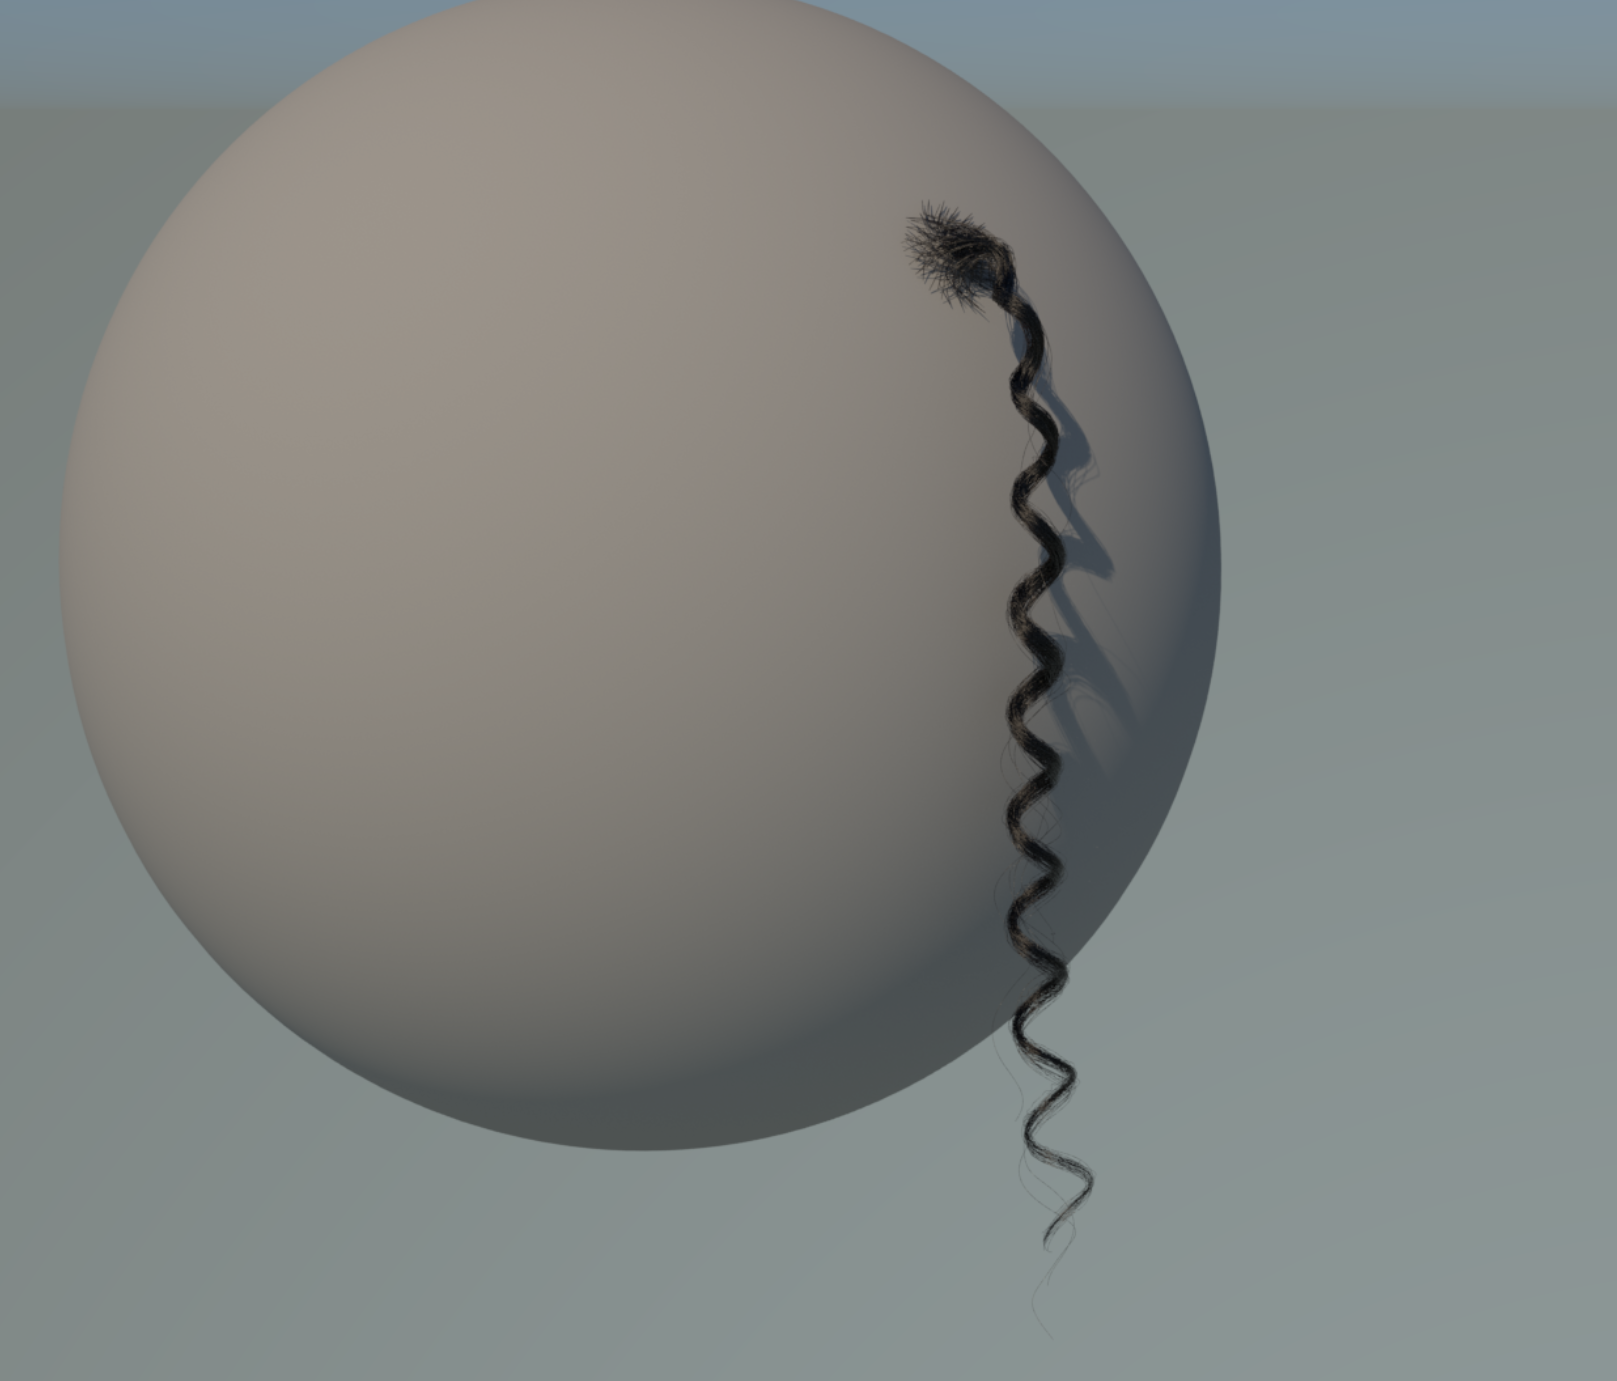
The hair doesn’t look realistic as it is thick and the Width node is what we need now. Try to find the proper width in its node inspector and render a test out. You should have something similar to my result.
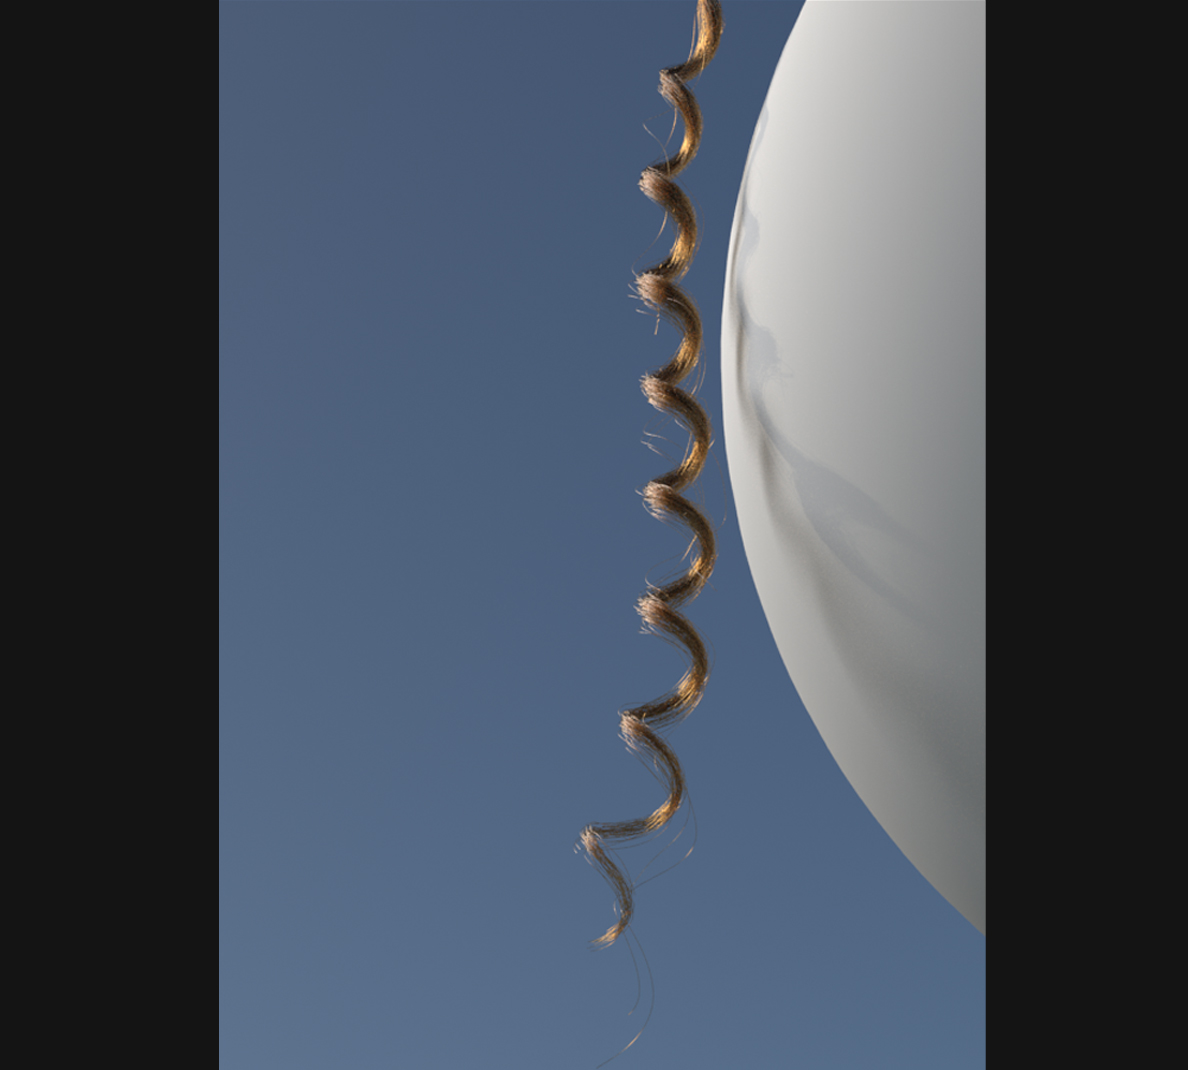
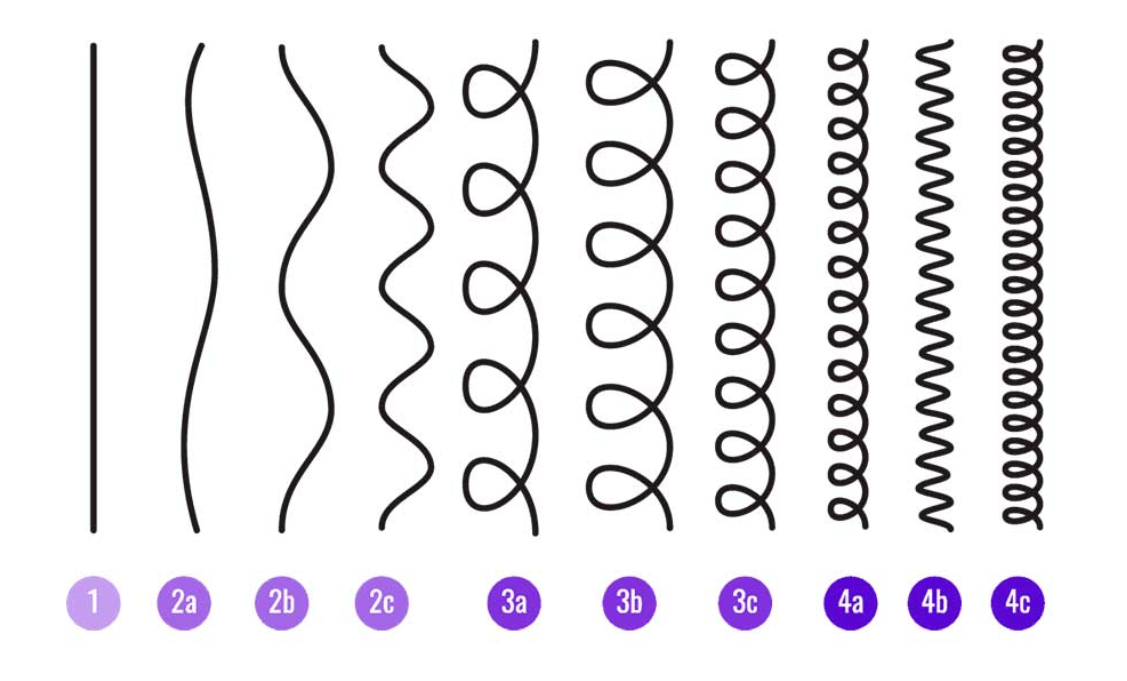
A Closer Look at the Hair
While modeling the hair, a very informative scale comes in handy showing the different hair types. By comparing our render to the scale, we find that the “type 3c” might be more similar to our hairstyle and if we increase the coil numbers we might fall into “type 4a.”

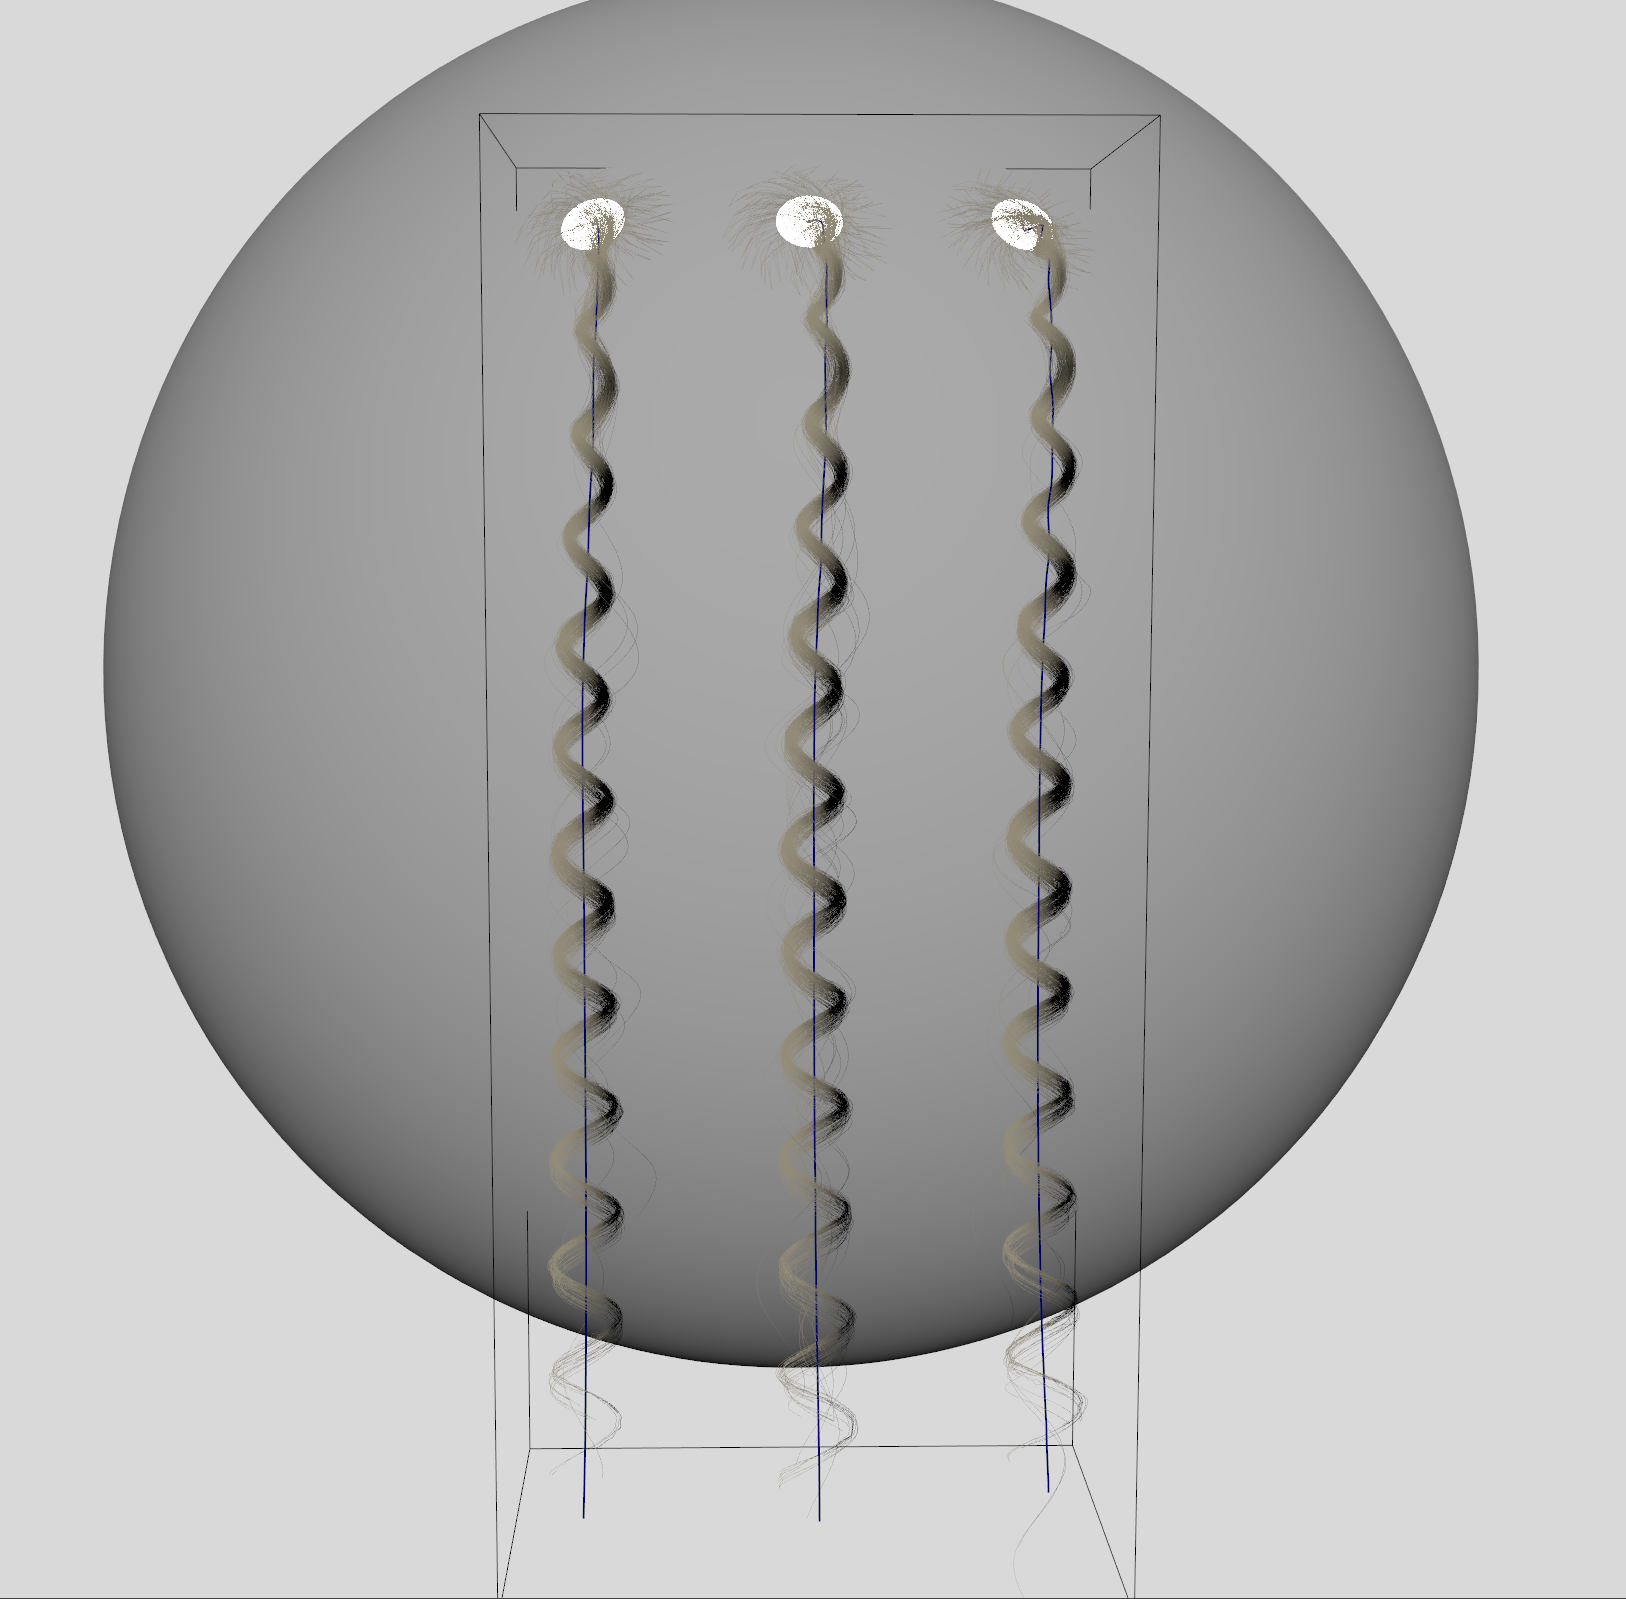
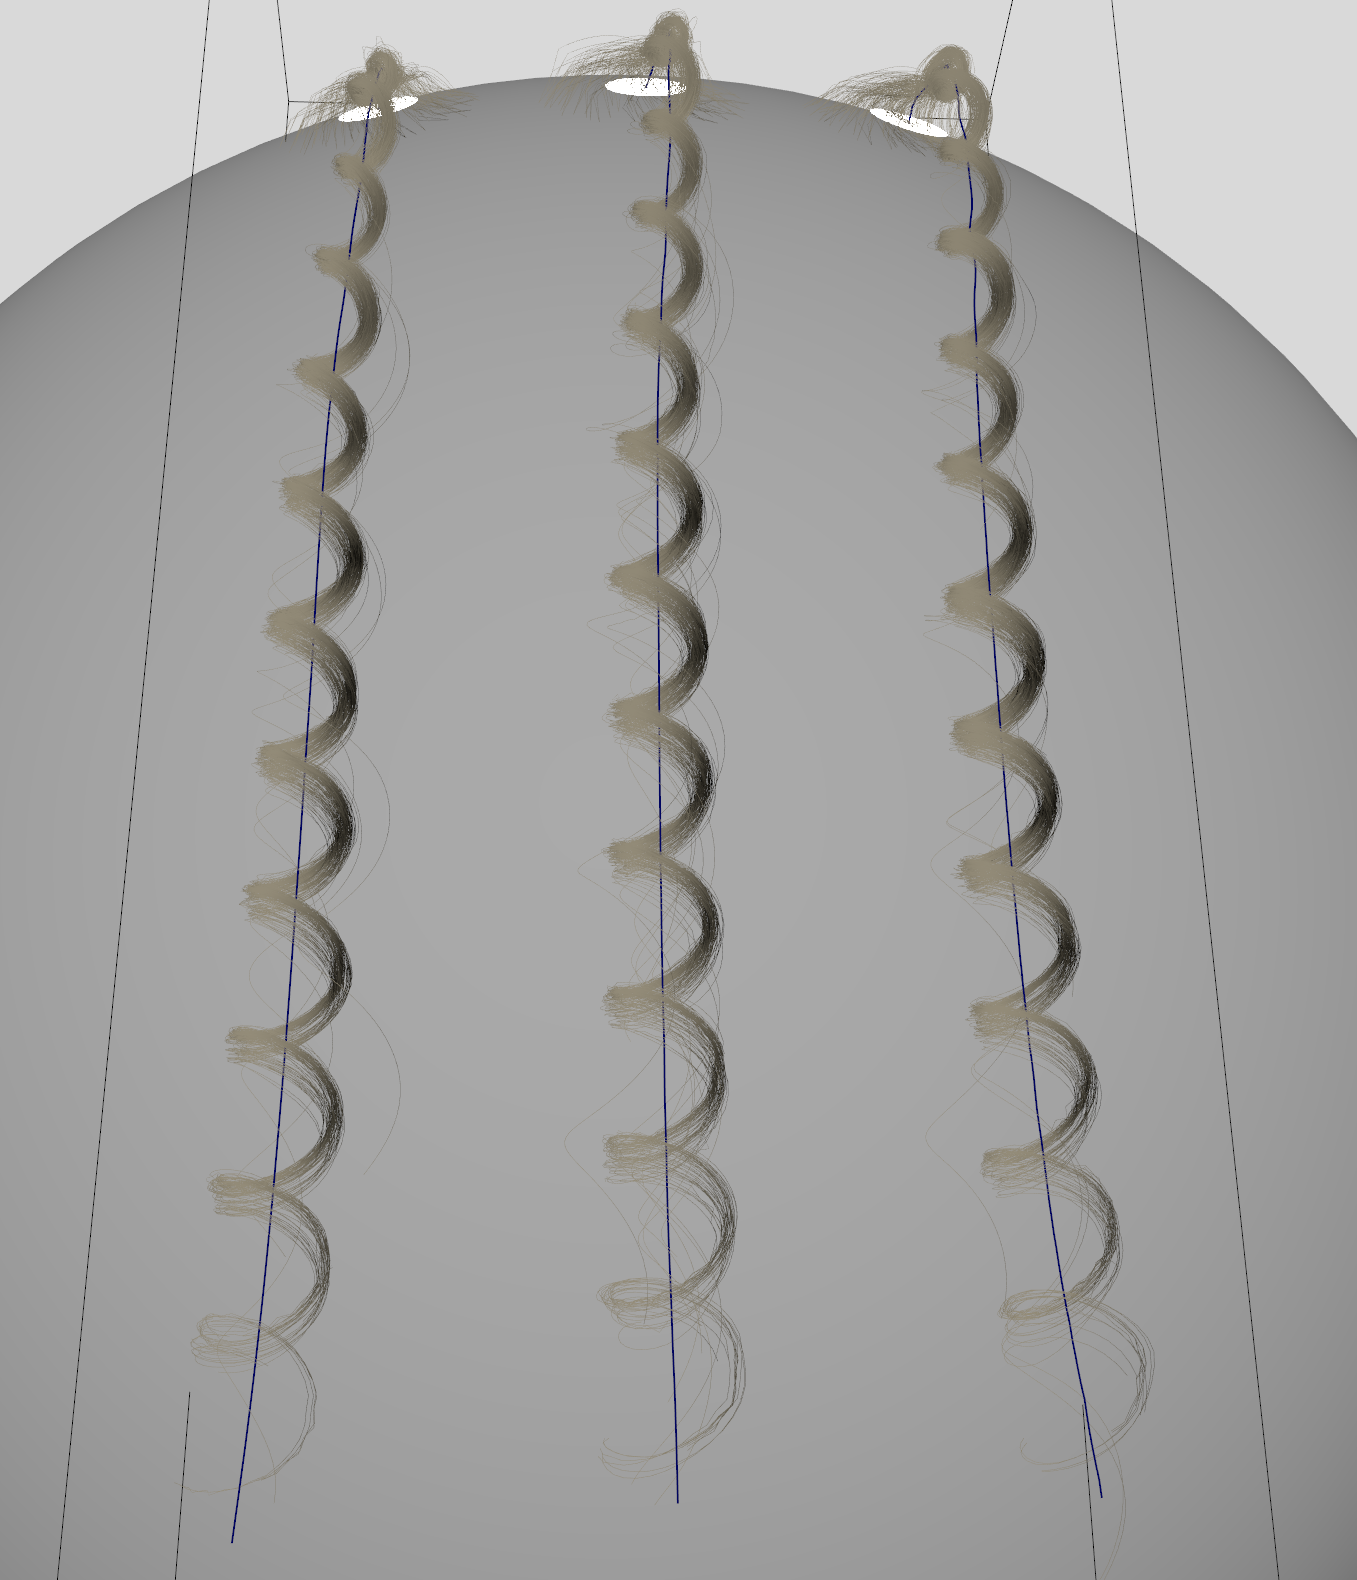
While adding more strands, a problem occurs. The instancing doesn’t break, but we notice a repetitive and boring look! We should add more variety to the different coils and be sure that one thread is slightly different from one other. There are several ways to accomplish that.
3D Curly Hair Expressions to the Rescue
Let’s start editing our “curl0” node by adding a few expressions. The length refers to the length of the current curl, while U and V Scale controls the scale of the curl perpendicular to the fibers.
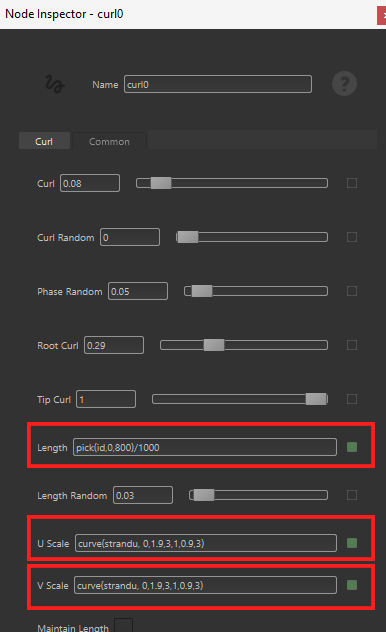
The two expressions are:
- pick(id, 0, 800)/1000 takes a value between 0 and 800 based on the id—previously hashed—and divides it by 1080. The id refers to each wire, so you’ll surely have different output values.
- curve(strandu, 0,1.9,3,1,0.9,3) which works along the fibers and sets a value of 1.9 at the root and 0.9 at the tip. A cubic interpolation makes smooth transition from the root to the tip. Typically, the curls start big and end smaller.
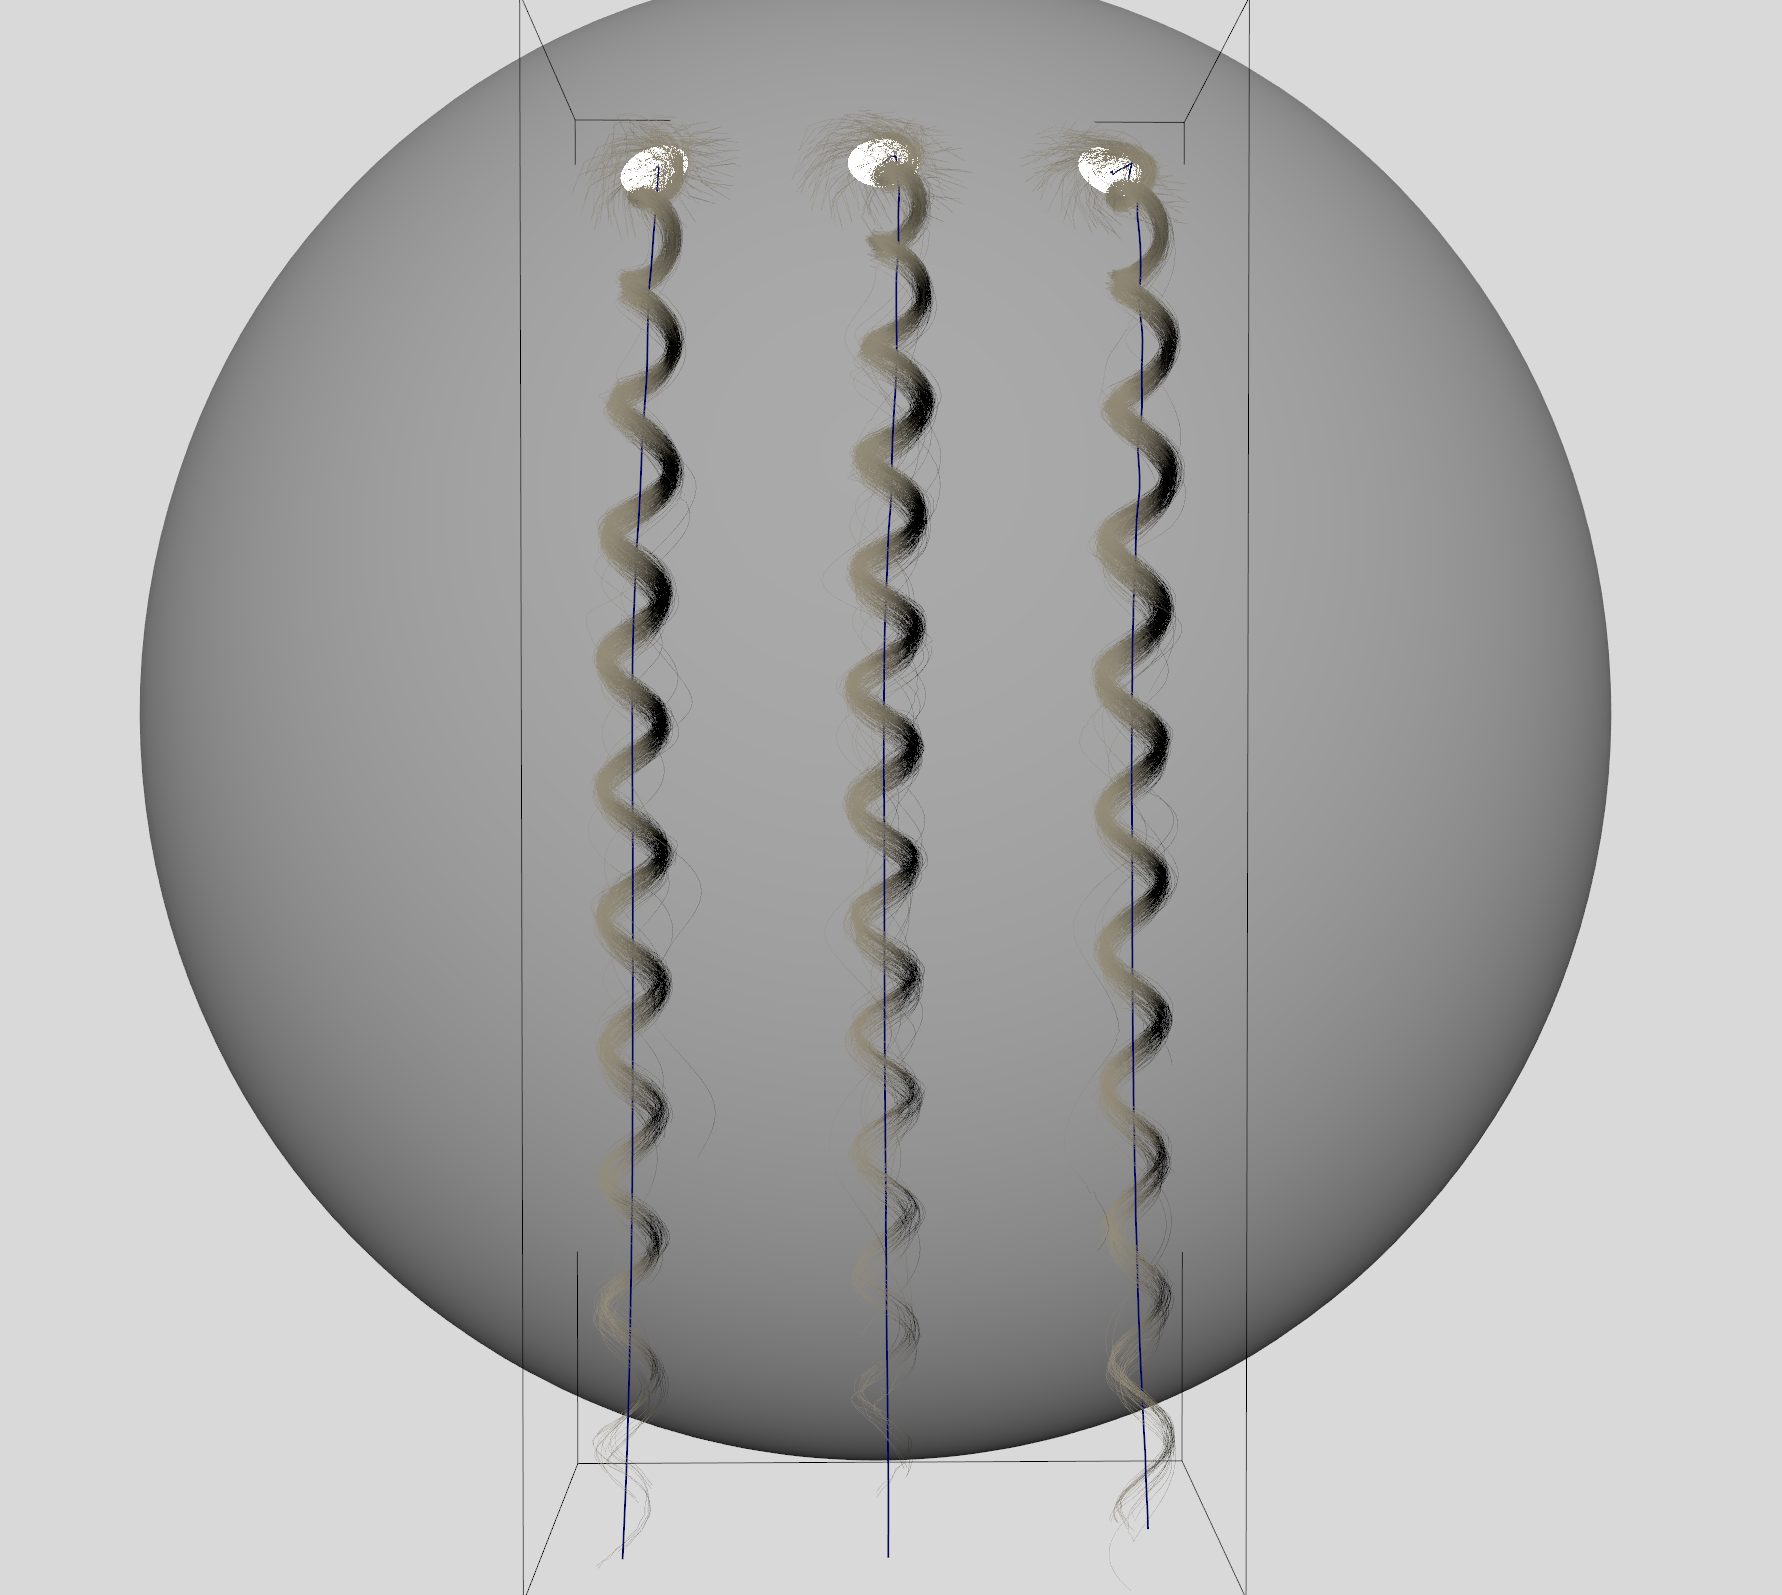
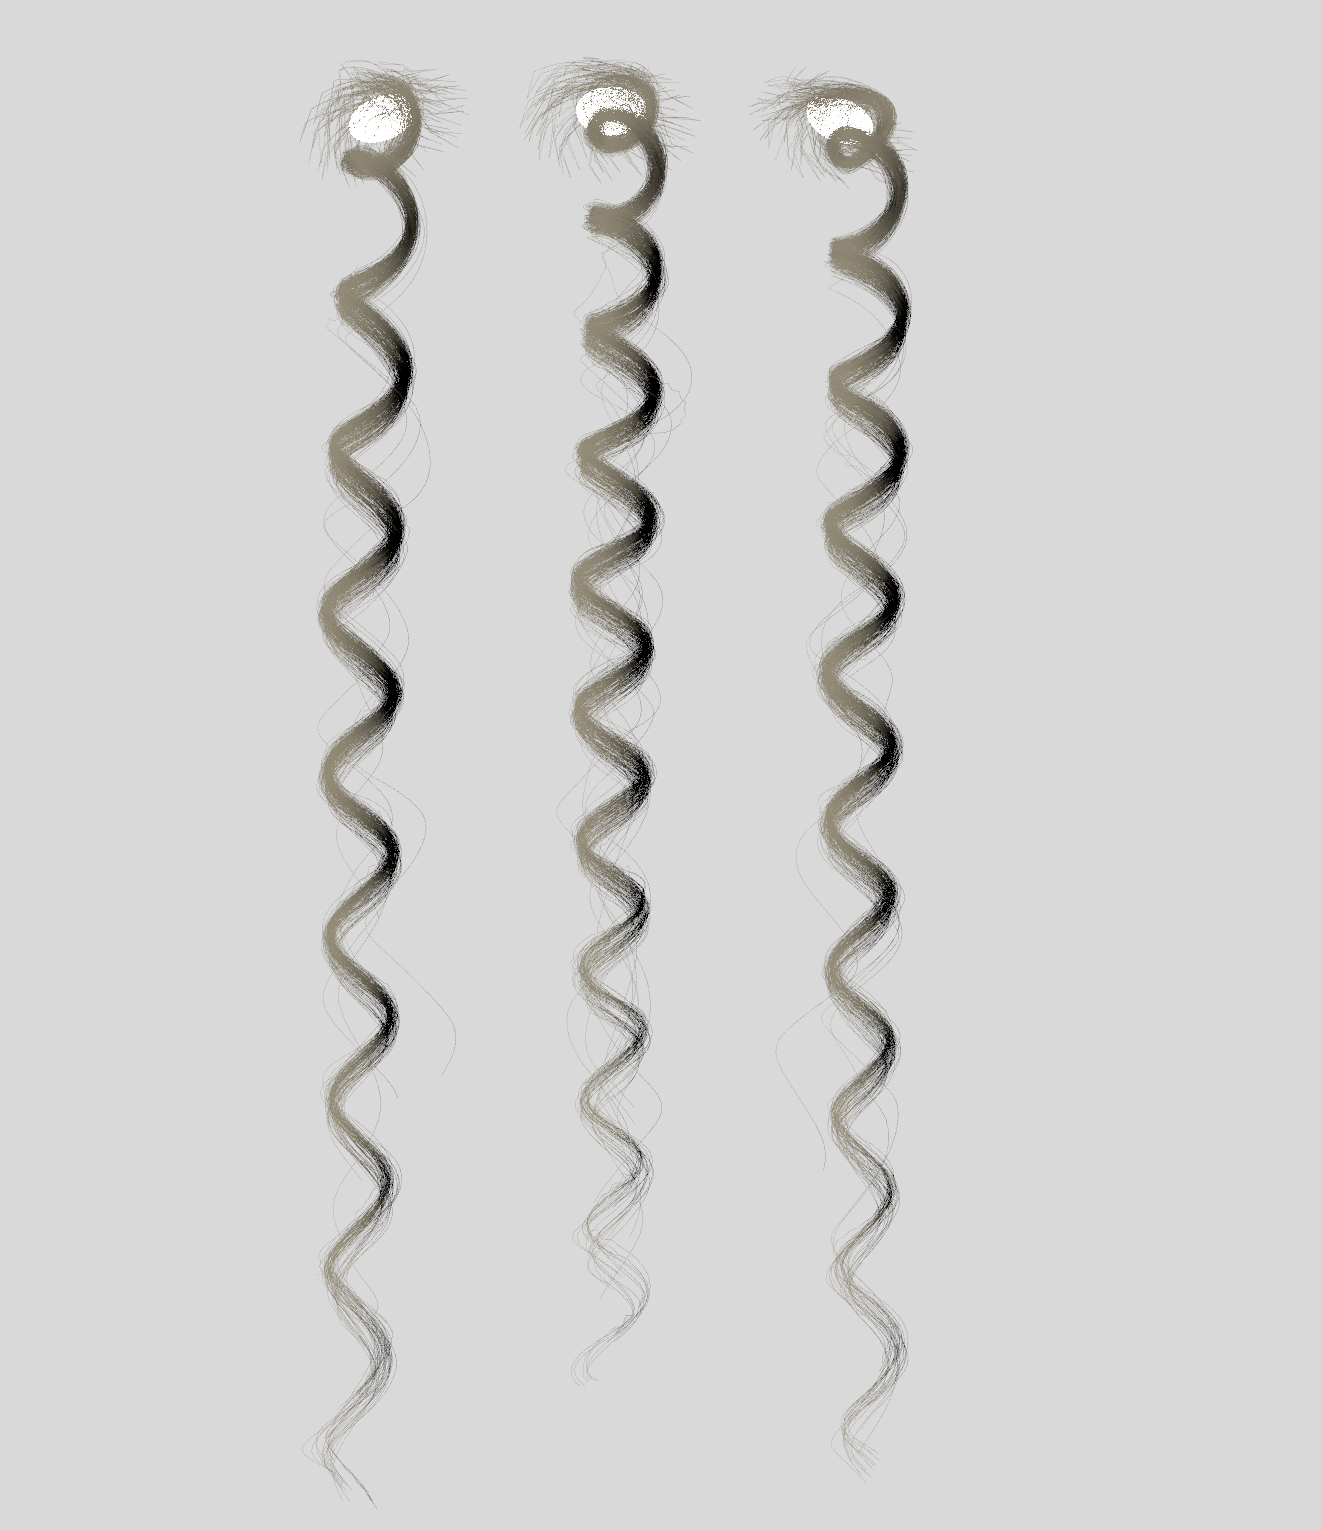
This is the result: observe how curls are now more random and a bit out of phase!
We can also fill other parameters with almost the same expression to see if we can reach better results. Here is a more significant example.
Also, here is the setting I created for the “curl0” node:

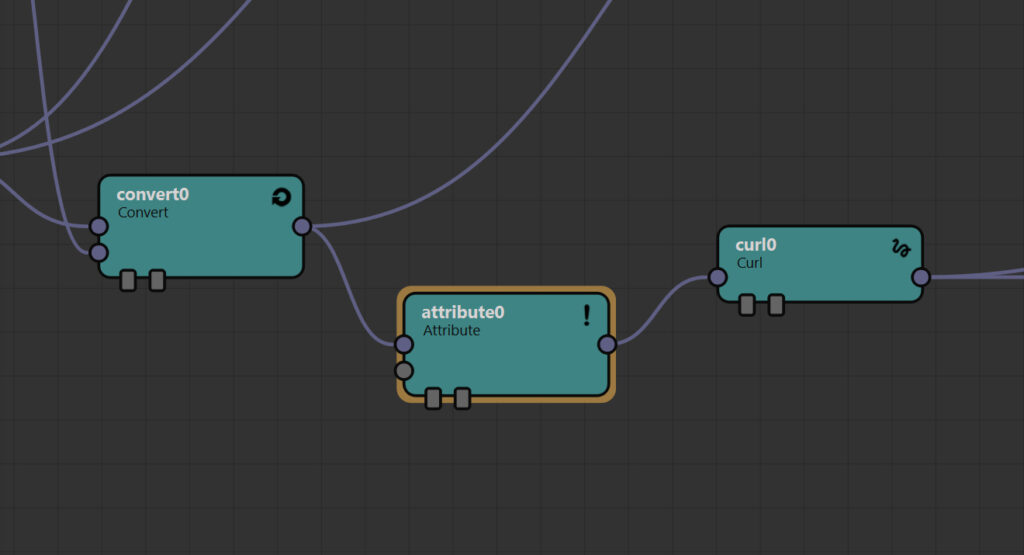
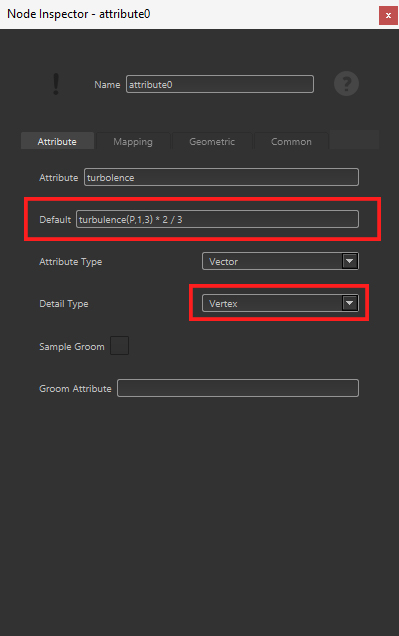
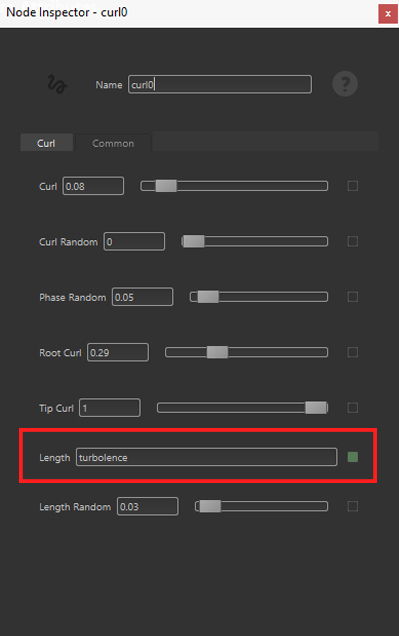
Finally, let’s play with a noise function! A nice example is the turbulence which gives a totally different result. By adding a new Attribute node before “curl0” we can define a new expression and use the name attribute in the Length parameter of the “curl0” node.
This is our expression:
- turbulence(P,1,3,10) * 2 / 3
As exercise, I’ll let you investigate on its parameters and try other noise functions directly from the Yeti Expression Reference Page. Note: The turbulence is being applied at each Vertex of the wire, that is along the strand.
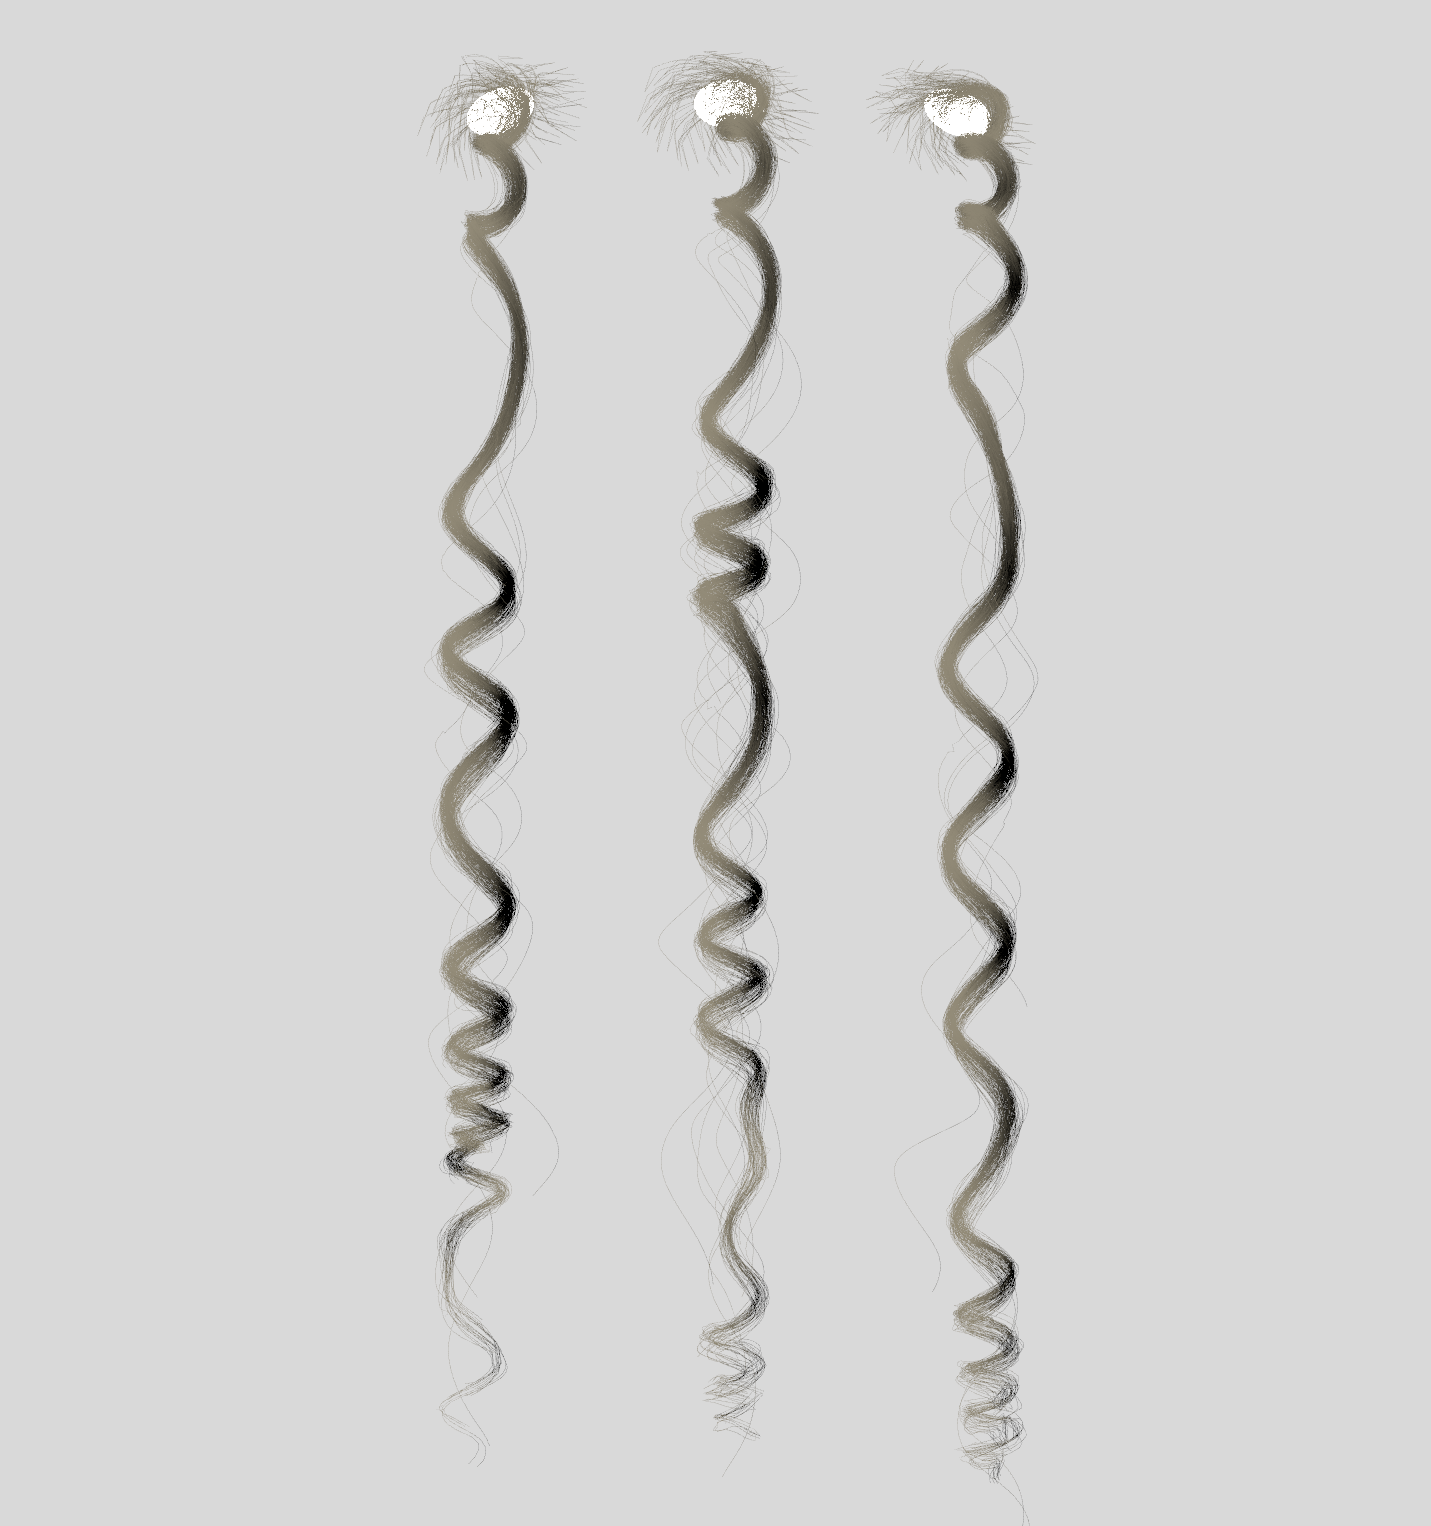
Here, I exaggerated the effect a bit to show how the turbulence gives a different result on each thread.
Tips about 3D Curly Hair Scattering
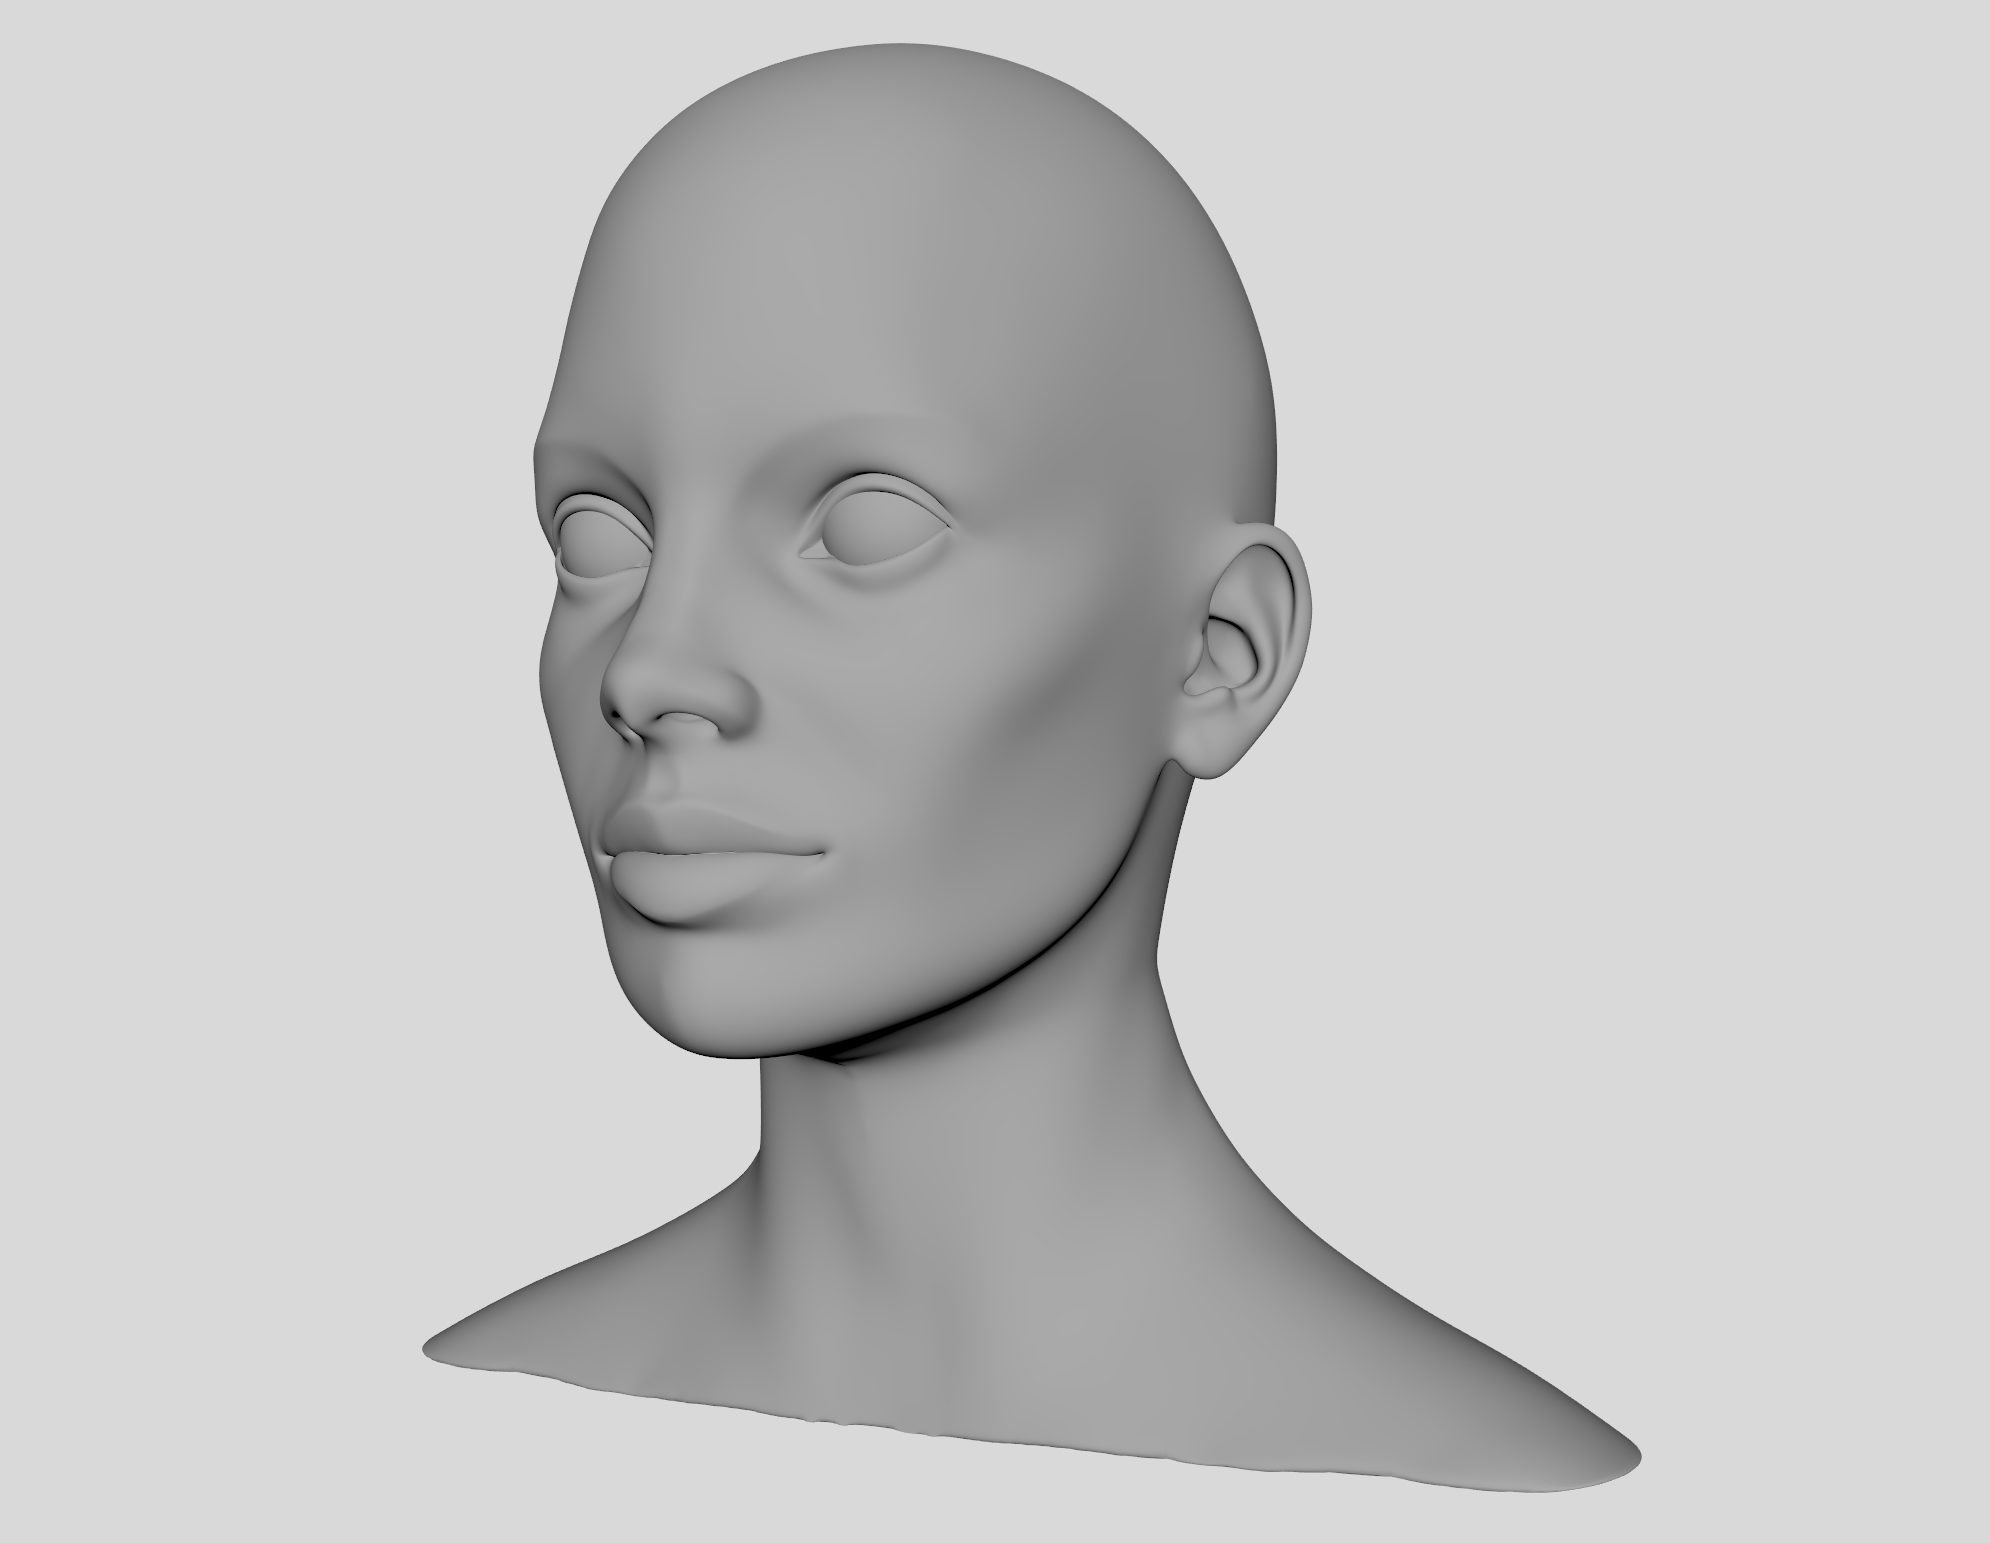
Now that we learned how to create a single thread with many fibers, it’s time to end up with a practical example—hair scattering on a female head.
For this purpose I kept the same Yeti Graph structure, as explained earlier, but with some small changes in the parameters to adapt it to the demo head. Thus, depending on your mesh, your parameters surely need tweaking.
In order to create a proper hairstyle, we have to play with the Grooming Tool. These are general tips to follow while modeling your hair:
- Start positioning one strand with the Add tool.
- Use the Comb tool in conjunction with the Sculpt tool to shape it.
- Once finished, create new strands in different spots but pay attention to the distribution—locate them in areas where you see a change of direction.
- When you create new strands in between, use the Scatter tool to randomize the distribution. Also remember to check the option called “Conform new Strand” in the Attribute Editor— this is located under the Strands tab of the YetiGroom element. When enabled, Yeti creates a new strand with almost the same shape as the strands nearby.
- If you see that your hair starts looking jagged, use the “Resampling” feature and add more vertices.
- Keep using different tools to refine the overall shape of your hair. The Move tool, for instance, is useful when you want to change the strand position.
- Tweak a few parameters in the Yeti Graph Editor to make the hair look more realistic and natural.
- Start rendering a low resolution image to check how your hairstyle works with your lighting setup.
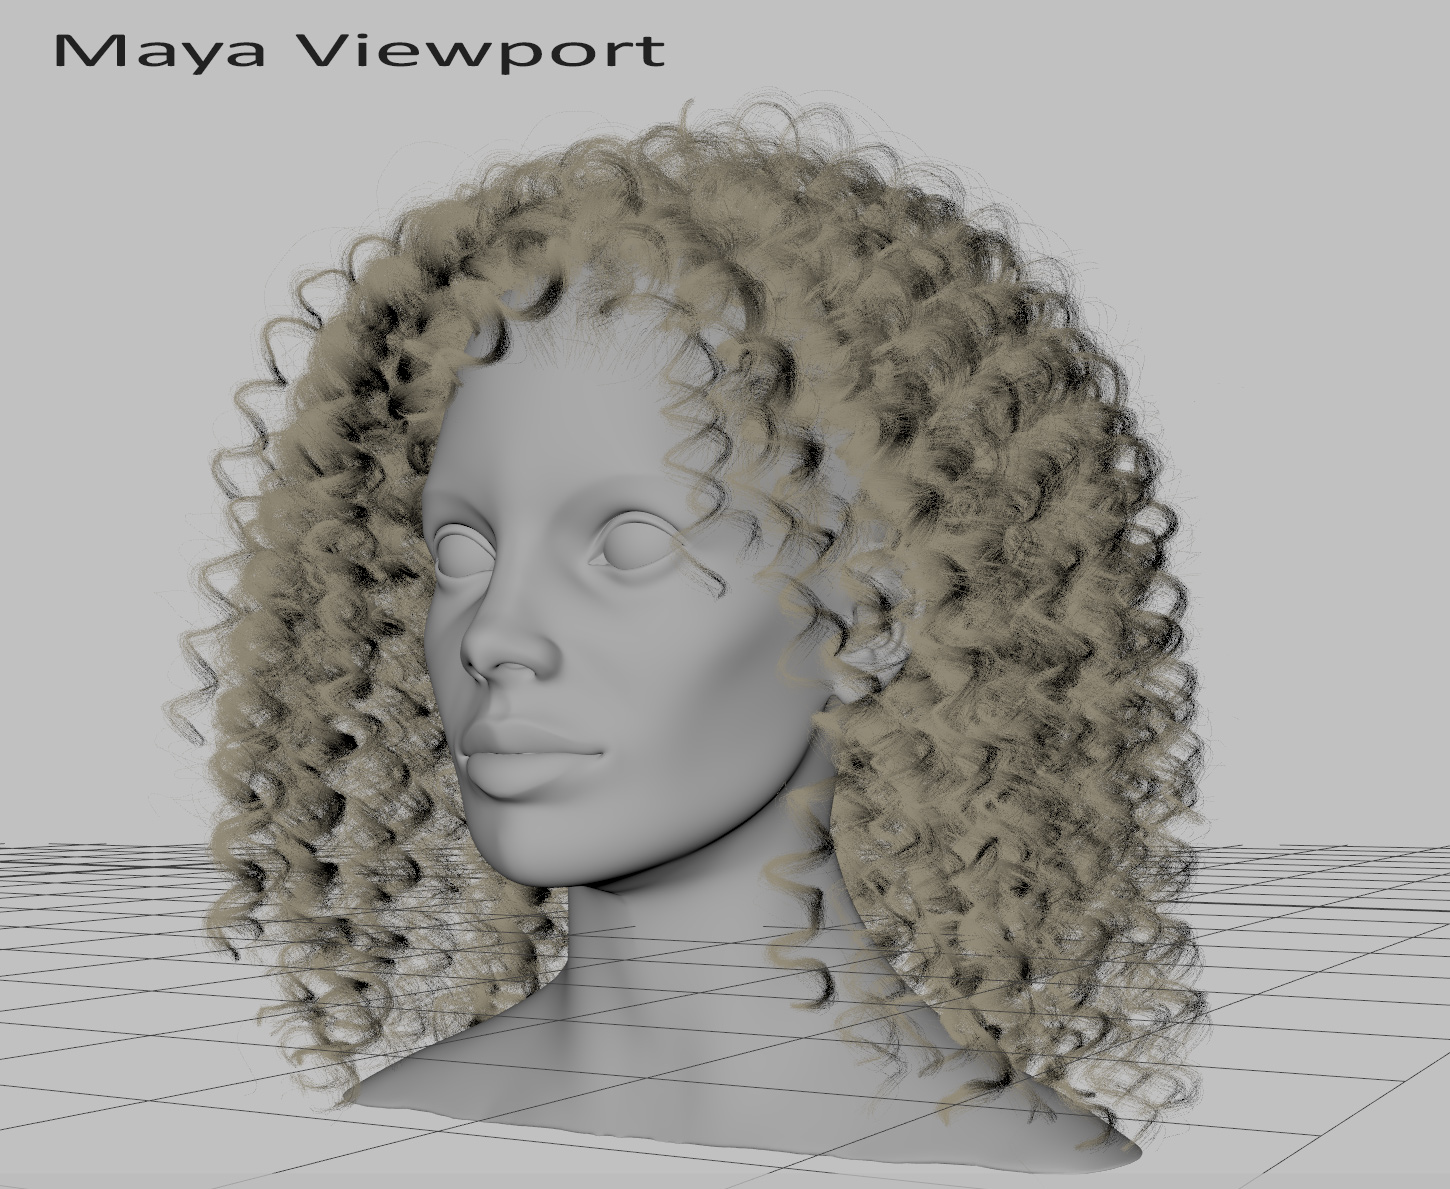
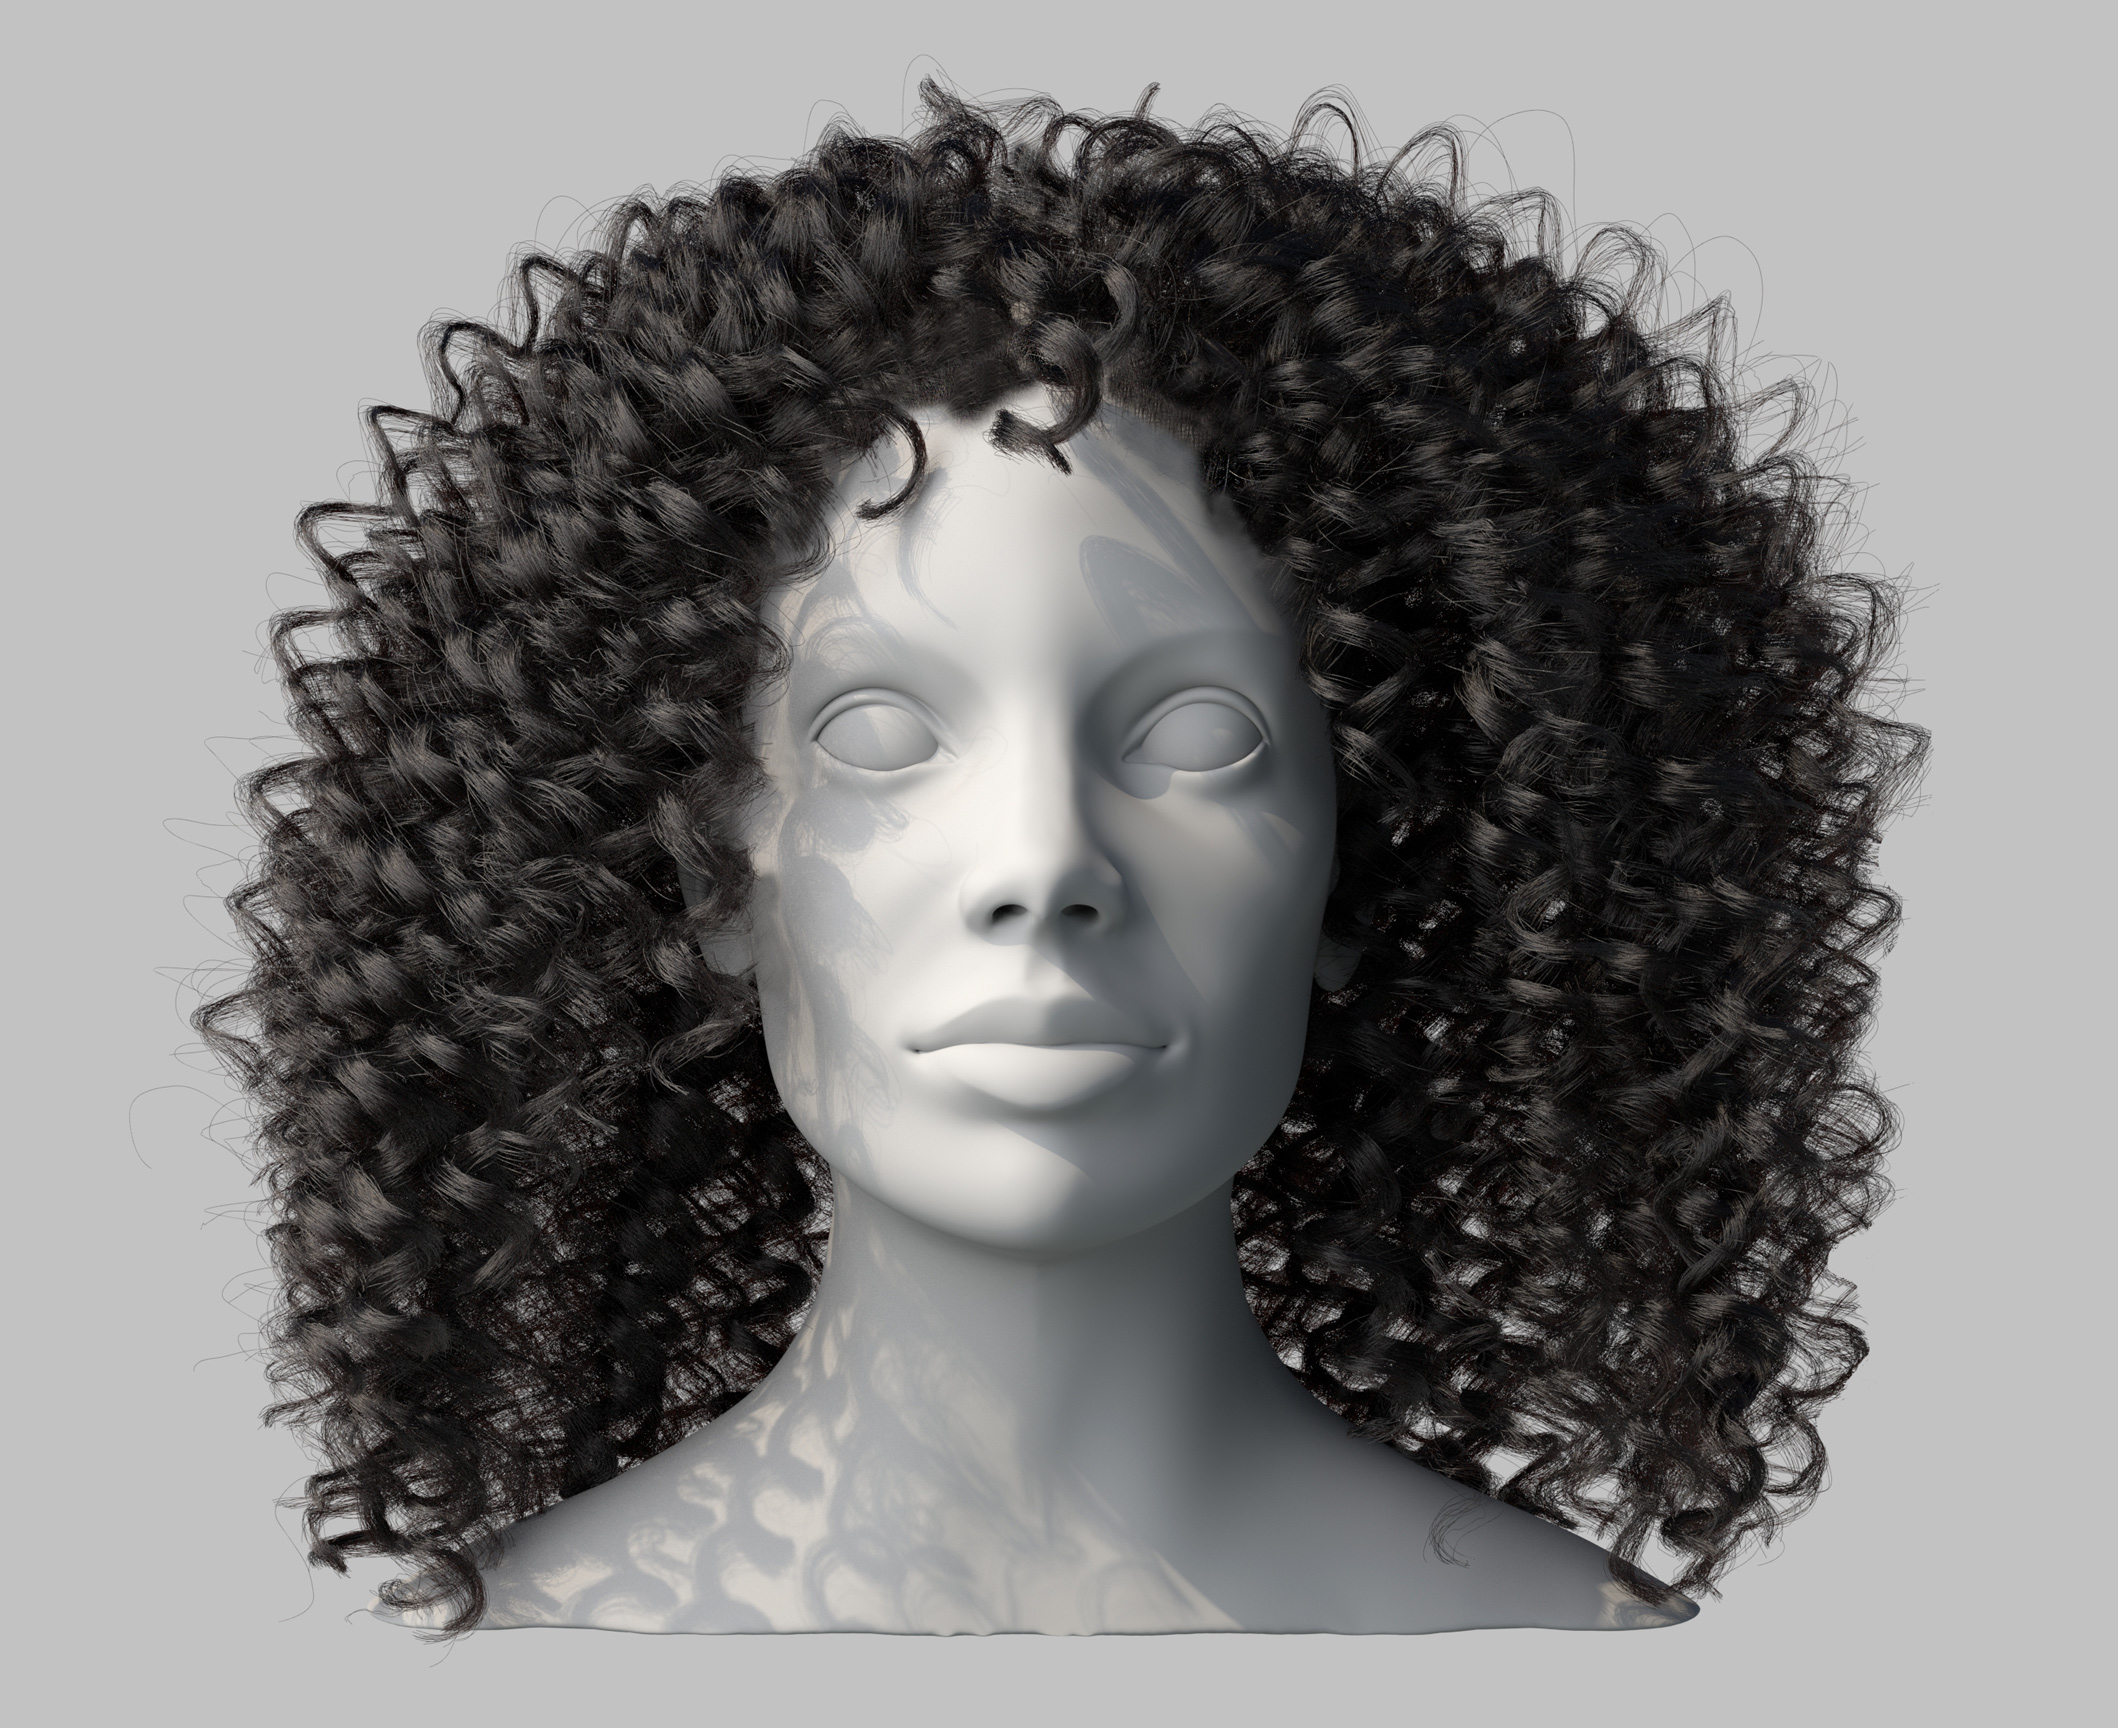
Final Result
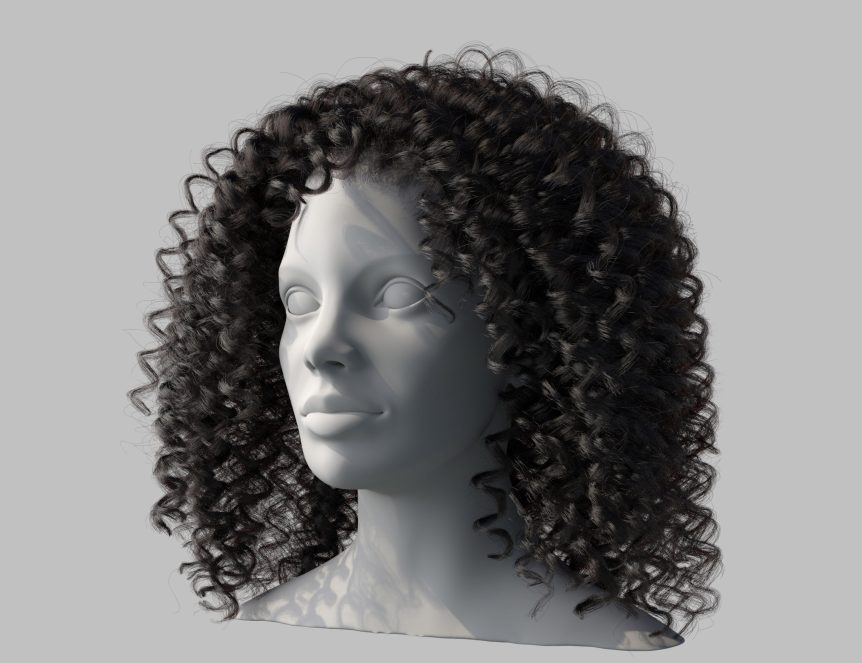
After a series of tweaks, we are able to obtain some natural textured hair applied to our 3D head.
Considering that we started from a single hair strand, the details we captured look so different and well distributed. This is the combination of the Yeti Graph Editor and the Grooming Tool.
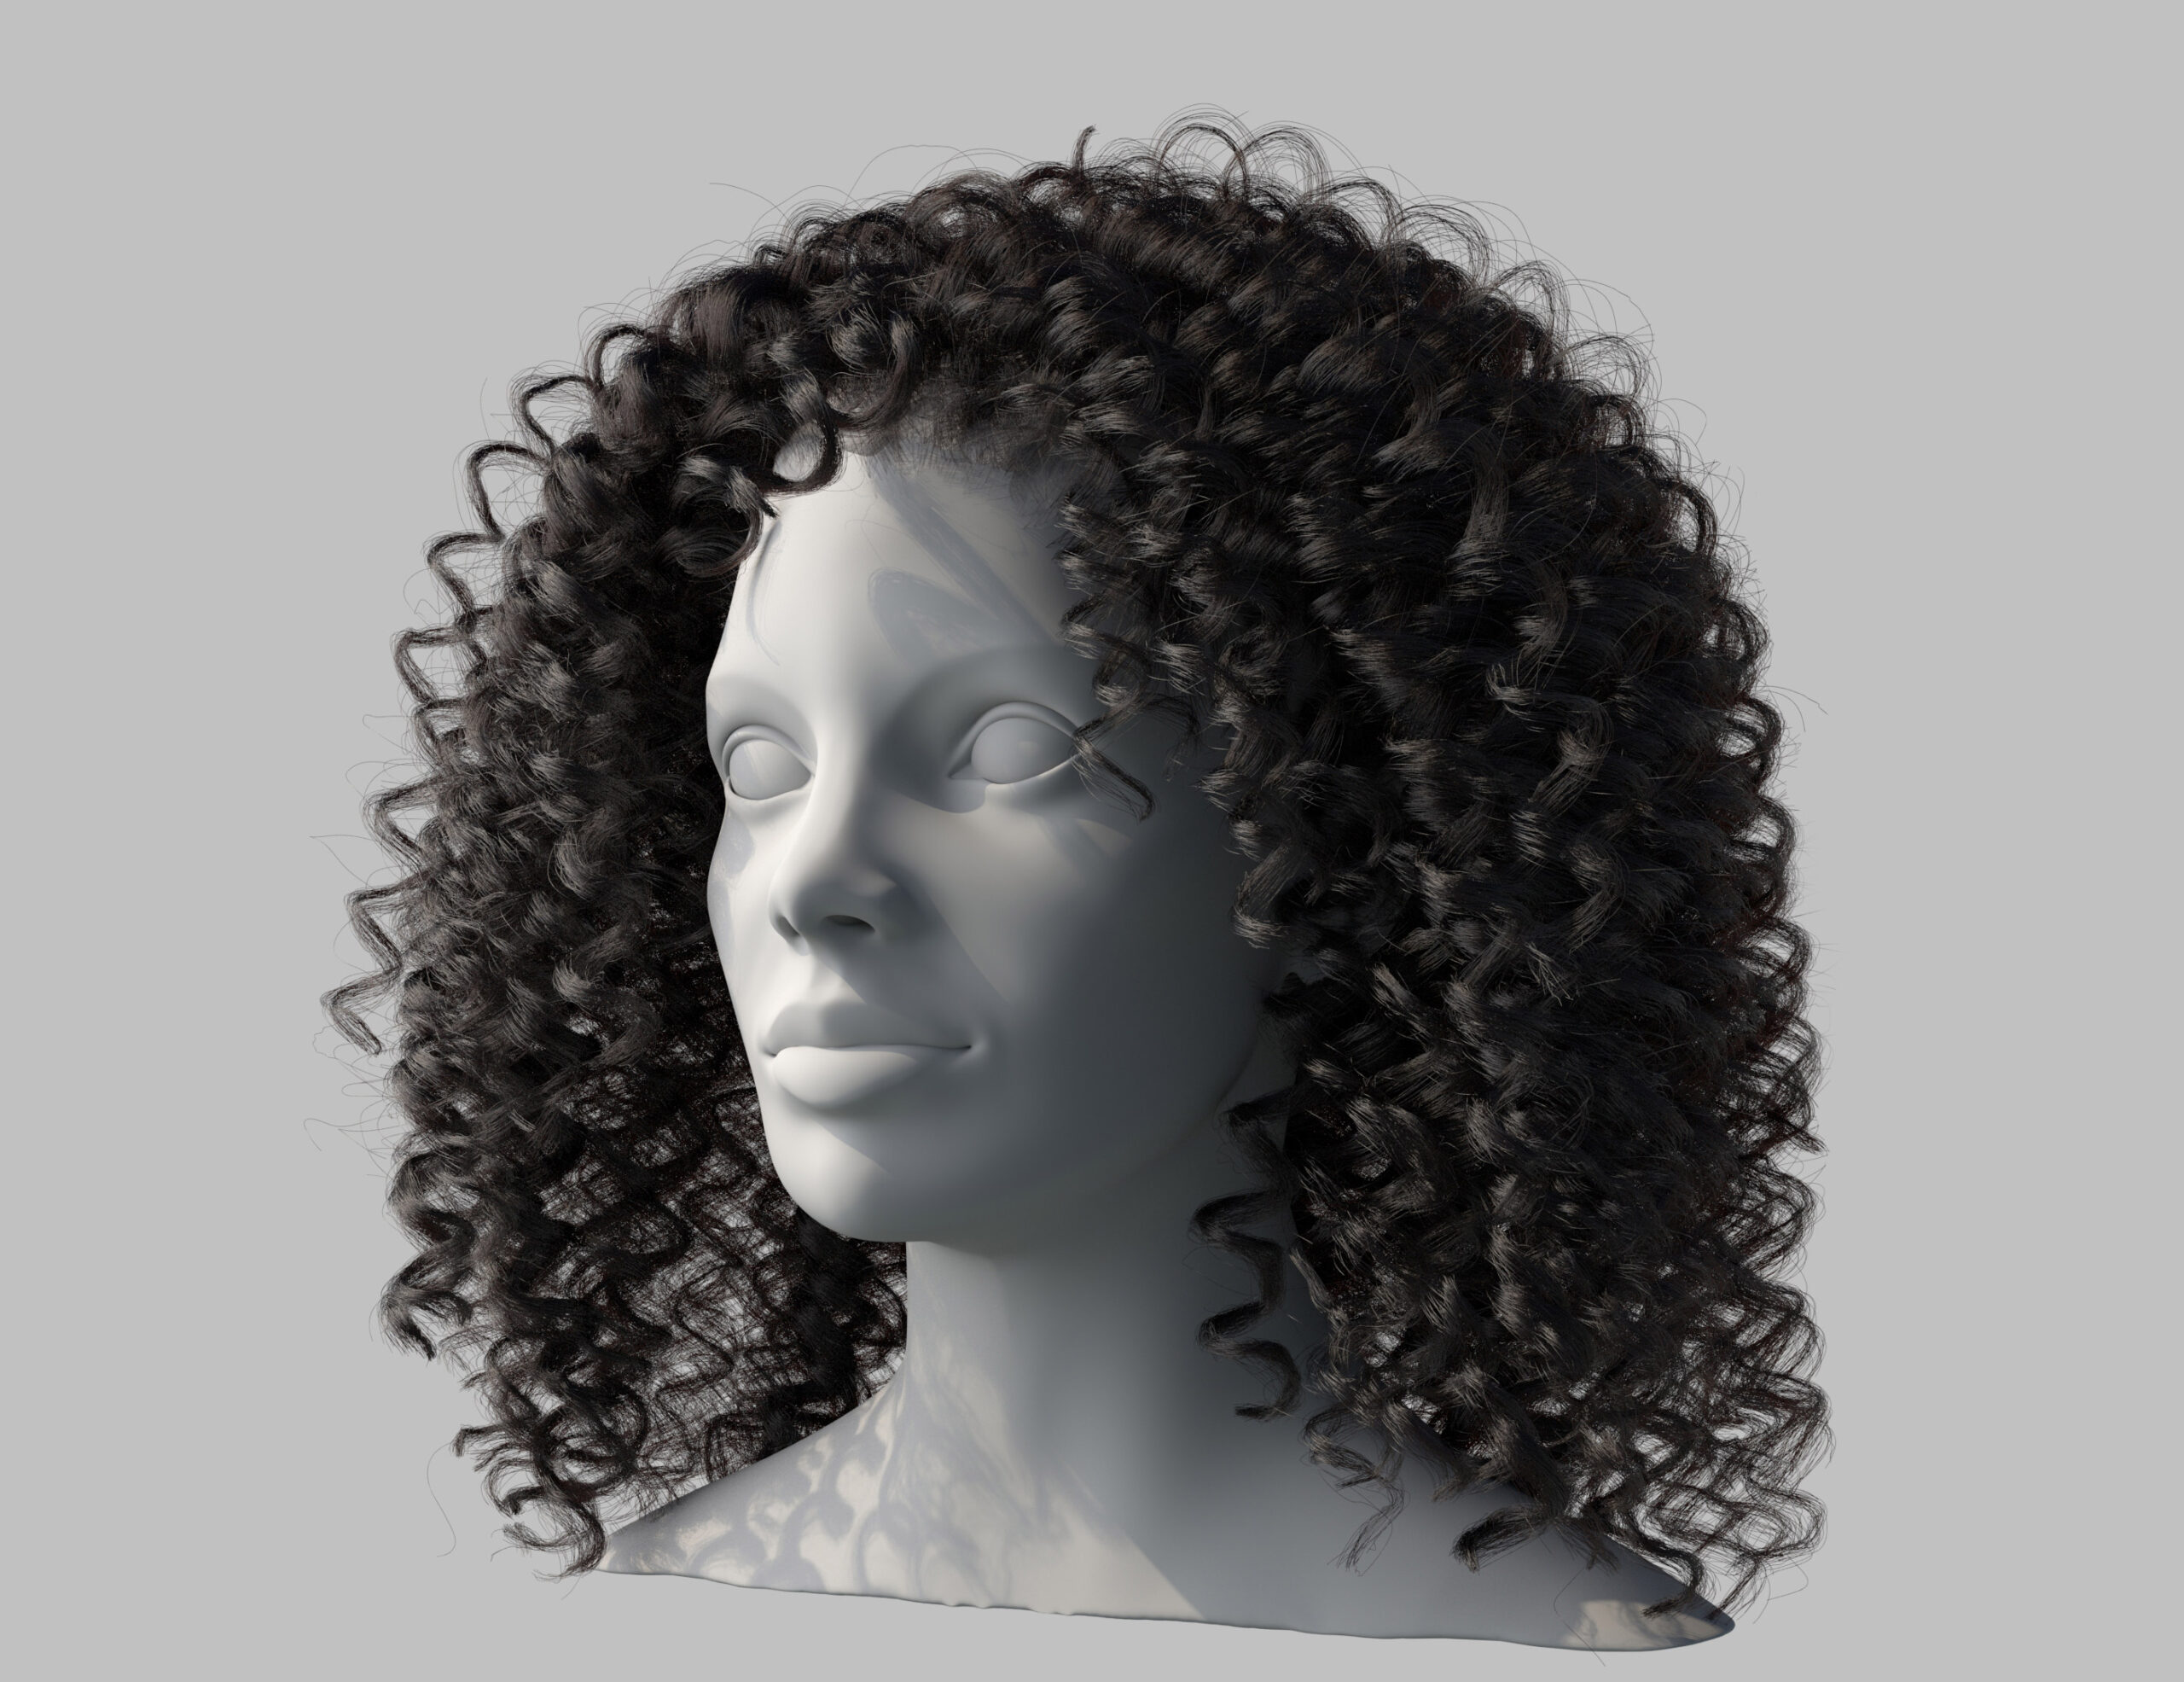
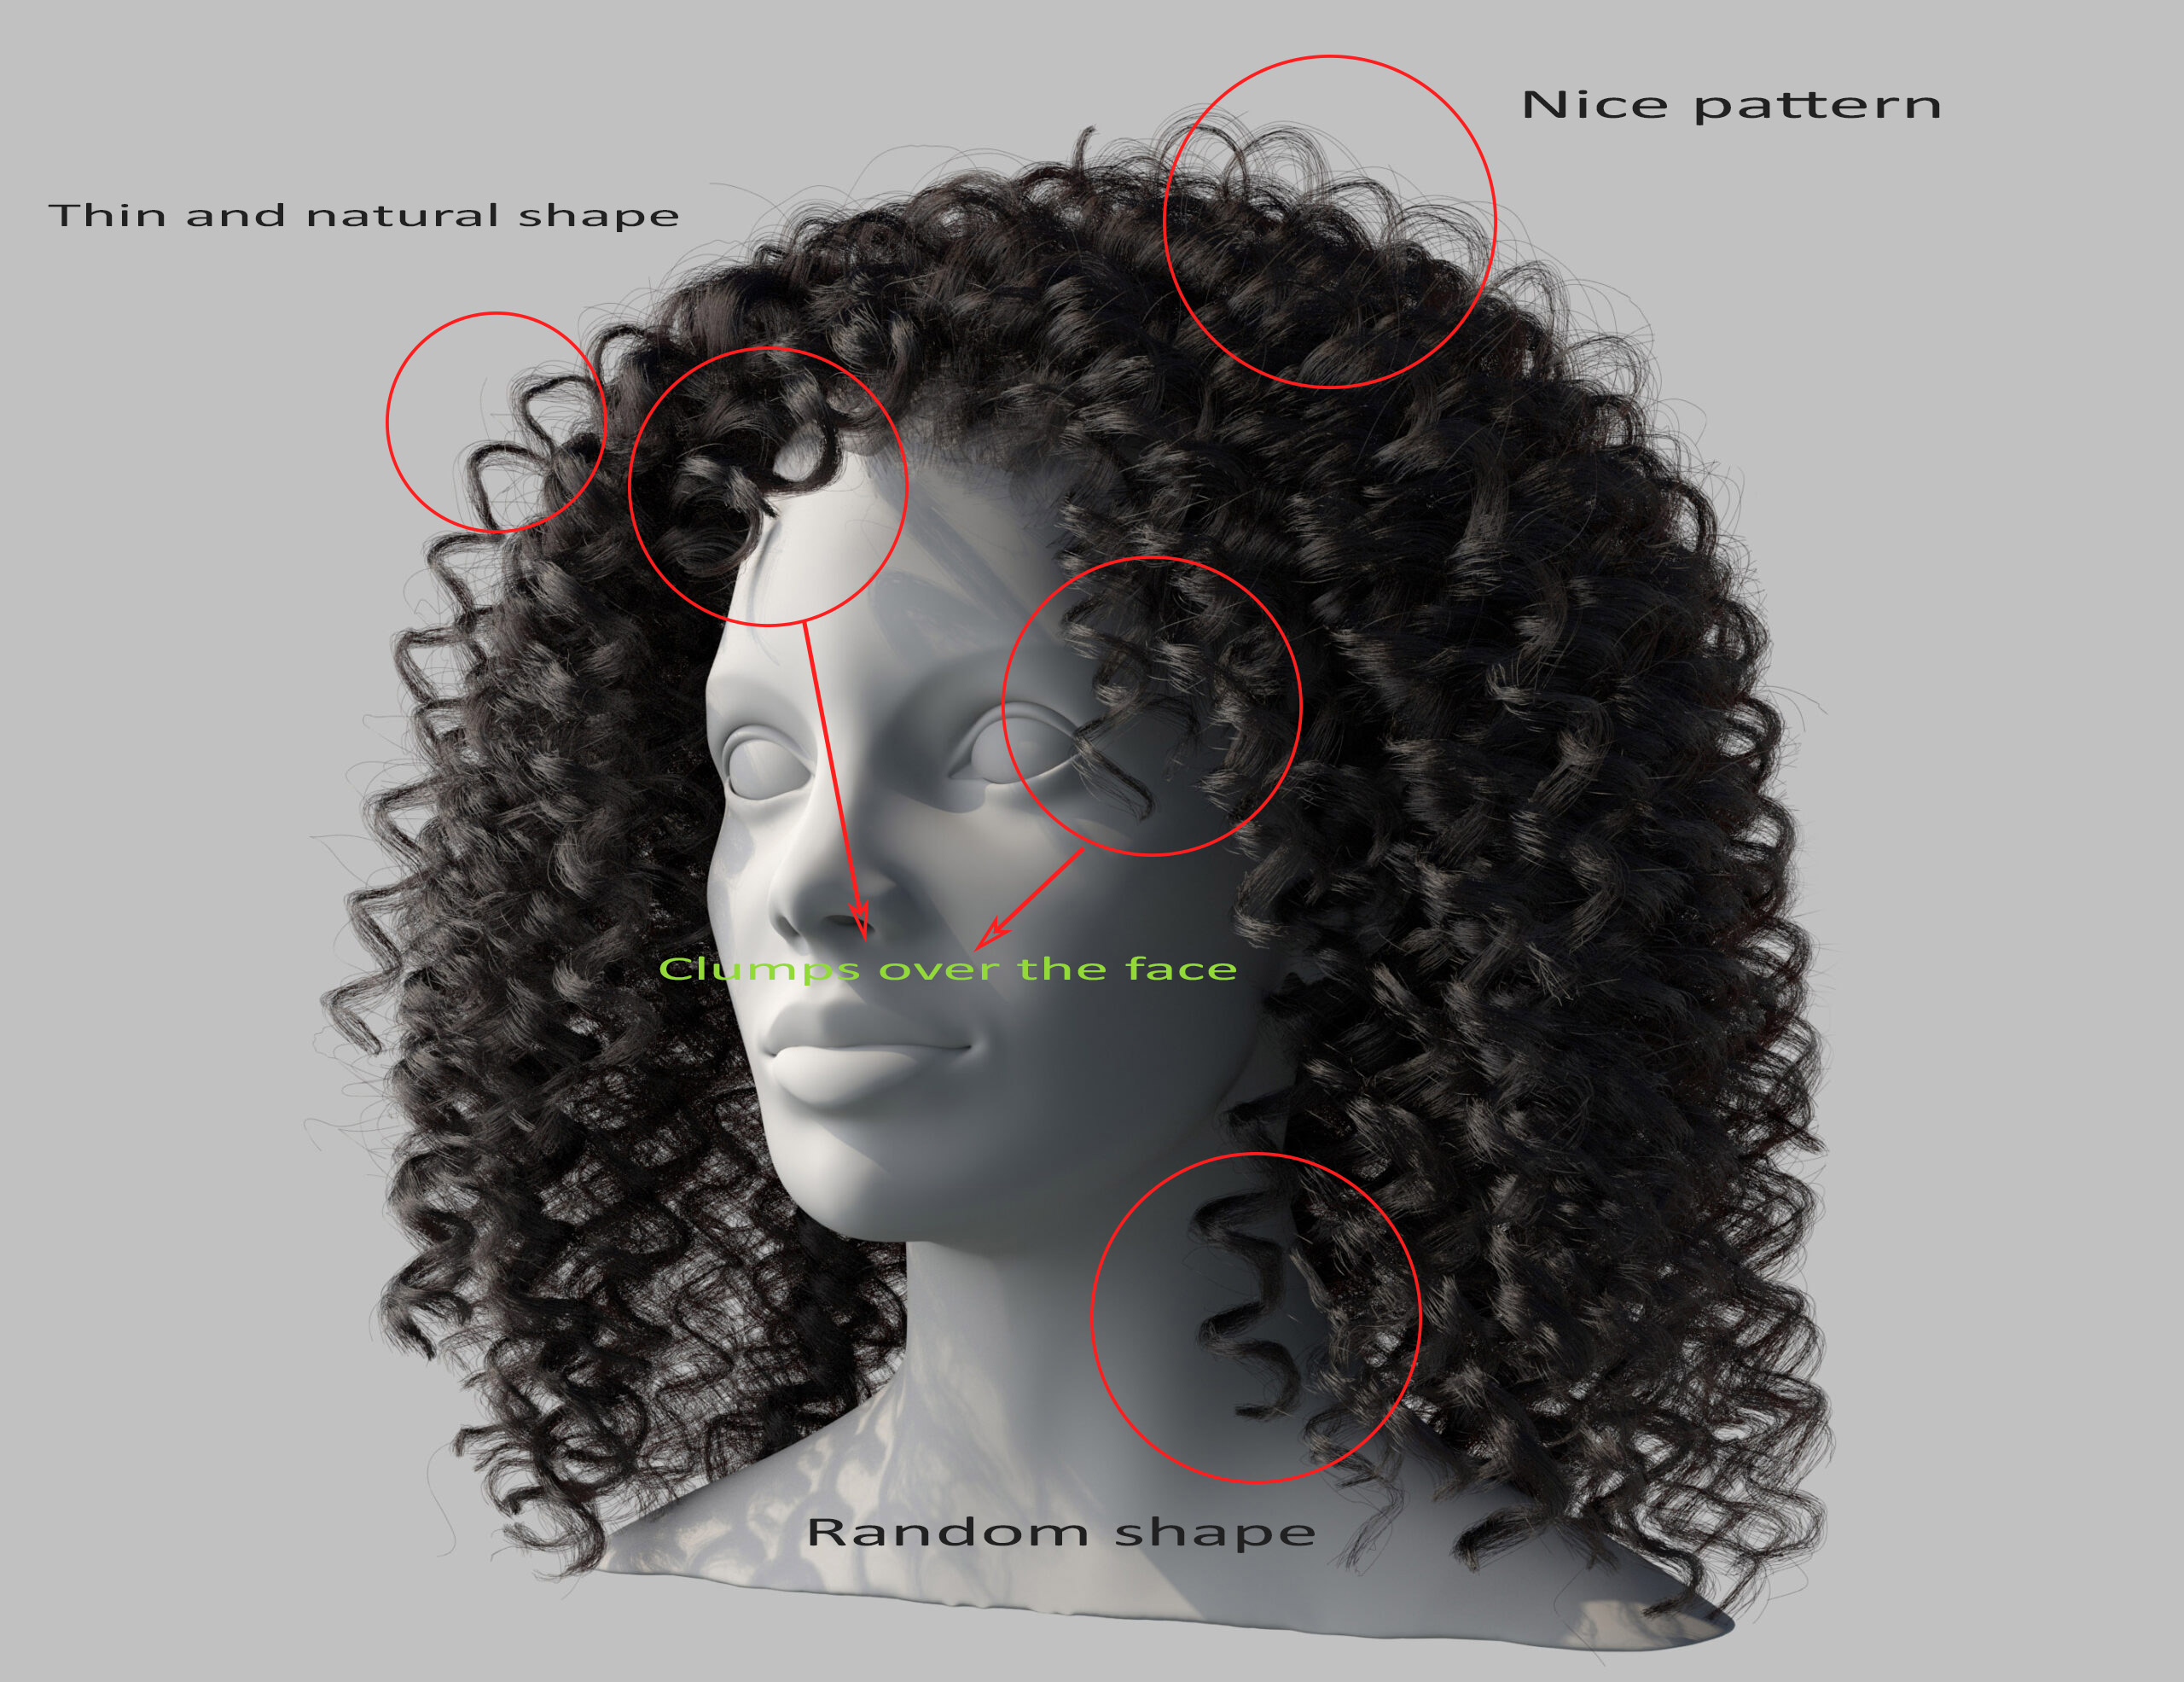
Let’s see some of the features
This is another render from the front. Remember to use different render views to make your hairstyle look good from each side.
Conclusion
This Yeti episode covered tons of information on modeling textured hair. We followed a bottom-up approach, starting from particular aspects of the hair, to more general shapes.
We learned a flexible technique to model a single hair clump. The Yeti Graph Editor is a perfect instrument to design any kind of hairstyle but it’s not just the only one.
Just as imporant as the Yeti Graph Editor, the Grooming Tool is terrific for working interactively with your strands—it only requires patience and method, but it surely pays off.
A word of advice: try to replicate a different hair scale type with the same approach I used. Work on either wavy hair or coily ones.
If you liked my tutorial, follow me at my Linkedin page for more news to come.
Building your own 3D character but don’t want to start from scratch? Check out the TurboSquid library for high quality assets.