Only 2 more installments in YurkP’s wonderfully detailed tutorial of his Cuban House of Diversity model. This week, it’s all about maps, stitching and converting them in Photoshop to use with V-Ray renderer. You can read other parts of this tutorial here.
Welcome back, everyone. We will jump back into it and start this tutorial with stitching maps in Photoshop.
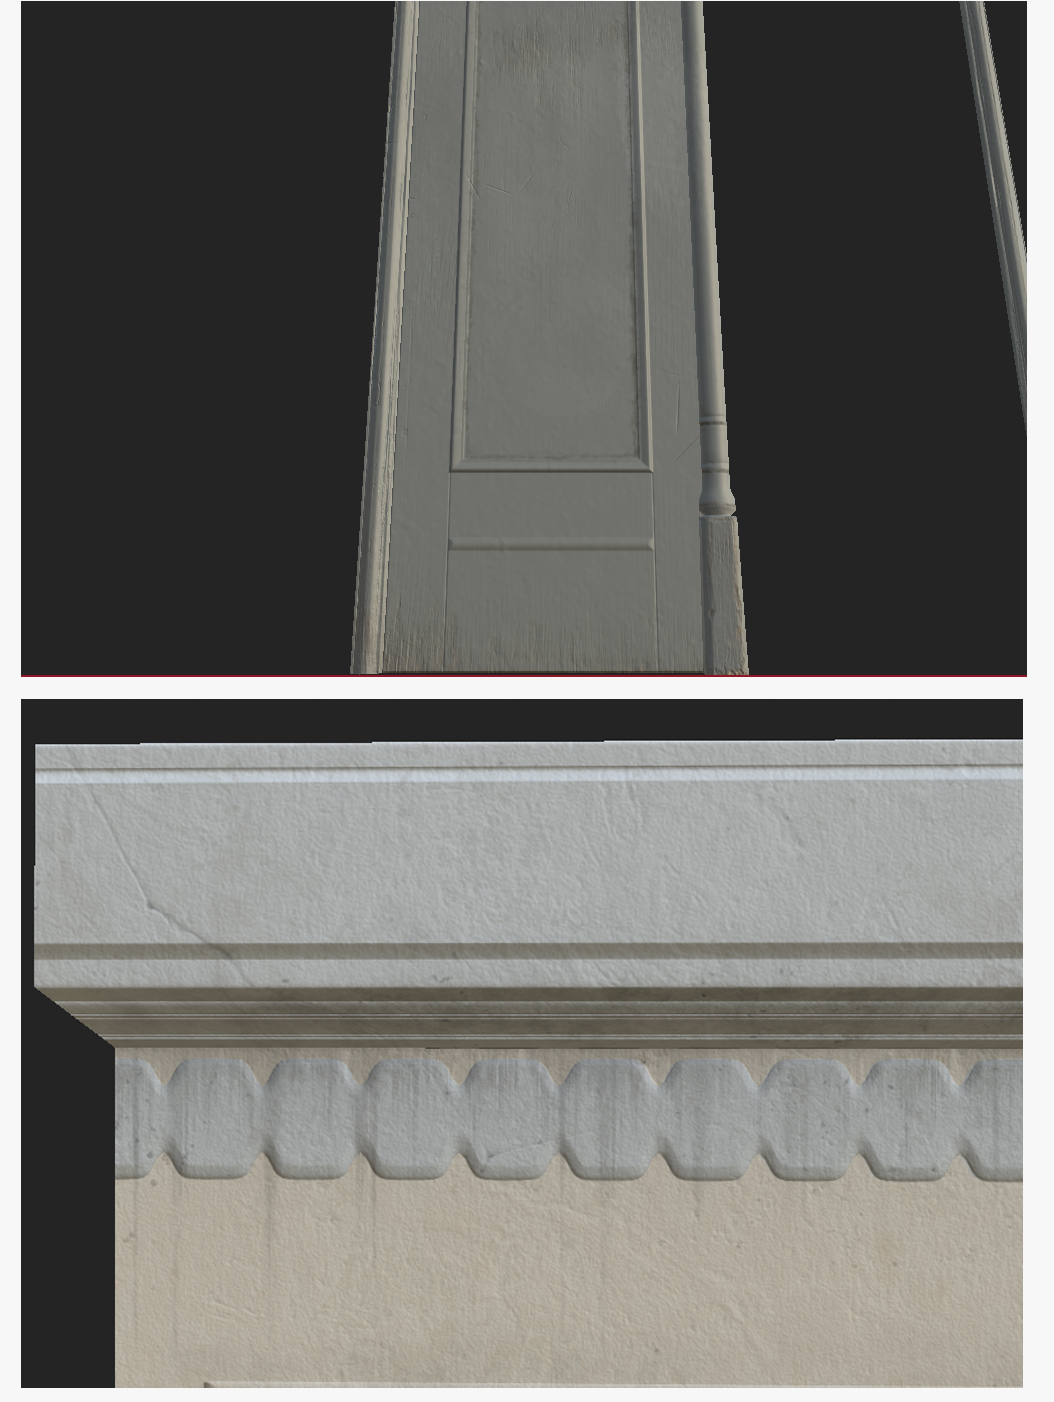
I’d like to reiterate from a previous portion of this tutorial series that the more time and effort devoted to designing textures, the more visually interesting the end result will be. For instance, playing with color variation can add realism to textures. Painting over damages or dents with a slightly different color, considering the real-life effects of weather on paint to determine how worn the texture should appear. These tiny details have the power to create a story for the object. Now, on to Photoshop.
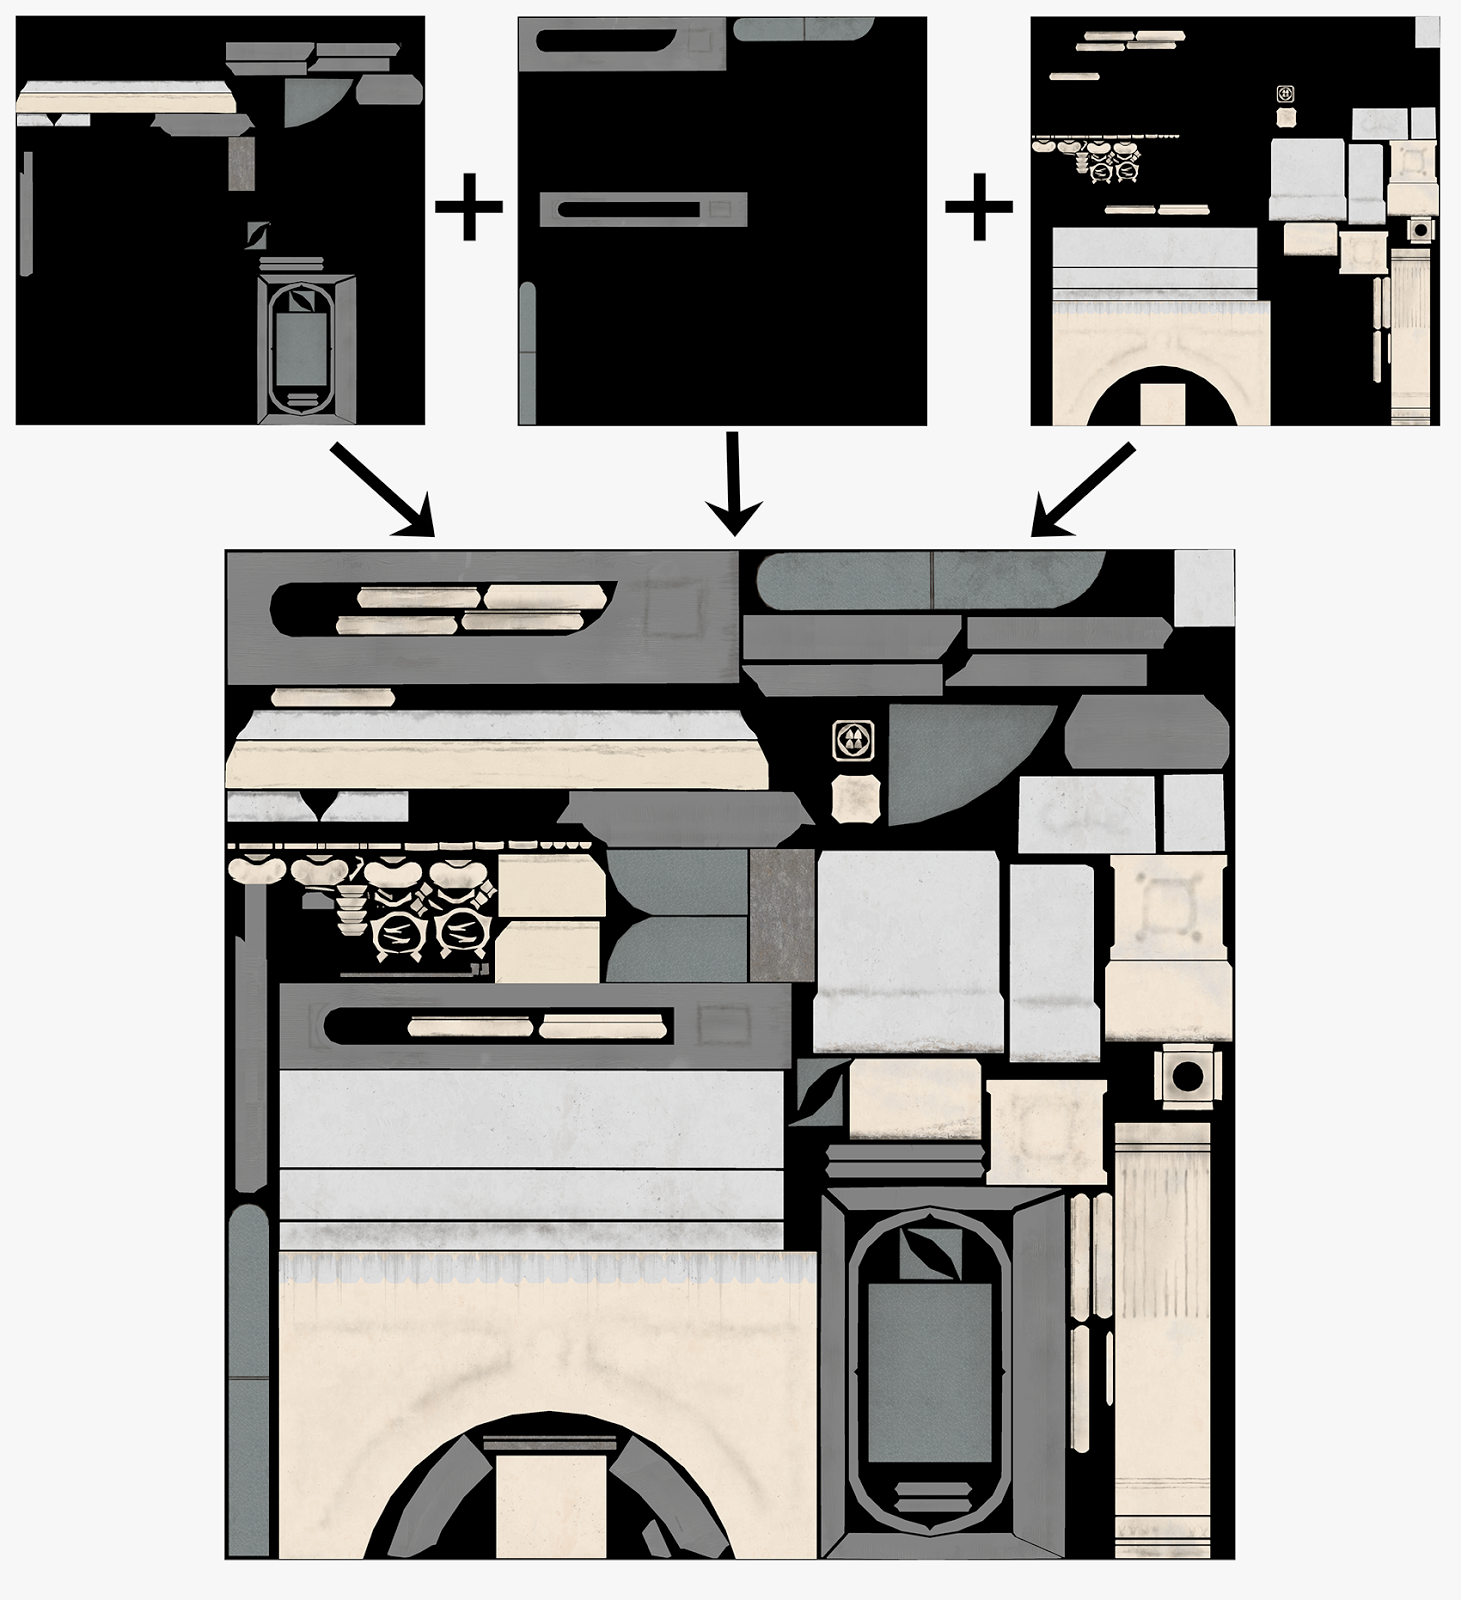
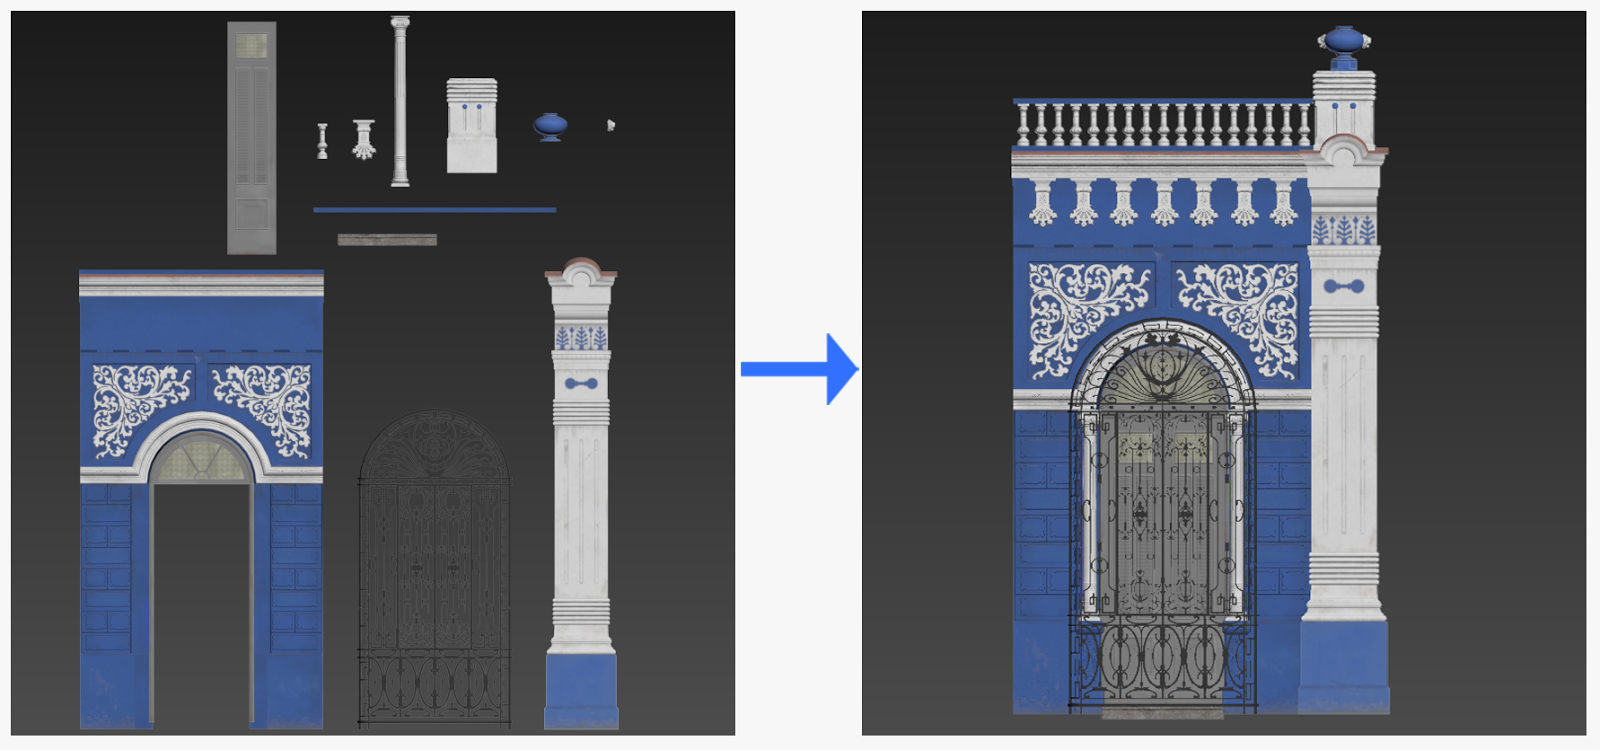
Adjusting Maps for Unreal Engine
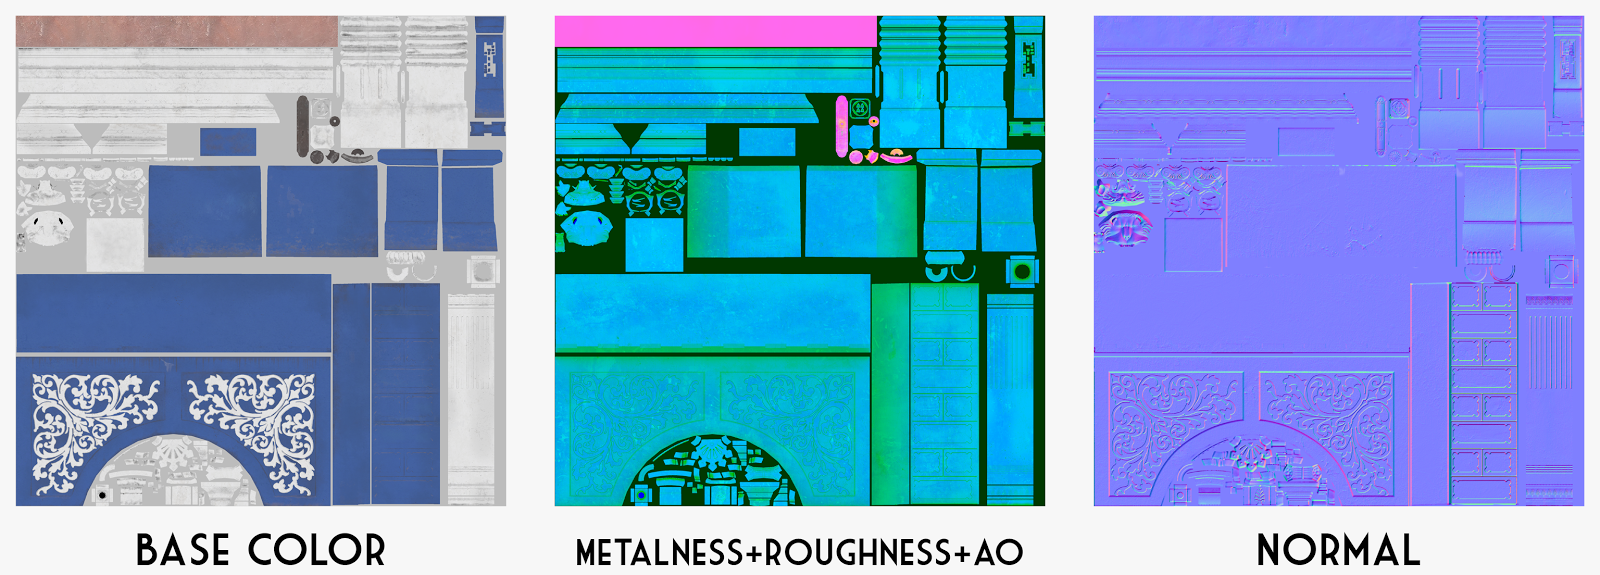
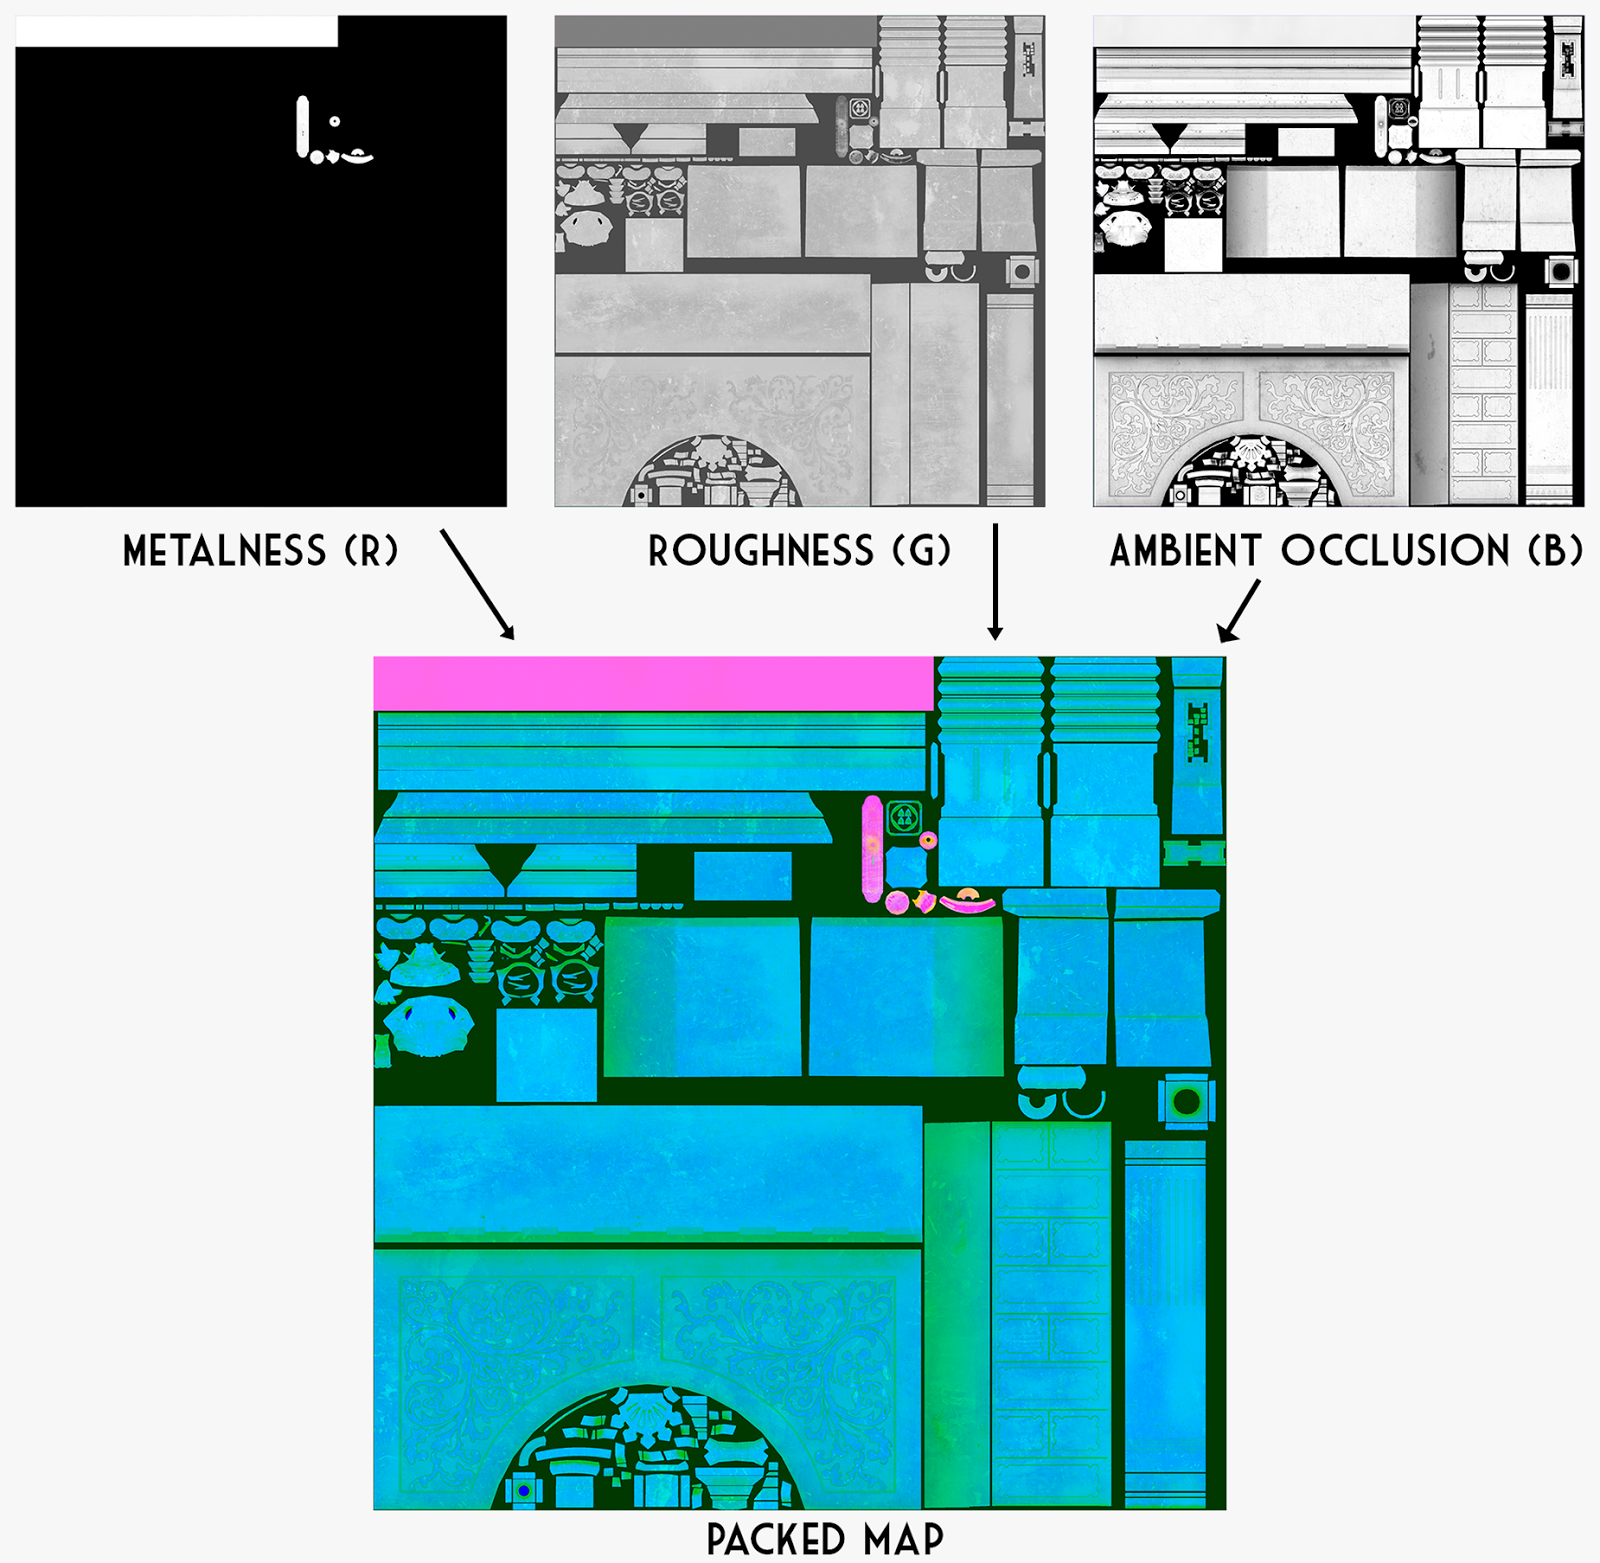
Here is an example of maps needed for Unreal Engine:
Adjusting Maps for V-Ray
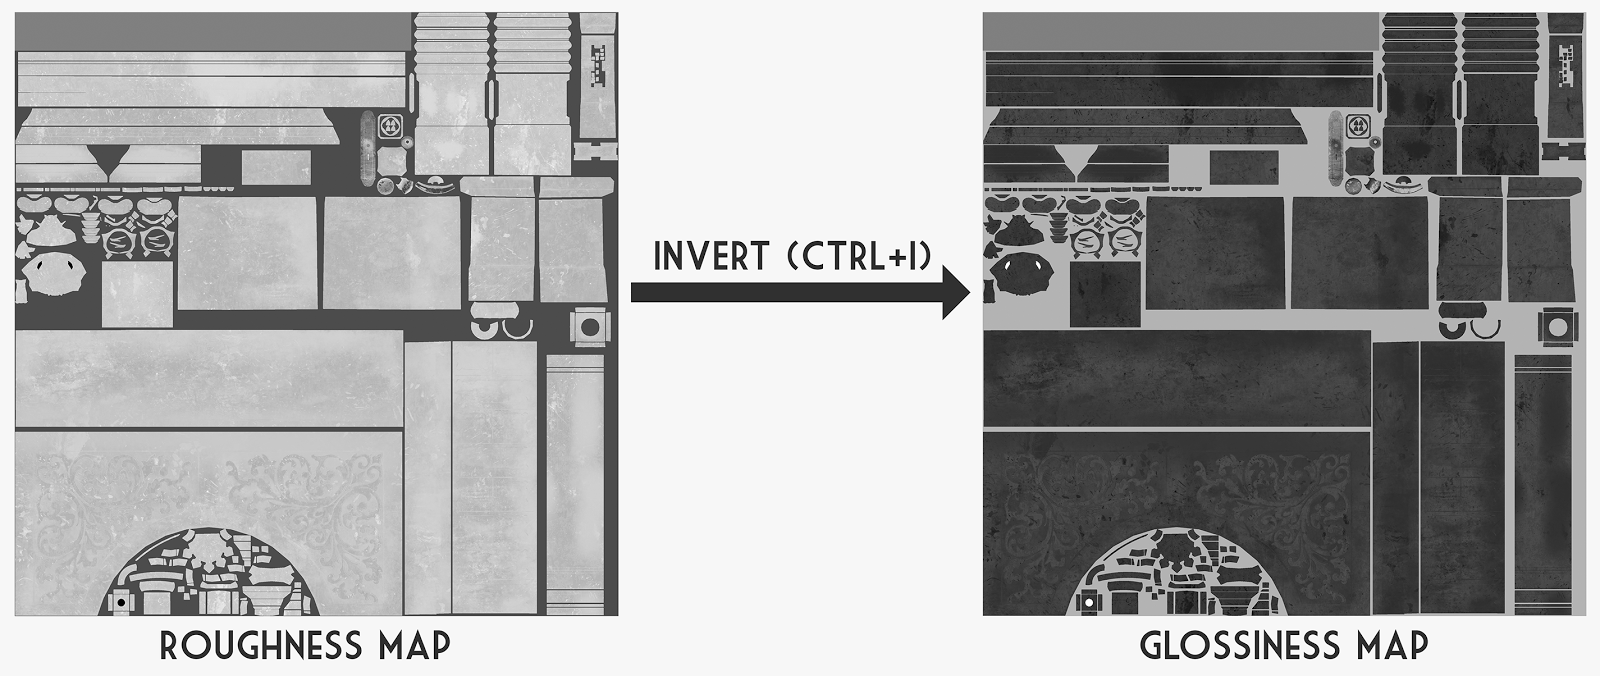
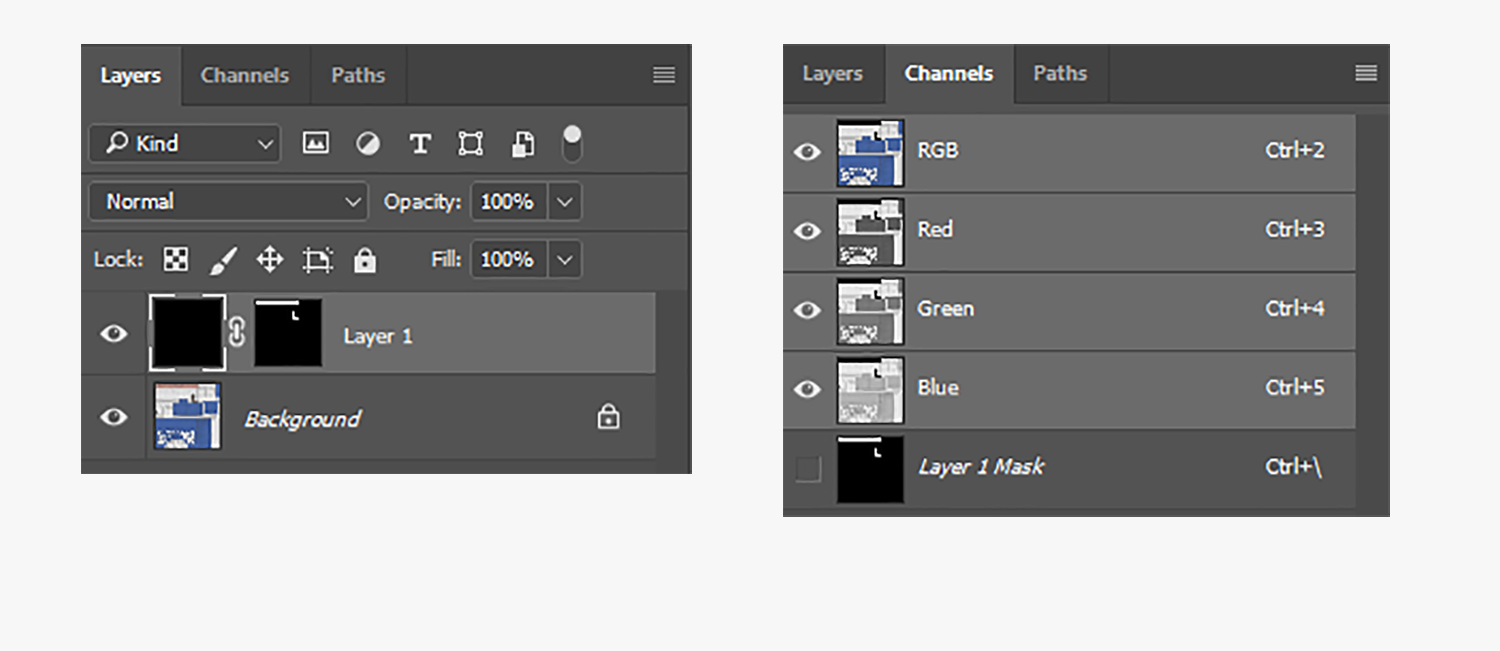
Like Unreal Engine, V-Ray renderer also needs specific texture maps and settings. V-Ray doesn't have a Metal/Roughness PBR workflow, so the maps will need to be converted to get the following set (Note: the Normal map can be used as is and doesn’t require a conversion):



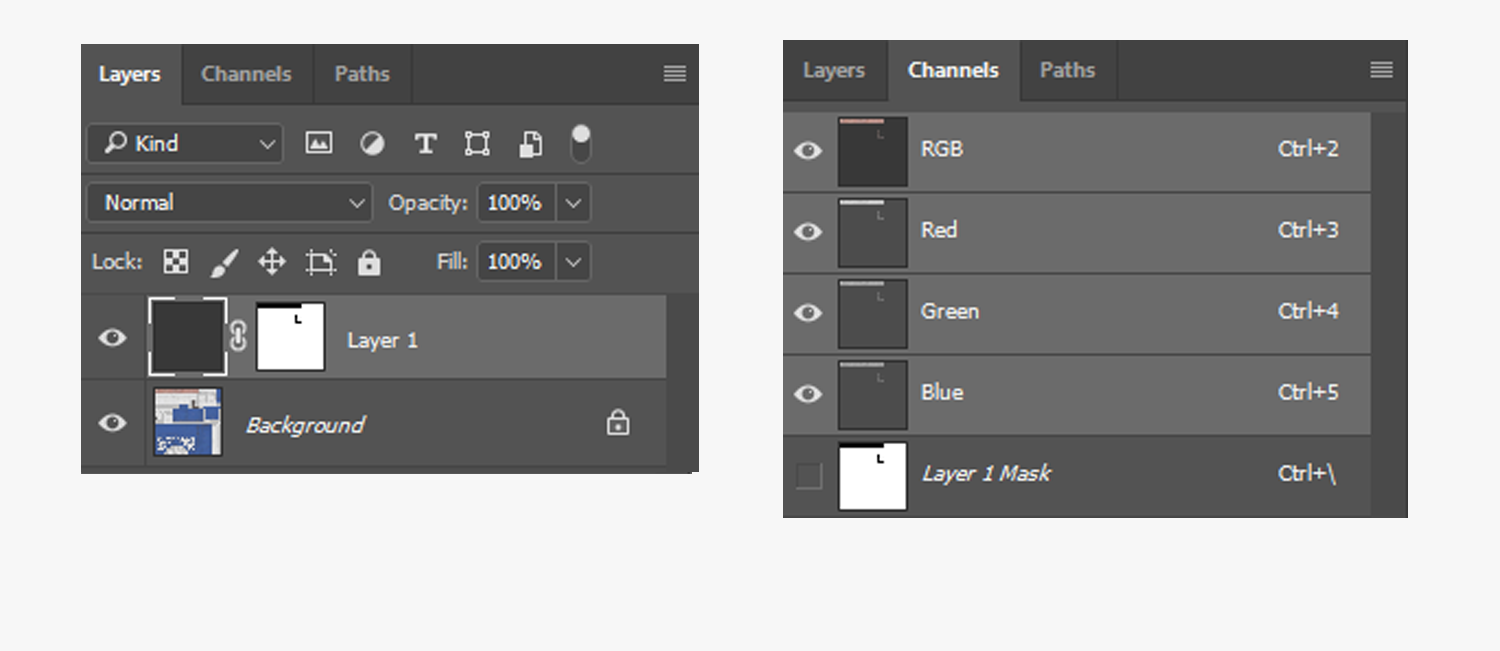
Rendering Maps with V-Ray Materials in 3ds Max
Here I will demonstrate how I use and render maps in 3ds Max with V-Ray materials. There are other ways of going about this, but this is my personal workflow.
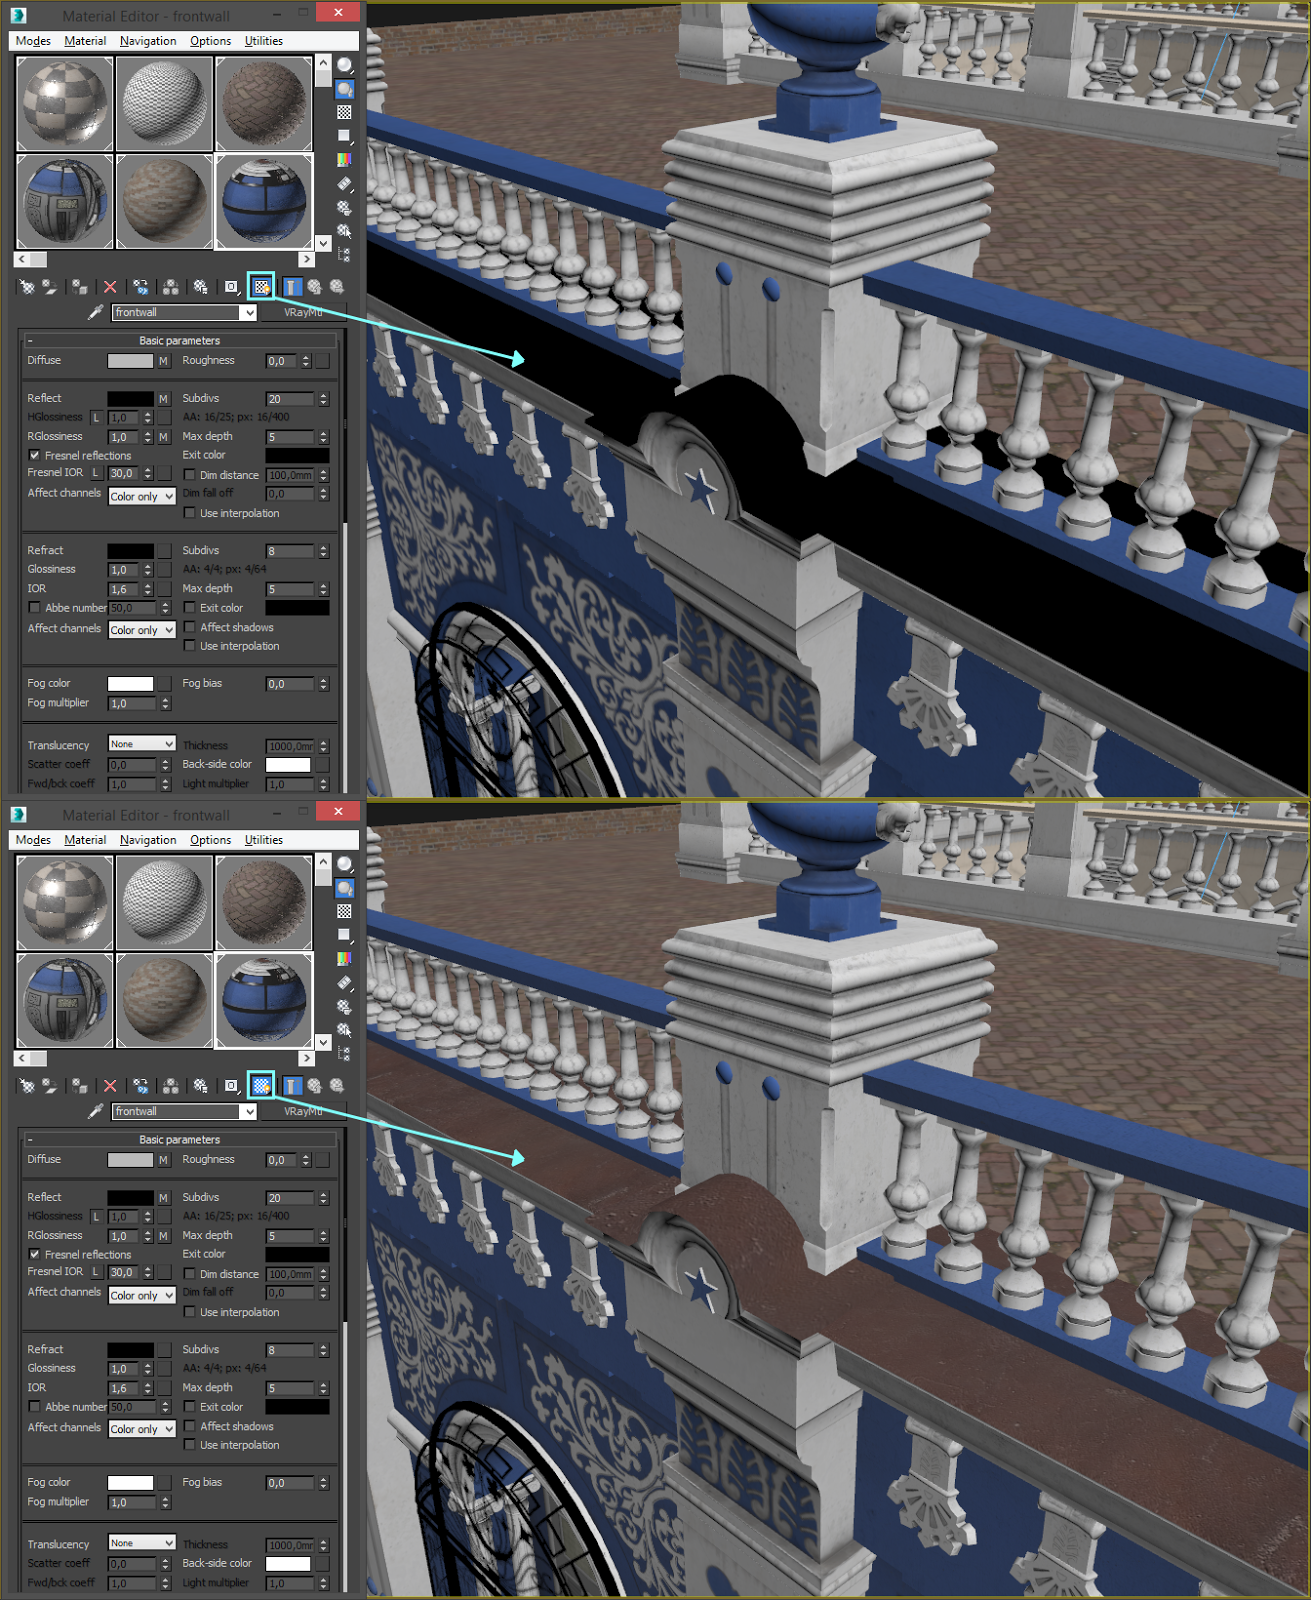
Upon opening the Material Editor, choose V-Ray Material to start the setup for rendering. Here are my settings and recommendations:
I start with the settings on the left hand side of the Material Editor and work my way down. The checker icon (located in the row of icons under the material grid) turns textures on/off in the viewport.
Regarding Fresnel Reflections (aka IOR), make sure this is always turned on. The I’ve set this value at 30, although nothing changes above 50. The settings could vary greatly depending on the project. In regards to reflection, the higher the IOR, the more overall reflectivity the surface will have. By using IOR, you can control whether your material appears as a dielectric material or as a metal material. You can learn more about IOR vs. Metallic Maps in this article.
In the right image of the BRDF tab, I chose Microfacet GTR (GGX). It's a new Physically correct shader, but an old Blinn material is still good. Below that, I imported maps into specific slots:
- Diffuse: frontwall_diffuse (wall_diffuse.png)
- Reflect: frontwall_specular (wall_specular.png)
- RGlossiness: frontwall_glossiness (wall_glossiness.png)
- Bump: frontwall_normal (VRayNormalMap)
The maps themselves also have some settings that need to be adjusted.
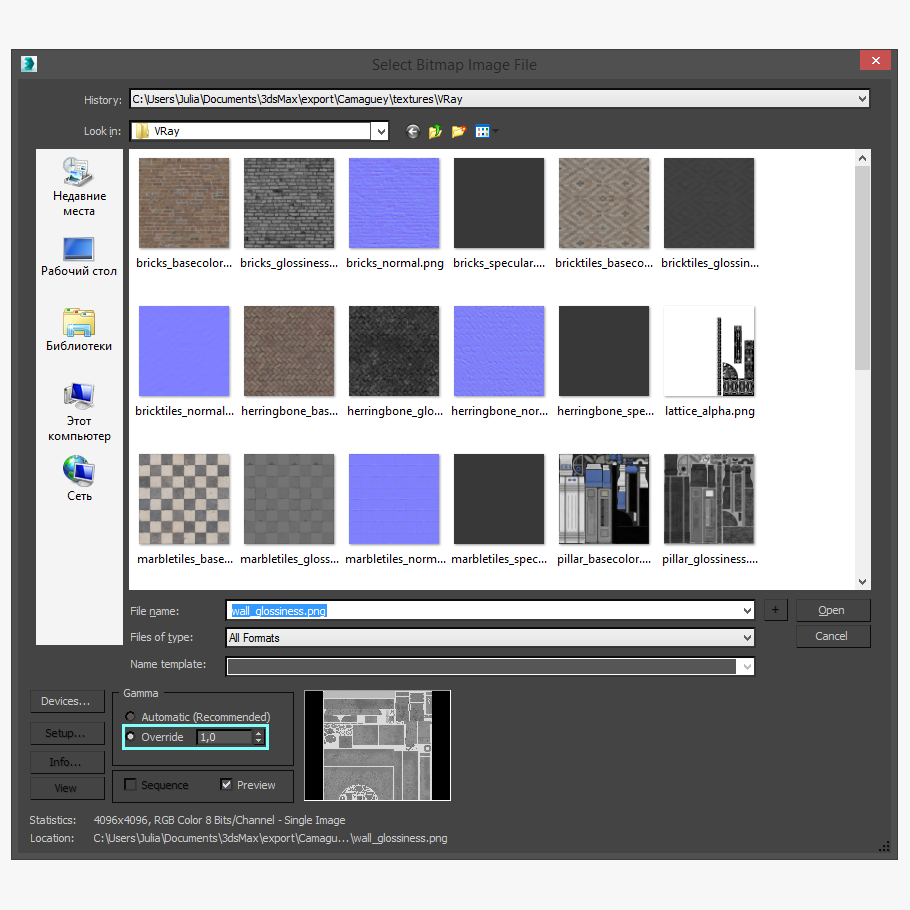
I chose Gamma 1.0 for glossiness map, instead of standard 2.2. Upon import, the Gamma values must match the following or there will be weird seams on the model:
- Diffuse - 2.2 ( Automatic)
- Glossiness - 1.0
- Specular - 2.2 (Automatic)
- Normal - 1.0
All other maps should be imported with Gamma 2.2. When uploading the diffuse map, the areas depicting metal will be black. Don’t worry about it; this is normal of the specular/glossiness workflow. In metallic/roughness workflow, color information is in Base Color map. The Metallic map just controls the level of metalness with grayscale values. In specular/glossisness workflow, all metals on the diffuse map are black. The specular map contains color information of metals. Here is an example with the imported maps:
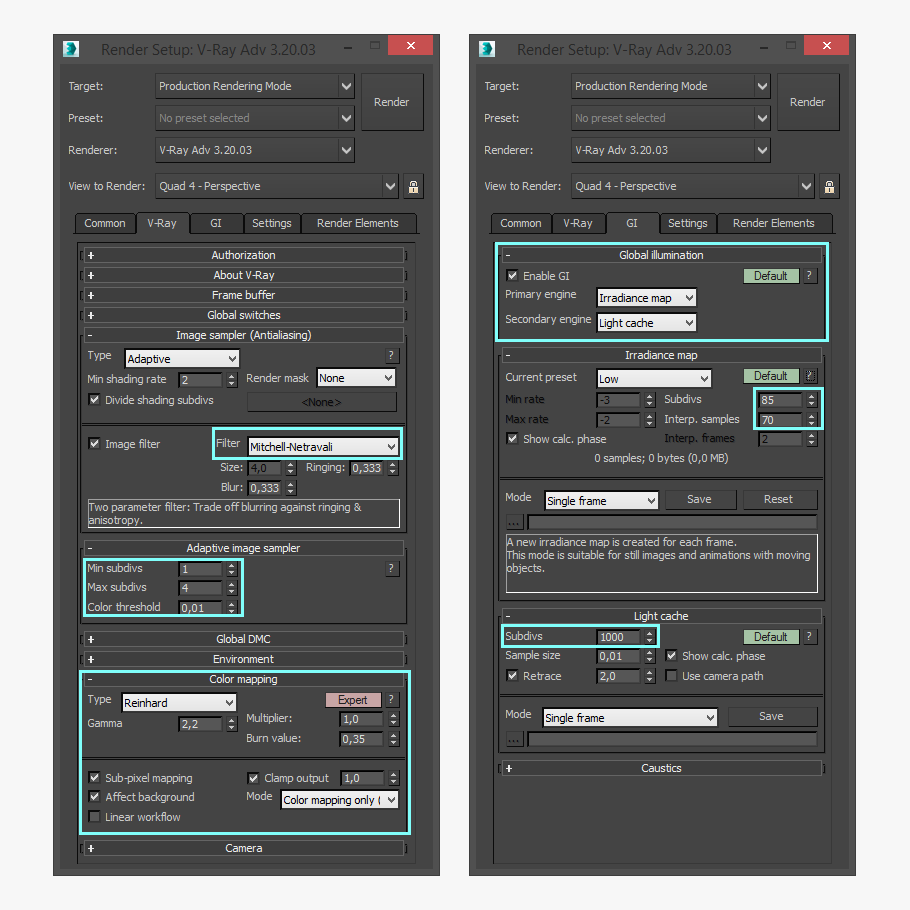
Correct lighting plays a very important role in rendering. My main light, that I set first is VRayLight. I use it to give HDRI lighting to the scene.
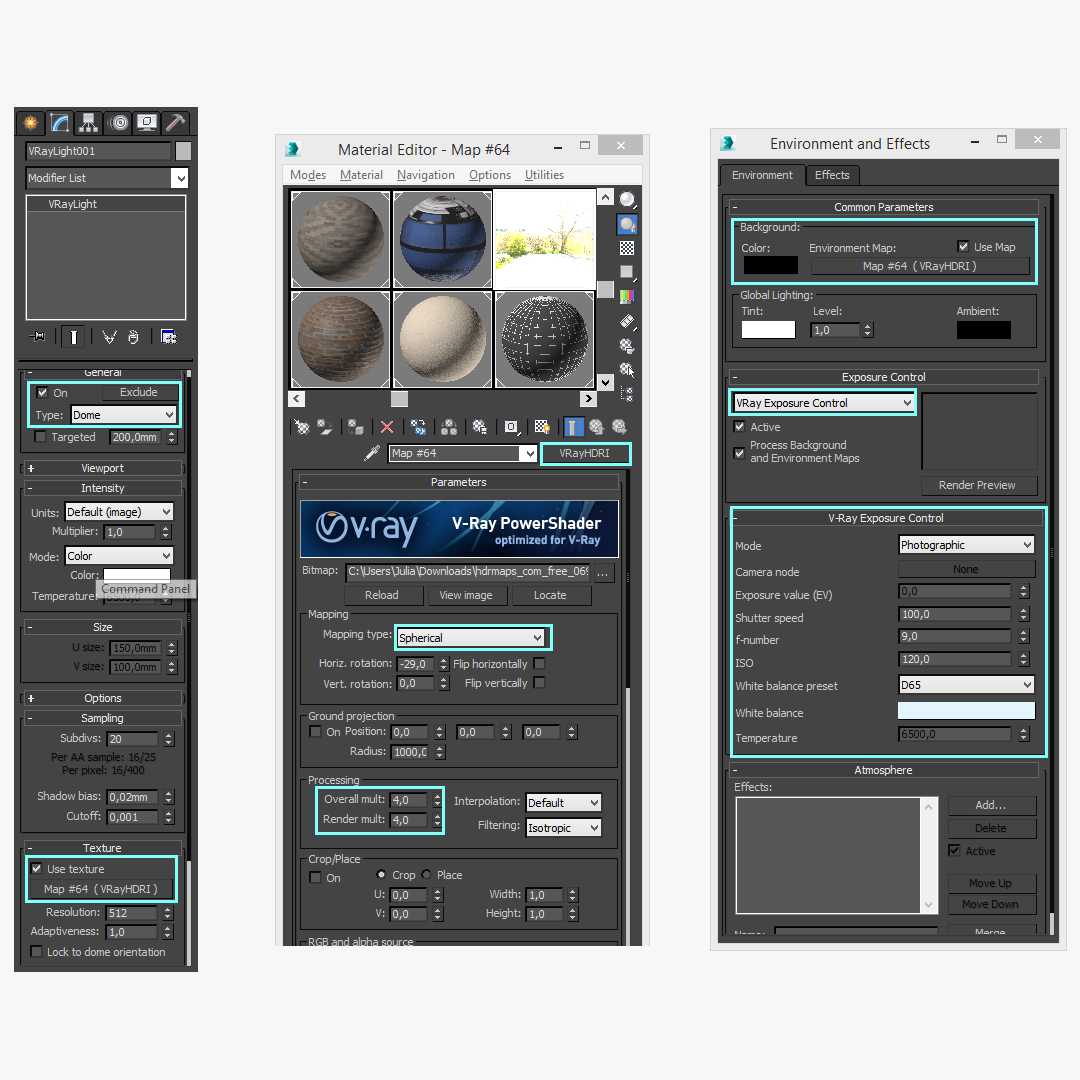
For VRayLight, I changed the type to "Dome" and picked VRayHDRI in the Texture Tab. There are numerous websites where you can download free HDRI maps. After choosing the wanted map, I drag and dropped it to a free slot in the Material Editor. Here I set Mapping Type to Spherical and set the Processing Multipliers (Overall Mult and Render Mult). Overall multiplier is a control for the overall brightness of the image. It affects both rendering and the material editor. The render multiplier controls the brightness of the HDRI image only when rendering; it has no effect on the display of the image in the material editor.
After setting the Processing Multiplies to 4,0, I drag and dropped it to the Environment Tab in the Environment and Effects window to the Environment tab. Don't forget to set exposure control, otherwise, the render will be overexposed. I then adjusted the V-Ray Exposure Controls to my preferred settings, and inserted a Physical Camera into the scene. It’s up to the artist to choose realistic or beautiful FOV settings.
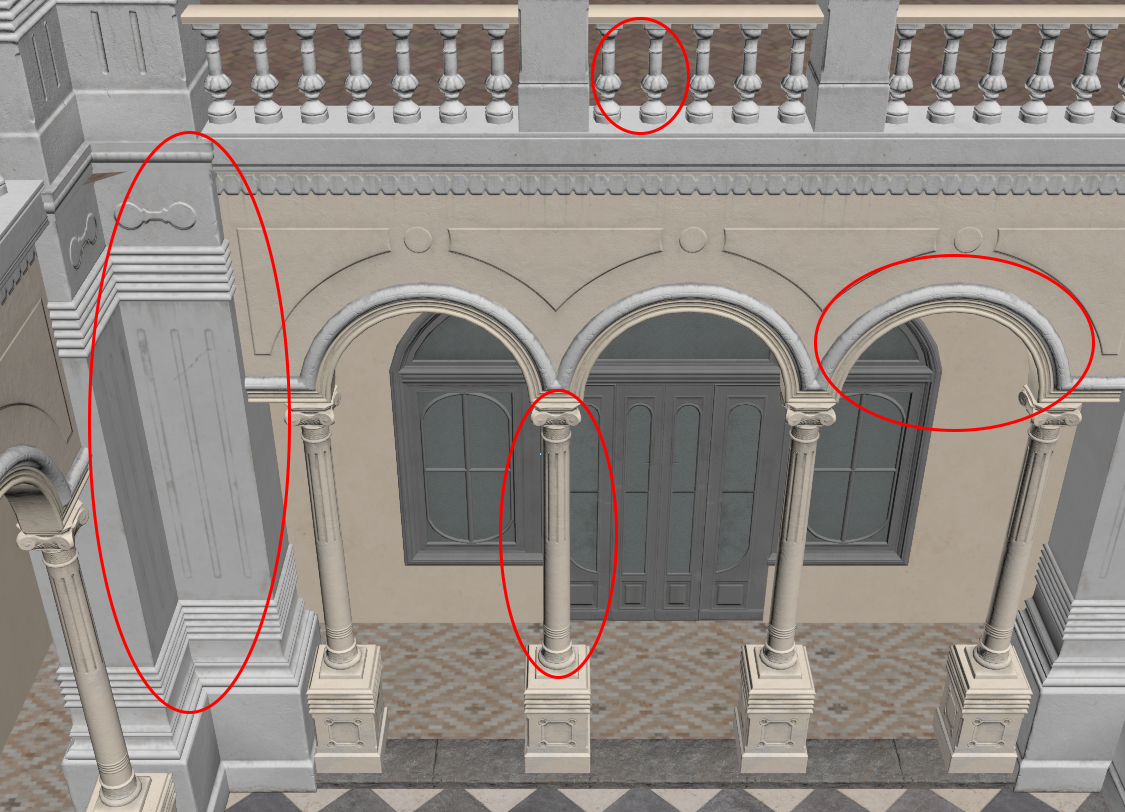
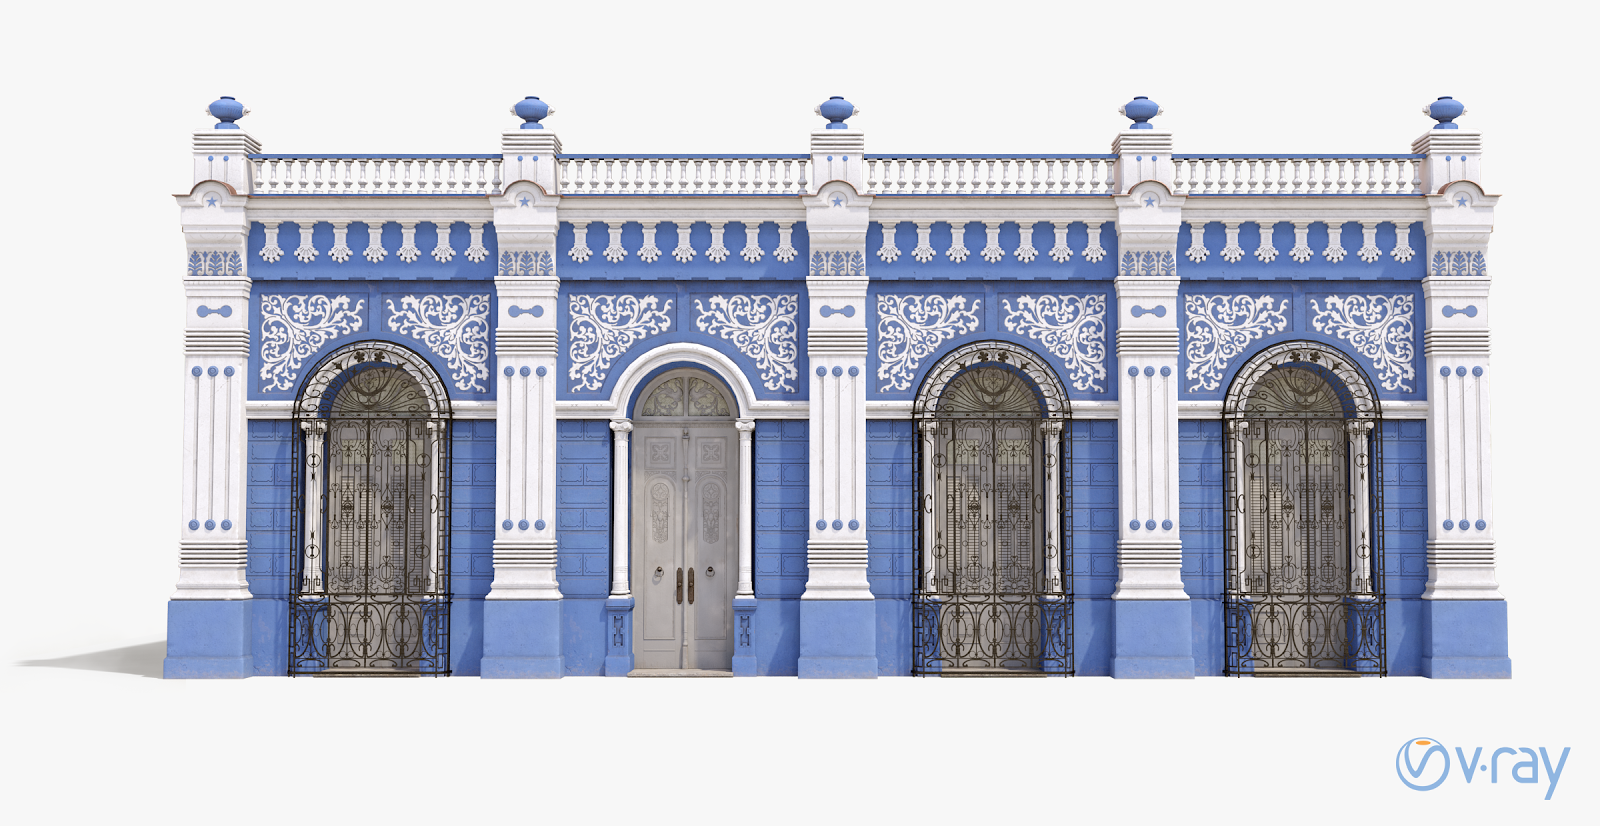
Here is an image I received with the above settings:
Stay tuned for the next segment of the tutorial: Preparing the Model for Unreal Engine!

