Welcome back to our continuing series of blog posts on physically based rendering (PBR)! If you missed our previous posts, we’ve linked them below for your reading pleasure.
- An Intro to Physically Based Rendering Material Workflows and Metallic/Roughness
- Explore 3D Technologies that Support Physically Based Rendering
In this third part, we’ll discuss the importance of having a good library of PBR materials for achieving a high level of detail and realism in your 3D models. Investing in a top-notch PBR material library is essential before starting your PBR workflow. This will enable you to paint your 3D models easily, reuse them, and continually enhance your library.
Downloading PBR materials
Searching for readily available PBR materials online can be challenging. For instance, many sites carry restrictions on how you can reuse their PBR materials and textures. That’s why it’s crucial to ensure that any resources you use are licensed correctly and suitable for your intended purpose—especially if you plan to sell your 3D models on TurboSquid.
Some websites offer free PBR assets licensed under Creative Commons CC0 1.0. This means anyone can use, modify, and distribute the work without permission or payment. So if you find a Creative Commons asset there, you should be good to go. I’d also advise supporting the authors of these websites whenever possible.
Authoring your own PBR materials
From photo-scanning to photogrammetry
Creating your own PBR materials from photos has several benefits over downloading pre-made ones. For one, it allows for greater customization and control over the final result. By using your photos and adjusting the settings yourself, you can create unique materials tailored to your specific needs. Additionally, creating your own materials gives you a better understanding of how they work and how to manipulate them, which can be beneficial in future projects. Here are a couple of great tutorials explaining the overall process:
- Photo-scanned Texture Creation Process
- Guide for Environment PBR Texture Creation Using Photogrammetry
Node-based procedural applications
Creating PBR materials using a node-based procedural application like Substance 3D Designer offers several benefits. First and foremost, it enables more precise control over the material’s properties and appearance. With a node-based workflow, users can easily tweak and adjust different parameters and then see the results in real time, making it much easier to achieve their desired look and feel. Additionally, a procedural approach allows for the creation of infinitely scalable textures, which can be particularly useful when working on projects with varying levels of detail or resolution.
- Adobe Substance 3D YouTube channel with Substance Designer tutorials
- Substance Designer material breakdowns from cgbookcase
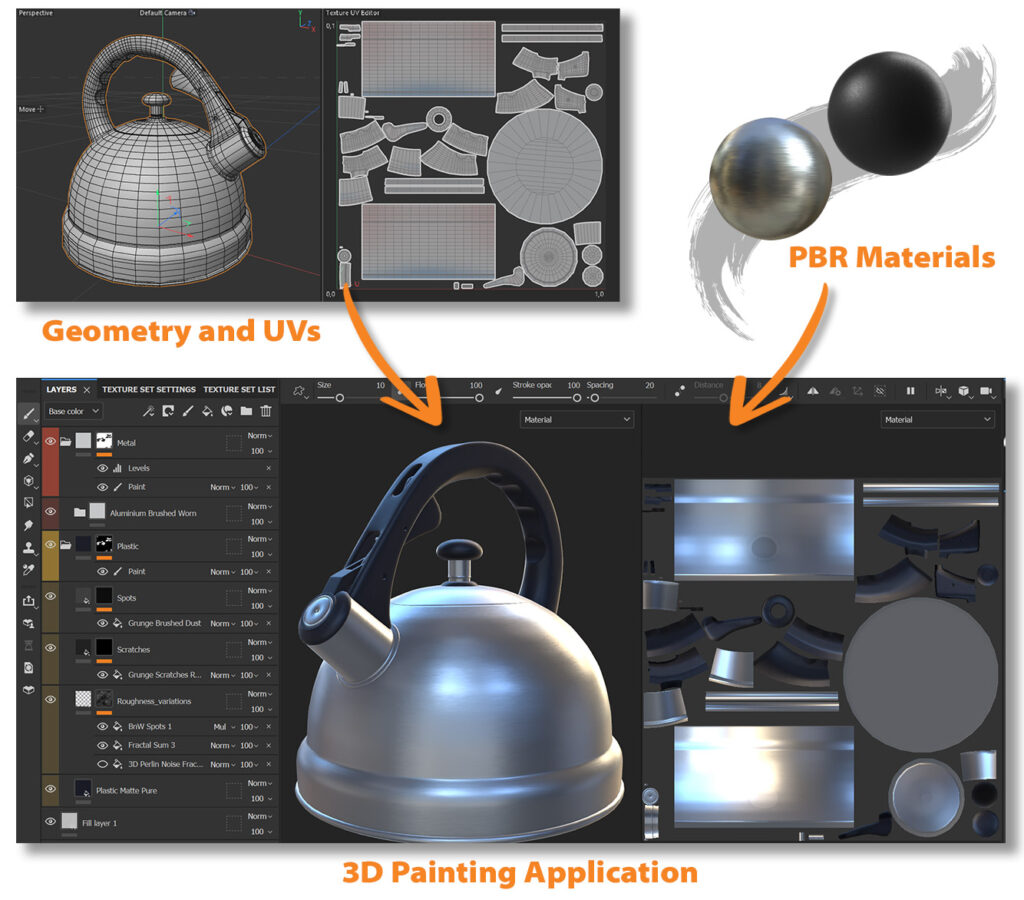
Bringing everything together in a 3D painting application
When creating shareable PBR 3D models, a necessary step is painting your authored PBR materials onto your geometry and UV coordinates. Our previous blog post stressed the importance of a texture-based materials workflow. This involves unwrapping the 3D models and packing the UVs in the 0-1 space. Then, the PBR material values must be exported as multiple texture maps for base color, roughness, metalness, normal, ao, and other features.
To paint these PBR materials directly onto your 3D models and bake out the texture maps, you can use painting applications like Substance 3D Painter, Quixel Mixer, Mari, Marmoset Toolbag, 3DCoatTextura, and ArmorPaint. Take the time to explore each one and choose the best fit for your PBR workflow.
When using any of these 3D painting applications, it’s important to keep two things in mind:
- These applications typically come with a stock library of basic PBR materials that can be used as a starting point. However, it is critical to read and comply with the license if you plan to use the materials on 3D models that will be sold on TurboSquid.
- When exporting your final texture maps, make sure to use a preset that outputs a standard metallic/roughness PBR workflow. You may see presets that could be for different or outdated workflows, so be sure to double-check before exporting.
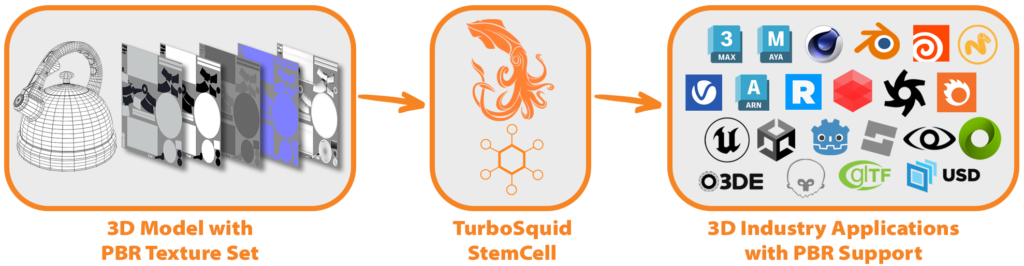
Selling your PBR metallic/roughness 3D models
Once you’ve applied PBR materials to your 3D models using the metallic/roughness workflow, you should be ready to share them with the world! If you’re curious how to best publish them on TurboSquid, we recommend looking into StemCell, our PBR-specific modeling workflow that will automatically convert your 3D models to formats people need. It takes the pain out of having to publish different formats and makes it easier for people to buy the model they need.
Want to sell your models on TurboSquid?