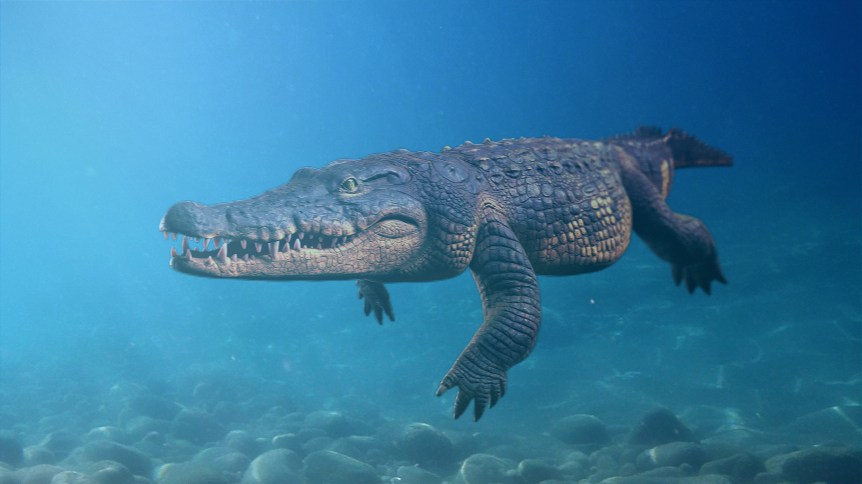
Have you seen our newest homepage image? It was created by TurboSquid Modeler Francesco Furneri, an expert in designing details that bring his 3D models to life. He has previously published a guest article on this blog on creating procedural rock details as well as Part One of this two-part tutorial. In this second part, Francesco dives deep into the lighting and rendering portion of his latest project, The Crocodile, which is now available for purchase on TurboSquid.
Francesco Furneri: Welcome to the second and final part of this tutorial. In the first part of the tutorial, we talked about the workflow for texture creation in Substance Painter. In this article, we’ll be discussing lighting and rendering in depth. I will then give you some tips and some useful advice to plan your work and to comprehend some key concepts while rendering a 3D scene.
Suggested reading: Francesco Furneri also provided TurboSquid with an article on key Sampling, Lighting, and Rendering concepts. If you are a beginning modeler looking to make your renders more appealing to customers and aren’t sure where to start, be sure to check out TurboSquid Resources‘ Rendering, Lighting, and Mood.
Crocodile Project – Lighting Schemes
Once you’ve covered the information in Rendering, Lighting, and Mood, let’s talk about what I did specifically for the crocodile project.
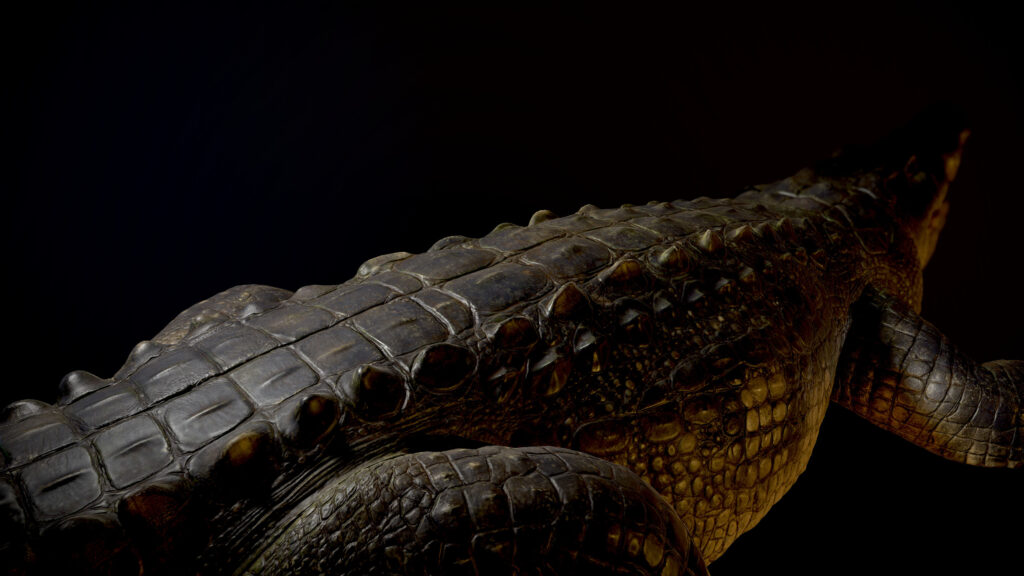
The first render below follows a scheme called White Box Lighting.
It has three lights from three different directions: one from the left, one from the right, and the other one from the top towards the character.
The purpose is to show the subject from all the directions. It is commonly used to present a product, to showcase your character, to create a 360 turntable where all the details are important. There is no reason to add drama or high contrast in this scheme.
Naturally, the only dark areas are in the occluded parts of the model like in the legs and inside the mouth.
In a real studio, this lighting scheme can be achieved by using soft boxes which create soft shadows. However, in the software, the same result can be obtained by using area lights.

The image was rendered using Arnold and it was essential to increase the diffuse samples from the program interface. As mentioned in the Resources article, that avoids the presence of noise, especially in areas where there is no direct lighting.
I used this scheme to show a turntable version of my crocodile.
Another lighting scheme was produced using Marmoset Toolbag.
It’s a tool for lighting, lookdev, and GPU rendering of 3D models, and it’s also an excellent tool for creating an interactive experience for the users that can move around your subject interactively.
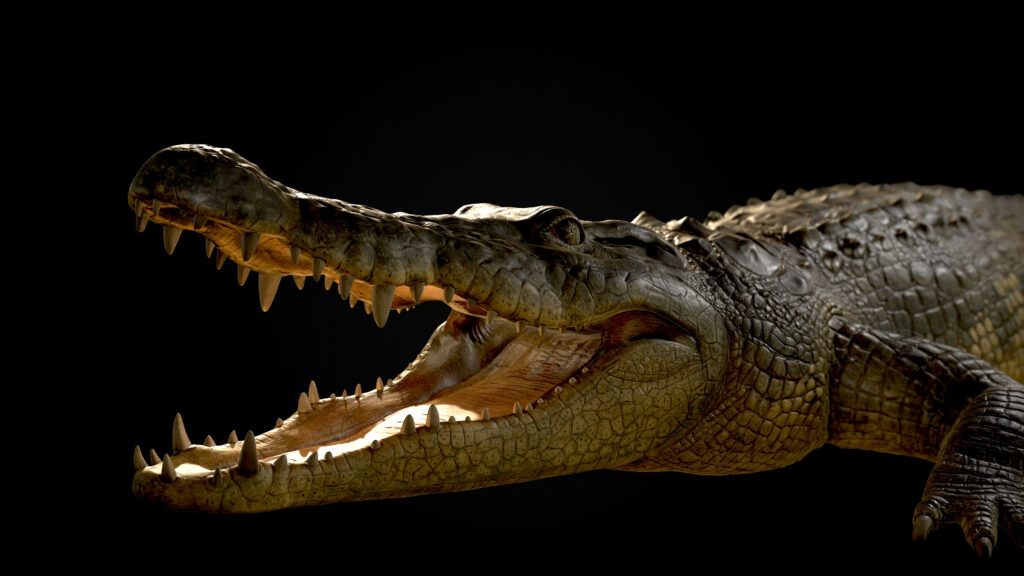
The first thing that we notice– when comparing to the White Box lighting– is the different mood. Here, I wanted to create more drama and to emphasize the inner part of the mouth.
With this idea in mind, I added a spot light on the left side of the crocodile, where I wanted to focus the attention on the specular reflections of the scales because those were an area of interest.
I then added another light behind the subject to create a silhouette of the head. See how the black background cuts the edge of the crocodile’s head? By hiding the rest of the render, just that rim light makes the crocodile shape recognizable.
Finally, I experimented with a direct light towards the lower part of the mouth to increase the contrast and to create a nice and soft indirect bounce onto the upper part (the palate). The light distribution is interesting there!
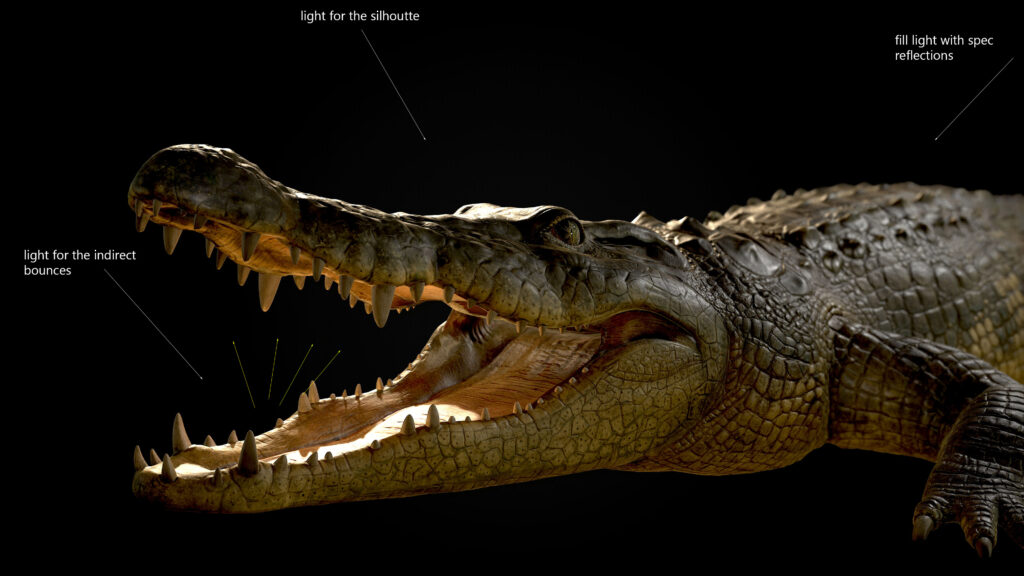
The light directed towards the inner mouth is the key light, while the one creating the silhouette is the rim light and finally, the one on the right side of the screen is a sort of fill light. This is essentially a Three-Point Lighting scheme without the use of any environment map. With Marmoset Toolbag, you have a bunch of interesting features involving the Camera and the final render.
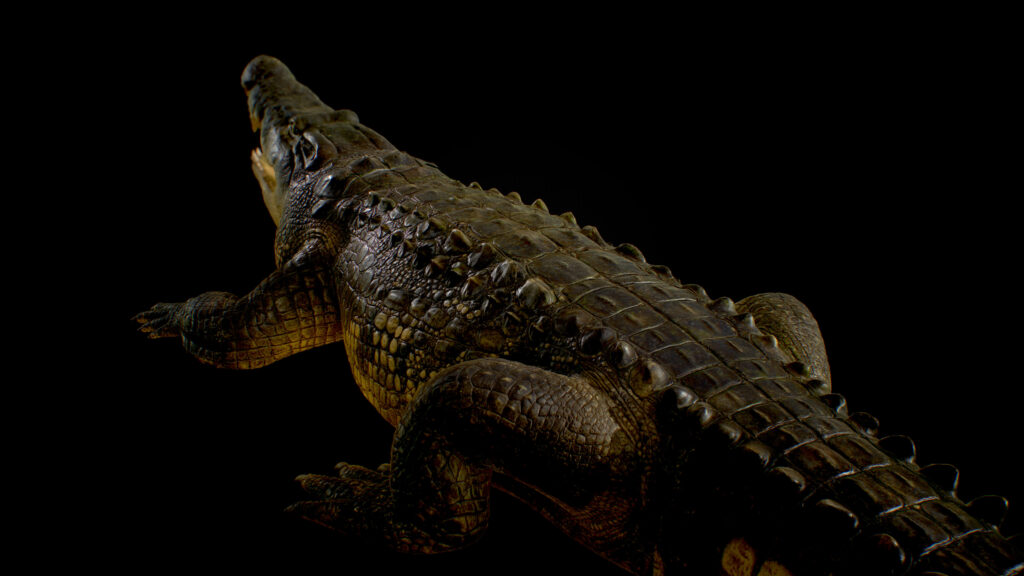
Generally, when I create a close shot like the next one, I like adding a depth of field option. In the previous image, you see that part of the crocodile’s back is intentionally out of focus. The depth of field improves the shot, as well as the use of small grains in the image.

The presence of noise is related to the old cameras, where high film speed corresponds to more grain or, if we talk about modern digital cameras, the more the ISOs, the more the digital noise.
Marmoset also provides the users with some cool Post Effects like luminosity, contrast, saturation, etc.
Marmoset also has the ability to sharpen edges in the render (Sharpen) or to apply a Bloom or Vignette effect, or as we said, to add grain.
Let’s introduce a more interesting close up to our renders now.

Again, the idea is to capture some details and, particularly, the upper part suggests a bit of drama for the presence of the intimidating eye and for the type of framing. The render is made inside of Marmoset Toolbag and here are some interesting details:
- The light shows the albedo on the side in a soft and uniform way, without exaggerating the light intensity.
- The presence of interesting specular reflections improve the render quality and their distribution on the top part of the head draws the viewer’s attention.
- A shallow depth of field suggests the use of a tele lens, where the eye area is in focus and the rest is not.
- The presence of an out of focus background, created with a simple image plane, makes the integration better because we know that the crocodile is living in an environment.
- Using chromatic aberration affects the type of lens (behaving like a prism), where different wavelengths bend at different angles without focusing on the same point on the focal plane. The effect is noticeable on the teeth with the presence of a subtle red fringe.
- It’s also interesting to notice the presence of a LUT (look up table) that changes the colors a bit by burning some dark details and by creating more drama in the scene. For instance, on the membrane near the jaw, on the right on the scales and a bit on the left.
Finally, to create more realism, I decided to add a lens dirt effect (e.g. some small stains on the lens). It happens when a camera lens is not properly cleaned. The effect can be seen on the background image, with a hexagon shape and some small stains here and there. Most of the effects are post processing effects and they should be used to improve some aspects of your render. Don’t overuse them if not necessary!
Before talking about the last render, I’m going to show you some quick examples of dramatic lighting that you can achieve with the previous LUT.
See how we want to draw the viewer’s attention to the scale details, with specular reflections on the left side of the crocodile? The entire composition is affected by the LUT which burns the darker parts. Some details vanish on purpose. It’s a style that I wanted to experiment with and it’s similar to the style choice that I saw in the game The Evil Within, where the artists intentionally want to convey a horror style.
See on the bottom, on the side of the tail? There are no details there. It’s not physically correct but it gives an interesting mood after all.
In this scene below, I applied the same light setting: a light from the top left to emphasize the details and the specular reflections, and the same LUT as before, to burn dark areas and a light coming from the right side (warmer) to give more interest, as if there was an artificial light source off screen.
This lighting scheme is set to give solid details on the crocodile’s back and to create an interesting shadow on the front paw. Globally, the right part of the scene is lit by a warm color while the left part is lit by a cold color: the contrast reinforces the composition.
Notice that the crocodile’s head, despite being burnt by the LUT, preserves some details on the side due to the presence of the warm light. In all my examples, we have always started from a precise idea and purpose. We’ve applied traditional lighting schemes but also, we’ve refined those schemes or applied custom solutions in order to reach a certain mood and atmosphere.
As the last example, before coming to the conclusions, let’s consider how we can integrate our crocodile into an underwater environment.

Apart from talking about light settings here, I would like to explain how I put the crocodile render onto a real backdrop.
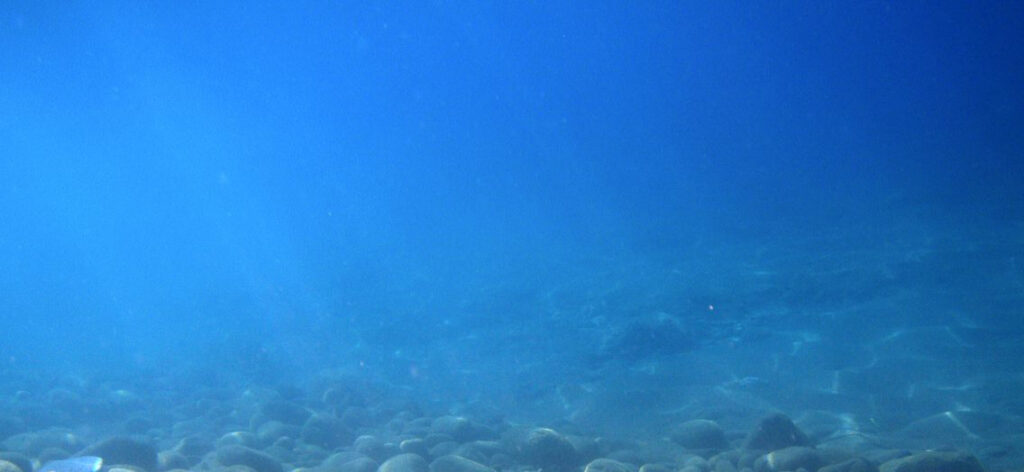
In this example I downloaded a real image from the web to test a different mood. I admit that, because of my personal taste, I preferred to choose an image with more limpid water rather than a dirty place (I also wanted my crocodile to be more visible). Though, it might be curious to try another environment with a swampy look, so that the scattering effect underwater appears interesting. Think about that!
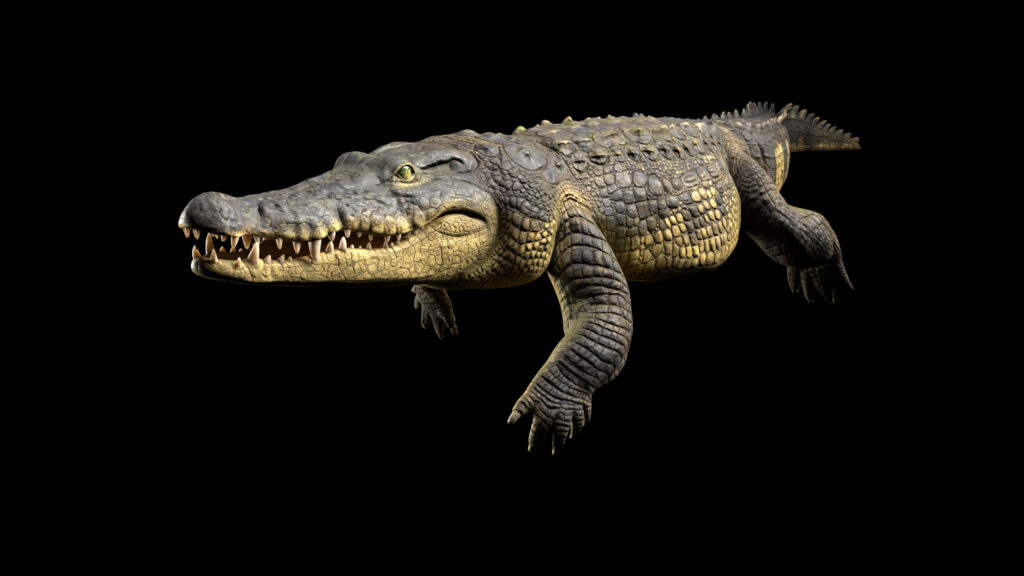
Let’s now get back to our integration. First of all, this is my rendered crocodile in Arnold with a uniform light setting and without too much contrast.
From our first impression, the crocodile doesn’t seem to match the environment lighting at all! The colors are not managed, and the tones seem literally off. The render needs some color correction as we want the crocodile to appear in the water.
To work and edit the rendered image I worked in Photoshop. The image below is COMPLETELY WRONG and the crocodile doesn’t seem to blend correctly.
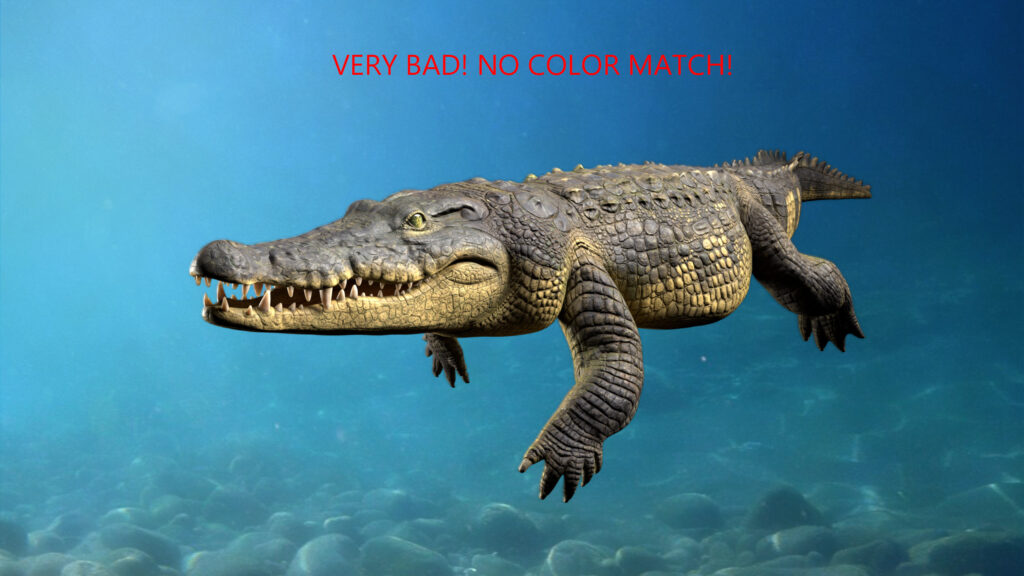
There are many ways to make the colors match between images. The first tool that I tried is called Match Color, which works on the two images together to reach a decent color match. Unfortunately, my first try didn’t succeed because the tool is powerful but can introduce some color cast that is obviously not desired. As you can notice from the image below, the light blue from the sea blends with the crocodile’s skin causing a kind of green in the render. The animal is into the water after all but the water itself cannot affect the color so much.
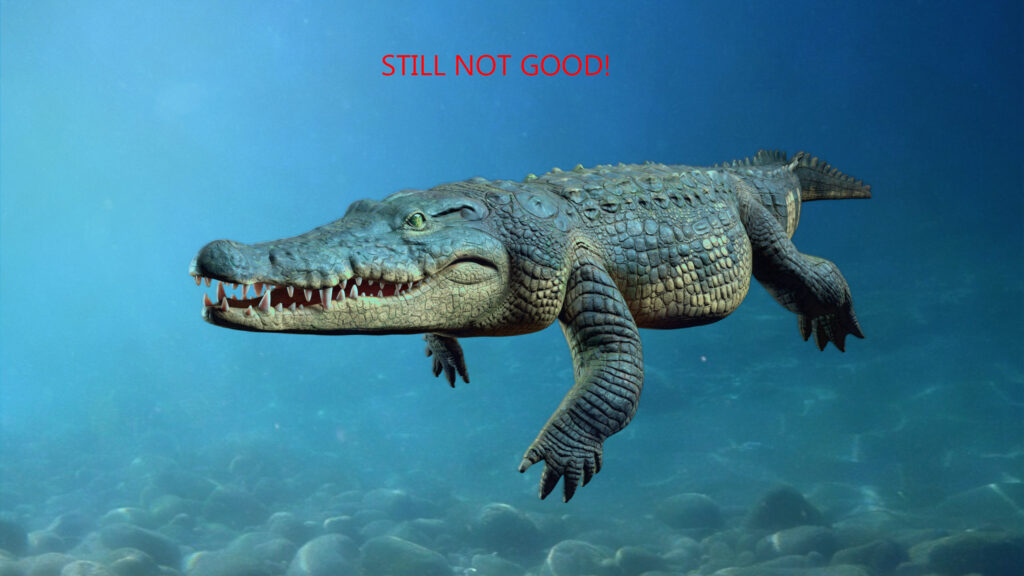
Another solution had to be applied. It’s better but the match is still wrong for the reason we explained before: the color cast introduces light blue / green colors but we want to preserve the dark color on the back and, at the same time, to make the water slightly change it.
If not satisfied with the Match Color tool, sometimes I use a filter calculating the average hue in an image. After having the average color in a separate layer, I put it on top of the crocodile and I’m free to use blending modes to obtain a more realistic result. (The functionality I’m talking about is under Filter->Blur->Average.) In conjunction with this, I create a stack of adjustment layers, curves, and levels to reach a better integration. In some cases I use the Color Lookup and I experiment with different LUTs.
At the end, you can see that the crocodile is in the water but there is no evident color cast on the skin. To add even more realism, I applied some blur to the crocodile layer (to smooth the sharp edges a bit) then I added the depth of field that makes the tail a bit blurred with the background.
I also created some adjustment layers to the entire image where I wanted the left side to be brighter than the right side. There is a sort of gradient from left to right that increases the depth in the composition.
A note on the environment: before putting the crocodile in Photoshop, I also worked on the downloaded image a bit, because the original photo was too uniform and blue. I applied some color correction and layers to add more variety and turbidity. You may notice some small differences on the stones.
Again, this is the final result. The crocodile seems to live in the environment thanks to Arnold and Photoshop.

Conclusion
This brings us to the conclusion of this article about lighting and rendering.
- I introduced the term Sampling. Sampling is a very important concept while setting up a 3D scene for rendering. Every 3D software (Maya, Max, Blender, Cinema4D, etc.) deals with the sampling.
- I gave you a quick introduction to understand how to obtain clear renders by just setting the camera AA and the diffuse samples in Arnold.
- I discussed the mood and the atmosphere in a 3D render, introducing different basic lighting schemes and we explained the motivations to insert a light in a place rather than in another one.
- I demonstrated these concepts using the crocodile project with some examples.
- Finally, I introduced a short example of post production in Photoshop as a way to integrate a 3D model into a real image.
Final Bits of Advice
- Deepen the Sampling concept with more than just the camera AA and diffuse sample parameter, and try to understand the other type of rays (specular, transmission, SSS, etc.) and how to set them according to your scene.
- Study your 3D scene to have a thorough understanding over the use of the Ray Depth.
- Learn from the references to understand the mood. Many artists from the past use interesting lighting schemes (for instance, Rembrandt for his portraits).
- Don’t stop at simple lighting schemes. Remember that those are starting points that can be modified, enhanced, and enriched with your own lighting.
- Get used to Environment Maps like 360 HDR for instance, because sometimes they can be useful to introduce ambient light and interesting reflections on your objects.
- If you have time, try to experiment more renderers to understand the differences (e.g. Arnold, Marmoset, VRay, Redshift to name a few).
- The post-processing can be helpful to improve the quality of your renders. If you already have a good quality render in your 3D package, you are already on the right track.
- To integrate your 3D model onto a real background, follow my simple advice above and learn more on guides and online tutorials. It’s not hard to get used to, but it requires time and patience.
I hope that my final bits of advice can be helpful and that you can develop some good projects.
My name is Francesco Furneri and I’m a 3D artist with more than 10 years experience in 3D Computer Graphics. I specialize in 3D Modeling and Texturing and have worked for 3D companies as a modeler, technical artist, and texturing expert. I also freelance in the States, creating organic 3D models of characters and prop textures. I want to thank TurboSquid for giving me the possibility to share this article with you, and I really hope that you find this description useful for your ongoing projects. Check out my Artstation page, and feel free to contact me.