Tick, tock… if your render is taking a maddeningly long time, we’ve got a few tips to help you speed up the process, in this edition of TurboTips.
There are many places where your settings can be optimized to speed up your render time. Decreasing the render time will make the model easier to work with (and it can even be mentioned in the model description to attract customers). Some of these are minor settings that don’t affect the model’s quality, and others are a trade off between quality and speed.
These small changes should always be kept in mind, so here are few things to think about when trying to optimize a render. While the examples use 3ds Max, these concepts apply to all 3d Modeling packages:
Render Region
One of the easiest tricks for saving render time is adjusting the render region size. 3ds Max seems to gain the most optimization for this setting when the Render Division is set to 10% of the Output render resolution.
NOTE: This does not apply when using Distributed rendering.
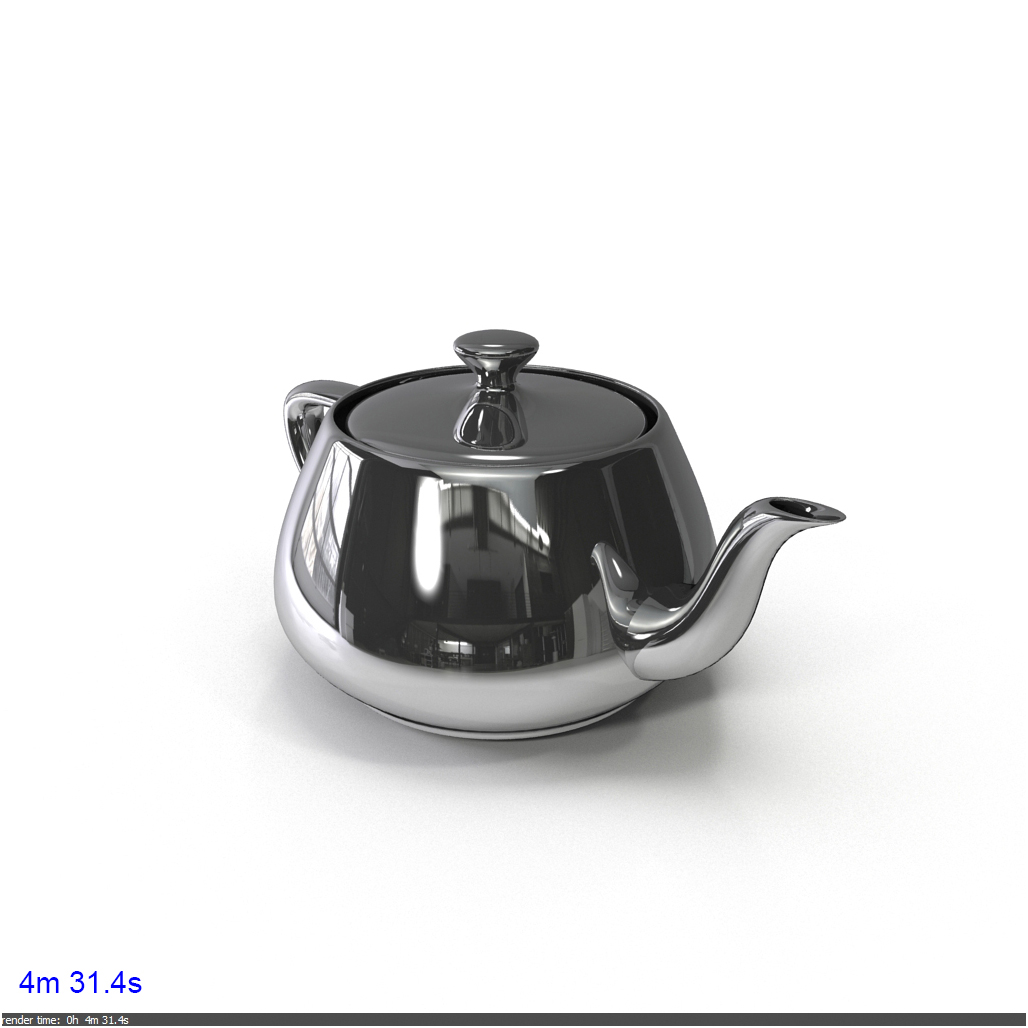
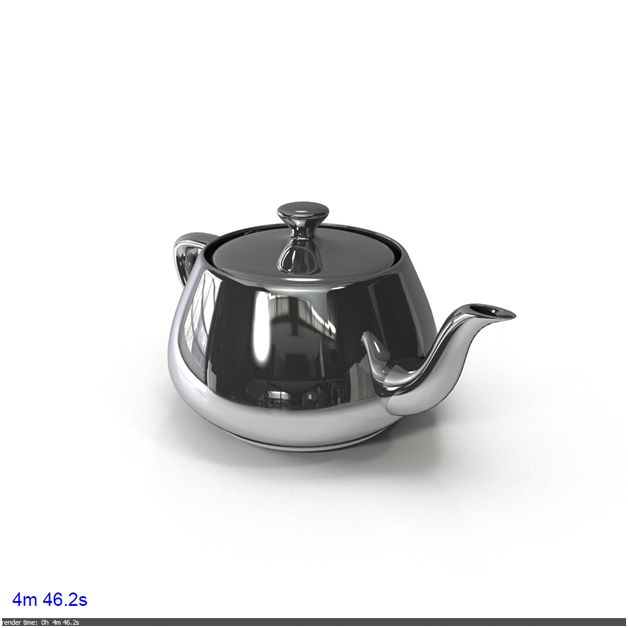
The first image below was rendered with the render region division set to the default, at 64. The second was set to 32, which is very commonly used. Both renders are at 1024 x 1024 resolution, at high quality settings. The smaller render region is notably slower.


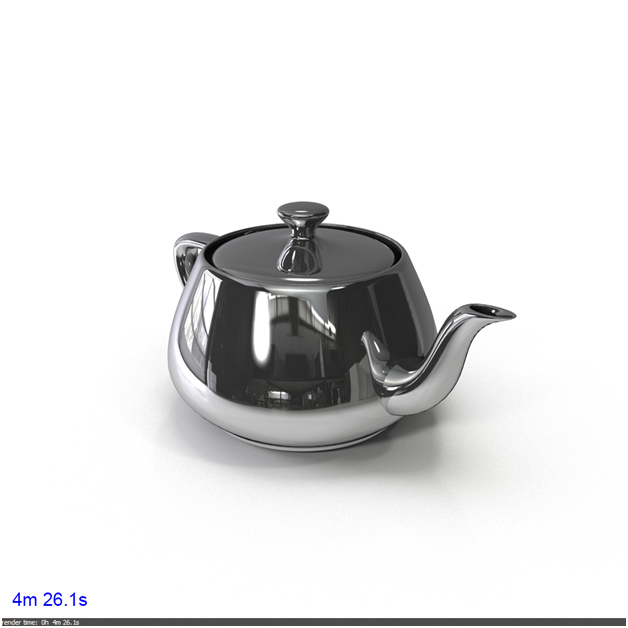
Here, we are setting the render region to 102, which is 10% of 1024 x 1024 (dropping the decimal). There is a gain in speed over both of the above settings. Several second gains-per-render may seem minor, but it is a percentage. If a render takes 30 minutes, adjusting this setting could save several minutes.

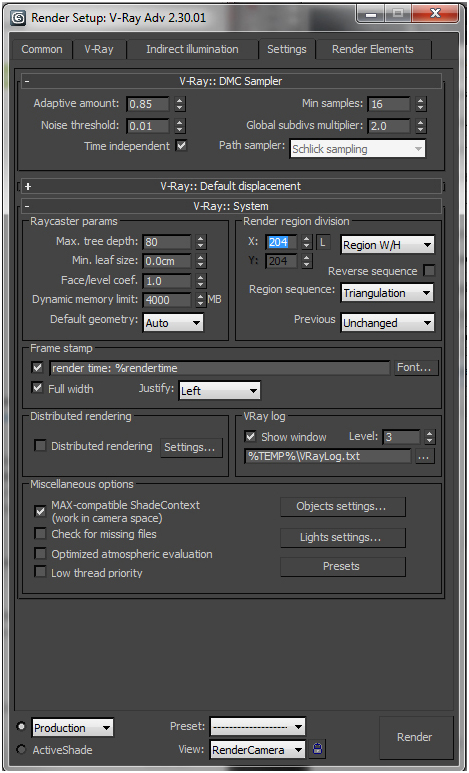
If a render region can be too small, it can also be too large. For example, on a 2048 x 2048 render, the render region would be set to 204. If the render output is changed to 1024 x 1024– and the render region remains untouched– there is a significant difference in how much longer the render takes.

Subdivisions
Calculating subdivisions can slow render times significantly. These settings can individually be set on lights, shaders, geometry modifiers, and globally in render settings. It is important to balance your settings across all of these areas, to maximize efficiency and quality.
Geometry Modifiers
- TurboSmooth Modifier:
When using smoothing modifiers, the number of vertices and faces in an object (thus, the calculation time) can increase as much as four times for each iteration (see images below).
Iterations sets the number of times the mesh is subdivided. When you increase this value, each new iteration subdivides the mesh by creating smoothly interpolated vertices for every vertex, edge, and face from the previous iteration. Applying three or four iterations, even to a moderately complex object, can take a long time to calculate.
With cleanly modeled geometry, rarely will there be a need to go above 1 or 2 render iterations– there is little to no visual gain in smoothness after 2 iterations. If the model is still not smooth after 2 iterations, the base mesh probably needs to be modified.

- Displacement Modifiers:
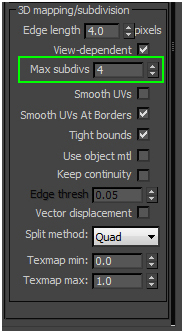
The subdivision setting on Displacements functions similarly to a smoothing modifier, except it calculates the subdivisions differently. Max subdivisions control the maximum sub triangles generated from any triangle on the geometry. Subdivisions on displacement modifiers will drastically affect rendering time from calculating, if they’re too high.
The subdivisions should be kept to a value of 6 or less, which is high enough for most any model with properly detailed geometry. Value is the square root of the maximum number of sub triangles. If you need to use higher values, it will be better to add more geometry to the base model itself, rather than increasing the subdivision number. Don’t add more subdivisions than required. The lower the subdivisions, the faster the model will render.
In Max, this modifier should never be left at the default of 256. A value of 256 means that, at most, 256 x 256 = 65536 sub triangles will be generated for any given original triangle. If your model is 100,000 tris with displacement subdivisions at 256, you now have a model that is 6,553,600,000 tris on render.
Most computers will freeze while trying to process this computation when rendering. Displacement modifiers will smooth the model based on the subdivision number being used– this is why stacking a displacement modifier on top of a smoothing modifier is very inefficient.
Shaders
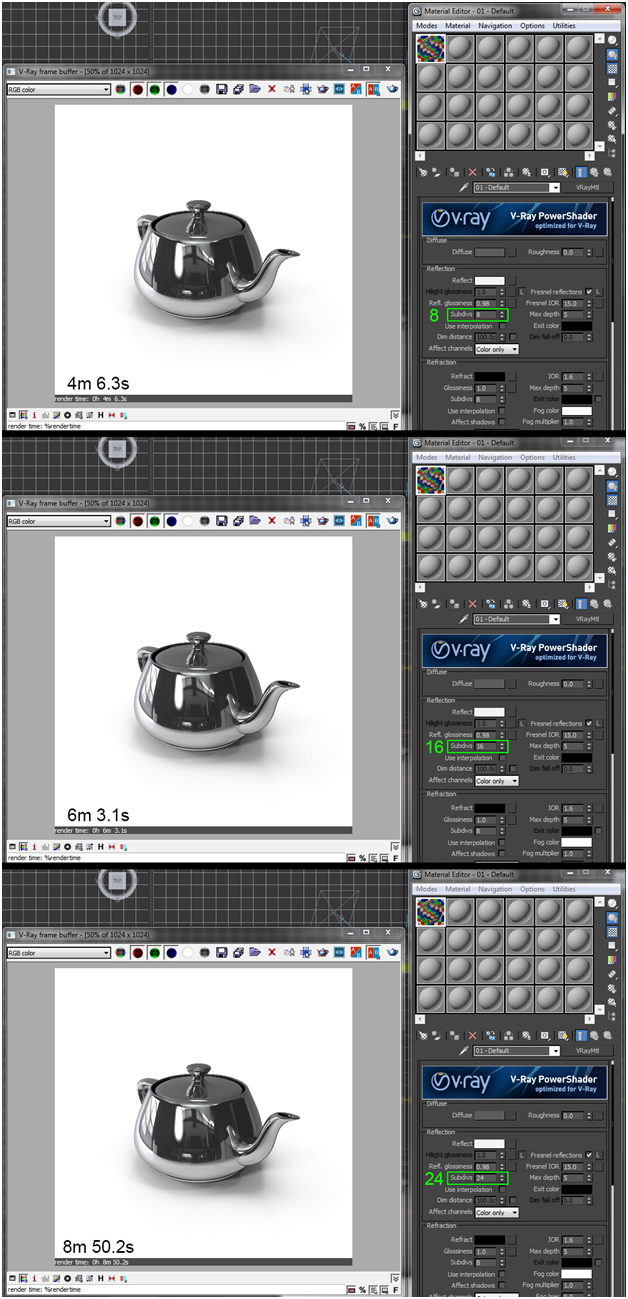
Reflect and Refract subdivisions settings on Vray shaders work in a similar fashion. As glossiness is lowered from a value of 1.0, the shader will start to appear grainy. Increasing subdivisions will help smooth this out, but it will have a significant impact on render time (see illustration below). Keeping this in mind, it is best to keep material subdivisions as low as possible.
Max Depth
Reflection and Refraction each have a setting for Max depth. This depth number limits the number of times a ray can be reflected or refracted. To reduce the time required to generate reflections and refractions, depth should be limited– the higher the number, the higher the calculation time.
Usually, the default value of 5 is sufficient. If there is a complicated model with lots of reflective or refractive surfaces the value may need to be higher in order to look accurate.
