In Product Support, we have noticed that there are frequent issues with artists’ exchange formats (FBX, OBJ, .3DS, DAE). When exporting these exchange formats, there are a few things that you should address.
Many artists use VRay materials and don’t convert their models into a standard format before exporting into one of the exchange formats. If you export a model with VRay materials attached, it will cause the materials to default to the color gray when importing the model into another program. Also, the texture paths on the VRay export will be erased. If you convert your model to a standard format before exporting, it will be easier for customers to adjust materials and add lighting.
Customers purchase from TurboSquid because they are on a tight deadline and need something right away. If customers have to contact support to re-convert an improperly exported model, the customers have to wait longer and sometimes miss their deadlines. This type of experience makes them think twice about purchasing from TurboSquid in the future.
We have some tips that you can use to export to an exchange format that customers will love and be able to use with ease.
Below is a tutorial (with many helpful images) that will take you step by step through our recommended process. You can click on any photo to get the full version and see exactly what’s going on. We hope it helps, and if you still have questions, feel free to ask us in the comments.
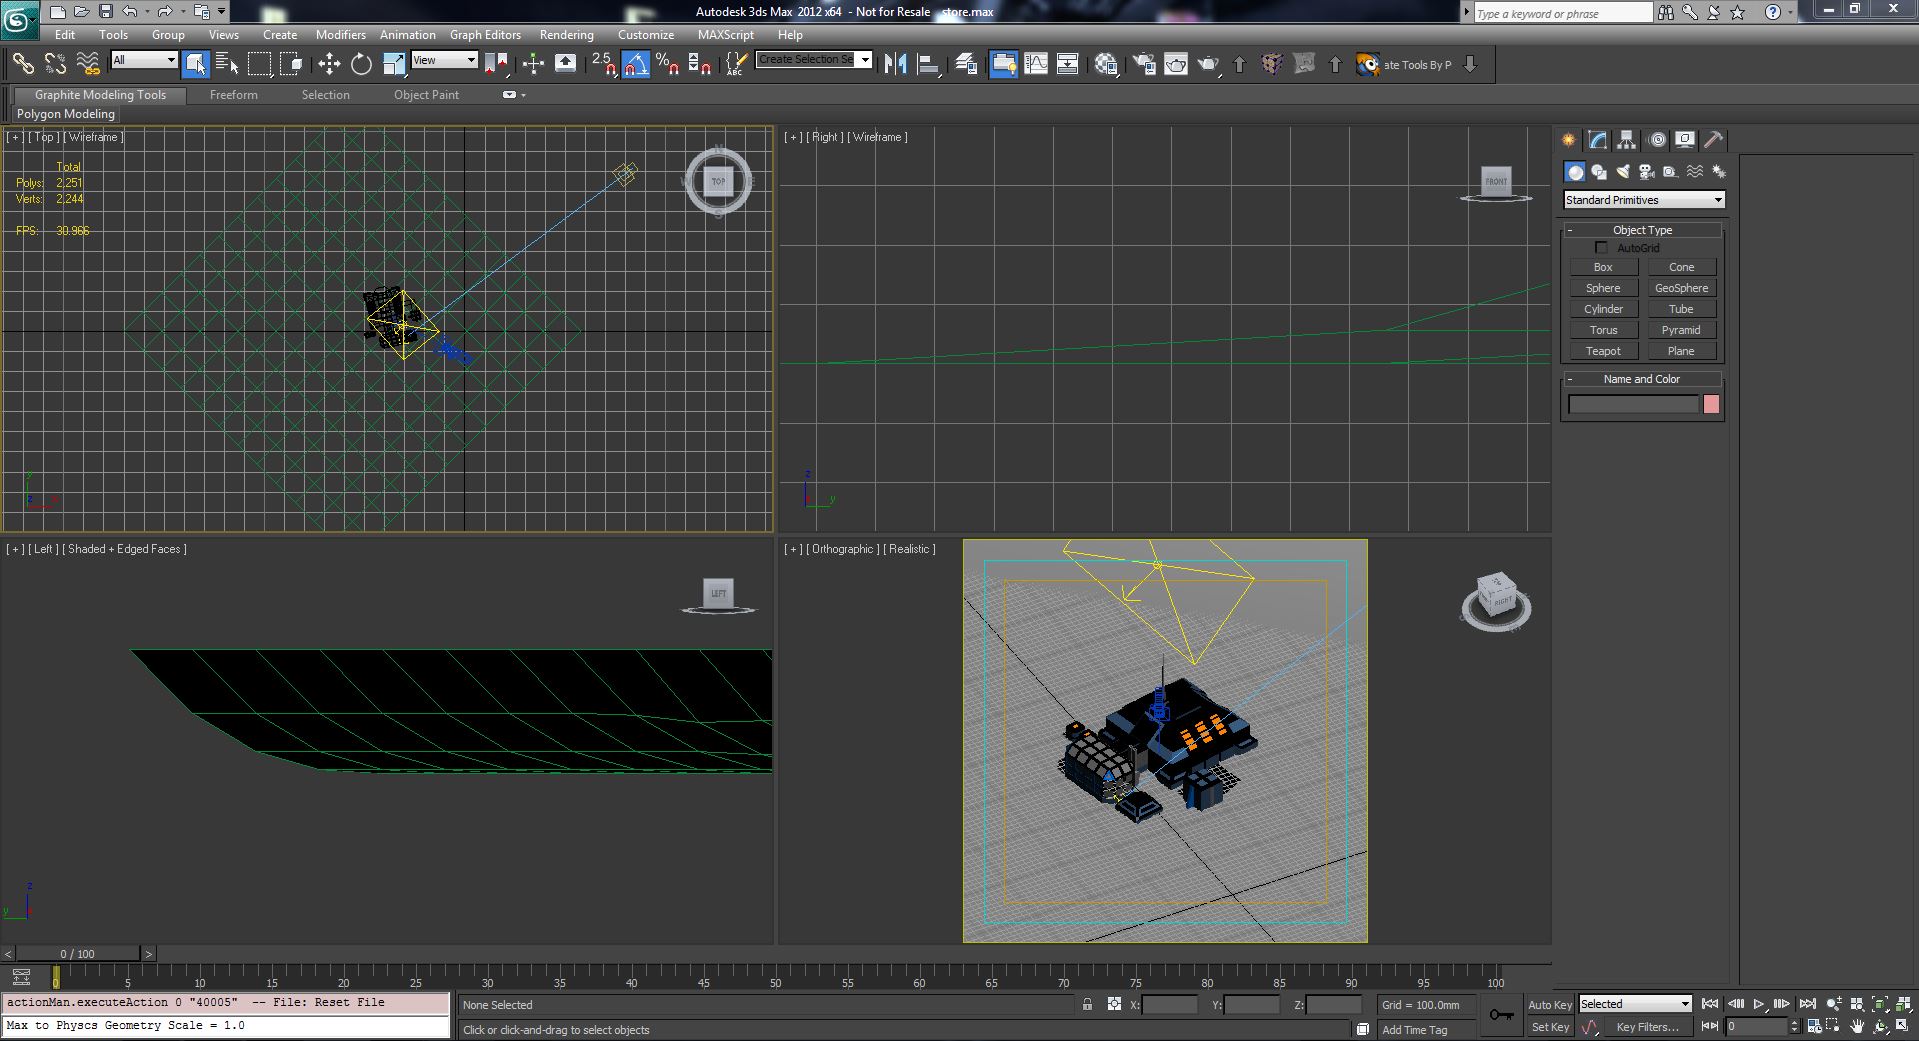
Open the model that contains VRay Materials:
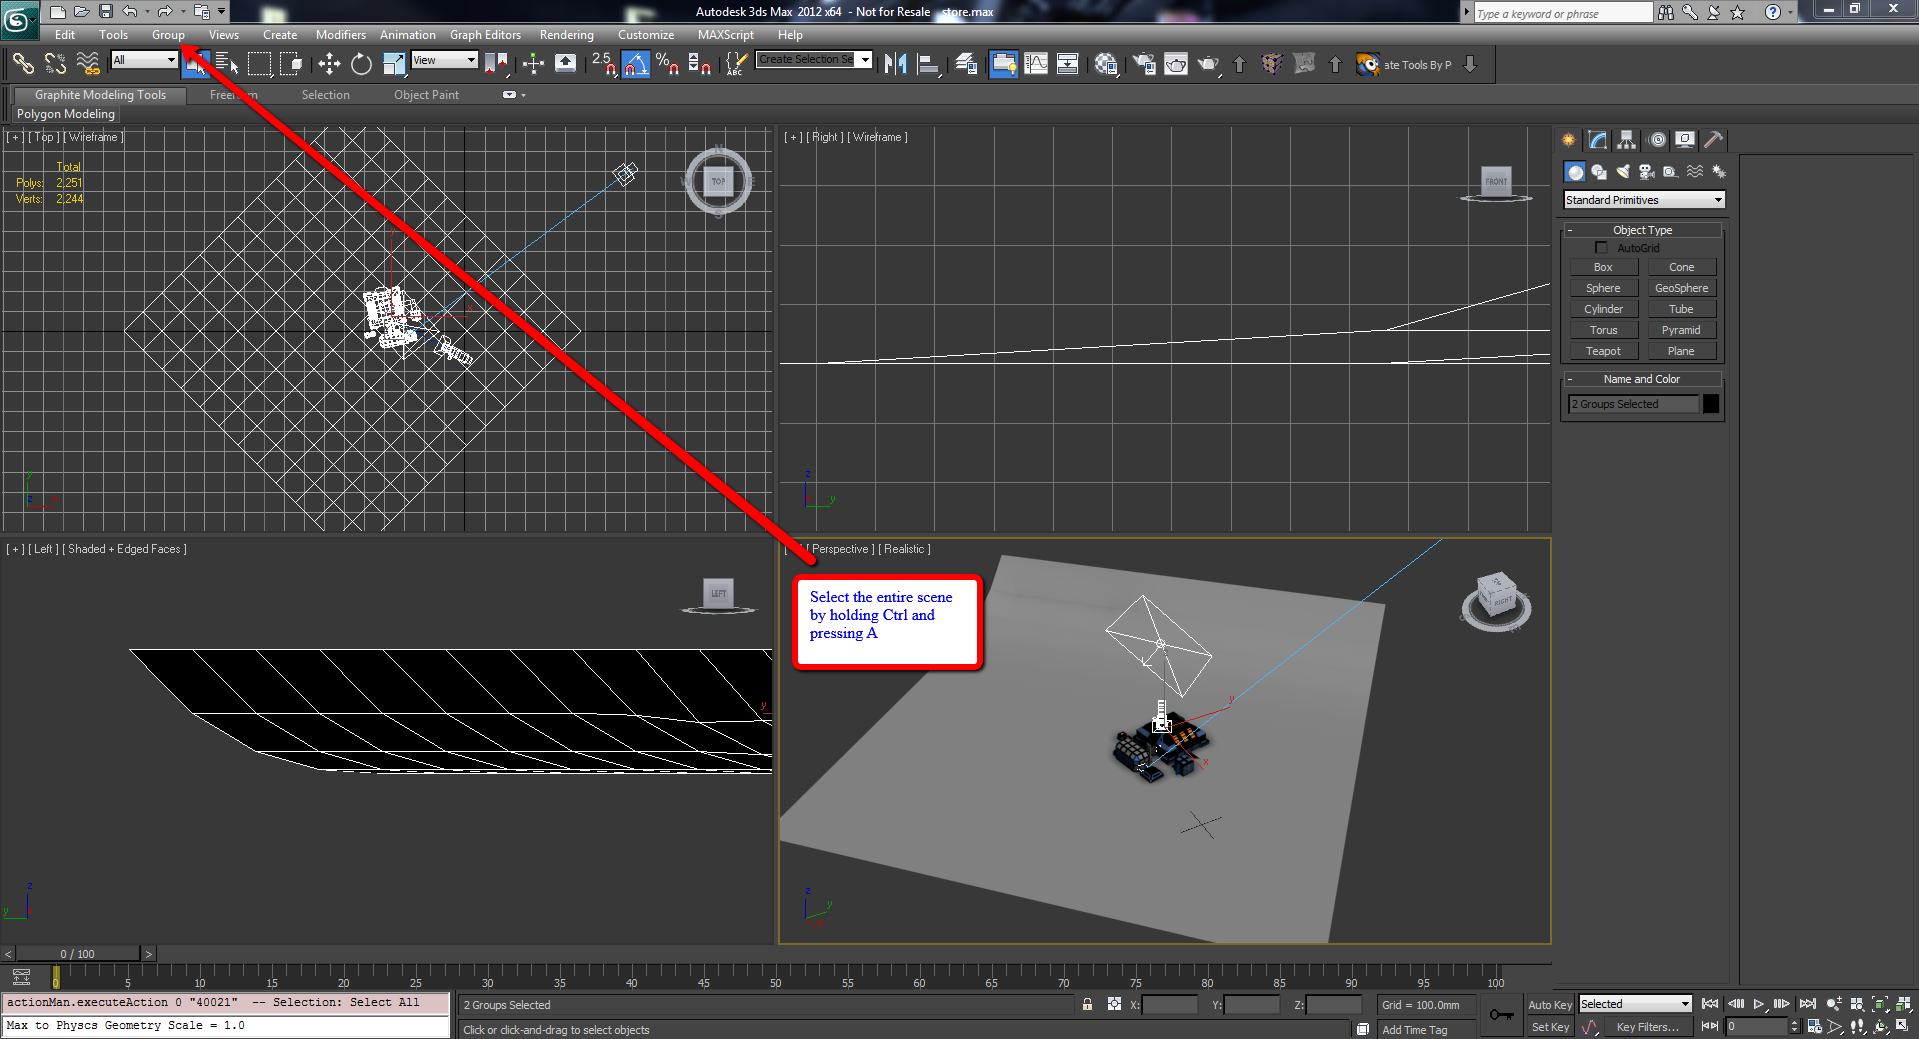
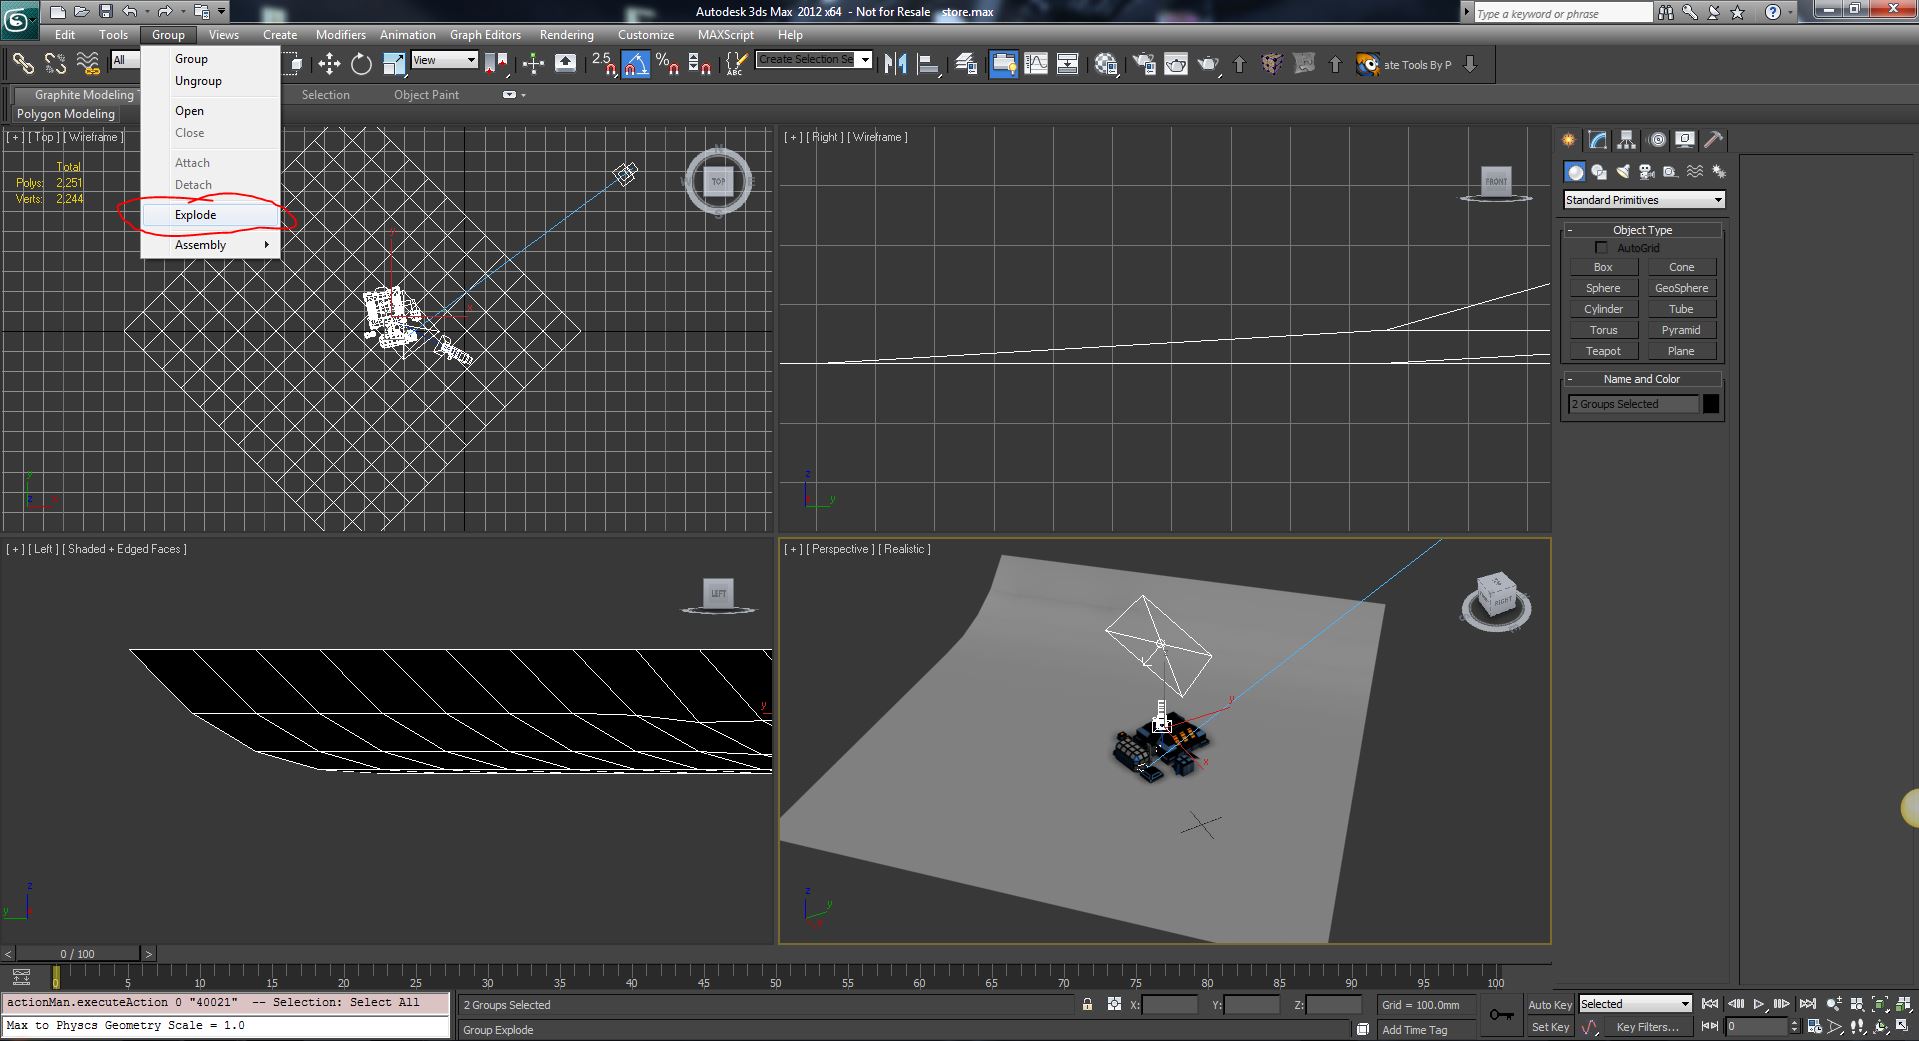
If the model is grouped, select the entire scene (Ctrl + A) and navigate to group dropdown and choose “Explode.”
Once you have the model open, you will want to delete any VRay lights, Cameras/VRay Cameras, and/or VRay planes. Click H on the keyboard and it will bring up the Hierarchy. Hold Ctrl and click on the individual cameras and lights. Once you have all the items selected, click Enter on the keyboard.
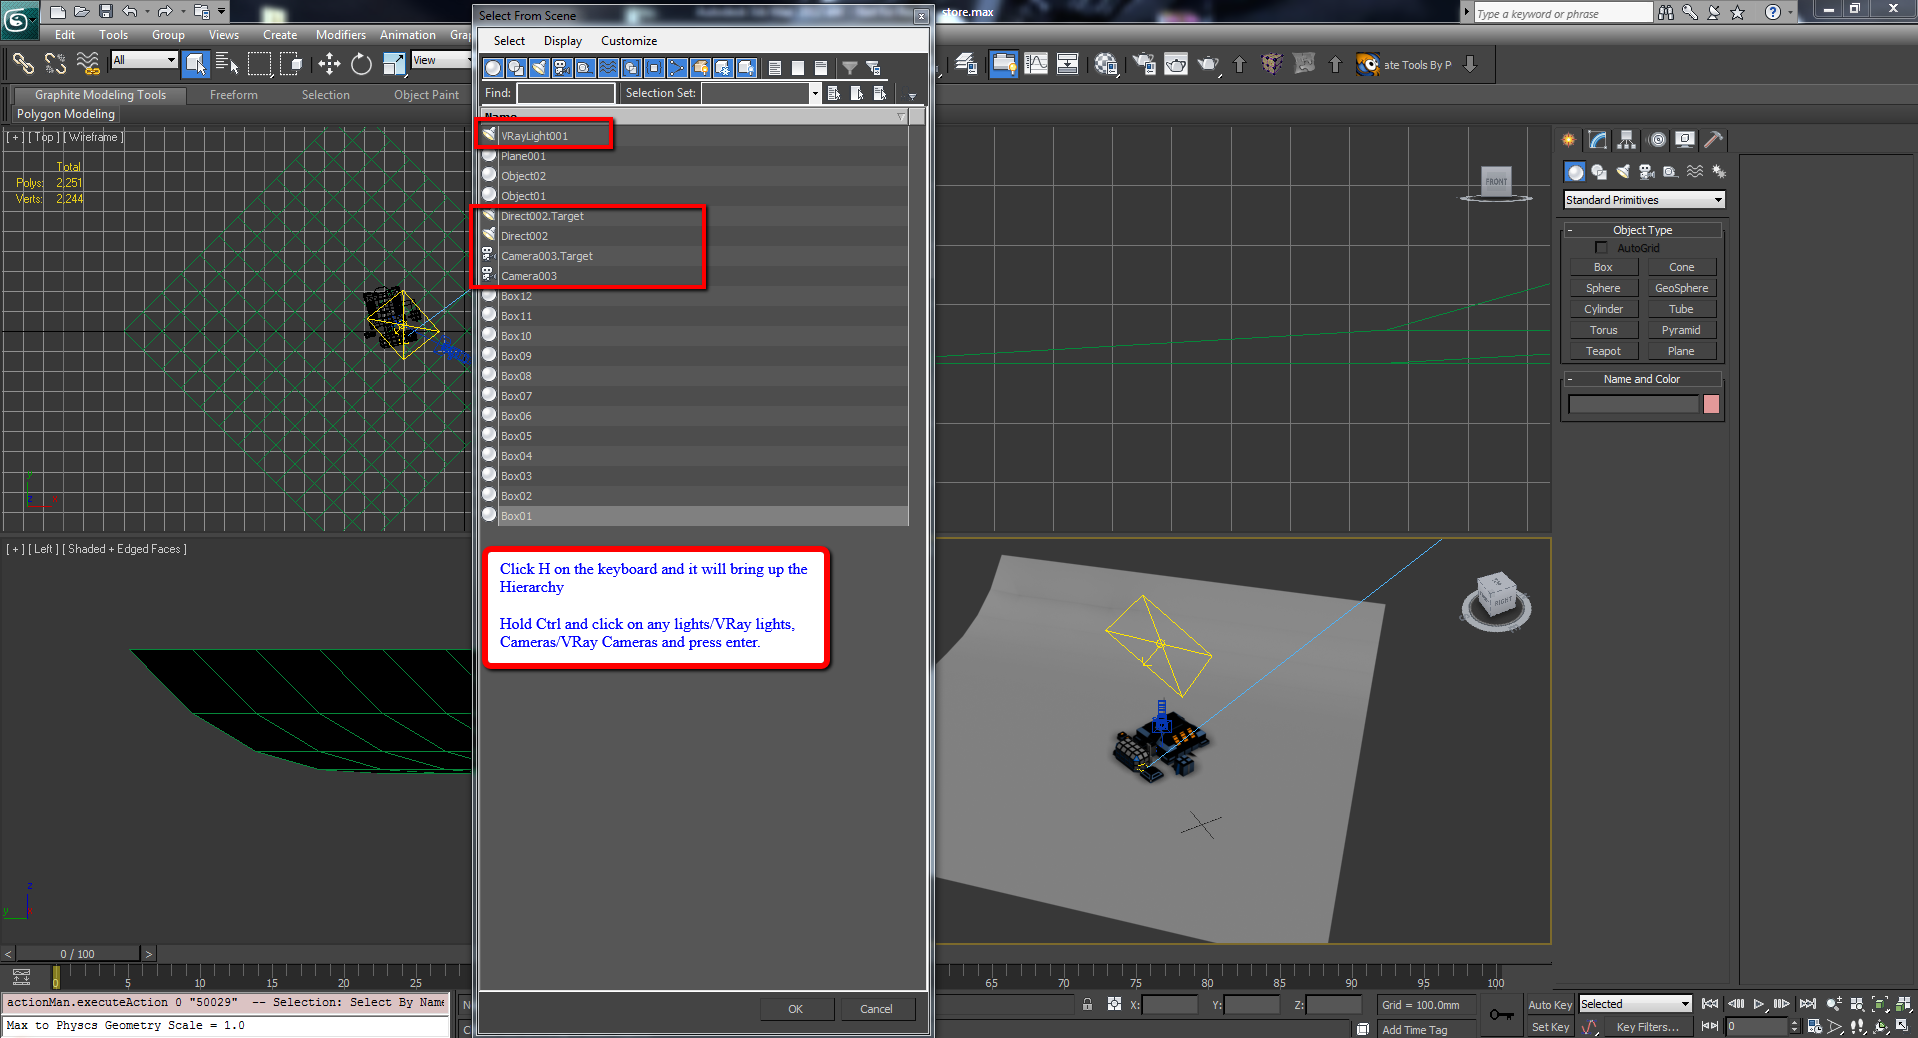
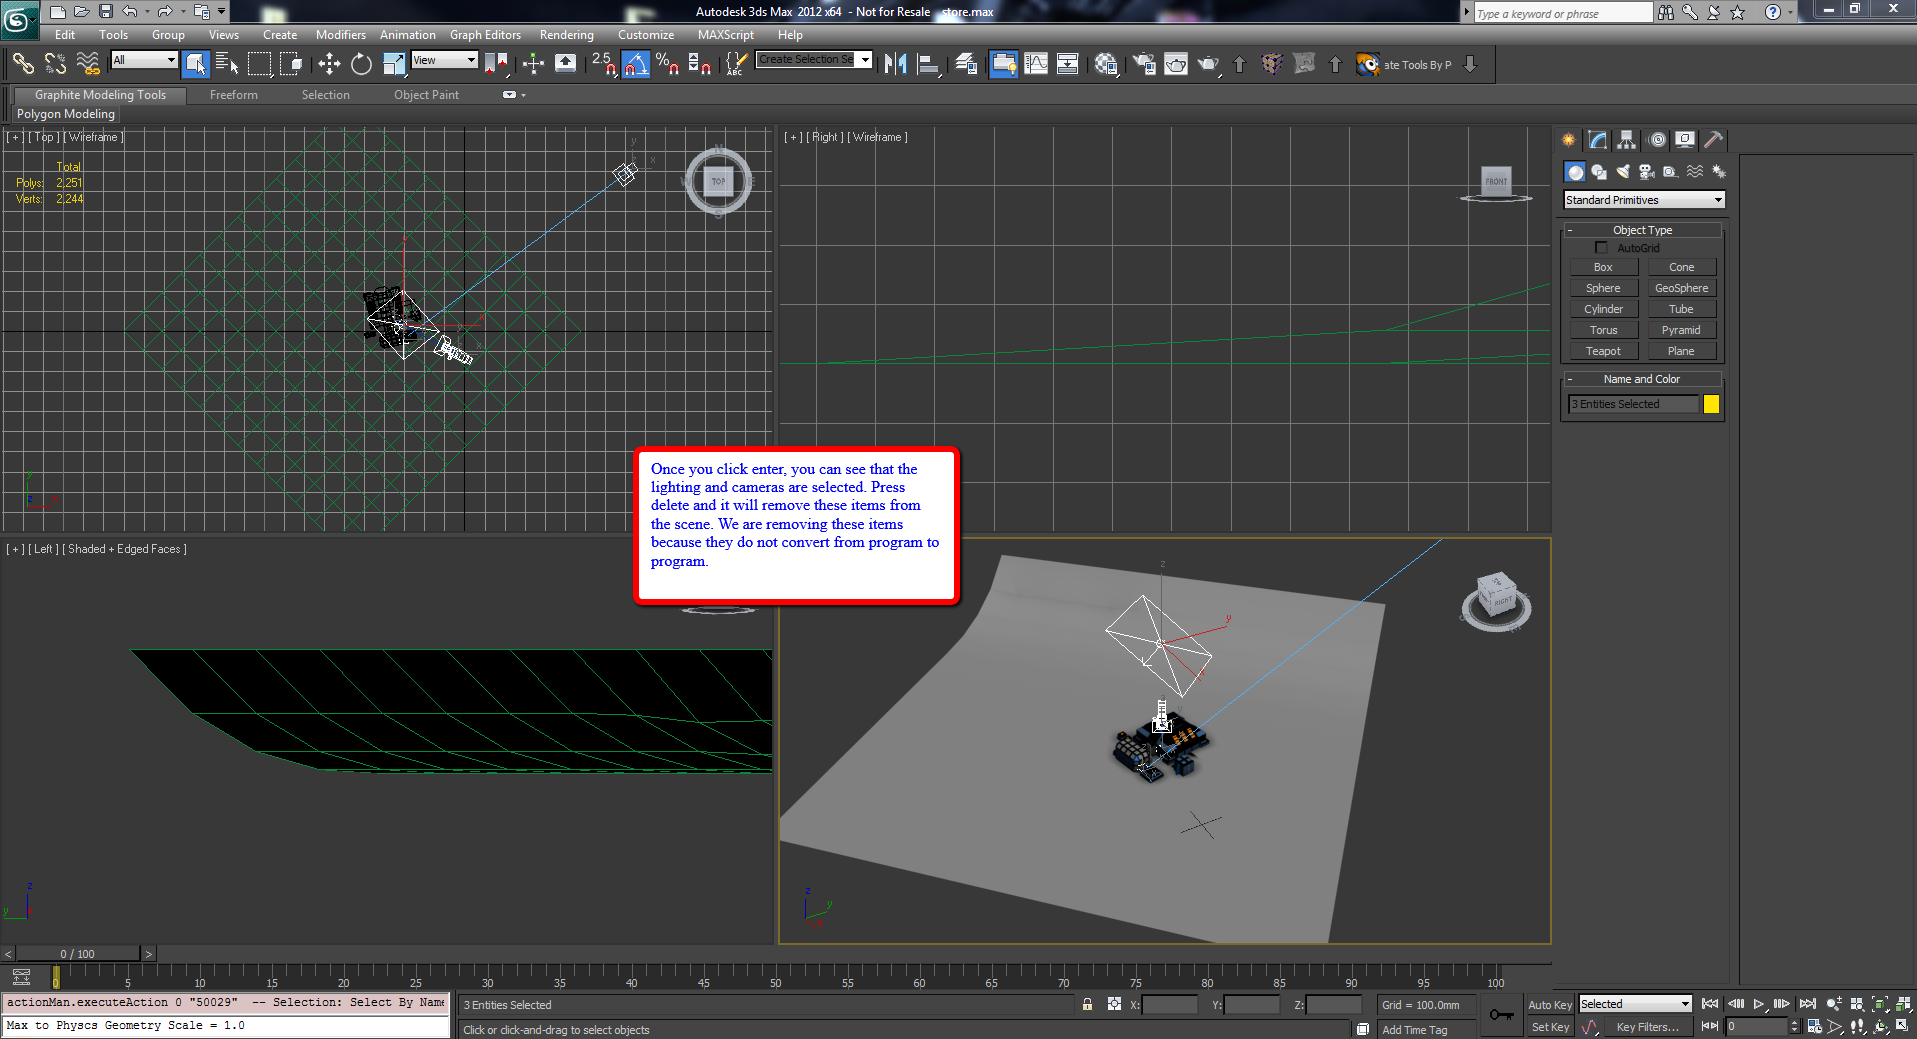
Once you hit Enter, you can see that the lighting and cameras are selected. Press Delete and it will remove these items from the scene. We are removing these items because they do not convert from program to program.
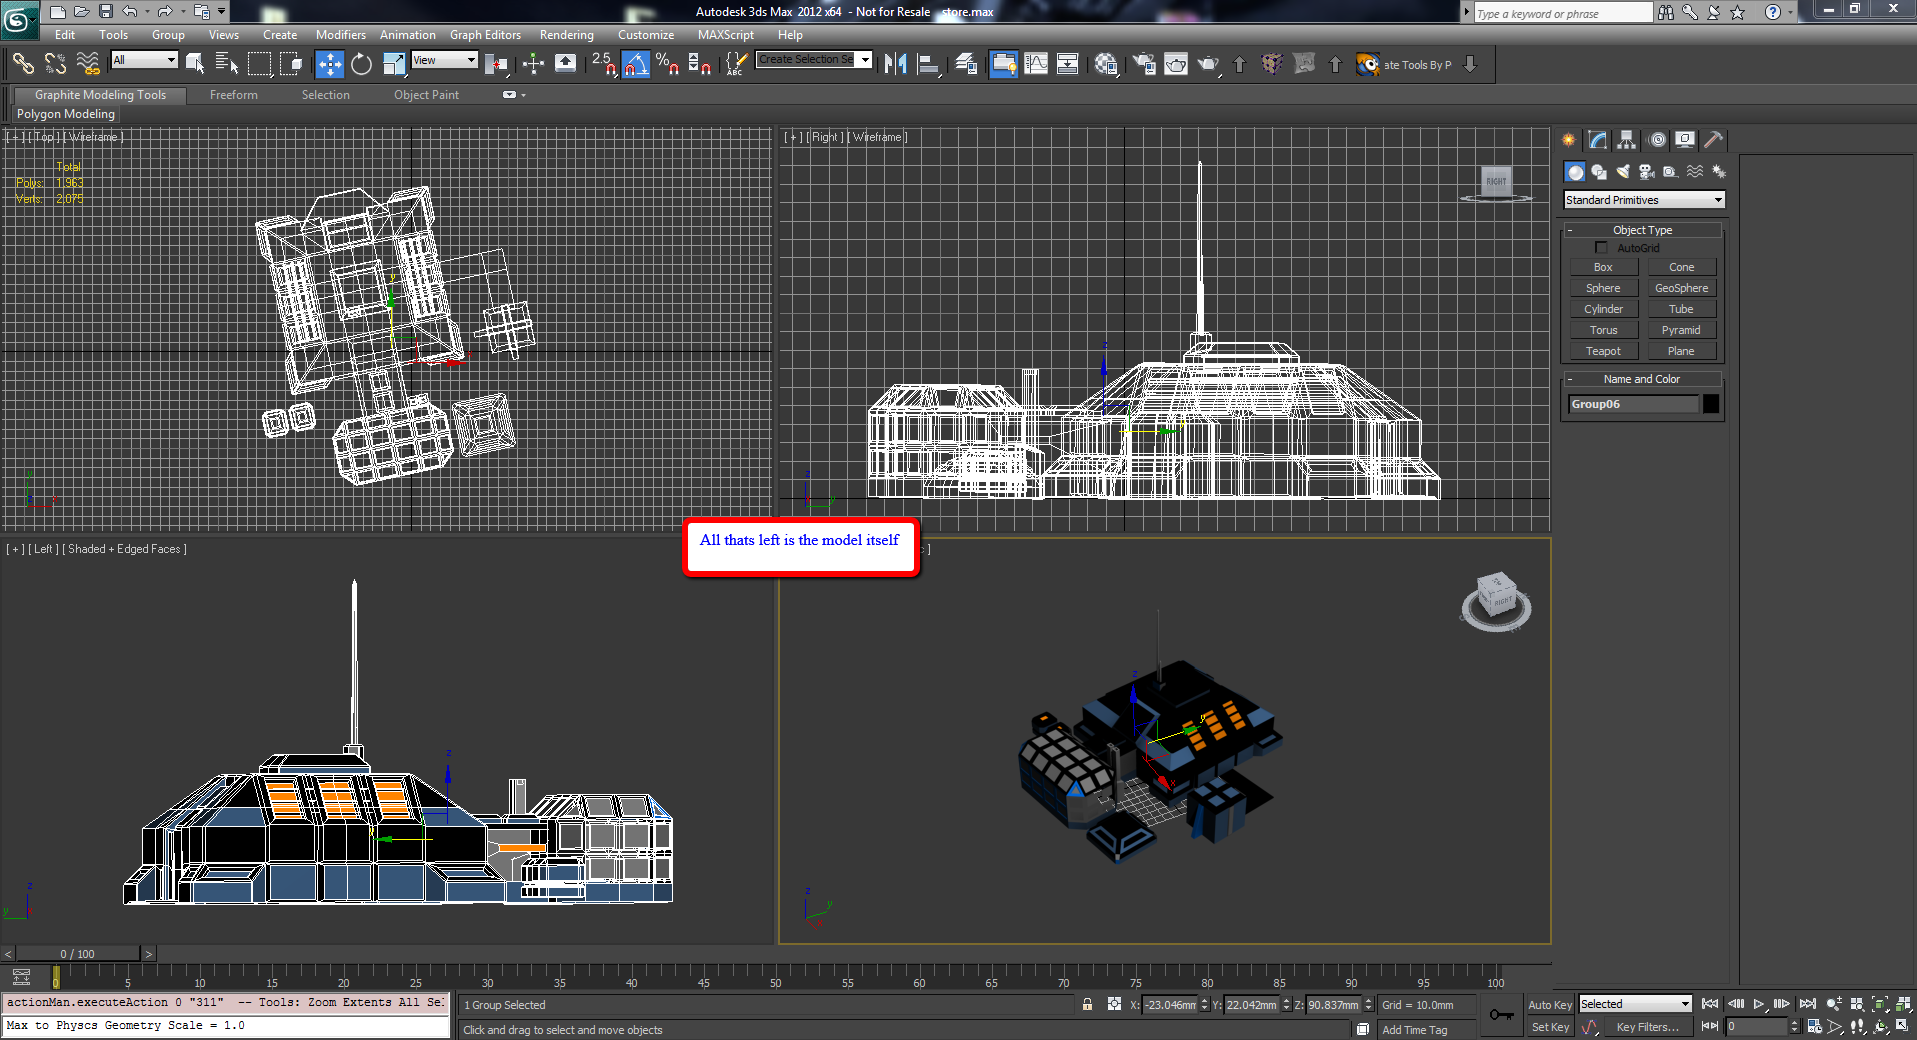
Now that we have isolated the model, we are going to manually convert the materials into a standard format.
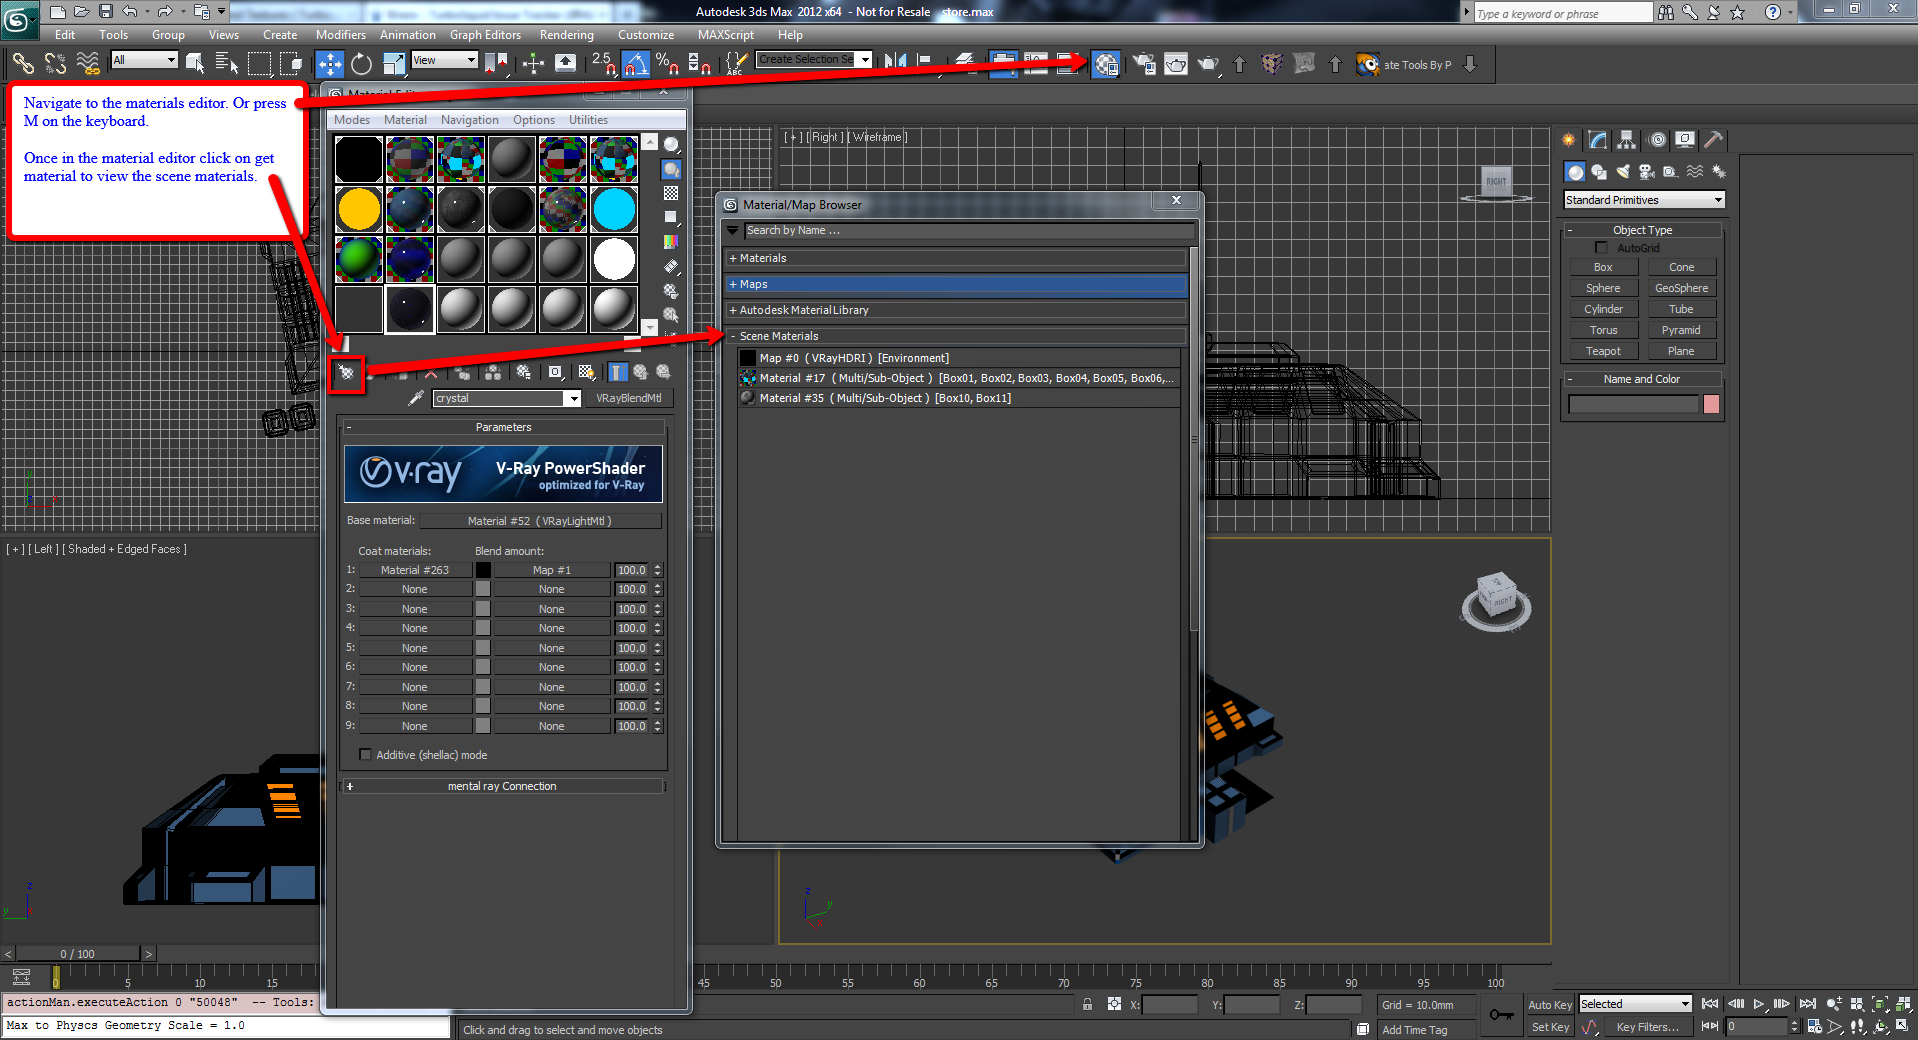
Navigate to your materials editor (press M on the keyboard).
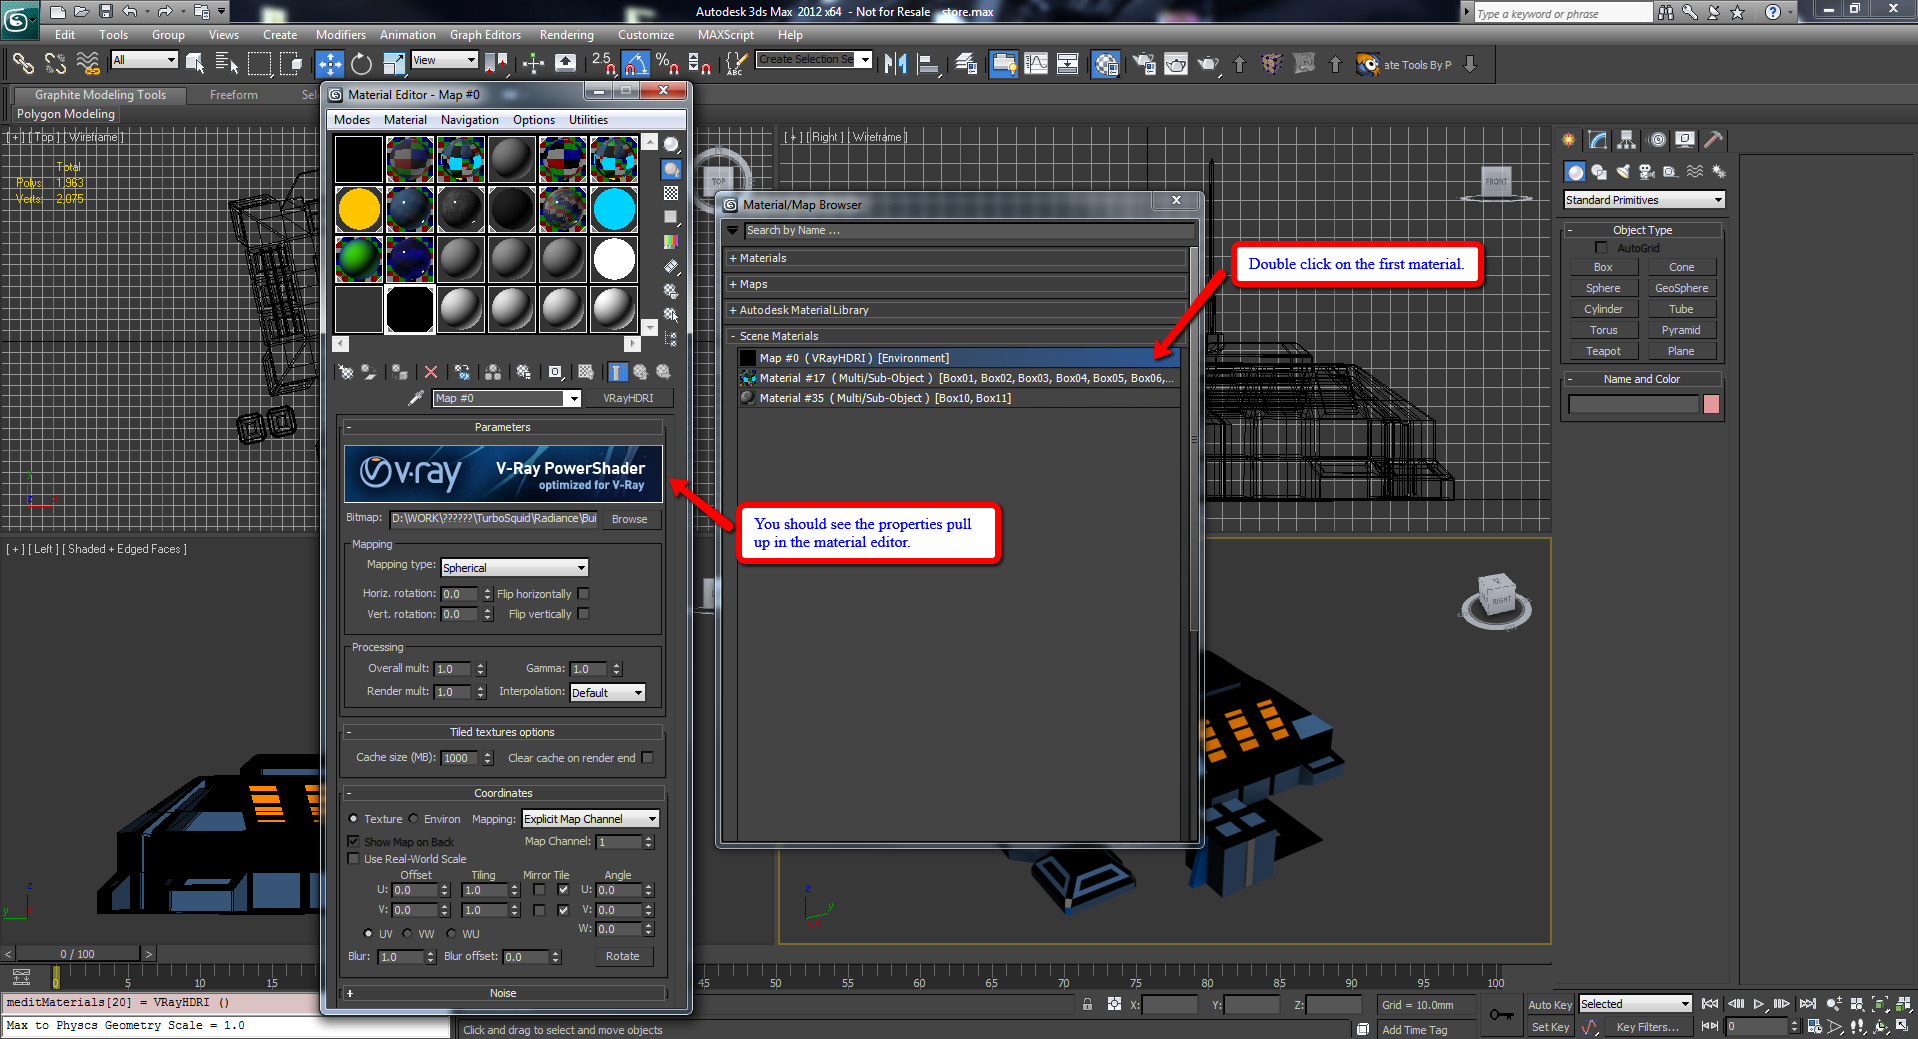
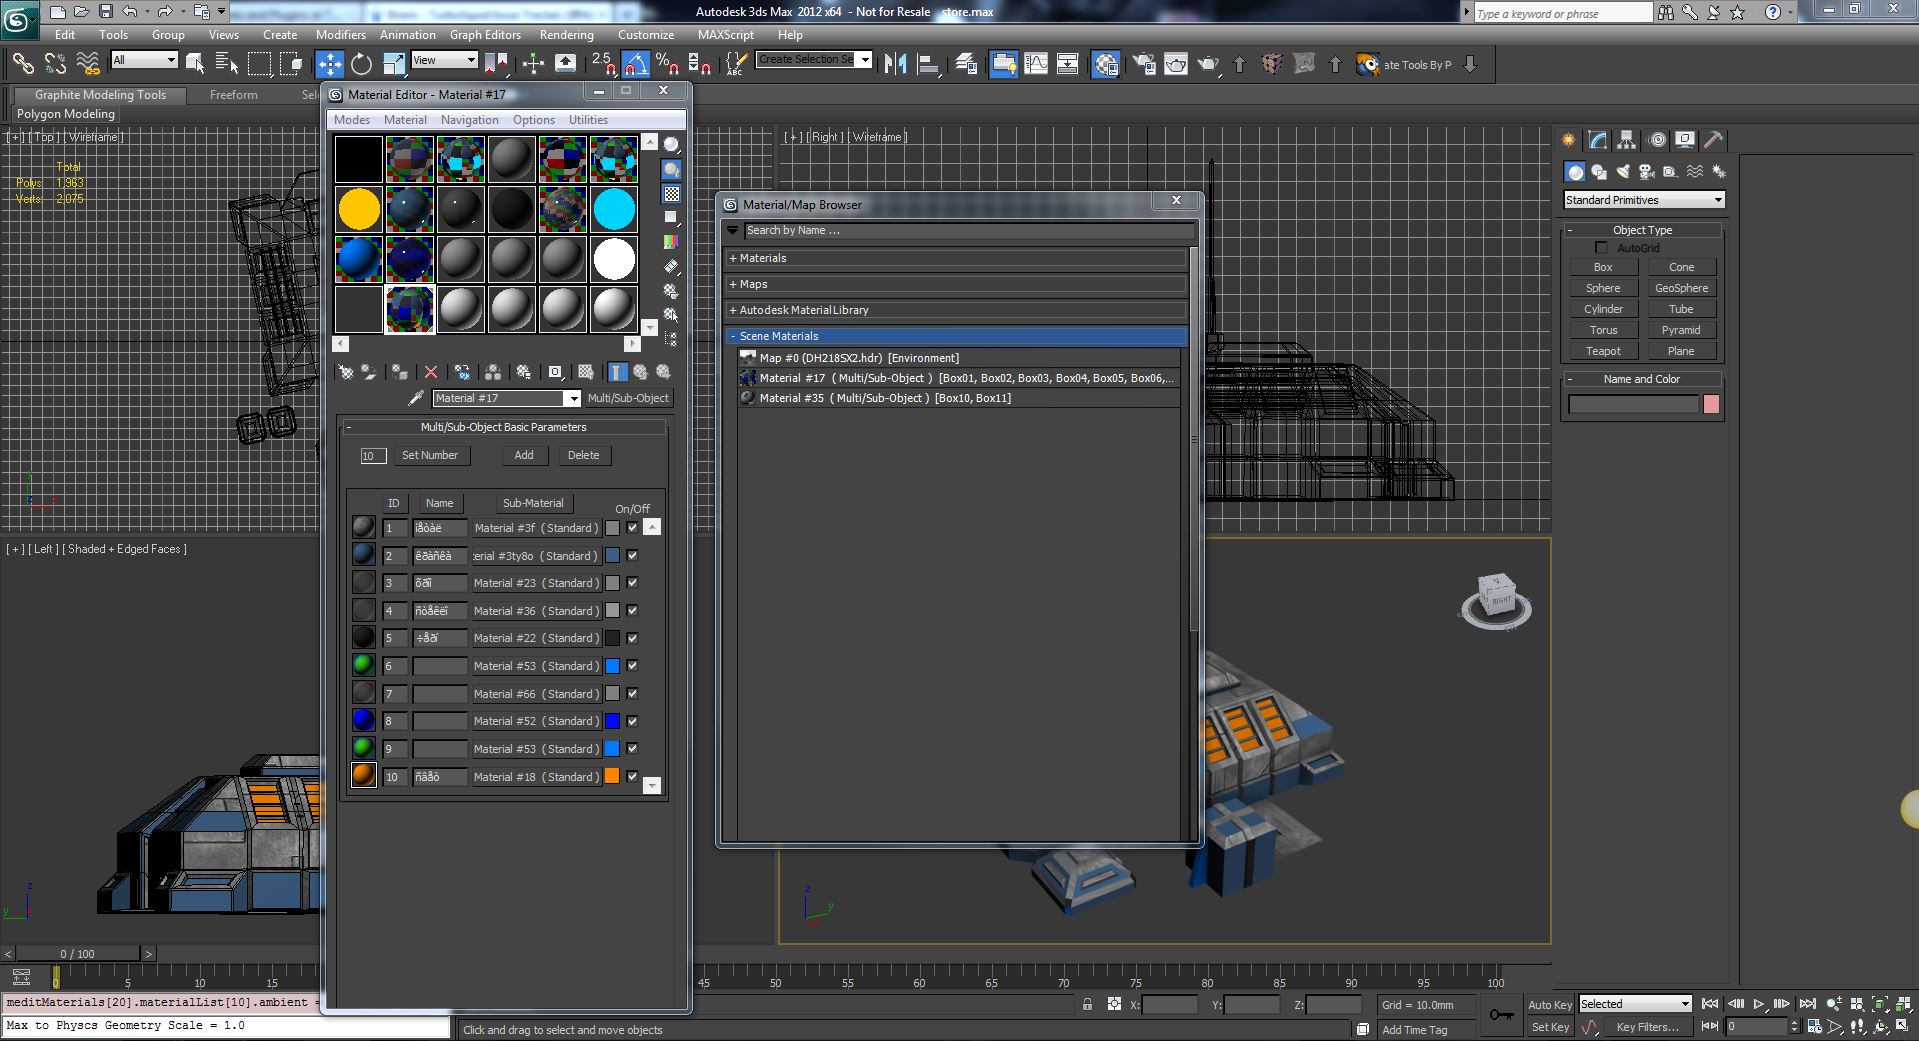
Once you’re in the material editor, click on “Get Material” to view the scene materials.
Double-click on the first scene materials. You should see the properties pull up in the material editor.
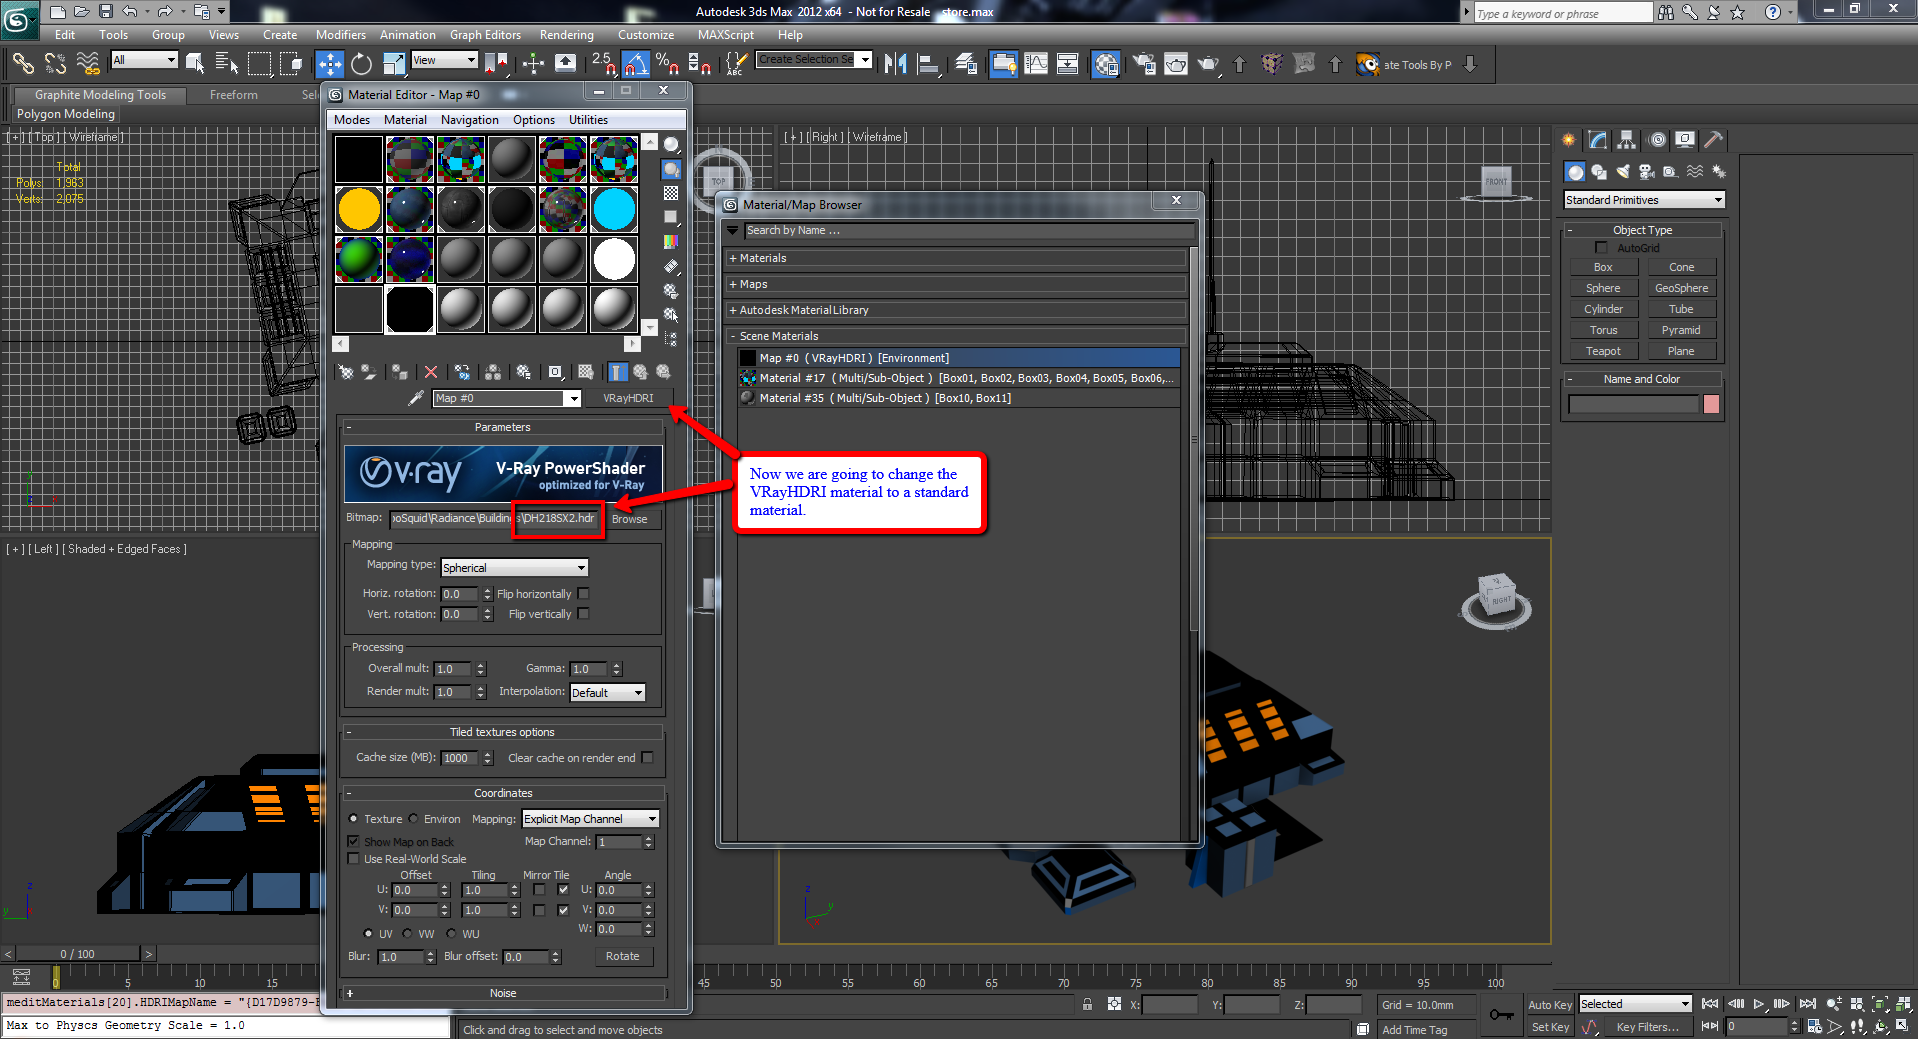
Now we are going to change the VRayHDRI material to a standard material.
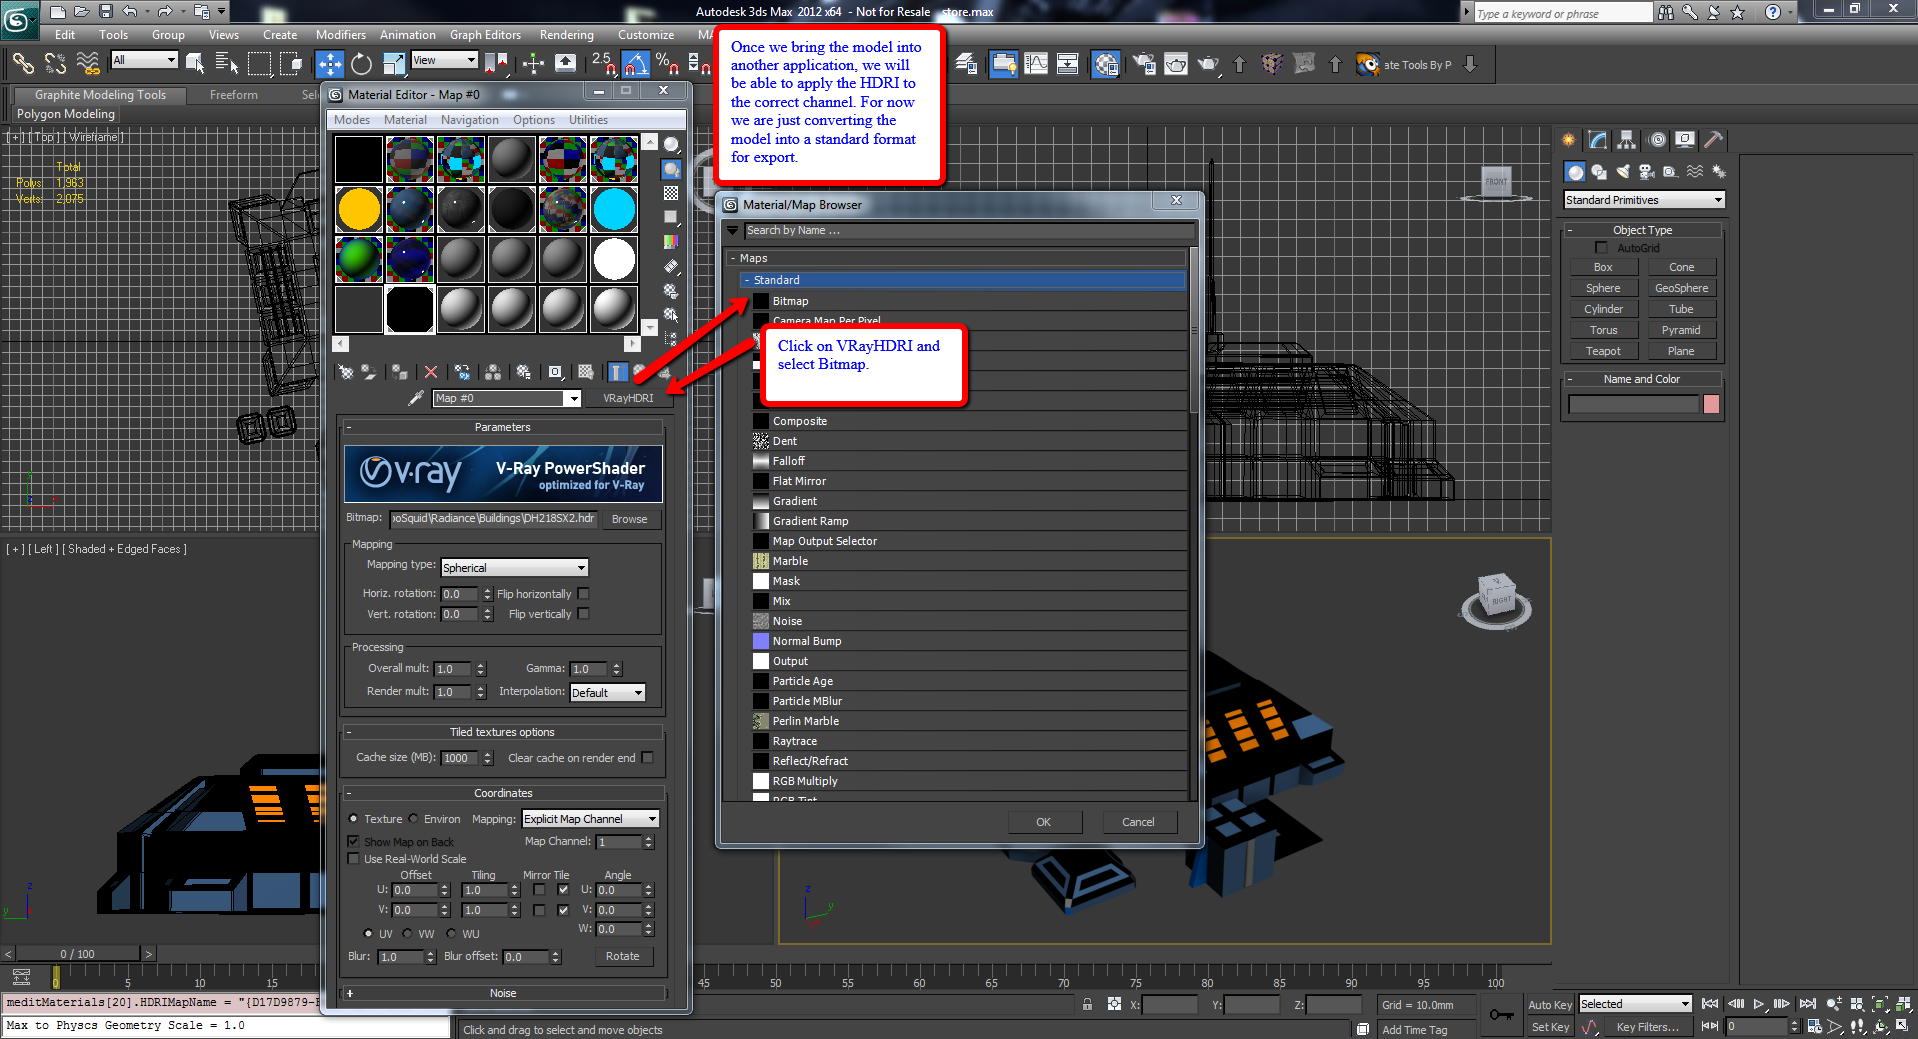
Once we bring the model into another application, we will be able to apply the HDRI to the correct channel. For now, we are just converting the model into a standard format for export.
Click on VRayHDRI and select “Bitmap.”
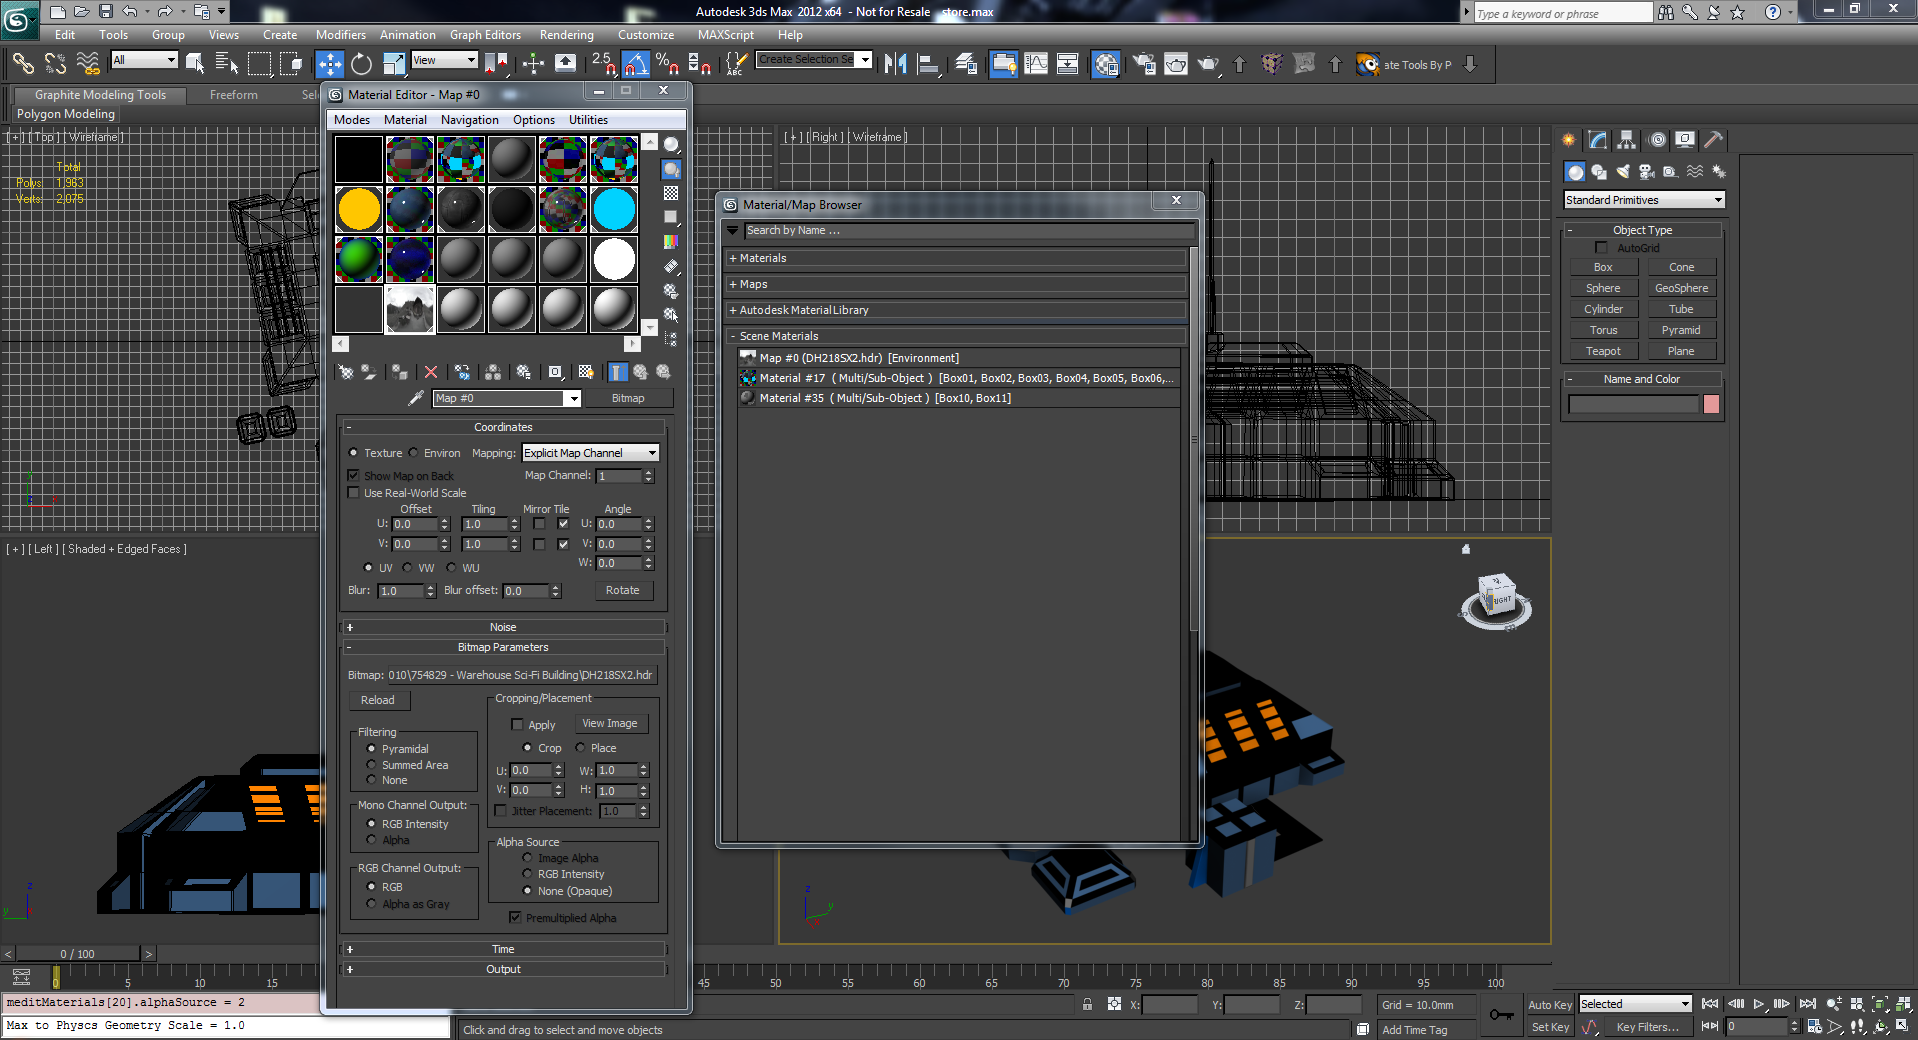
Now, navigate to the folder that contains the HDR, and click Open.

Now you have a standard environment.
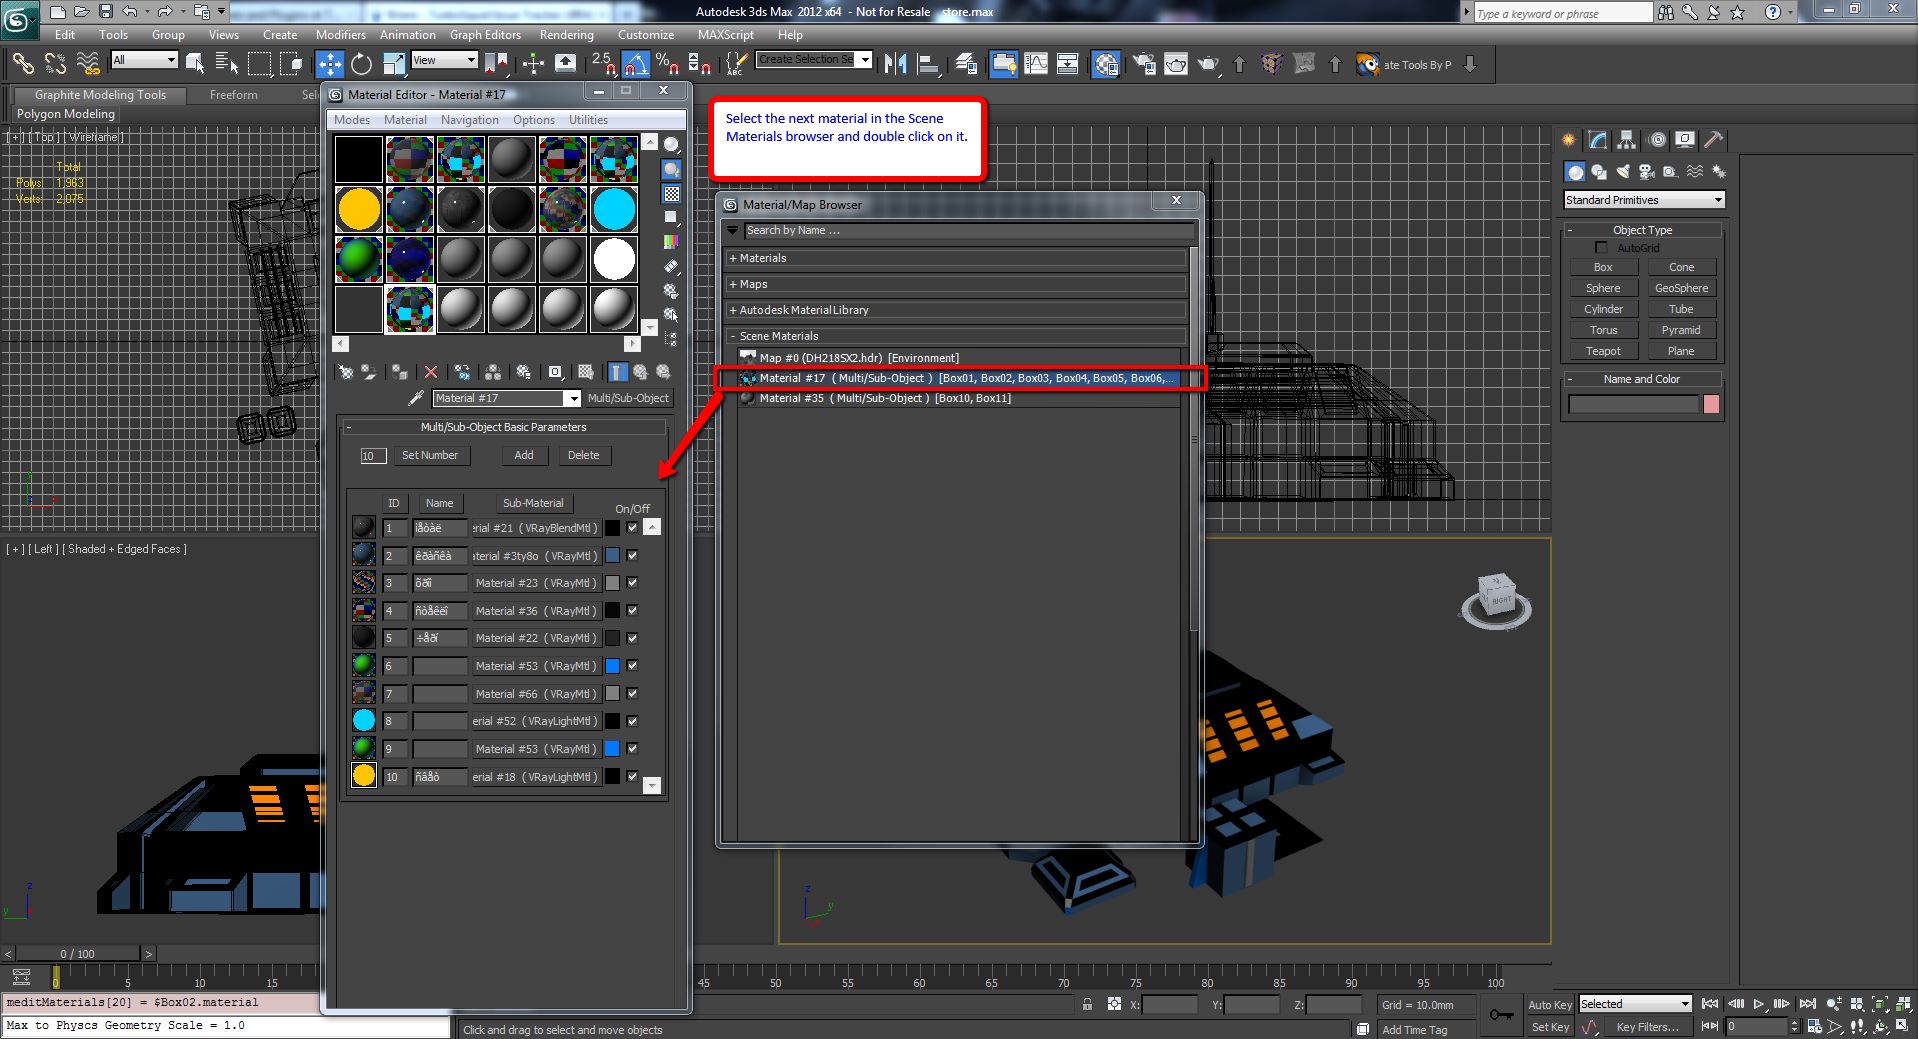
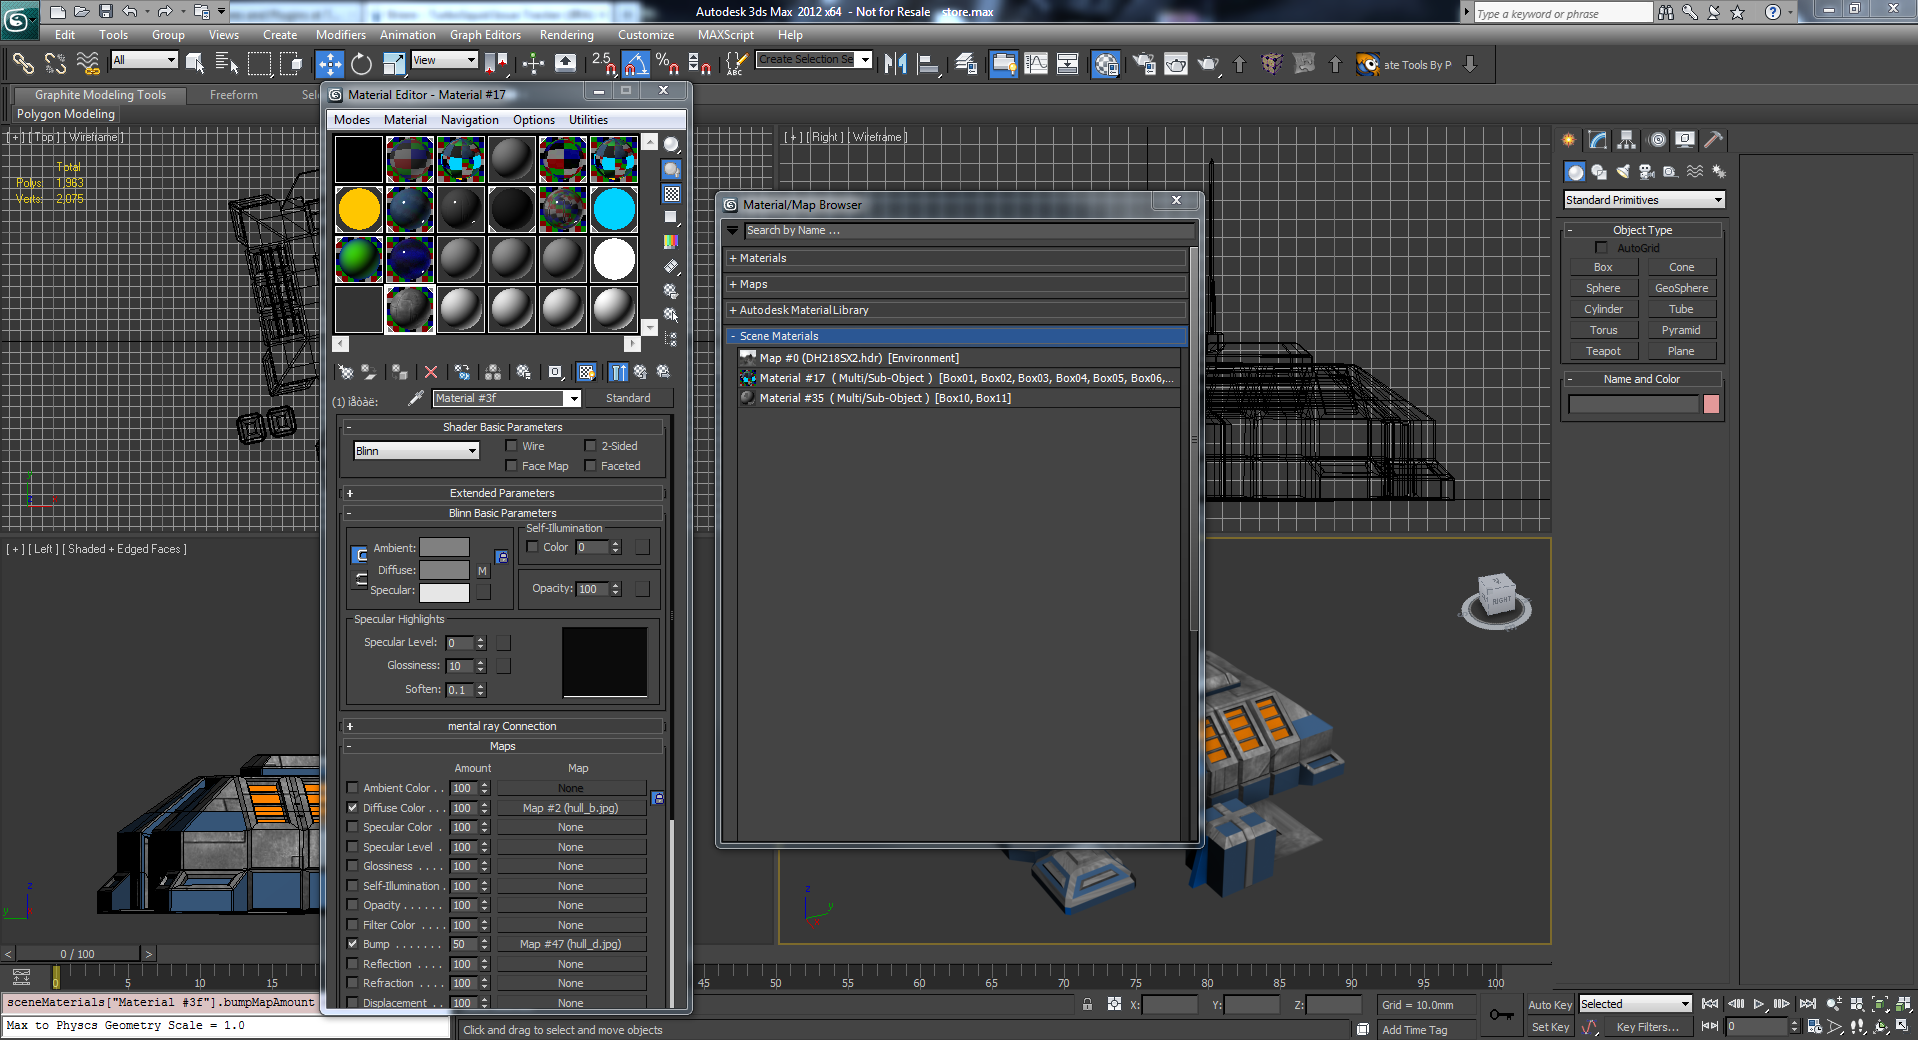
Select the next material in the “Scene Materials” browser and double-click on it.
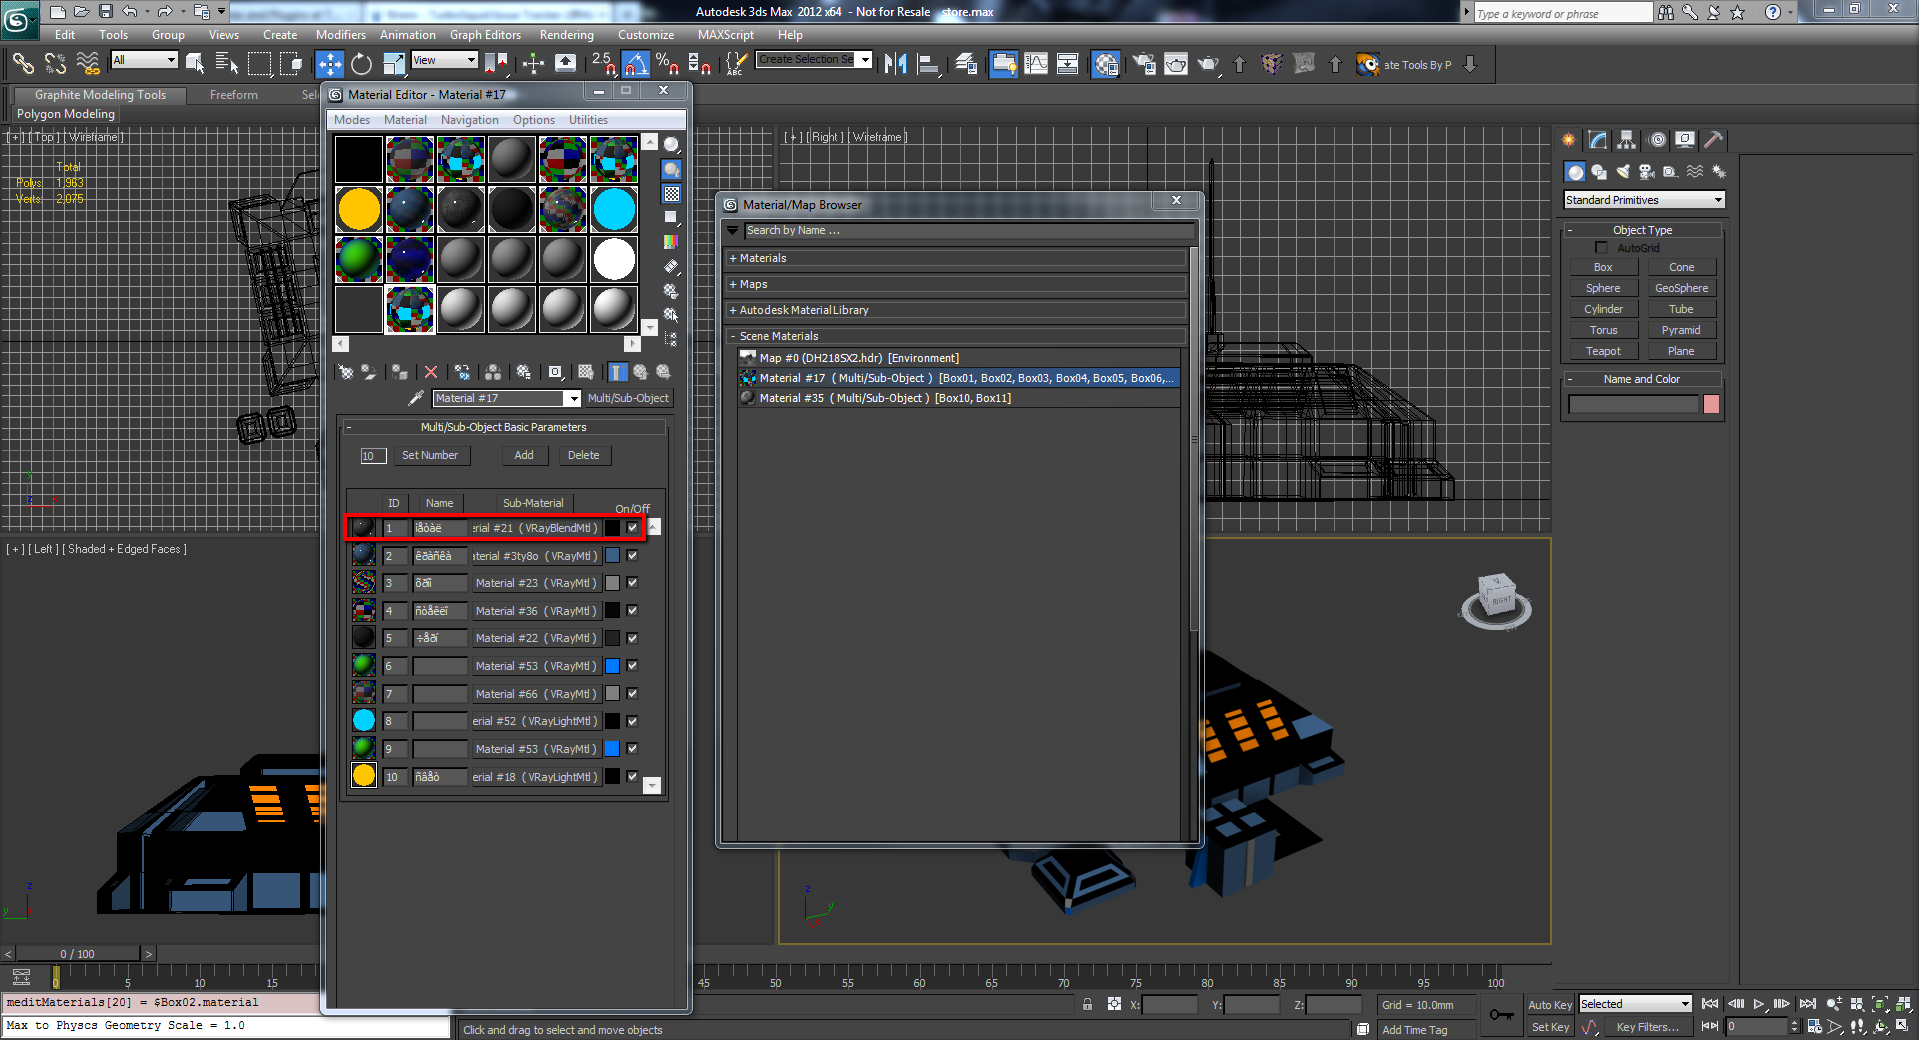
Let’s start with the first material and work our way down.
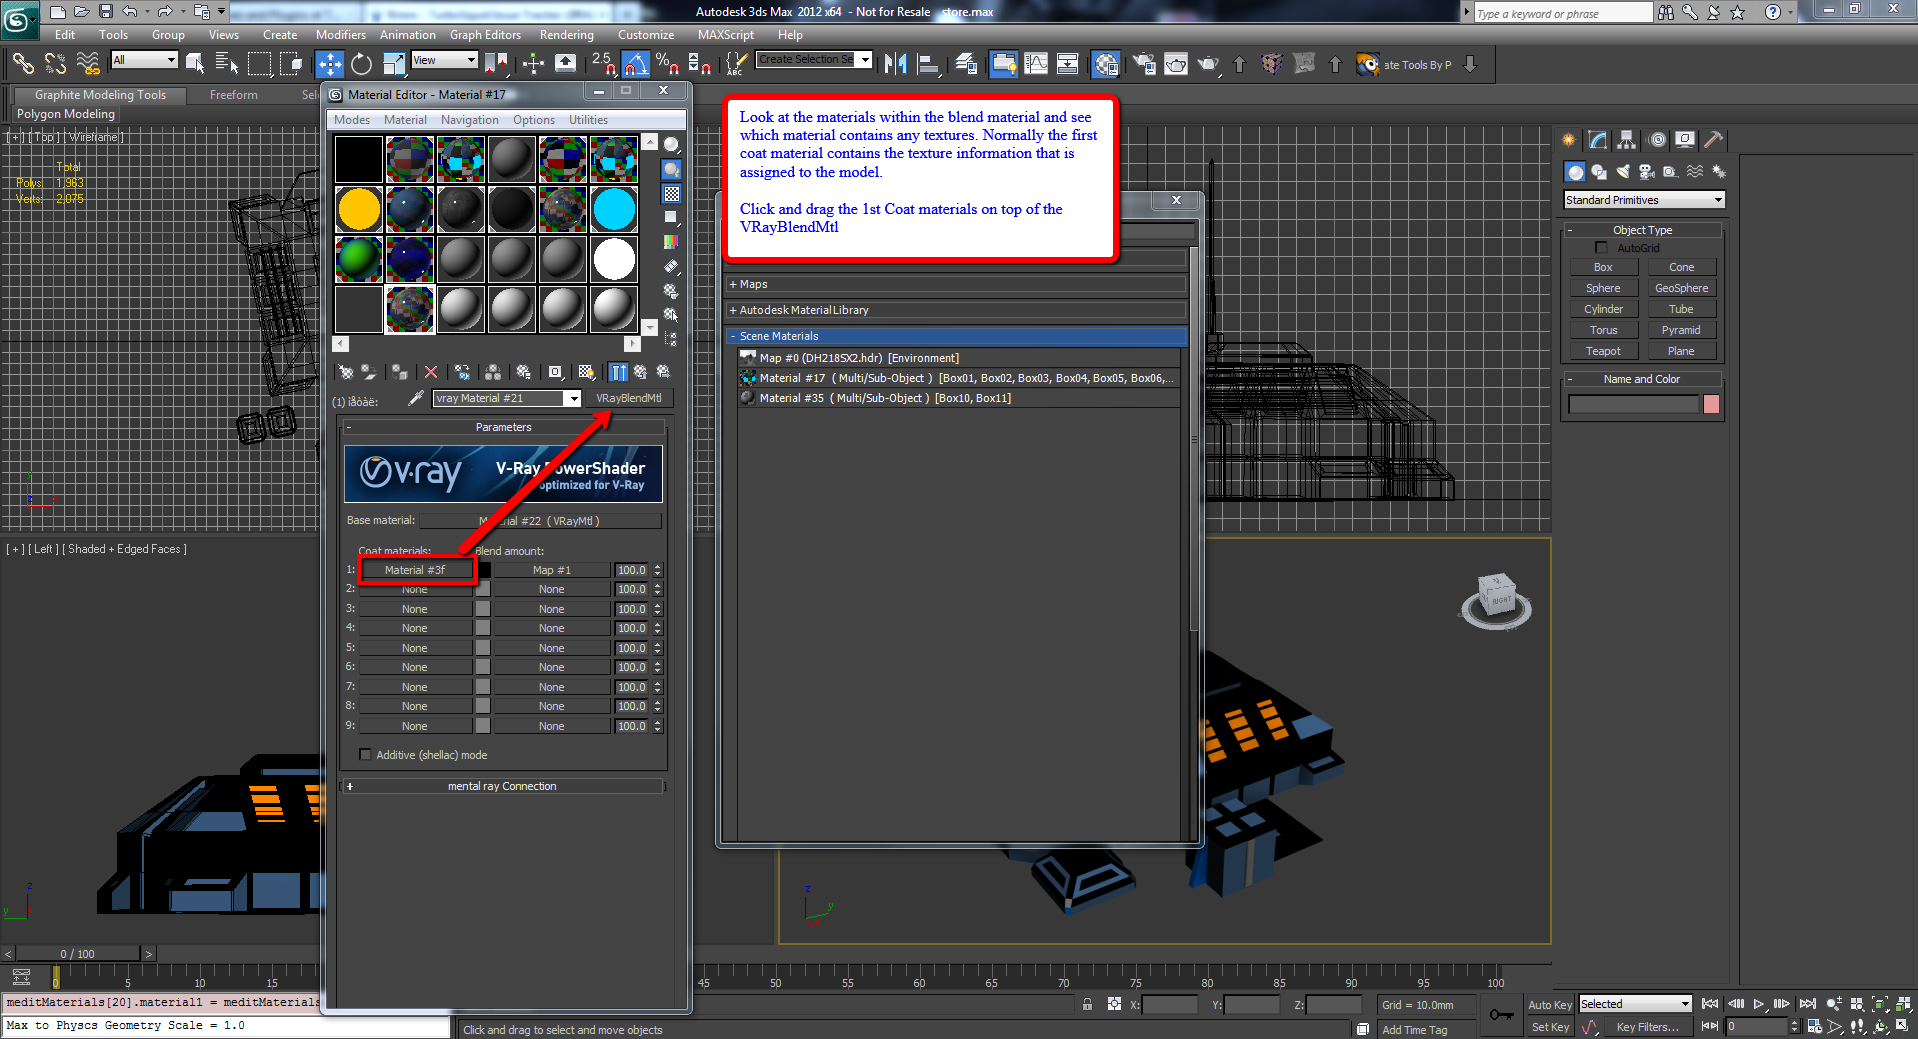
Look at the materials within the blend material, and see which material contains any textures. Normally, the first coat material contains the texture information that is assigned to the model.
Click and drag the first coat materials on top of the VRayBlendMtl.
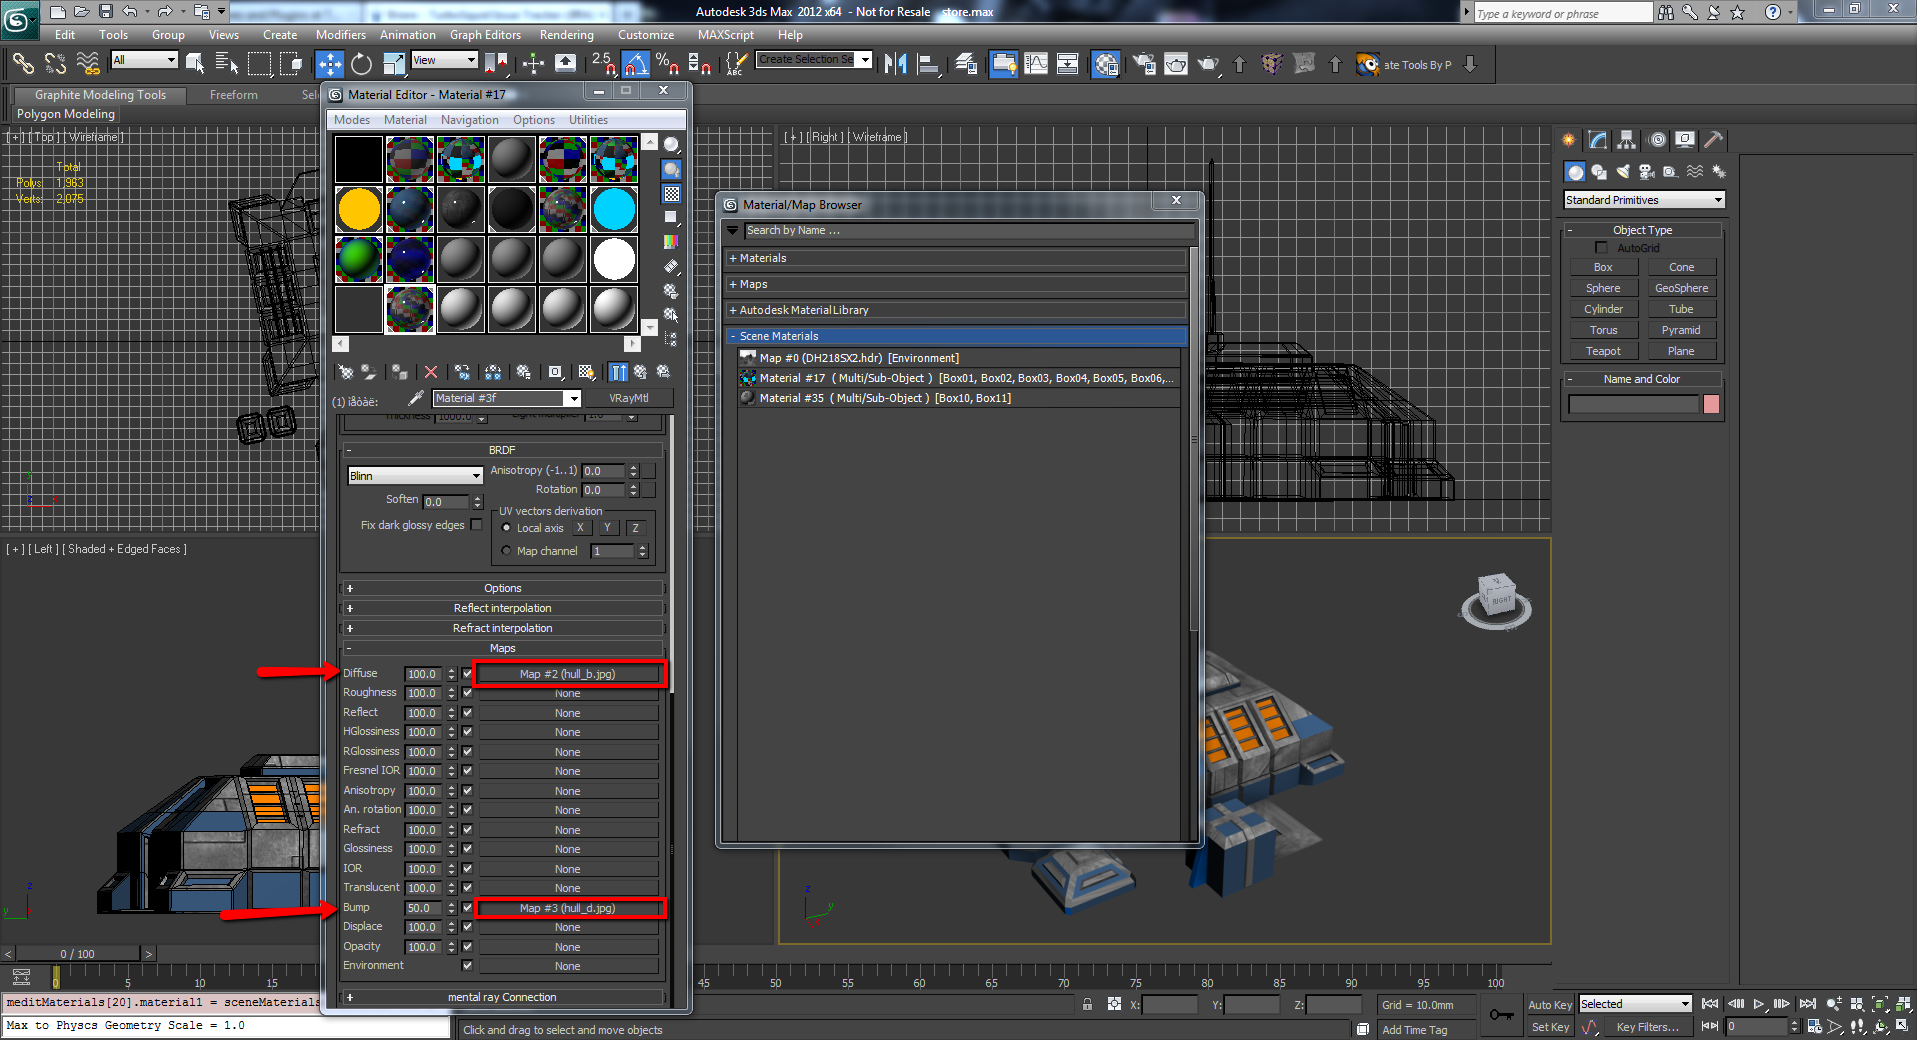
Now, we are going to convert the VRay Material into a standard. Check to see what maps are being used in the maps section of the material.
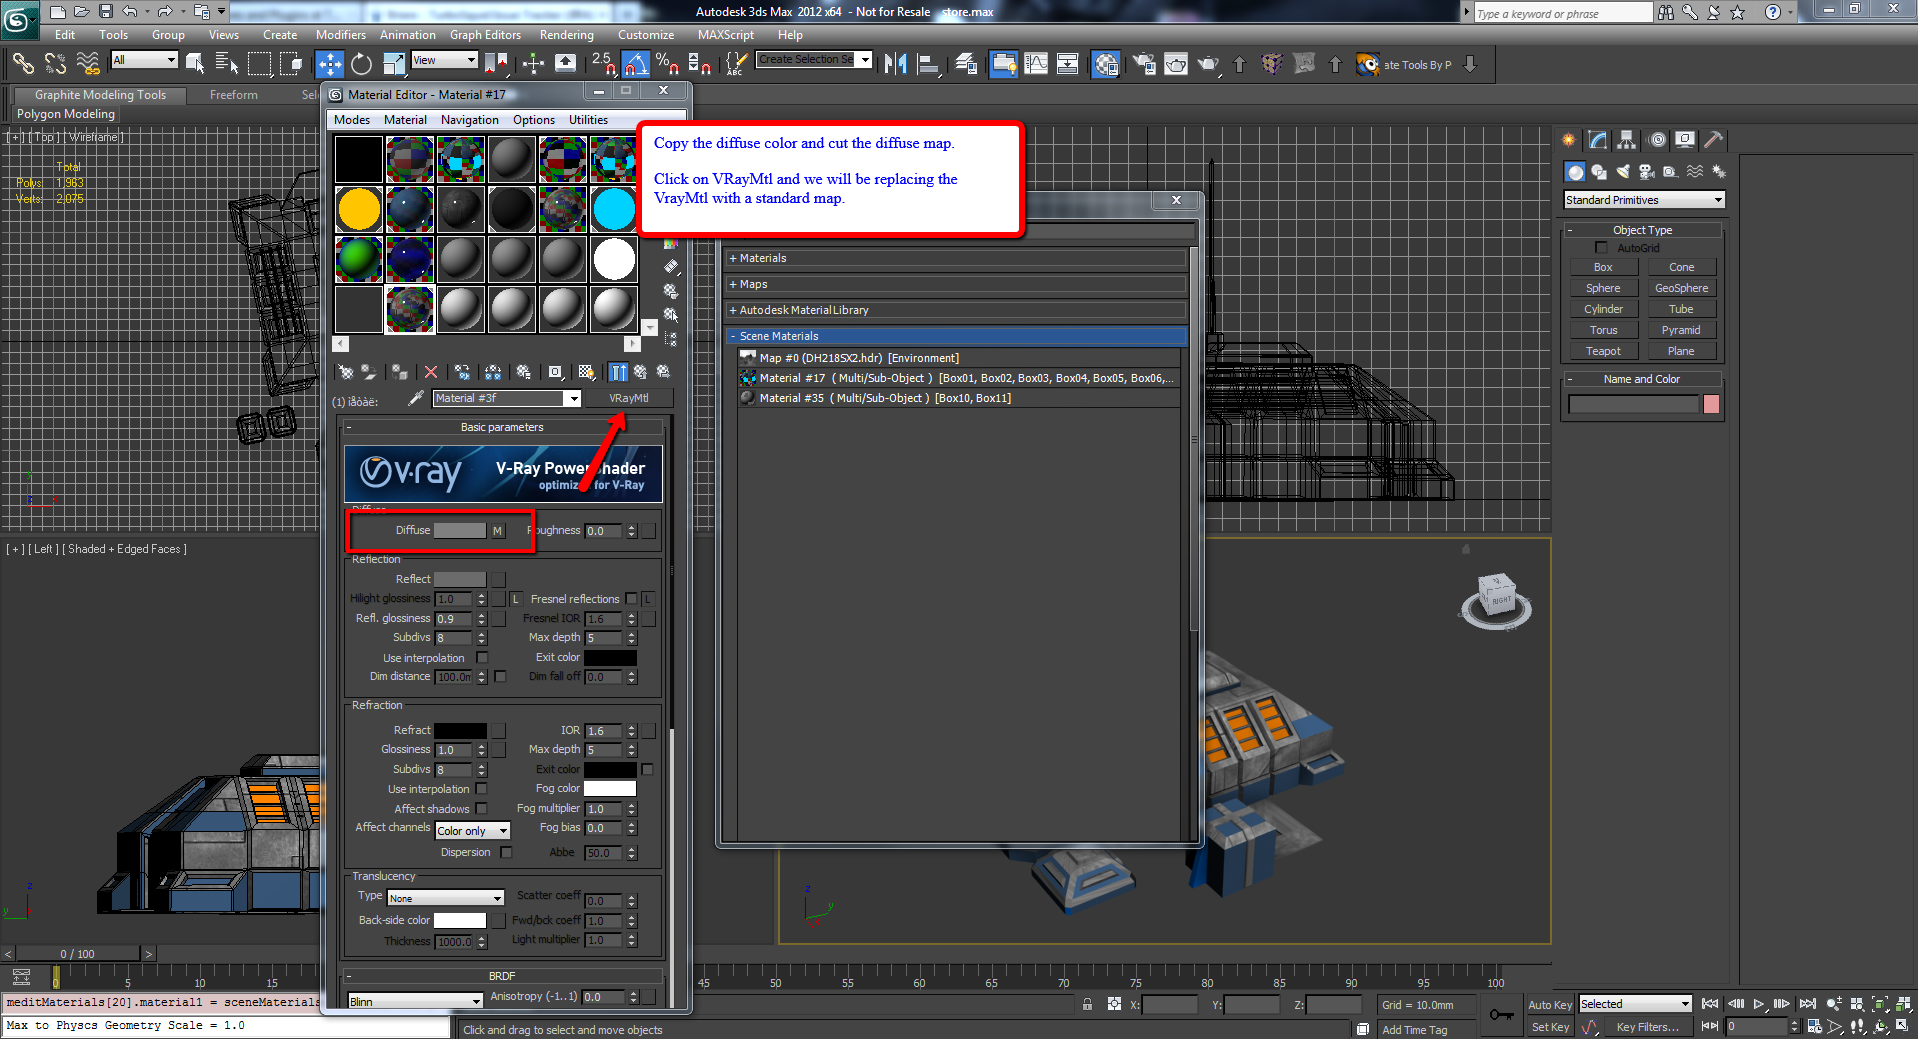
Copy the diffuse color and cut the diffuse map.
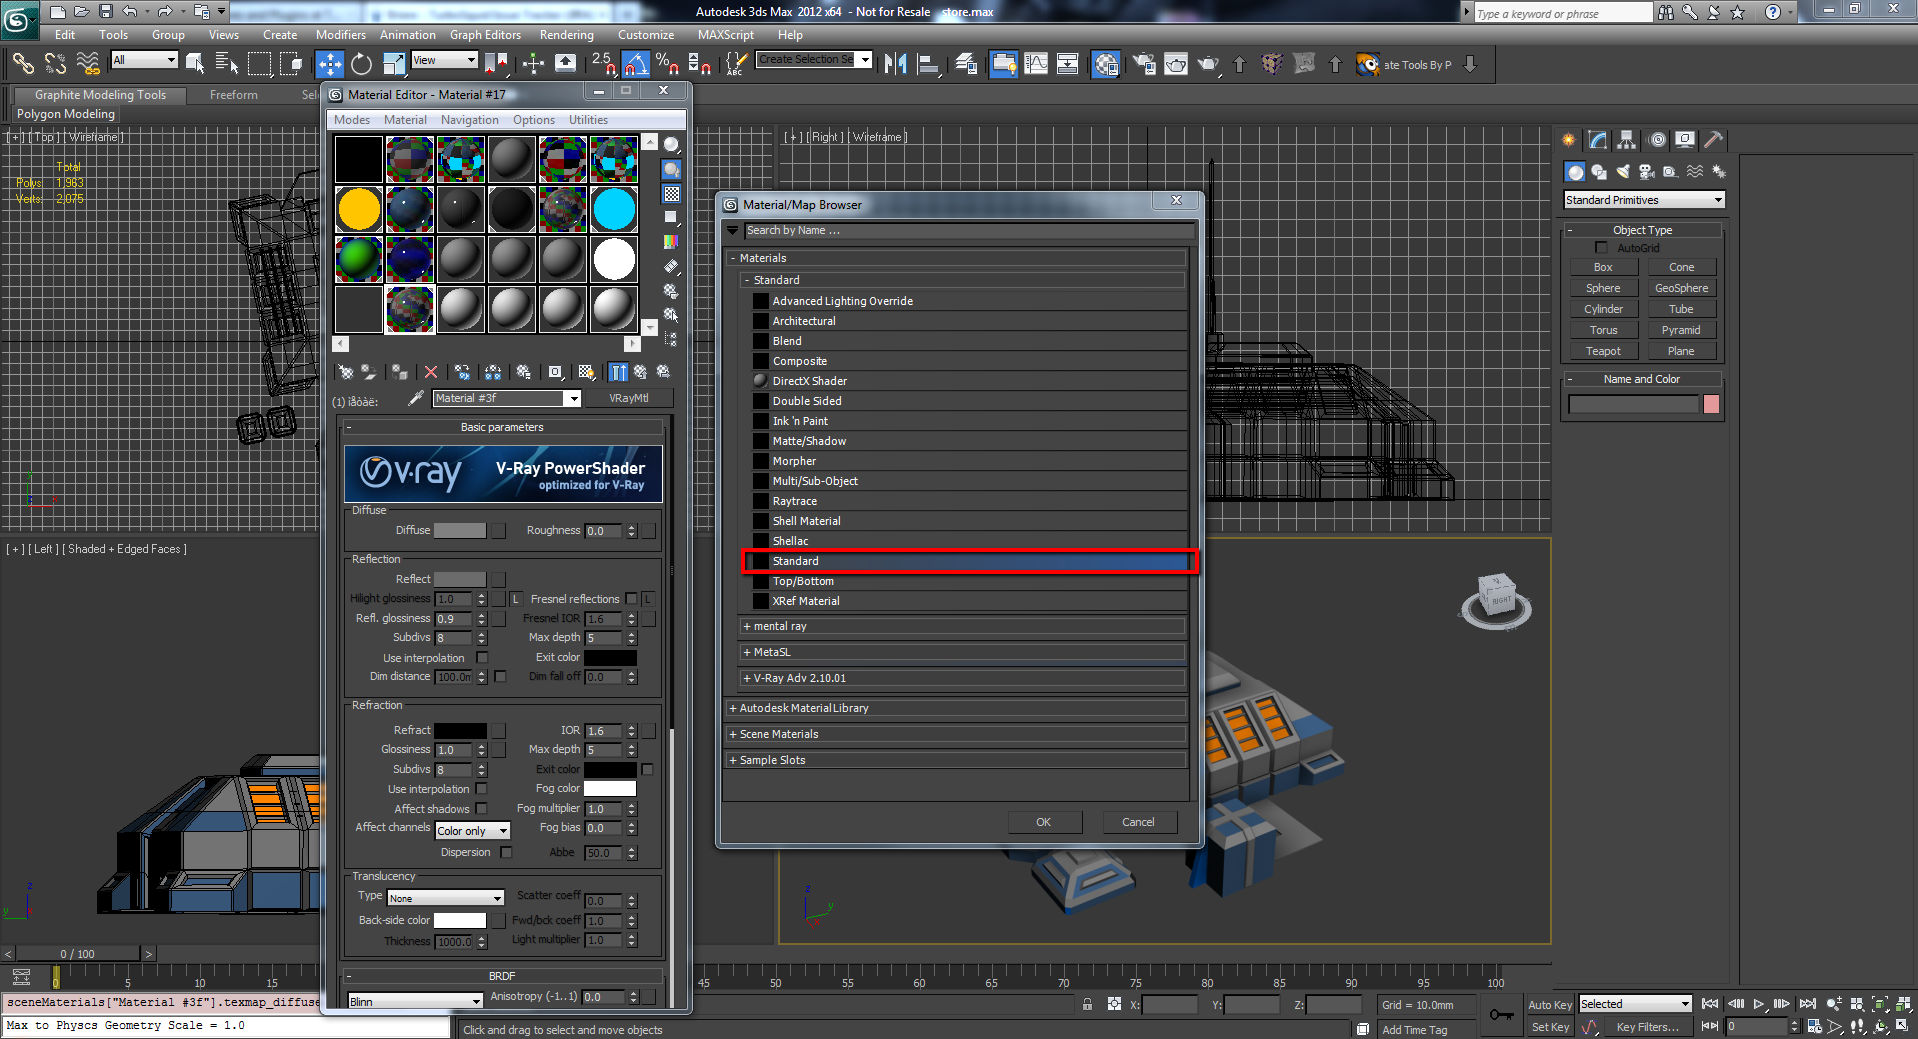
Click on VRayMtl and we will be replacing the VrayMtl with a standard map.
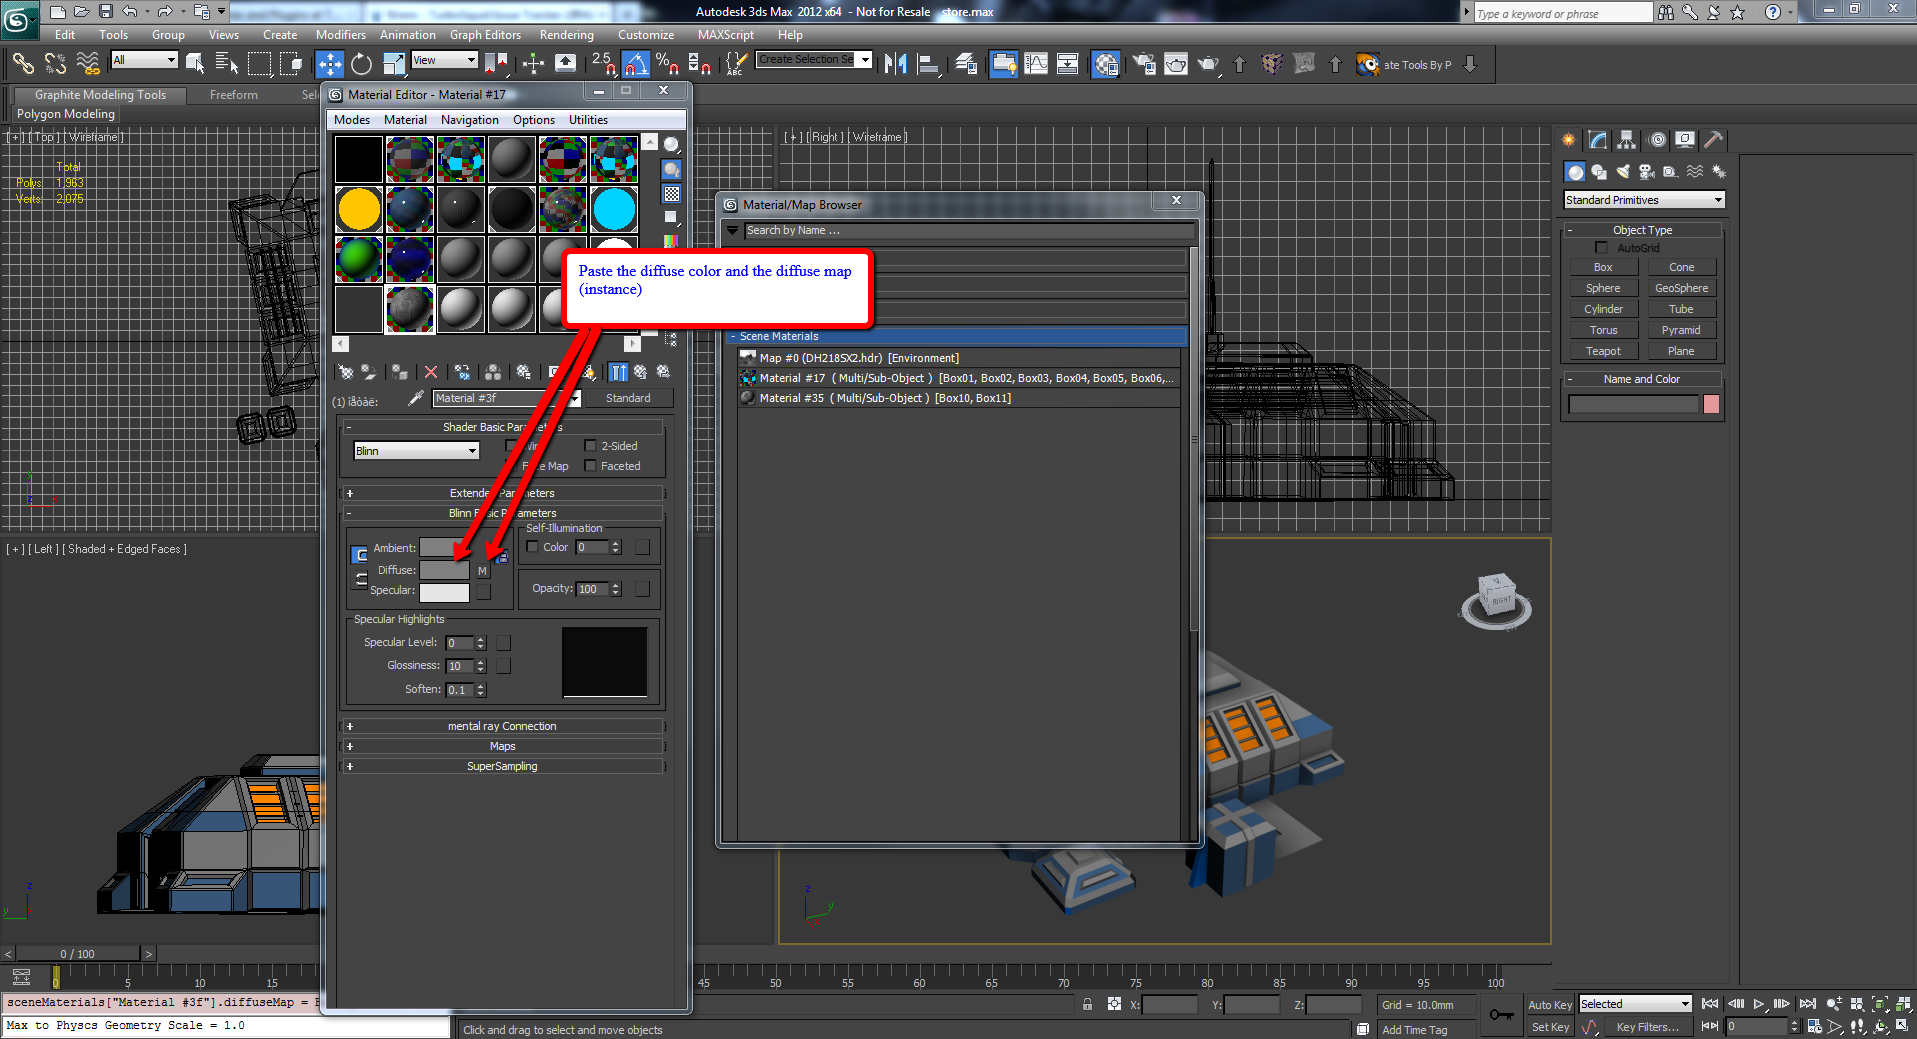
Paste the diffuse color and the diffuse map (instance) into your new standard material.
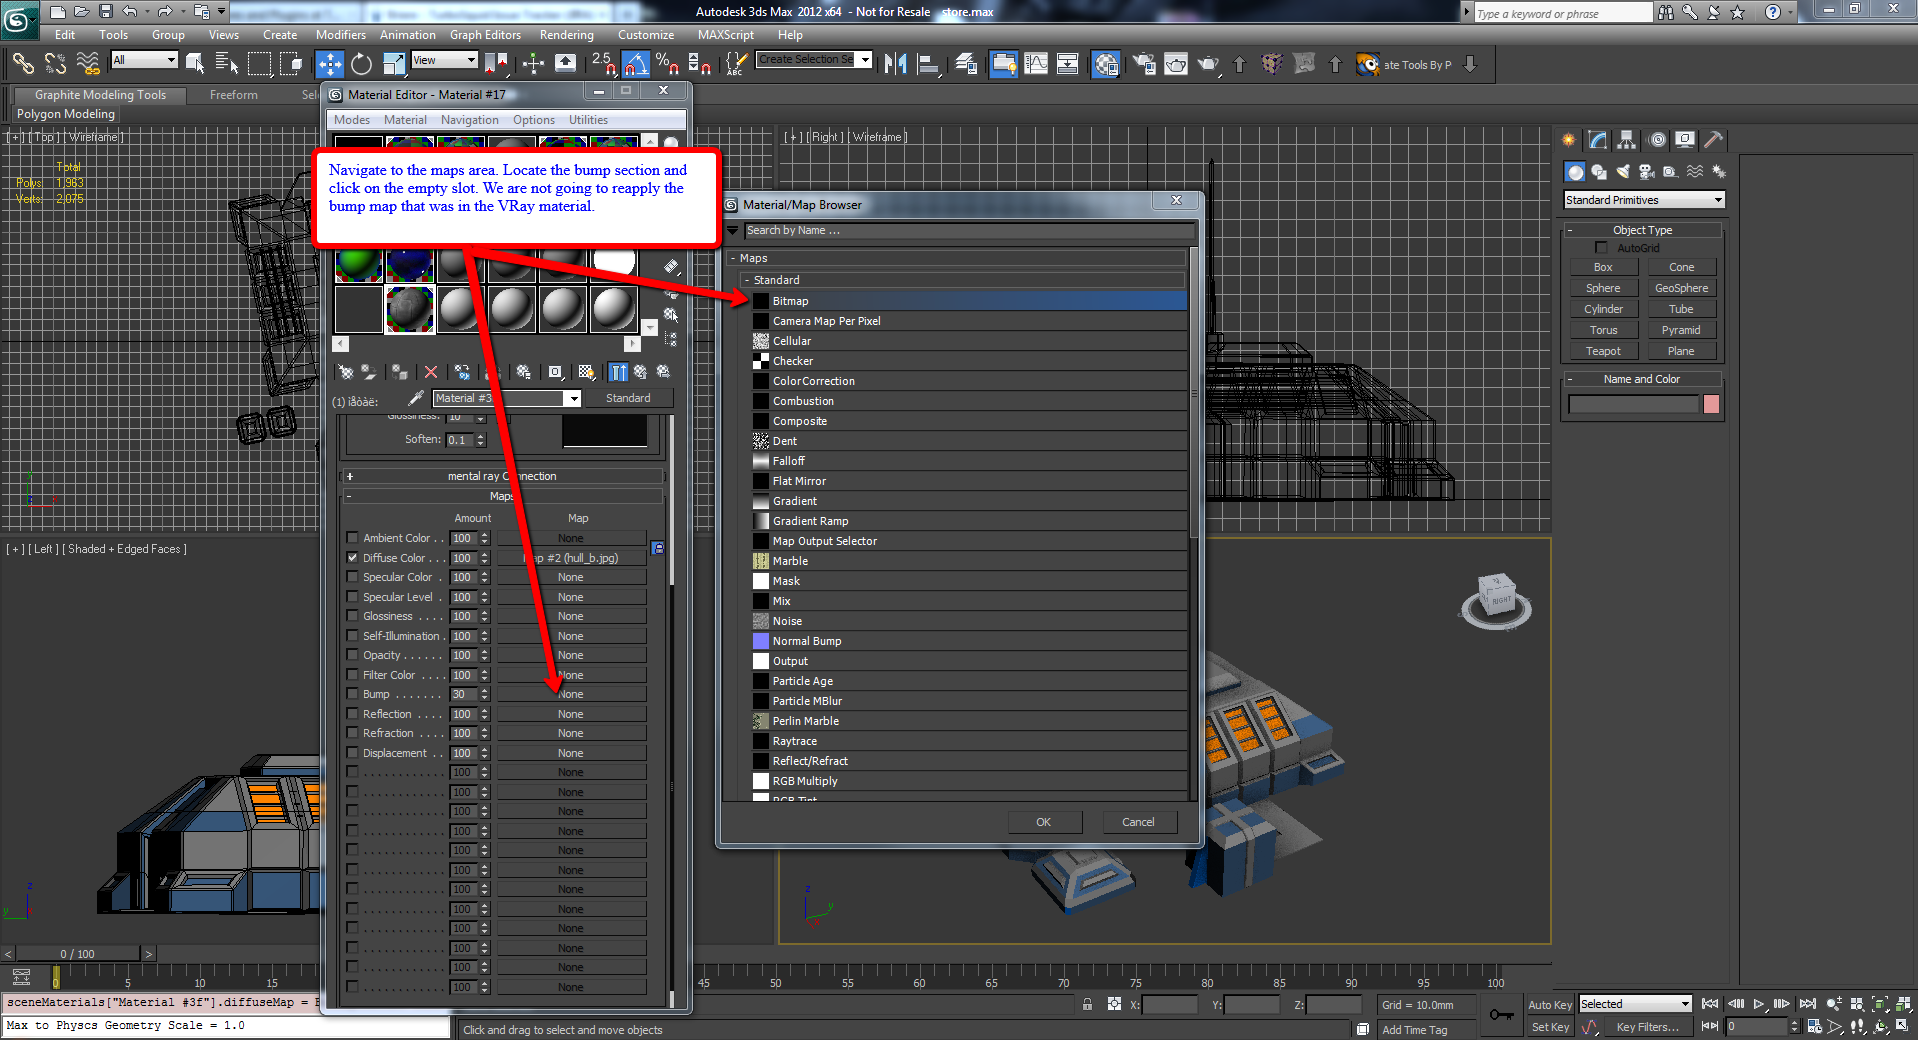
Navigate to the maps area. Locate the bump section and click on the empty slot. We are going to reapply the bump map that was in the VRay material.
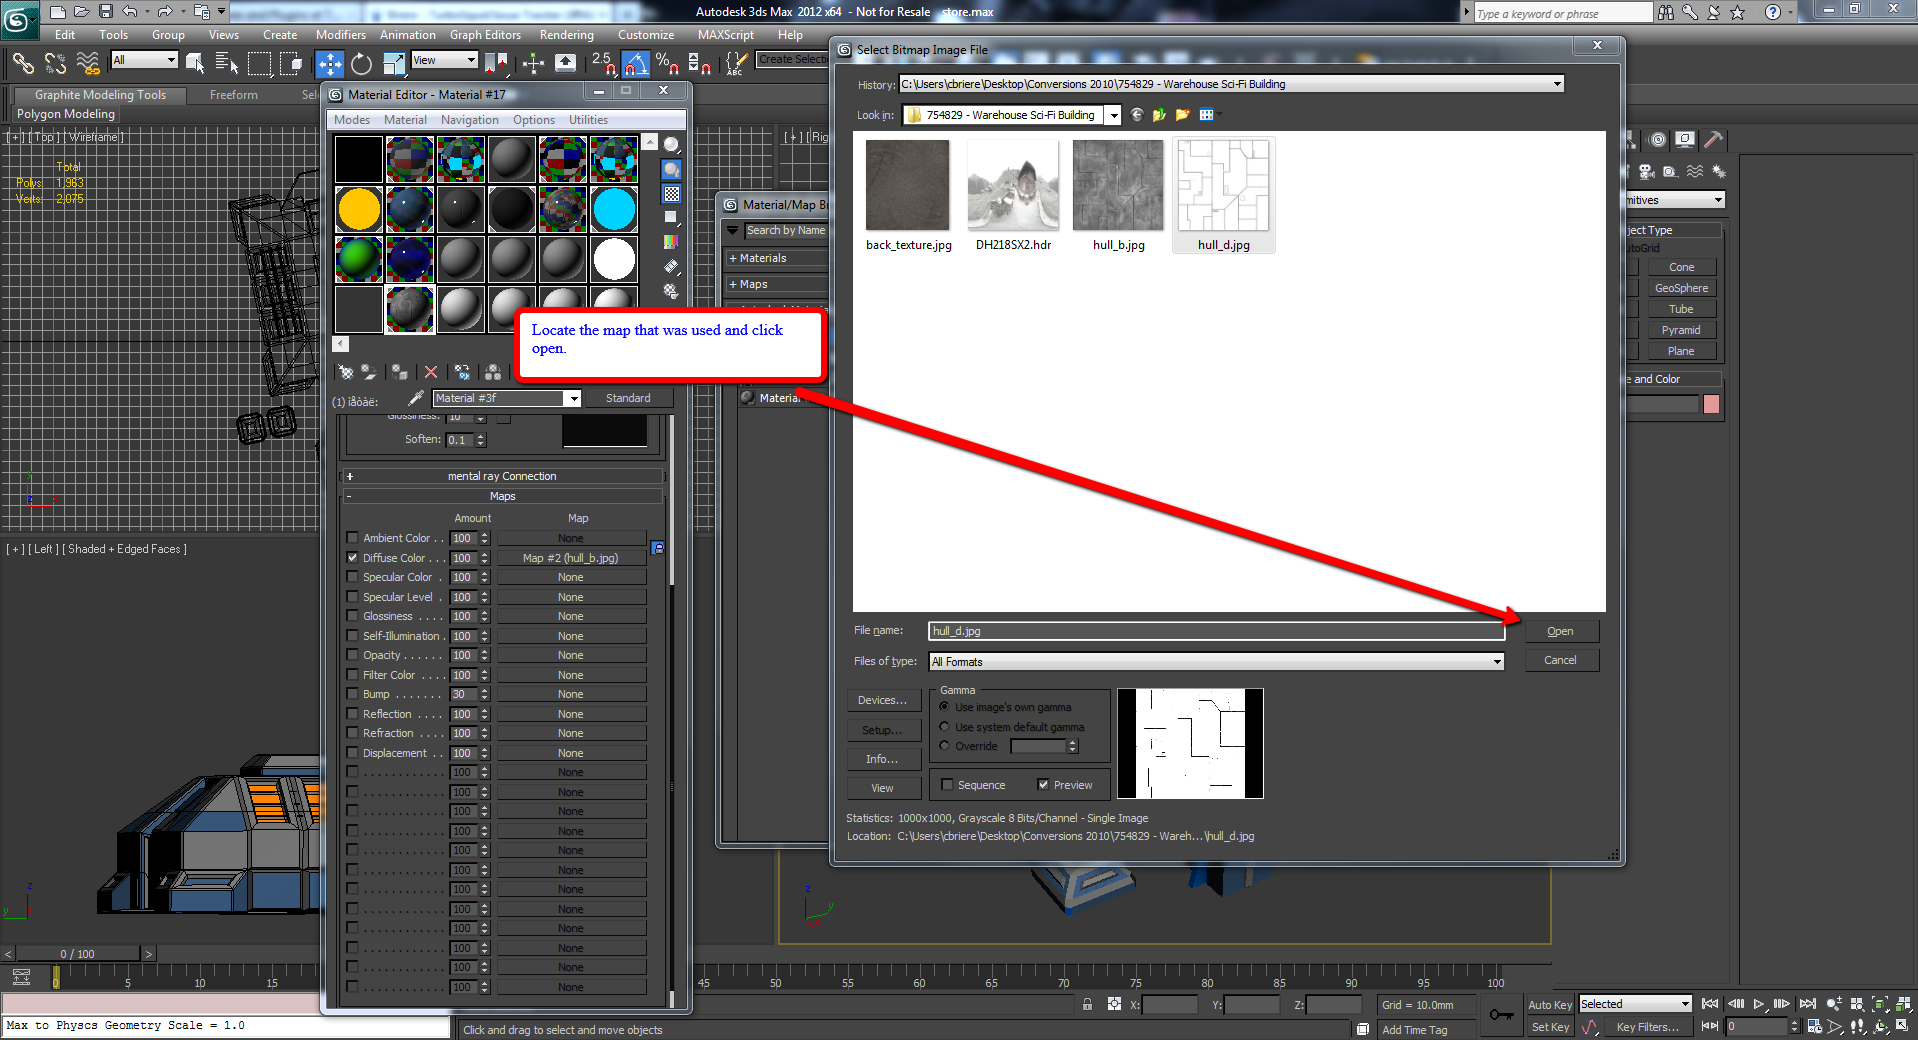
Locate the original map that was used and click Open.
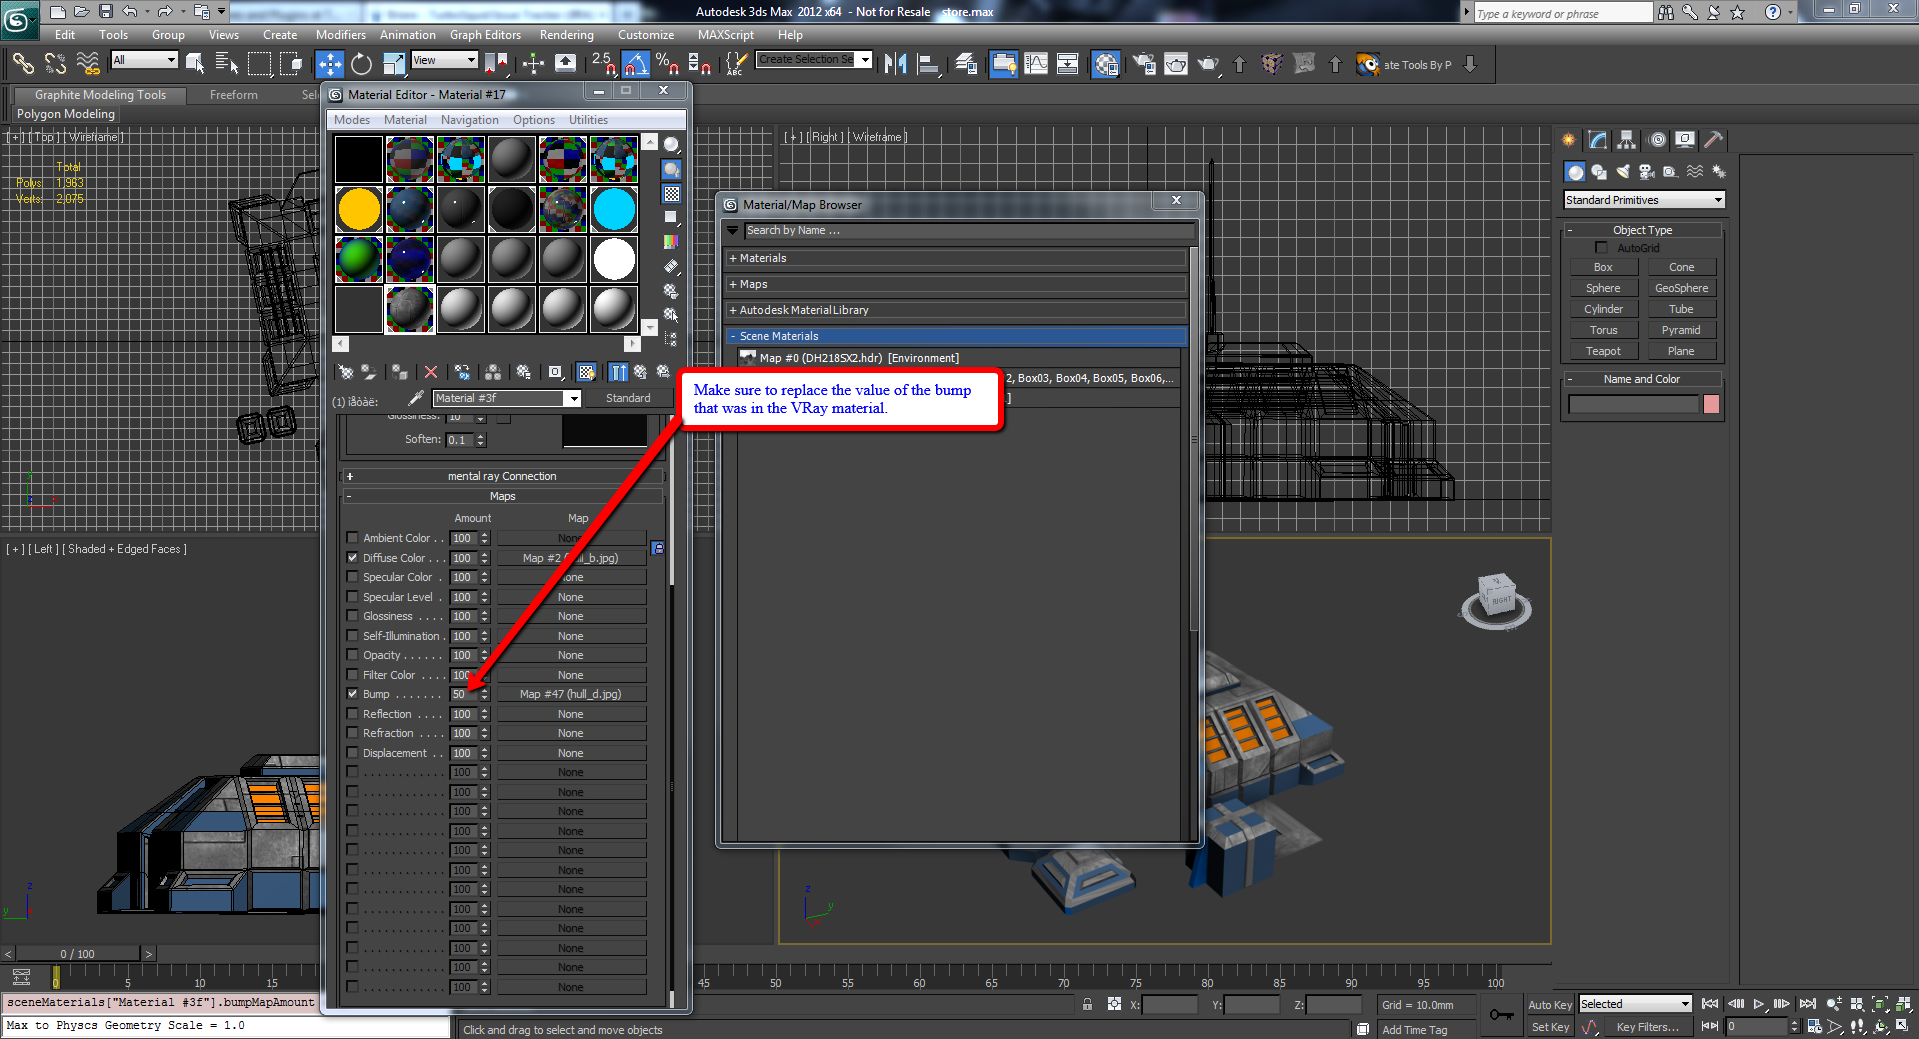
Make sure to replace the value of the bump that was in the VRay material.
Now you have a standard material. We are going to repeat the process for the other materials.
Now that the model has standard materials, you will need to convert the model into an editable poly. Once you are finished, proceed to export the model out as a FBX, OBJ, and .3DS.

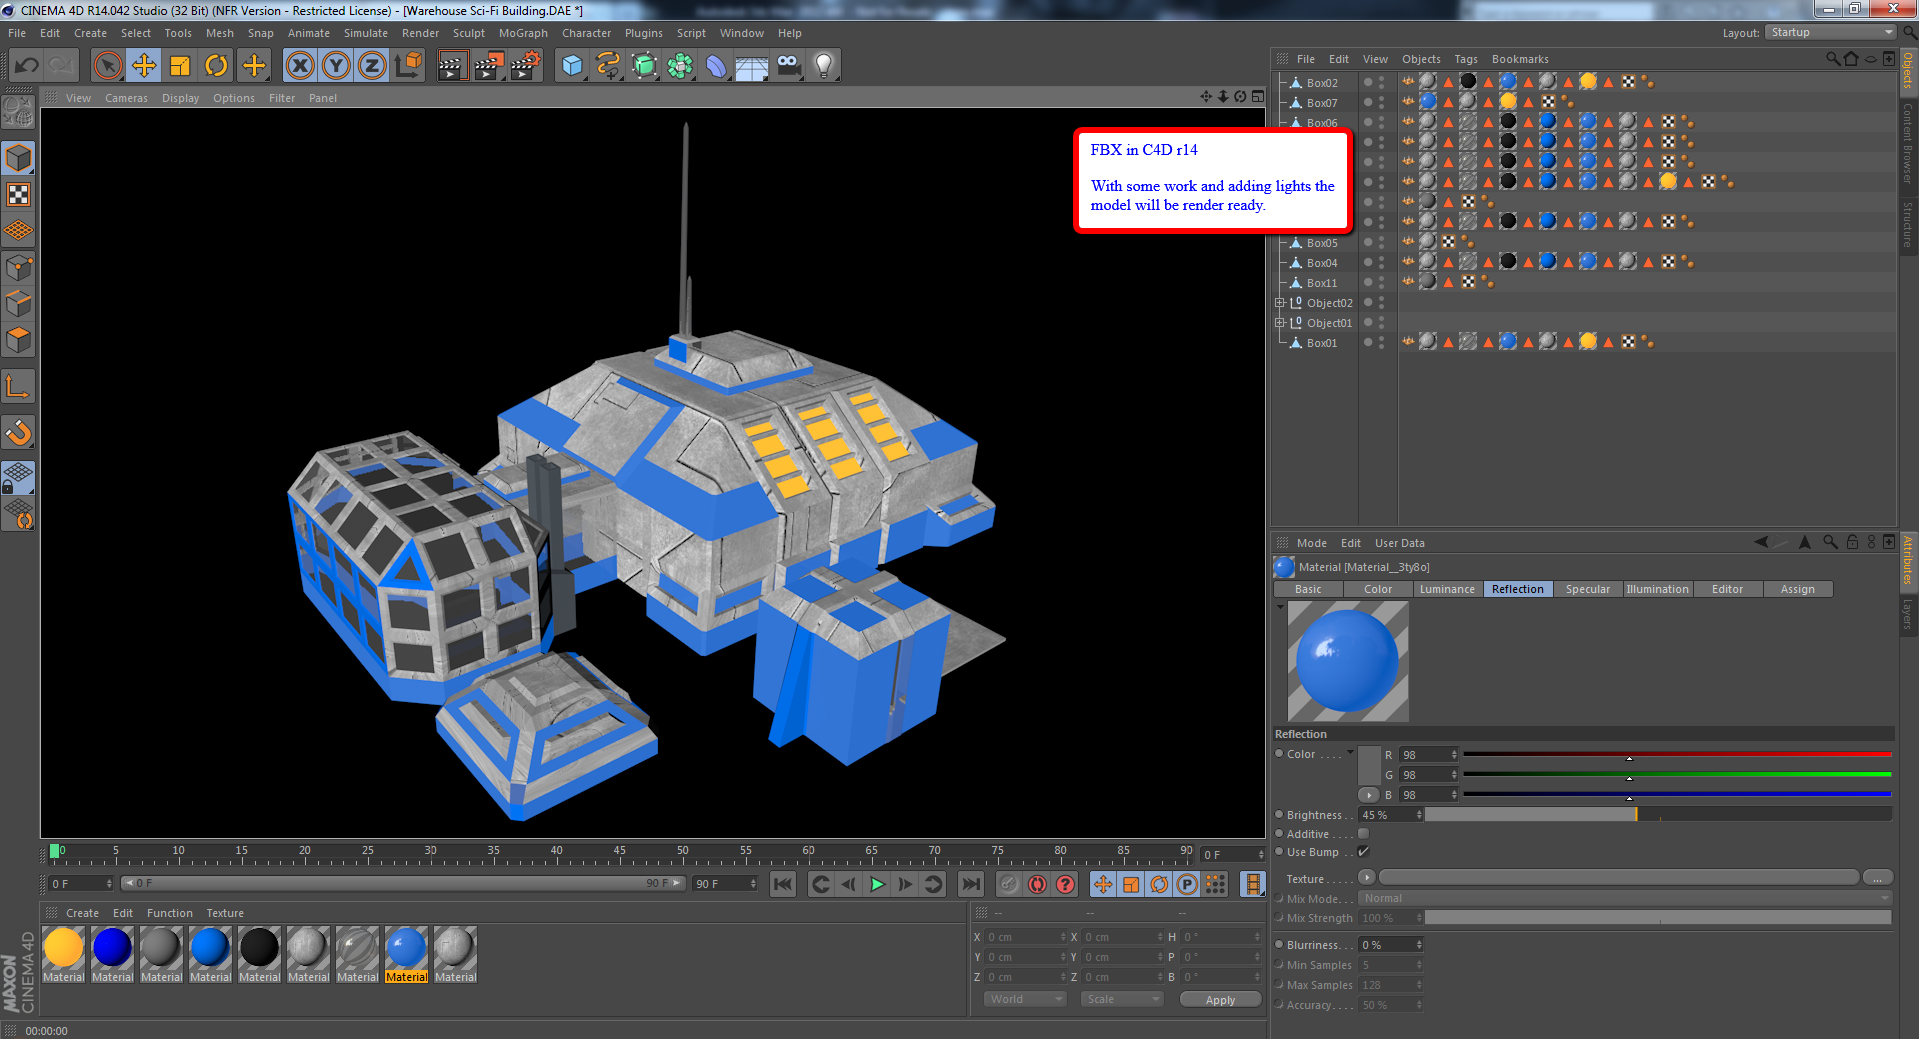
You can see that the conversion loses the quality, but once you add lighting and adjust the materials, it will be ready for rendering.