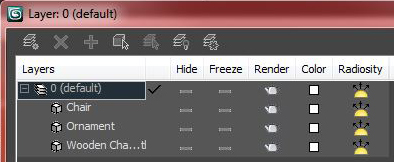
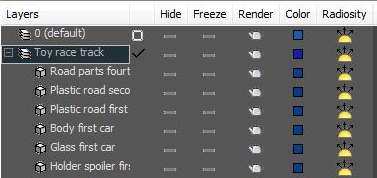
Part of the CheckMate Pro v2 specification calls for objects to be placed in a named layer within the scene file. This helps customers a great deal when they merge your 3D model into a scene with many other models. Rather than having to search around for all the bits and pieces of your model, the customer can find everything easily within the named layer.
If you use 3ds Max, please note that you can’t rename or delete the default Layer 0. You will need to create a new layer and name it after your model.

The layer must be named to pass CheckMate Pro v2, but you cannot rename the default layer in 3ds Max.
You should also use short names on your objects if possible, and avoid using the same prefix on multiple objects. Then, when the customer opens up the layer window, all your object names are obvious and readable without having to scroll over.

